Never Too Old for a Toga Party (or–Cotton Jersey, never again!)

33

Can a middle-aged woman pull off a toga? (Figuratively of course, though I went to my share of toga parties in college…)

IMG_2946

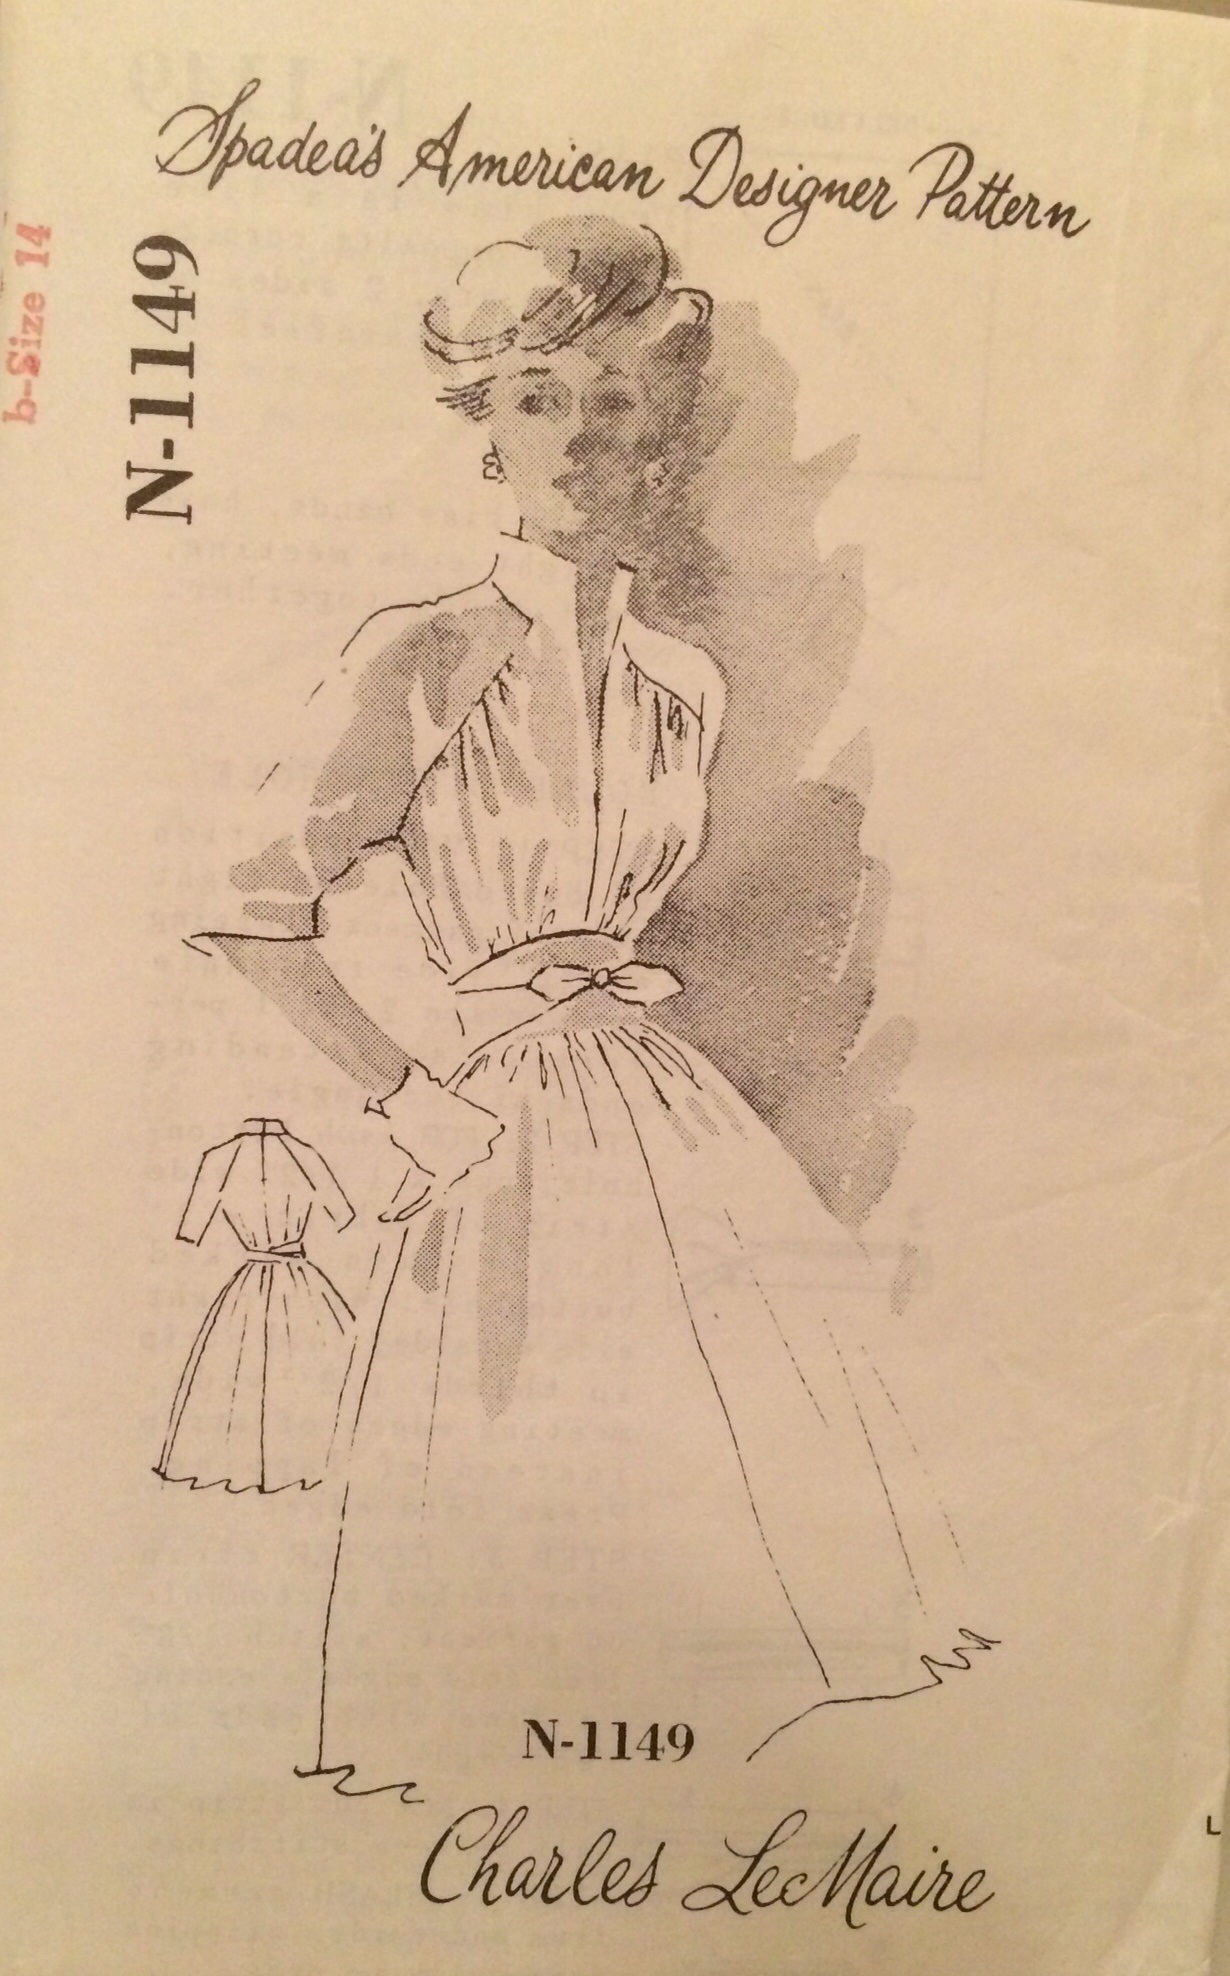
For Pattern Review’s Historical Fashion contest, I was raring to go with a pattern by a famous 50s designer–fabrics, notions, everything I needed. Then I read the rules…nothing later than 1929! Eeeeek! Darn you contest committee! (Actually, though, not knowing the rules until a few days before the contests start makes them more fun.)

I still wanted to be a part of the contest, because making garments with a history is what I do. But I wasn’t taking it too seriously, what with all of those Regency, Renaissance, Downton Abbey and reenactor sewing people out there. I knew someone would be ripping down the drapes and coming up with an antebellum outfit that would put Scarlet to shame, so my chances of winner were low. I wanted to join the fun, though.

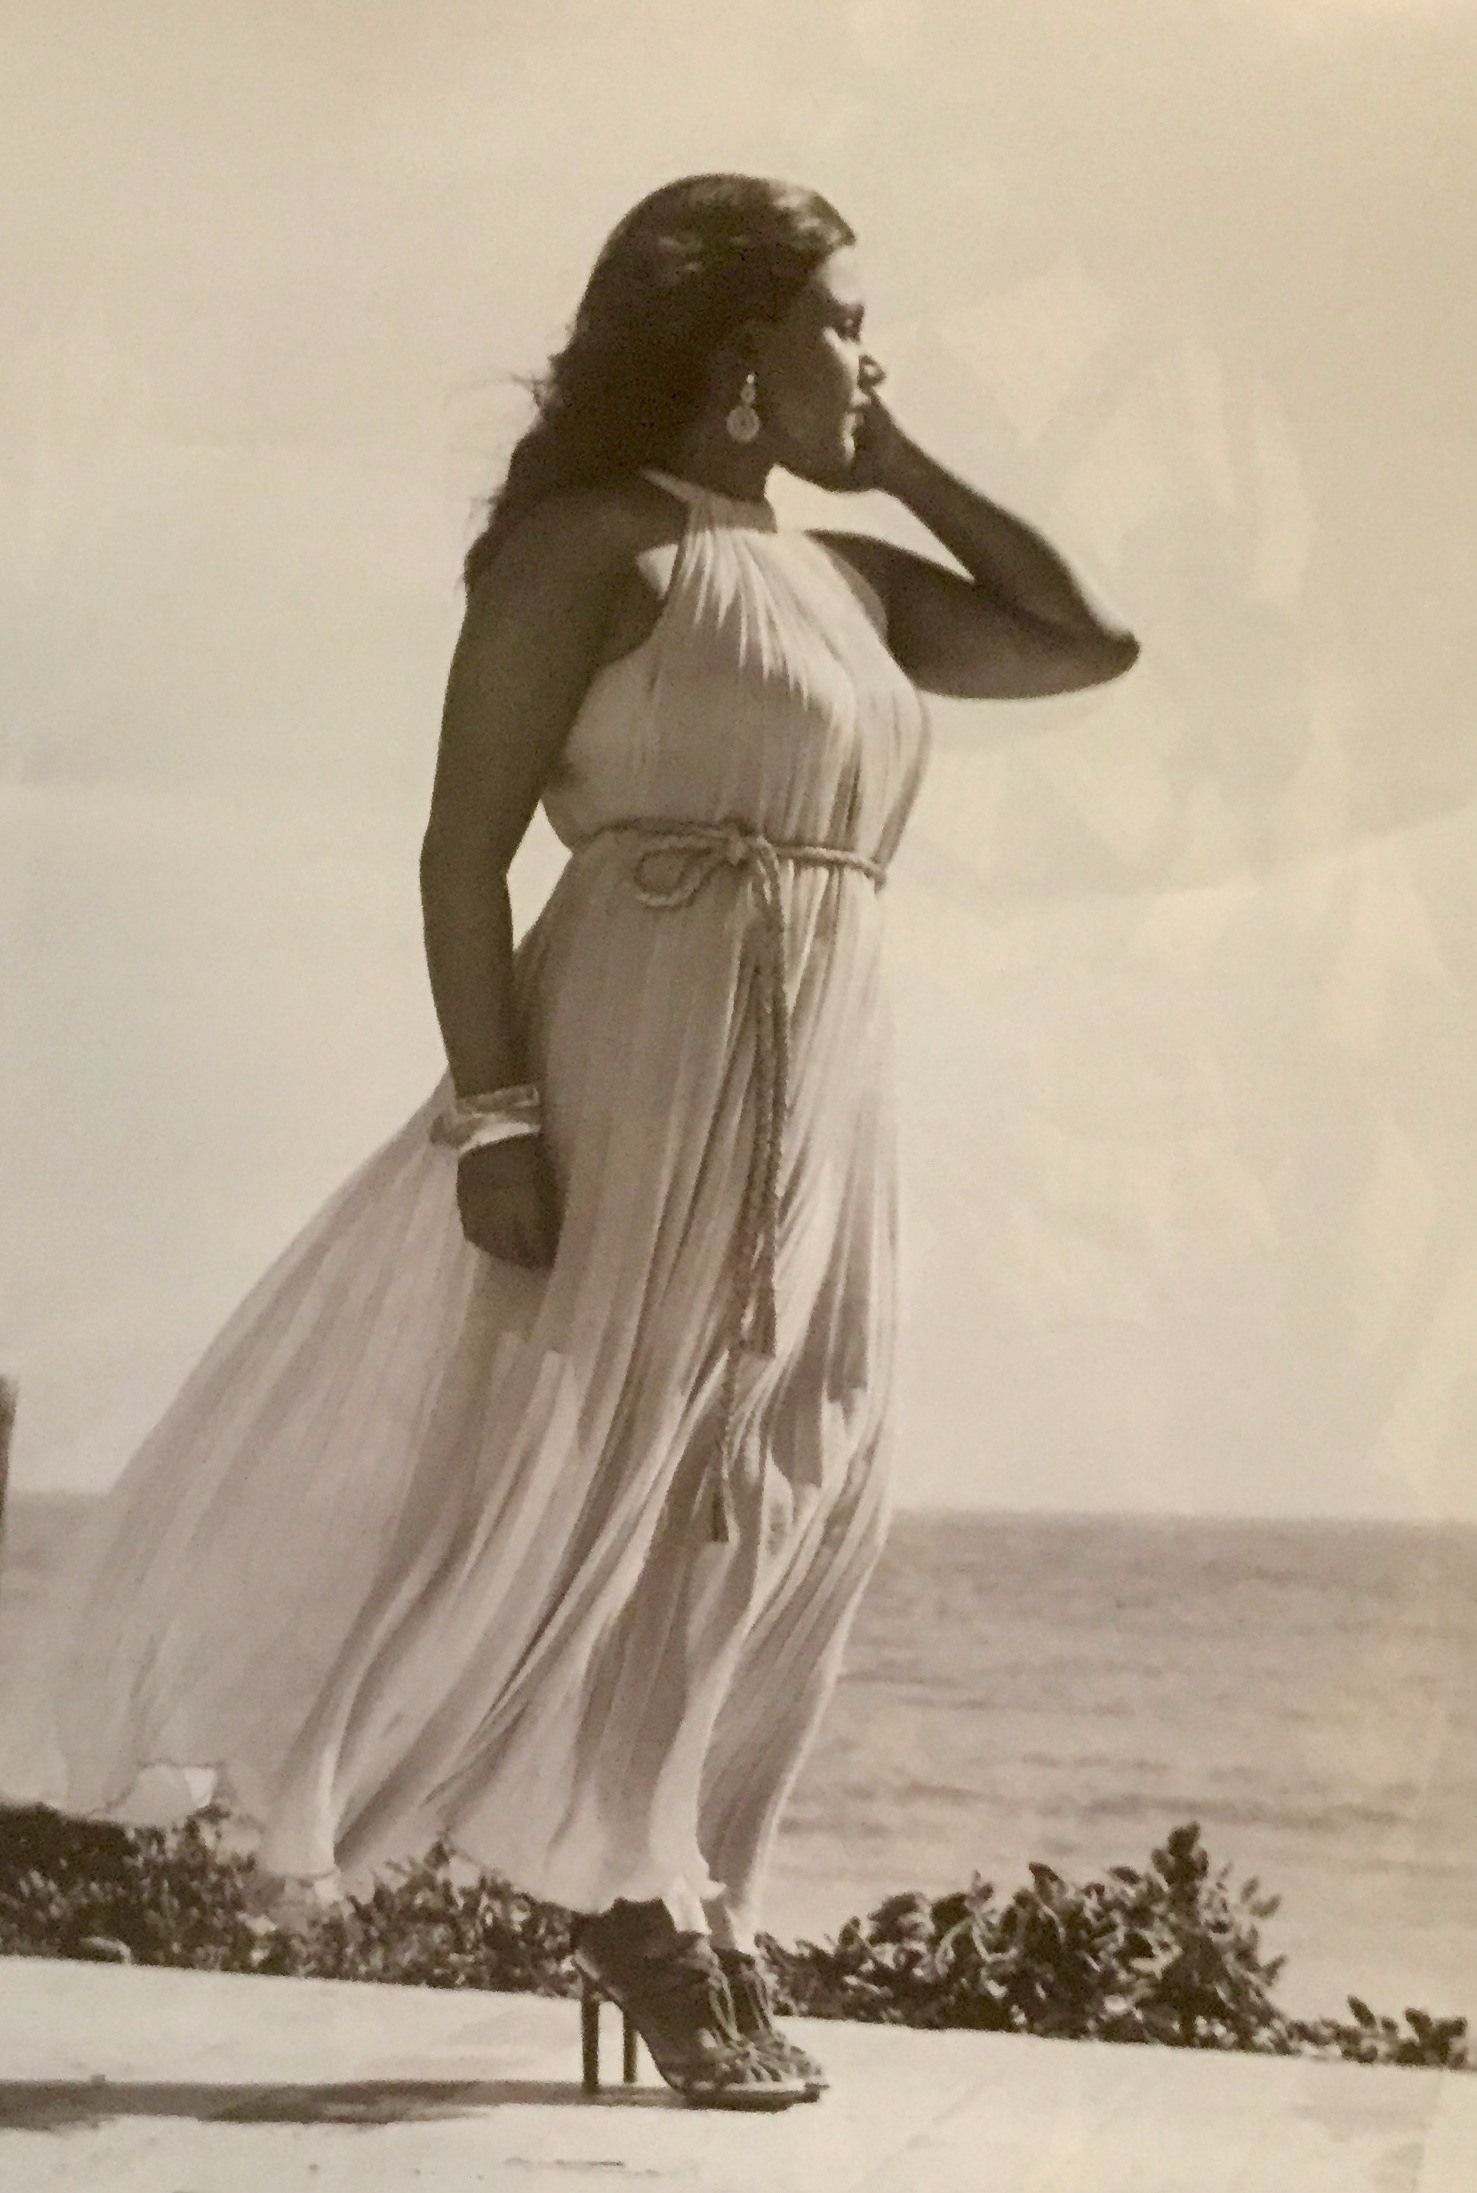
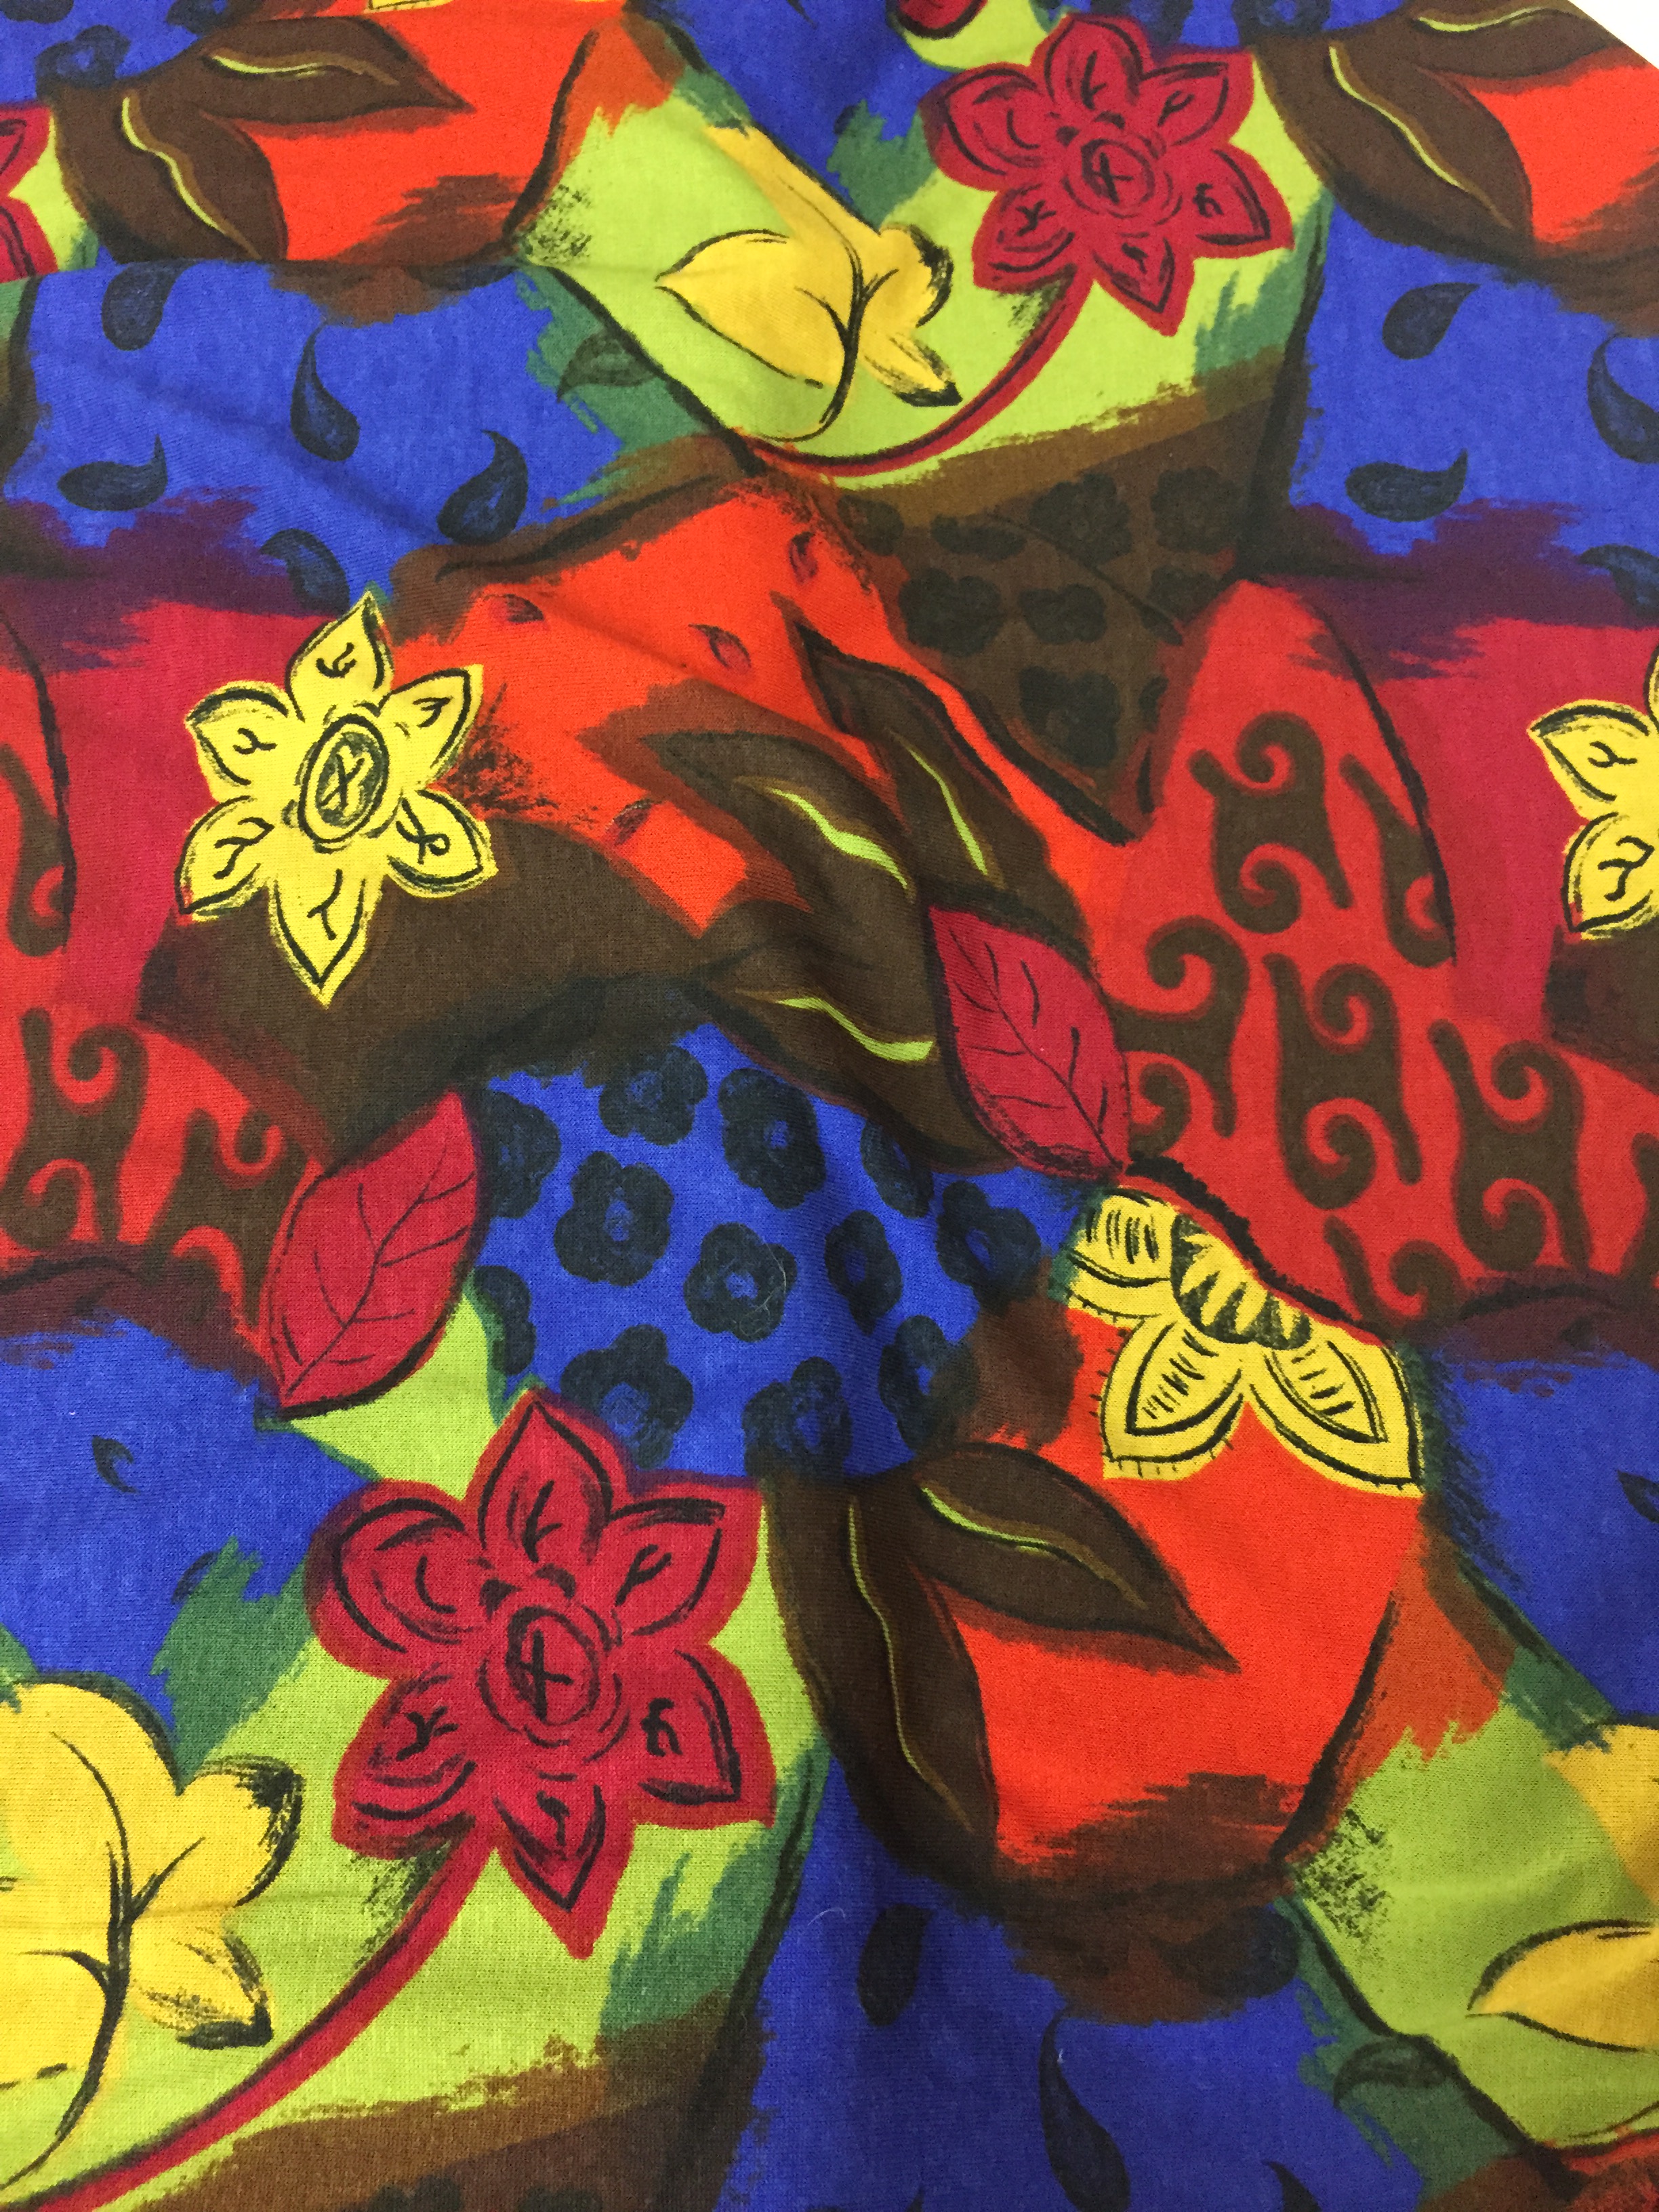
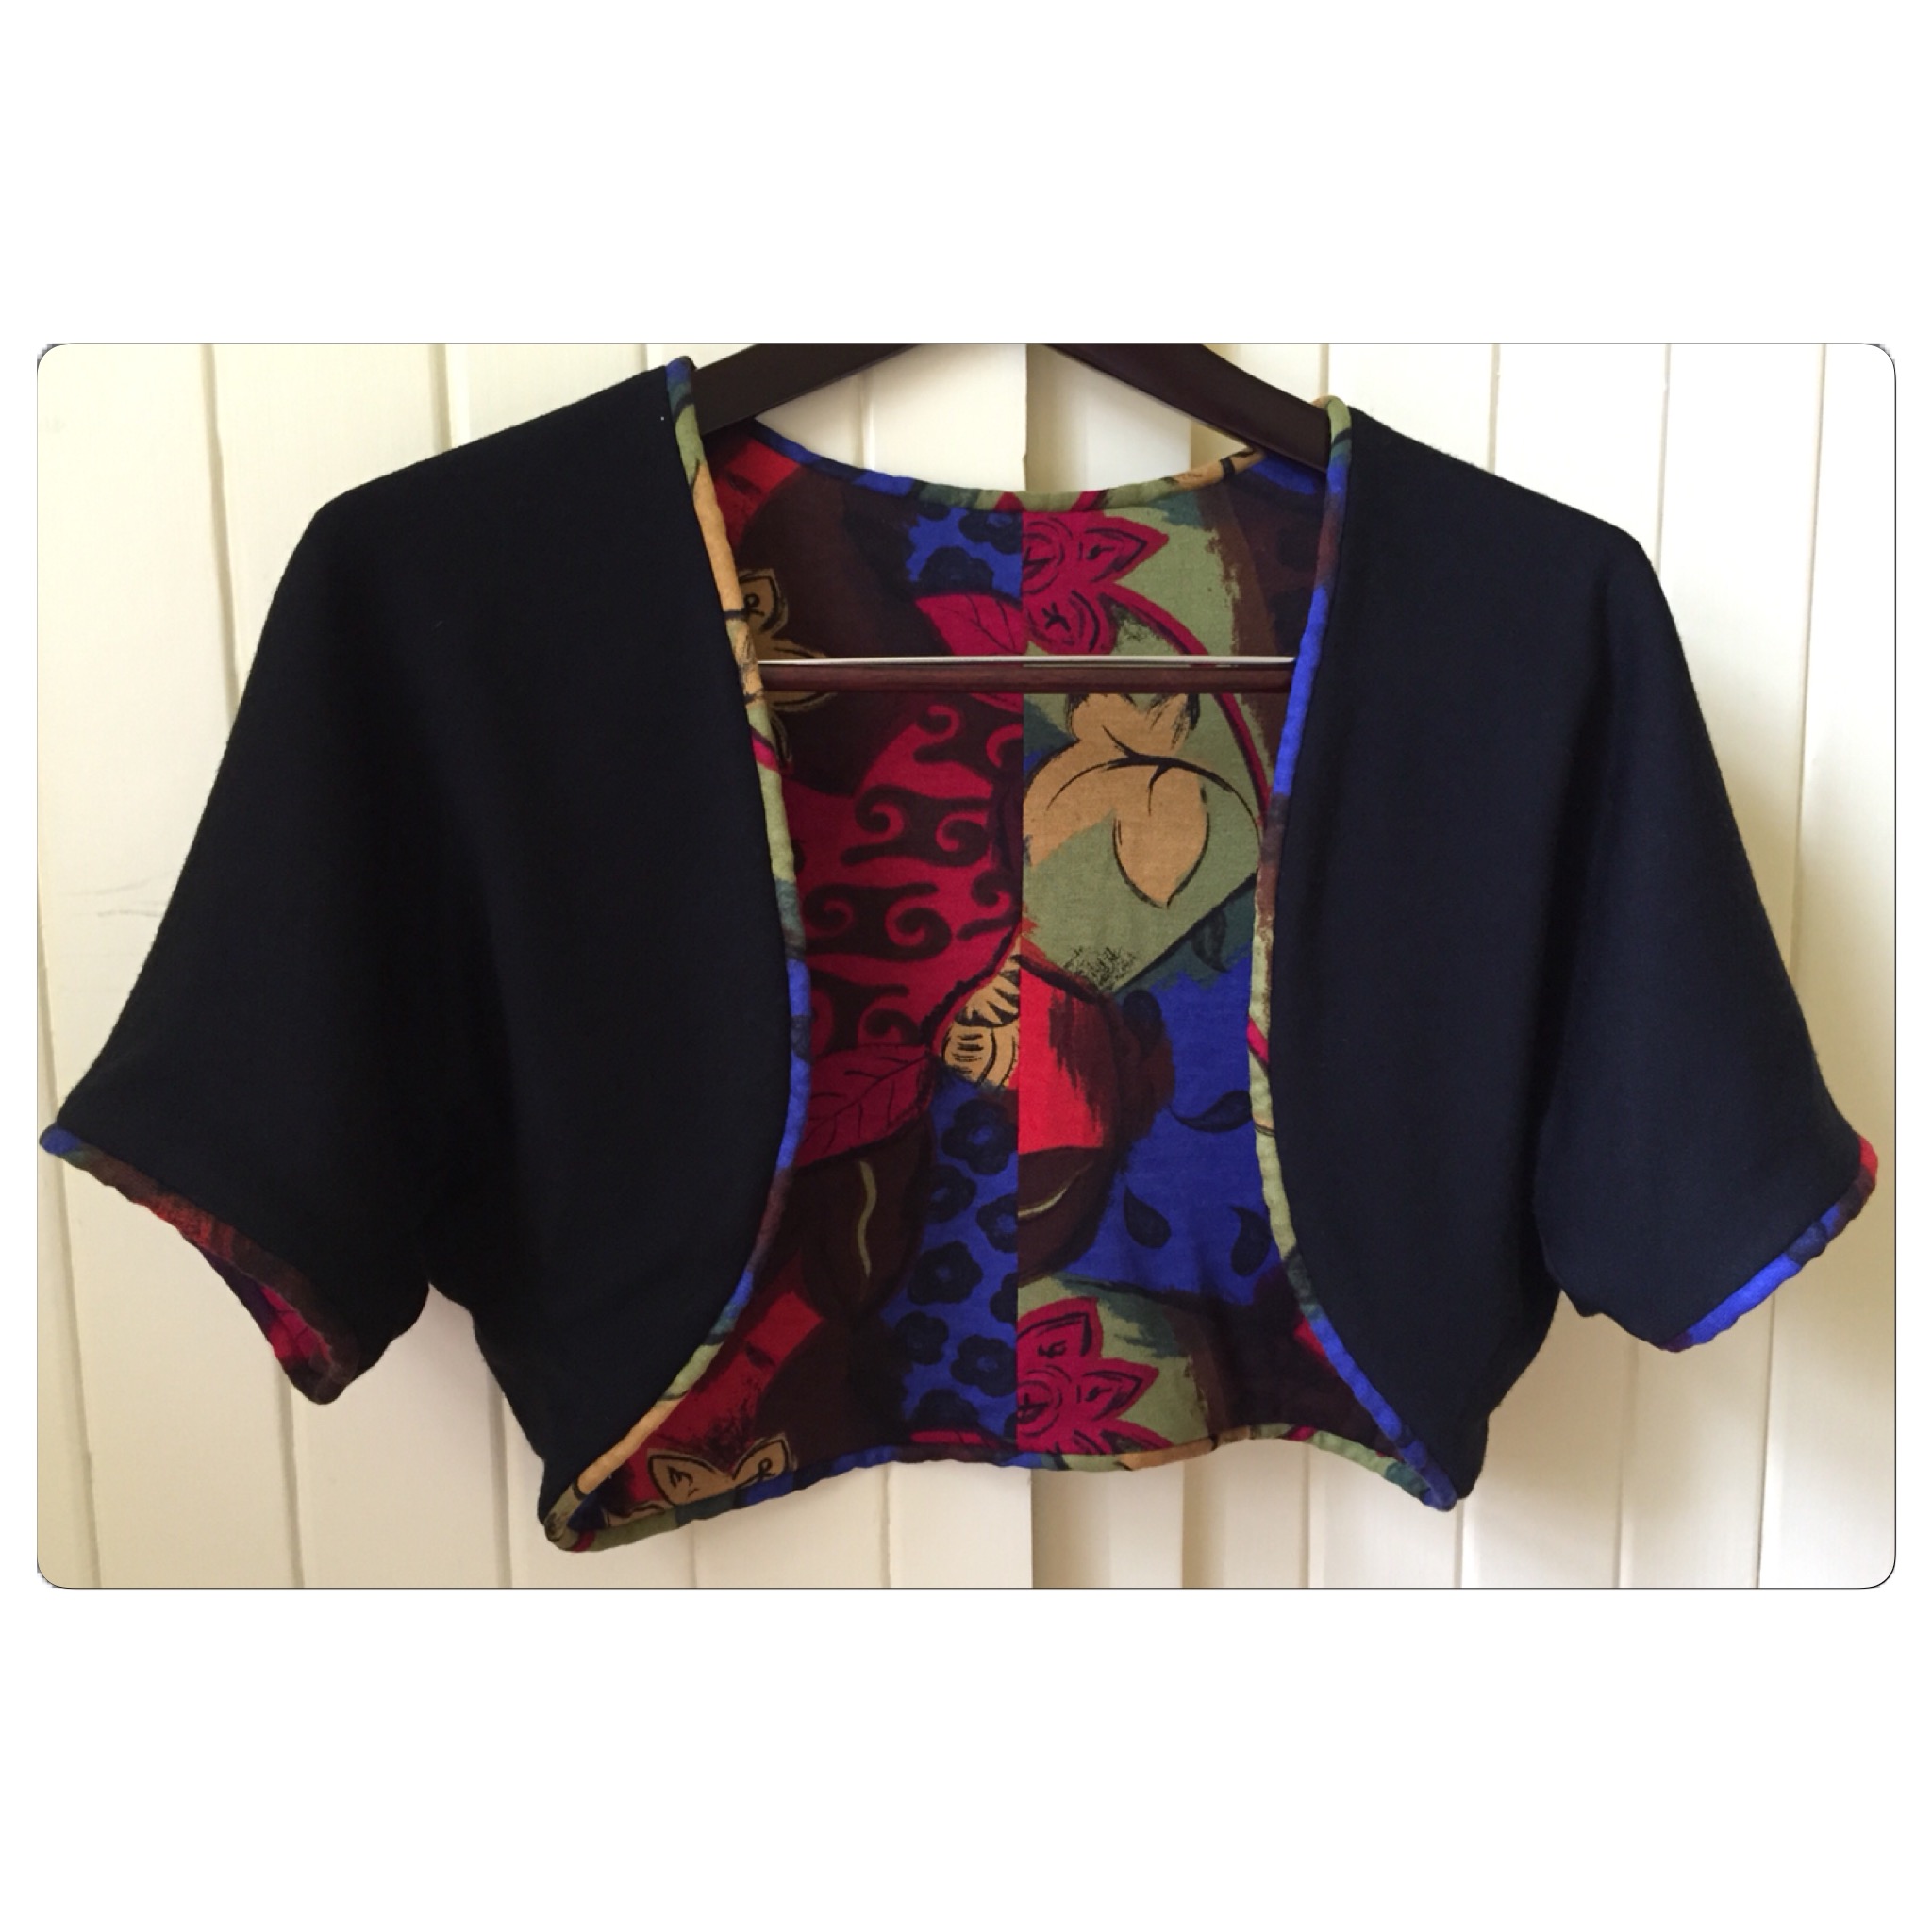
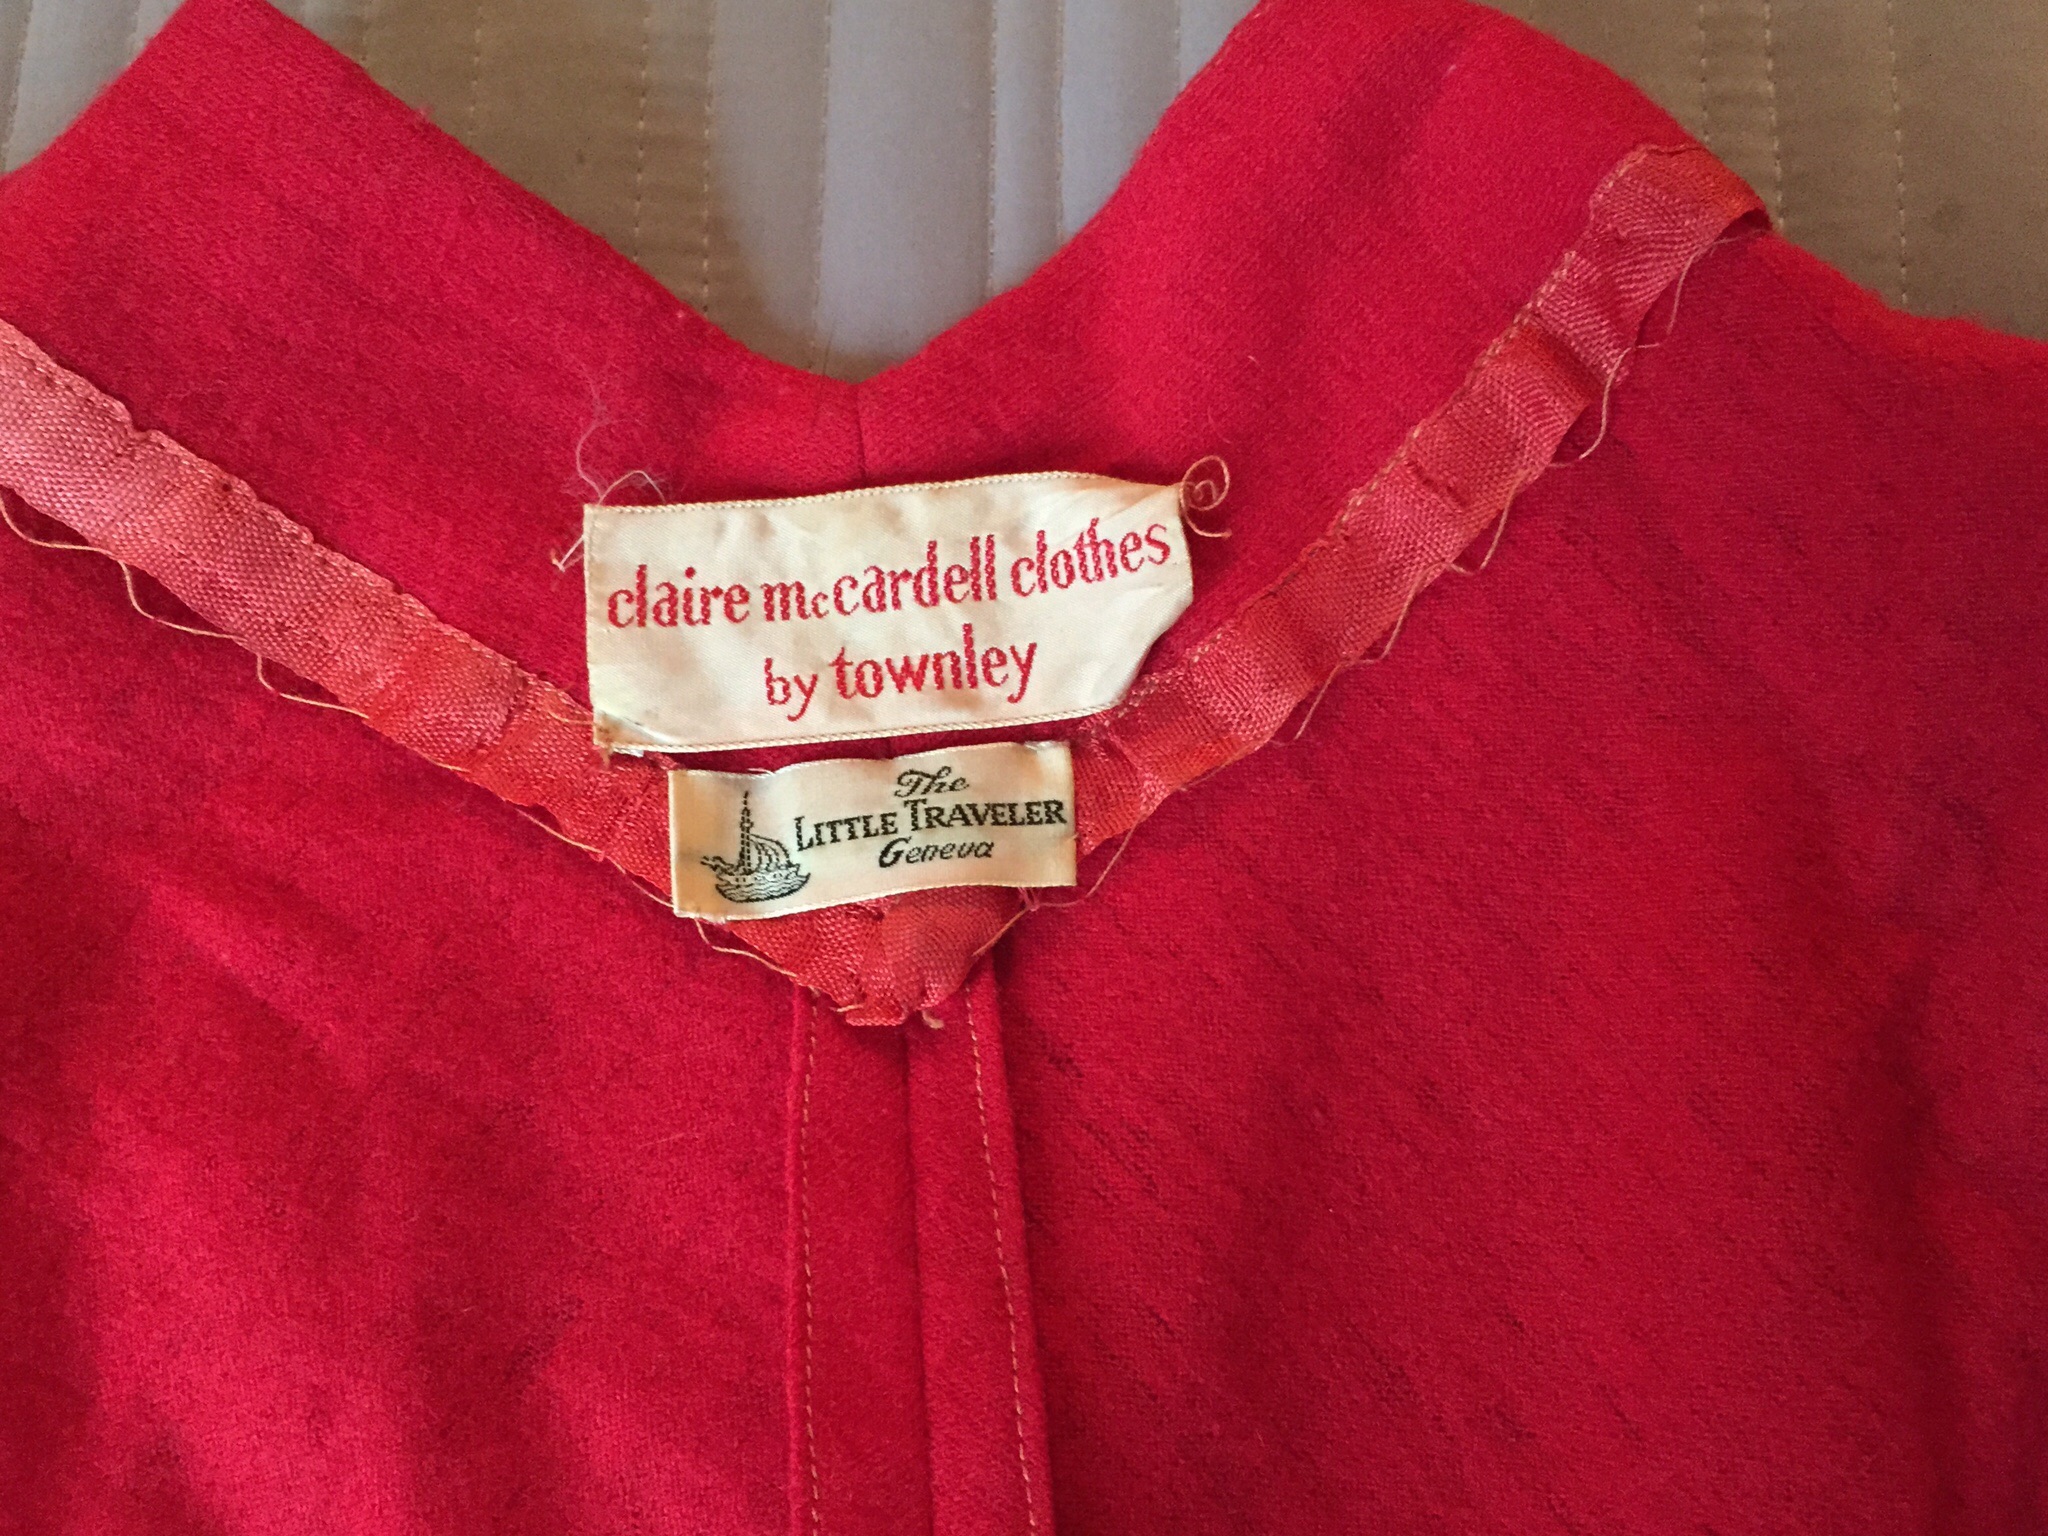
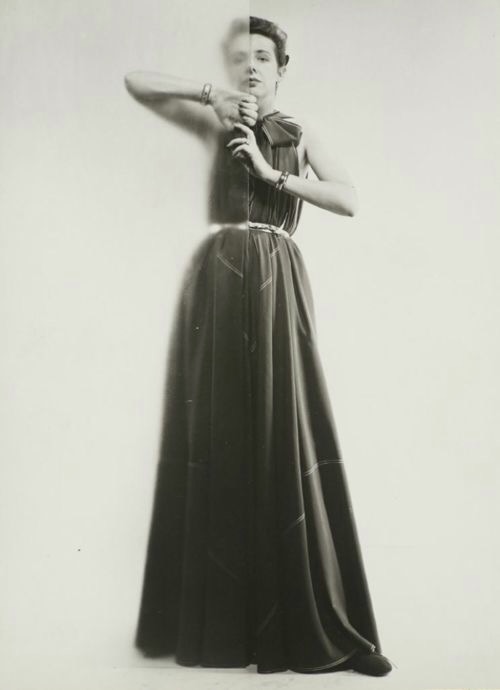
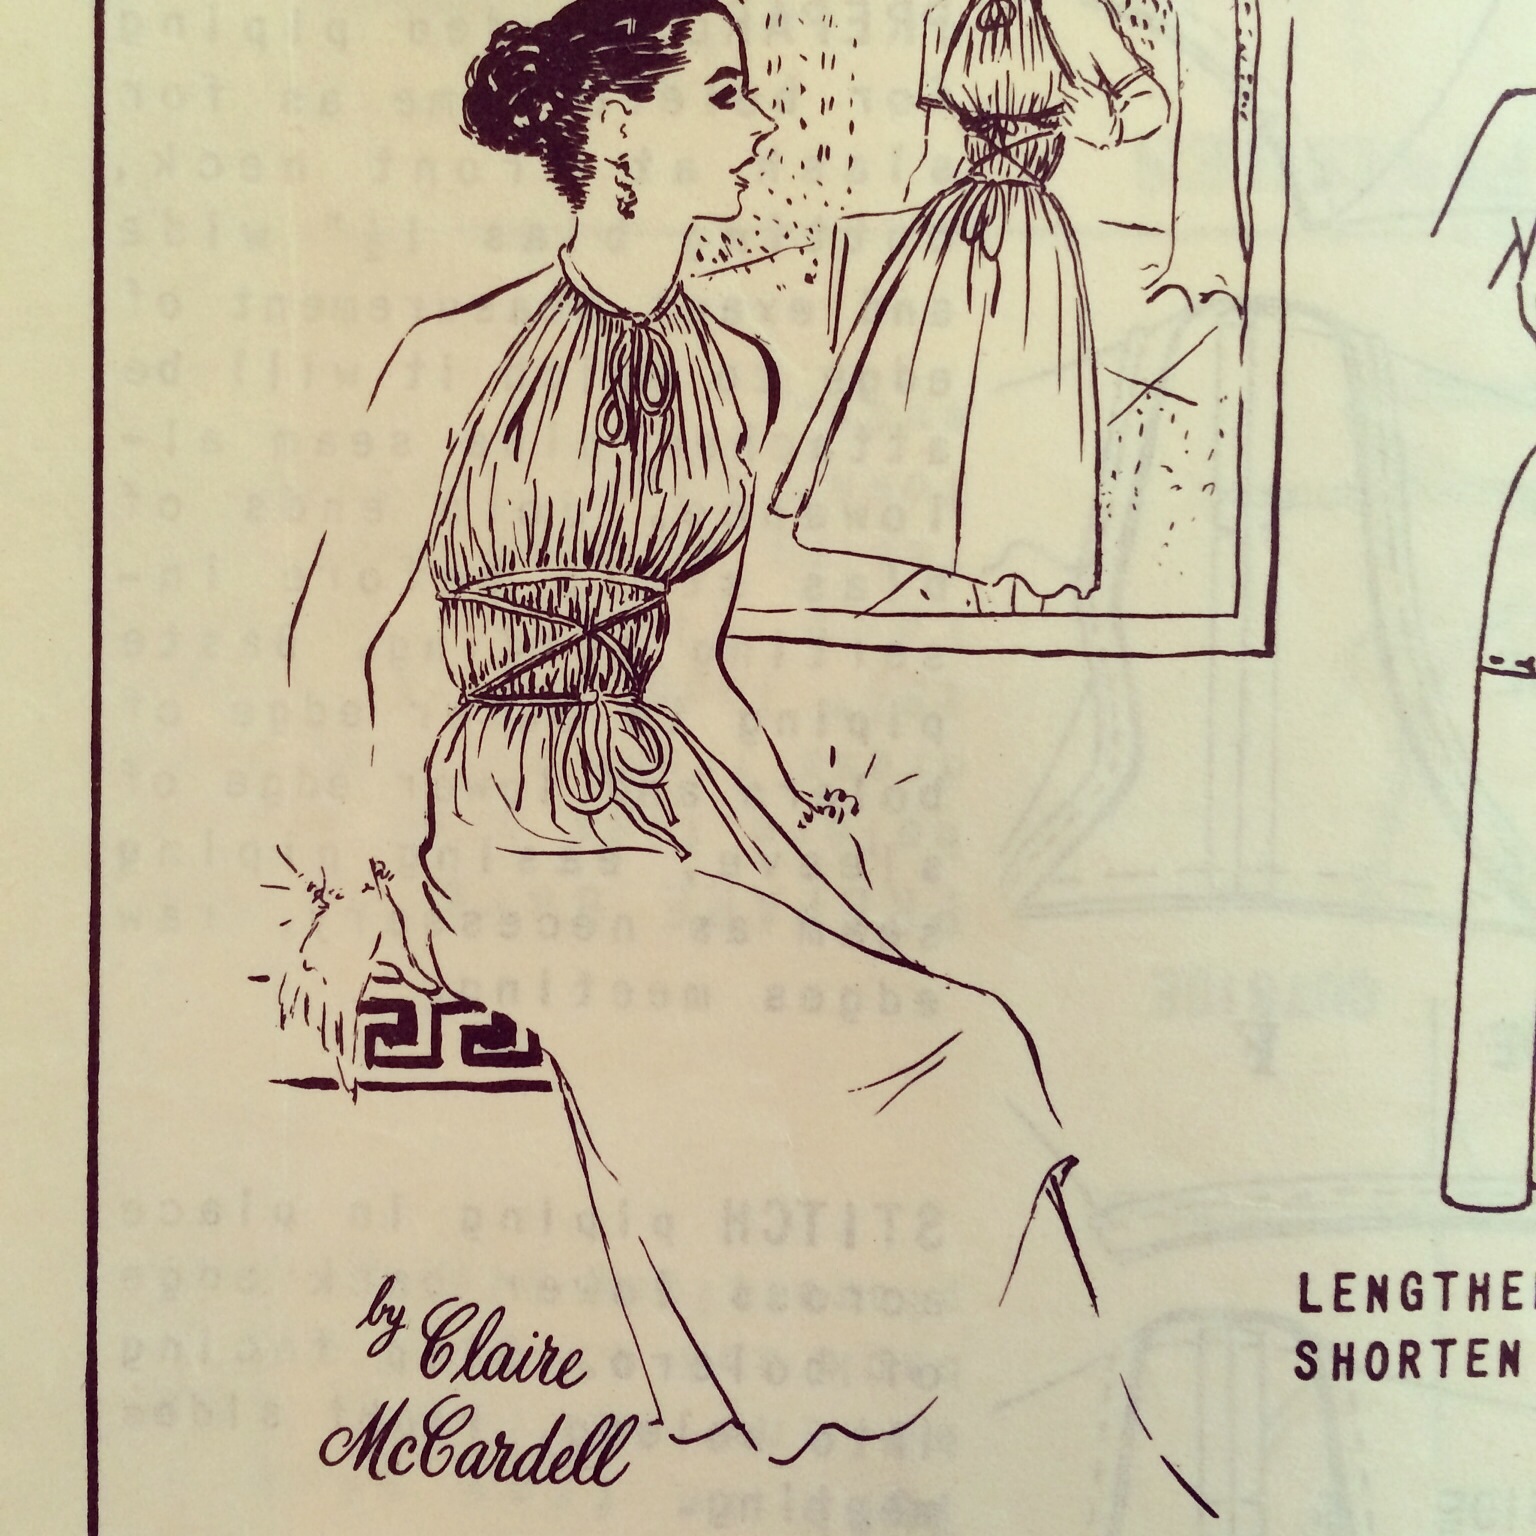
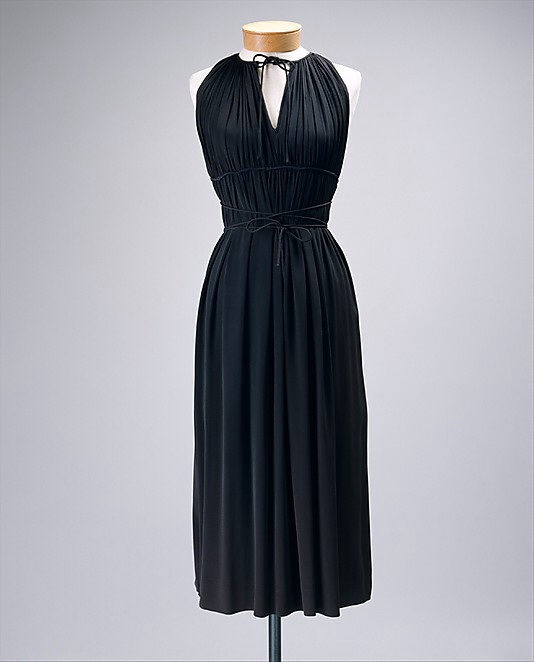
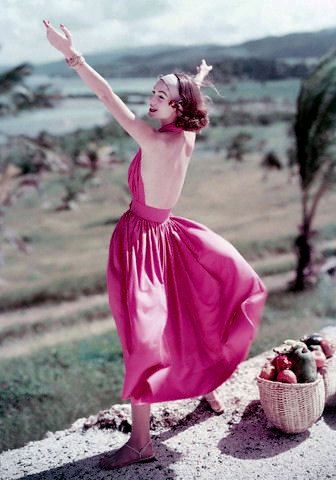
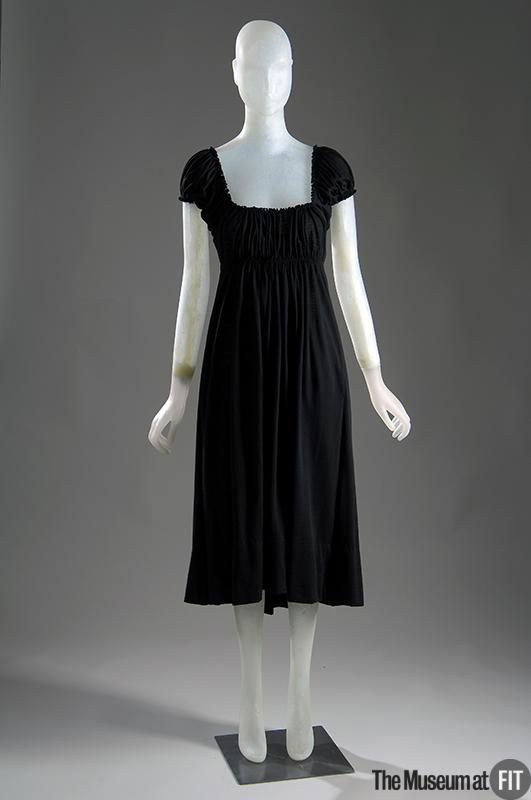
Rooting through my stash, I saw that I had a nice length of lightweight cotton jersey that I’d bought at The Fabric Store in L.A. I’d been wanting to make my own version of the Claire McCardell dress that I’d made for my sister last fall. Here’s my niece modeling the dress:

IMG_2436

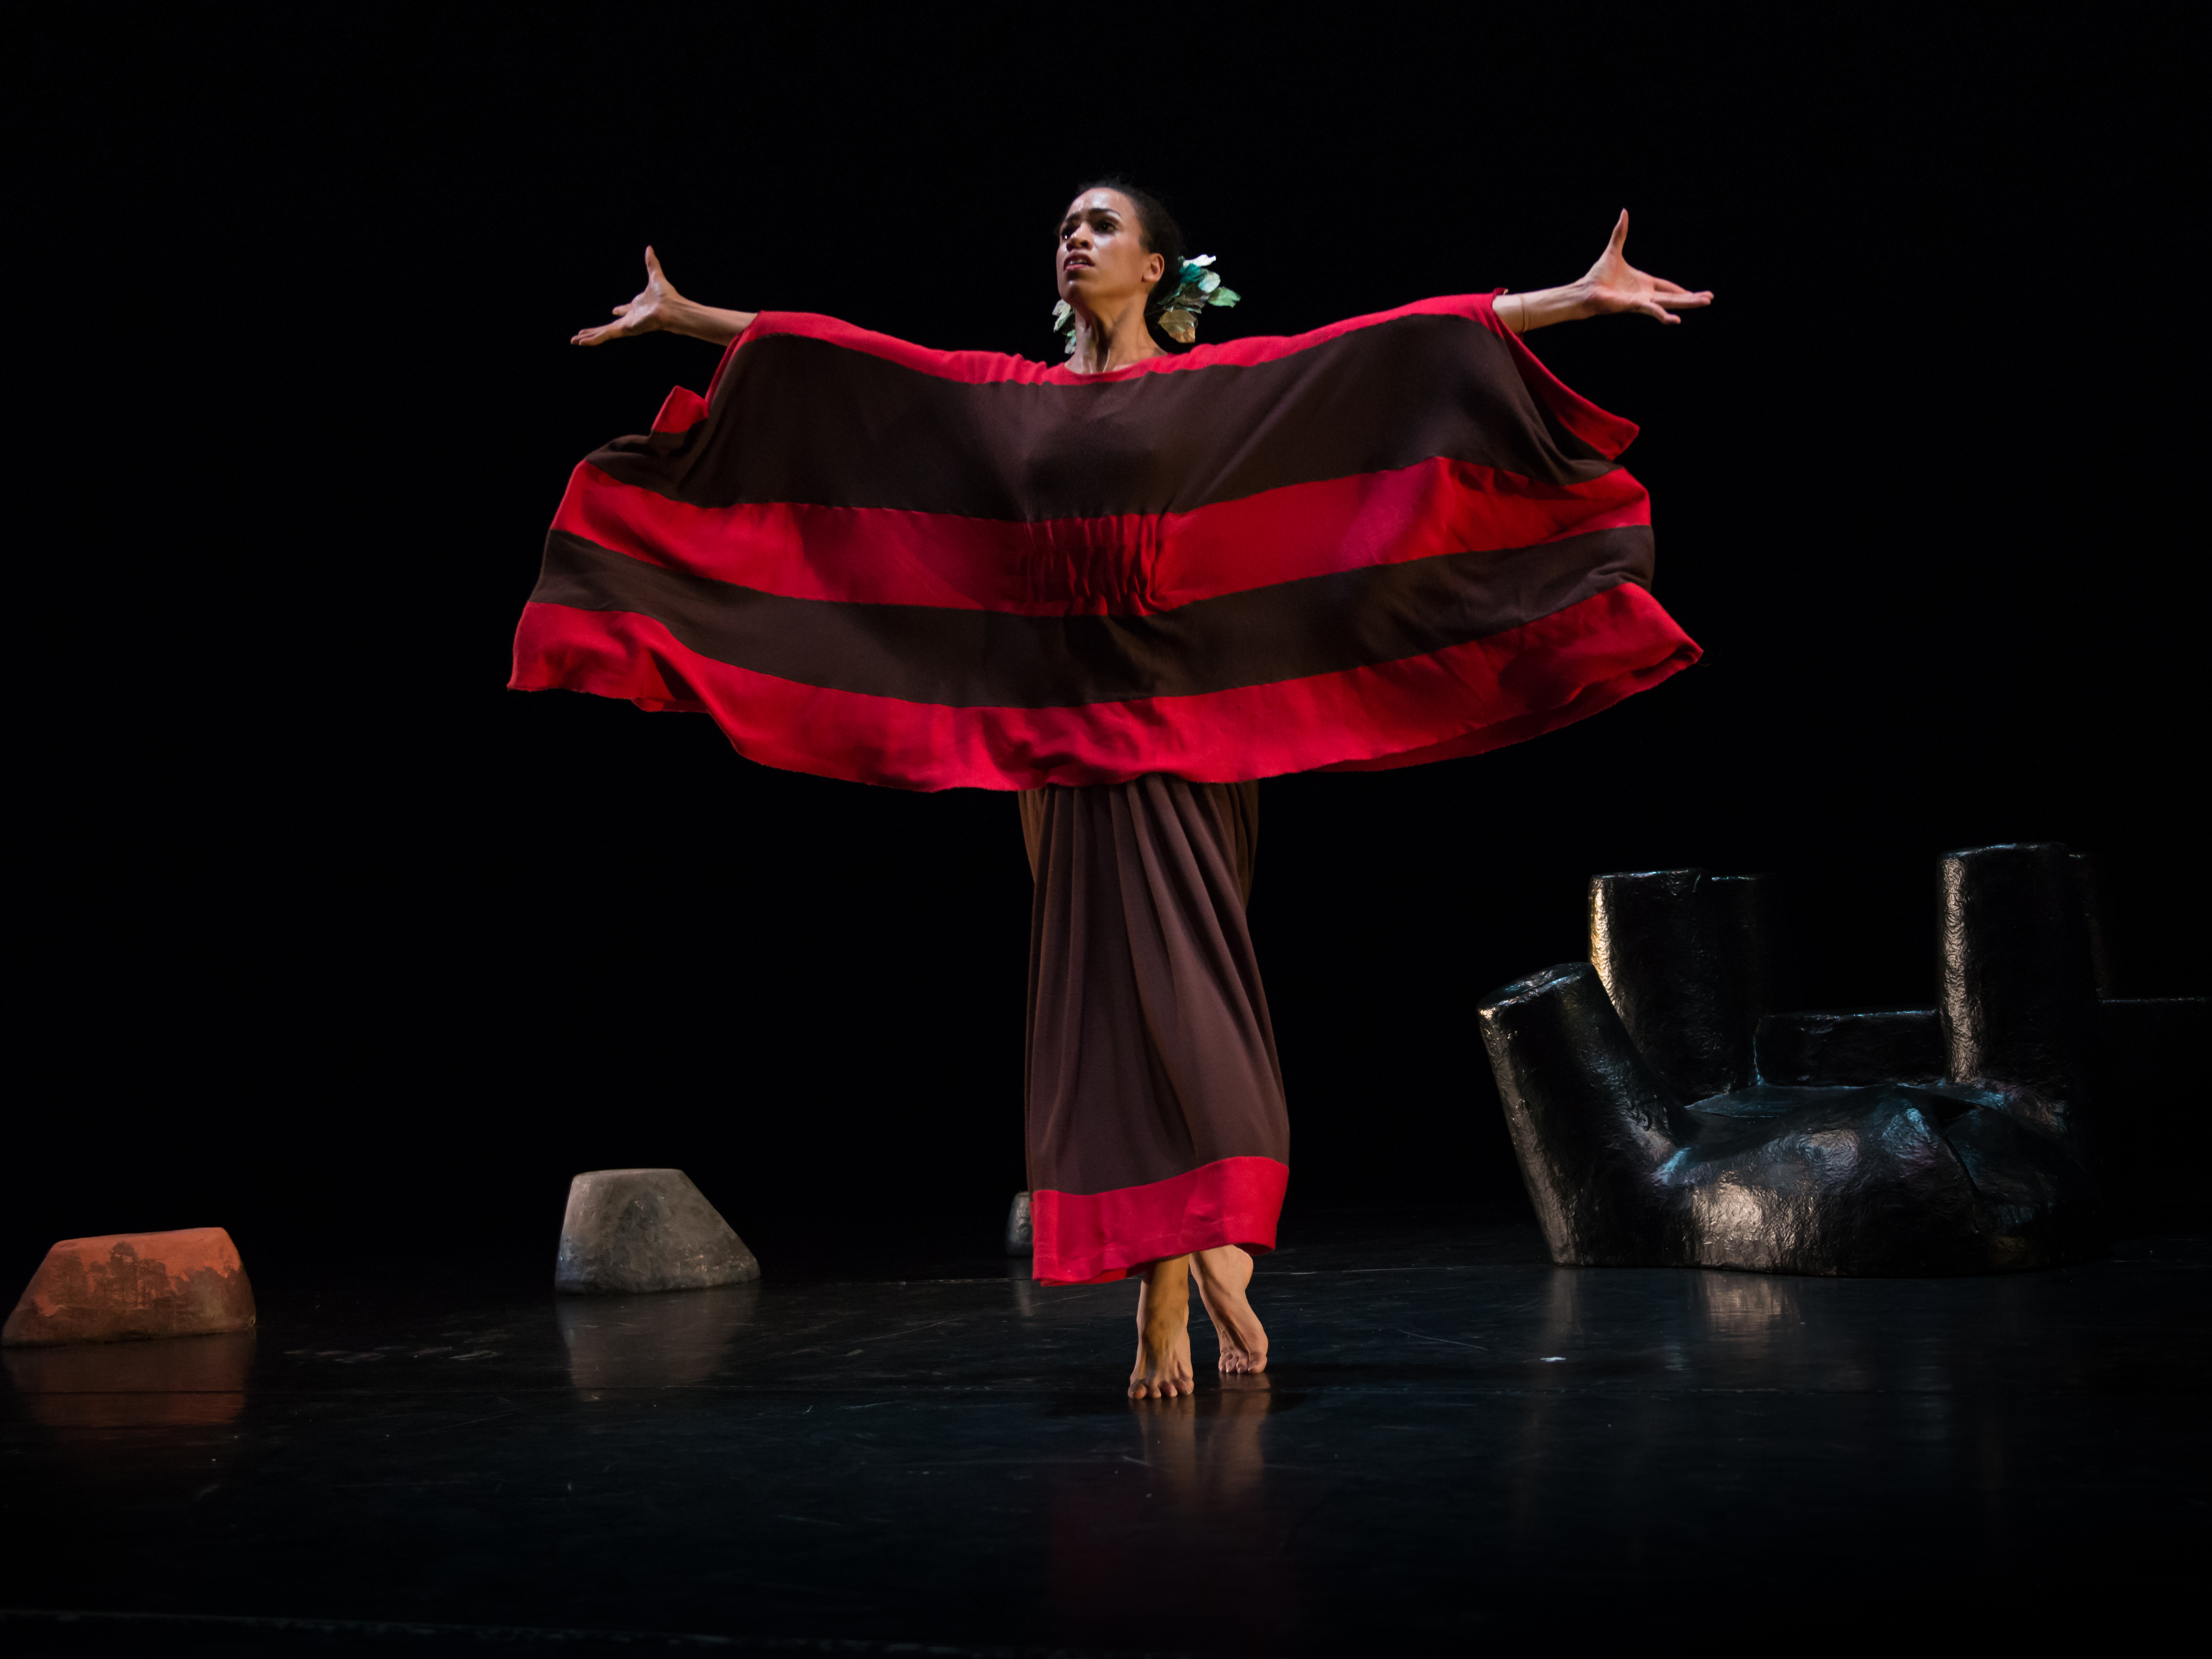
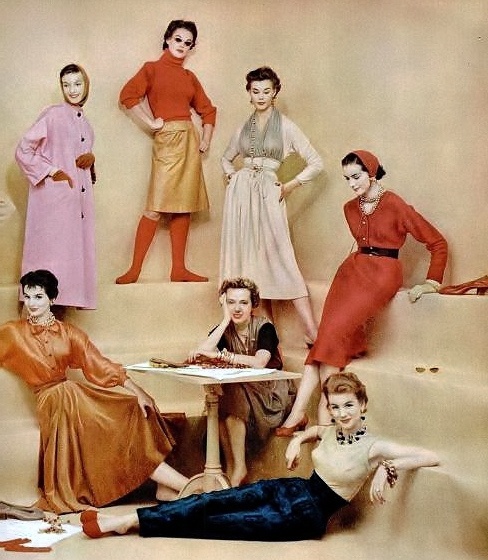
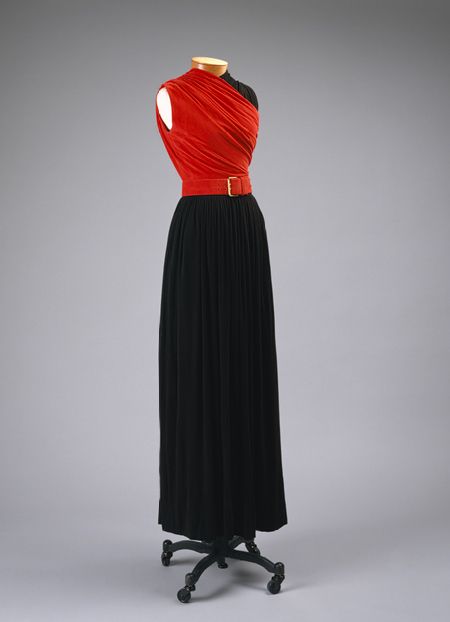
Though McCardell first introduced a version of the “monastic dress” (loose and belted, like a monk’s robe) in the late 30s, it morphed into a more Grecian toga-like style in the 40s. This design was so popular that I remember women wearing cheap nylon nightgown versions of it (and those pink plastic hair rollers) in the 60s, several years after McCardell’s death. The design is gathered tightly at the neckline, and then either gathered at the waist with a belt, or gathered under the bust with McCardell’s famous “spaghetti strings” that wrap three or four times around to the waist.

IMG_0567

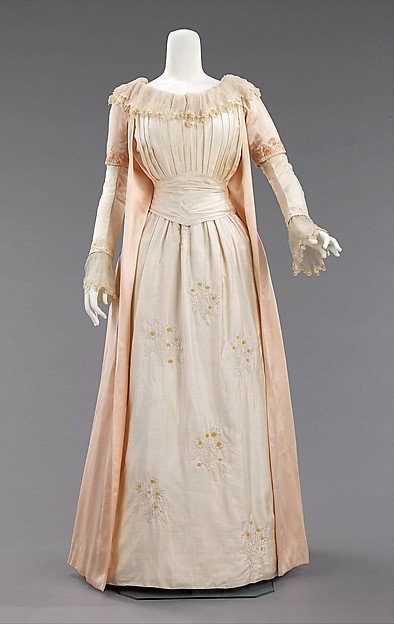
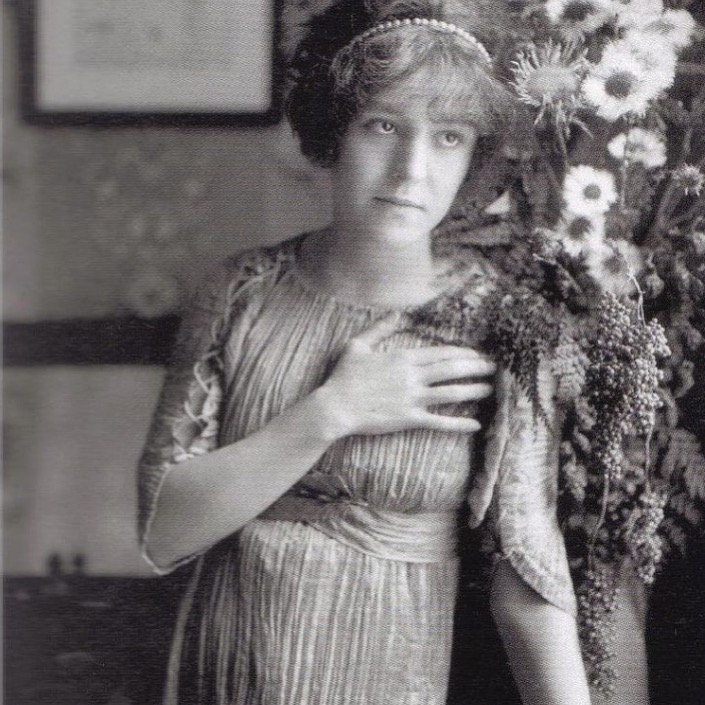
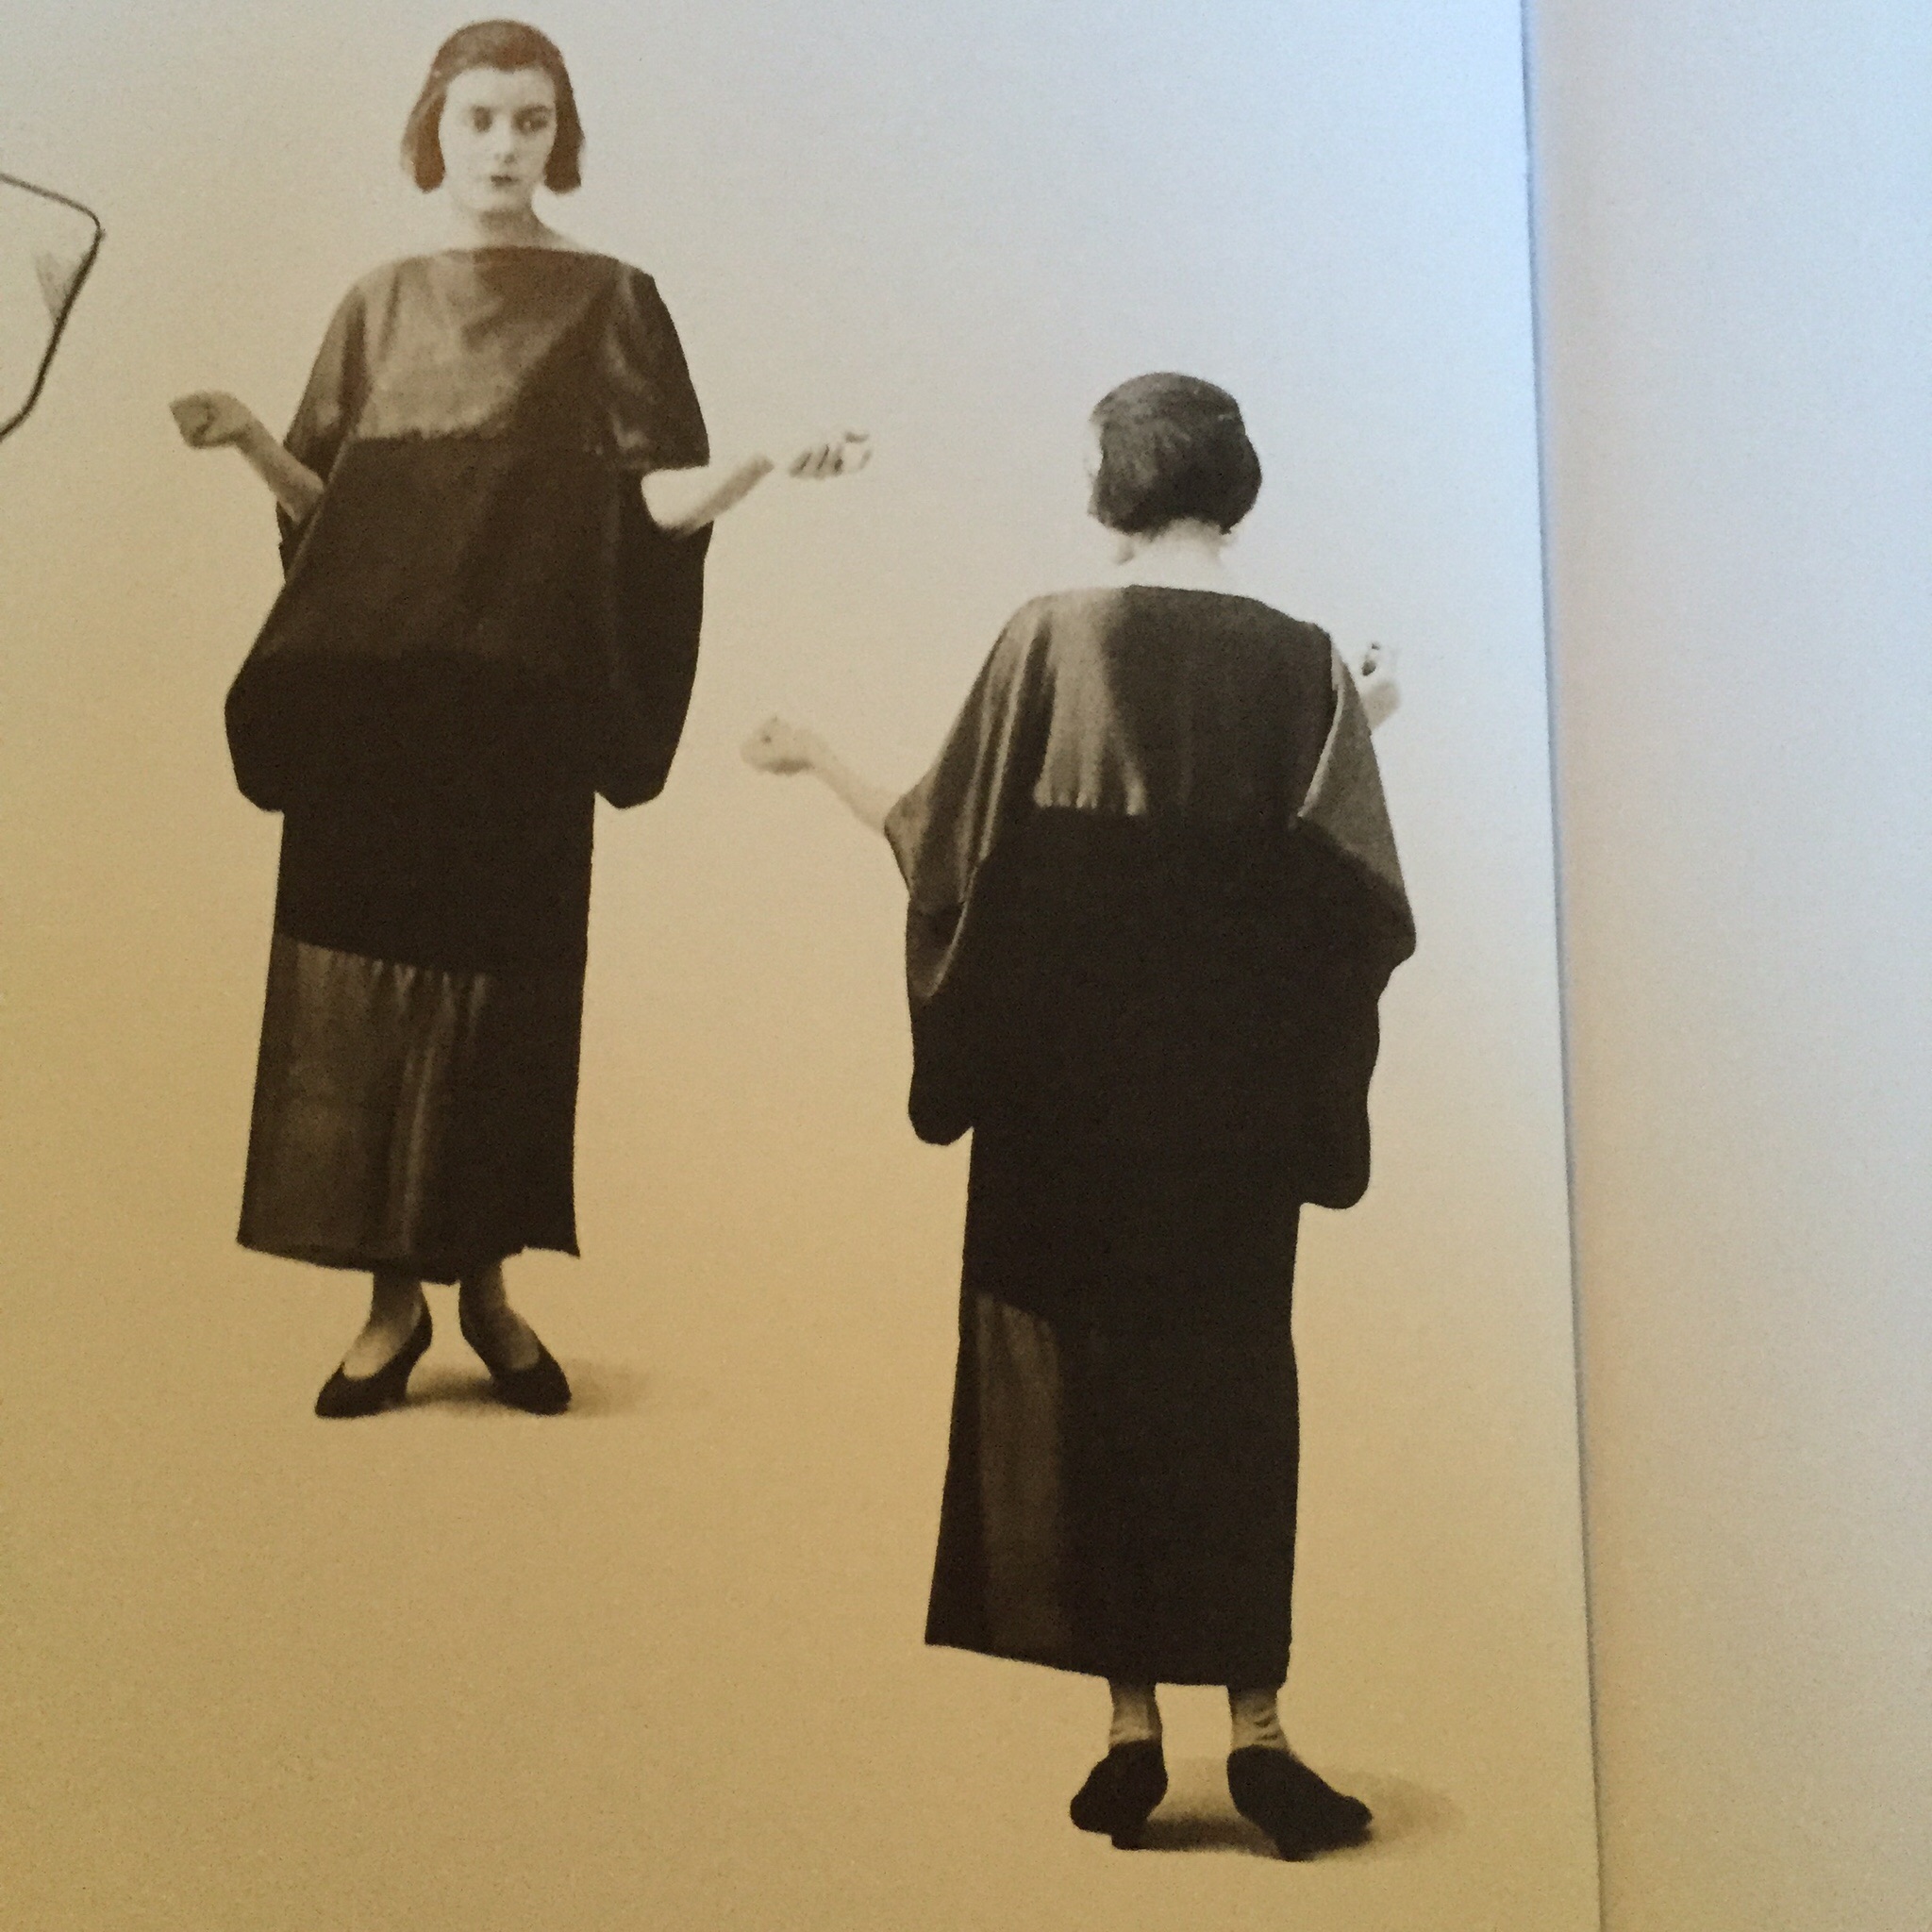
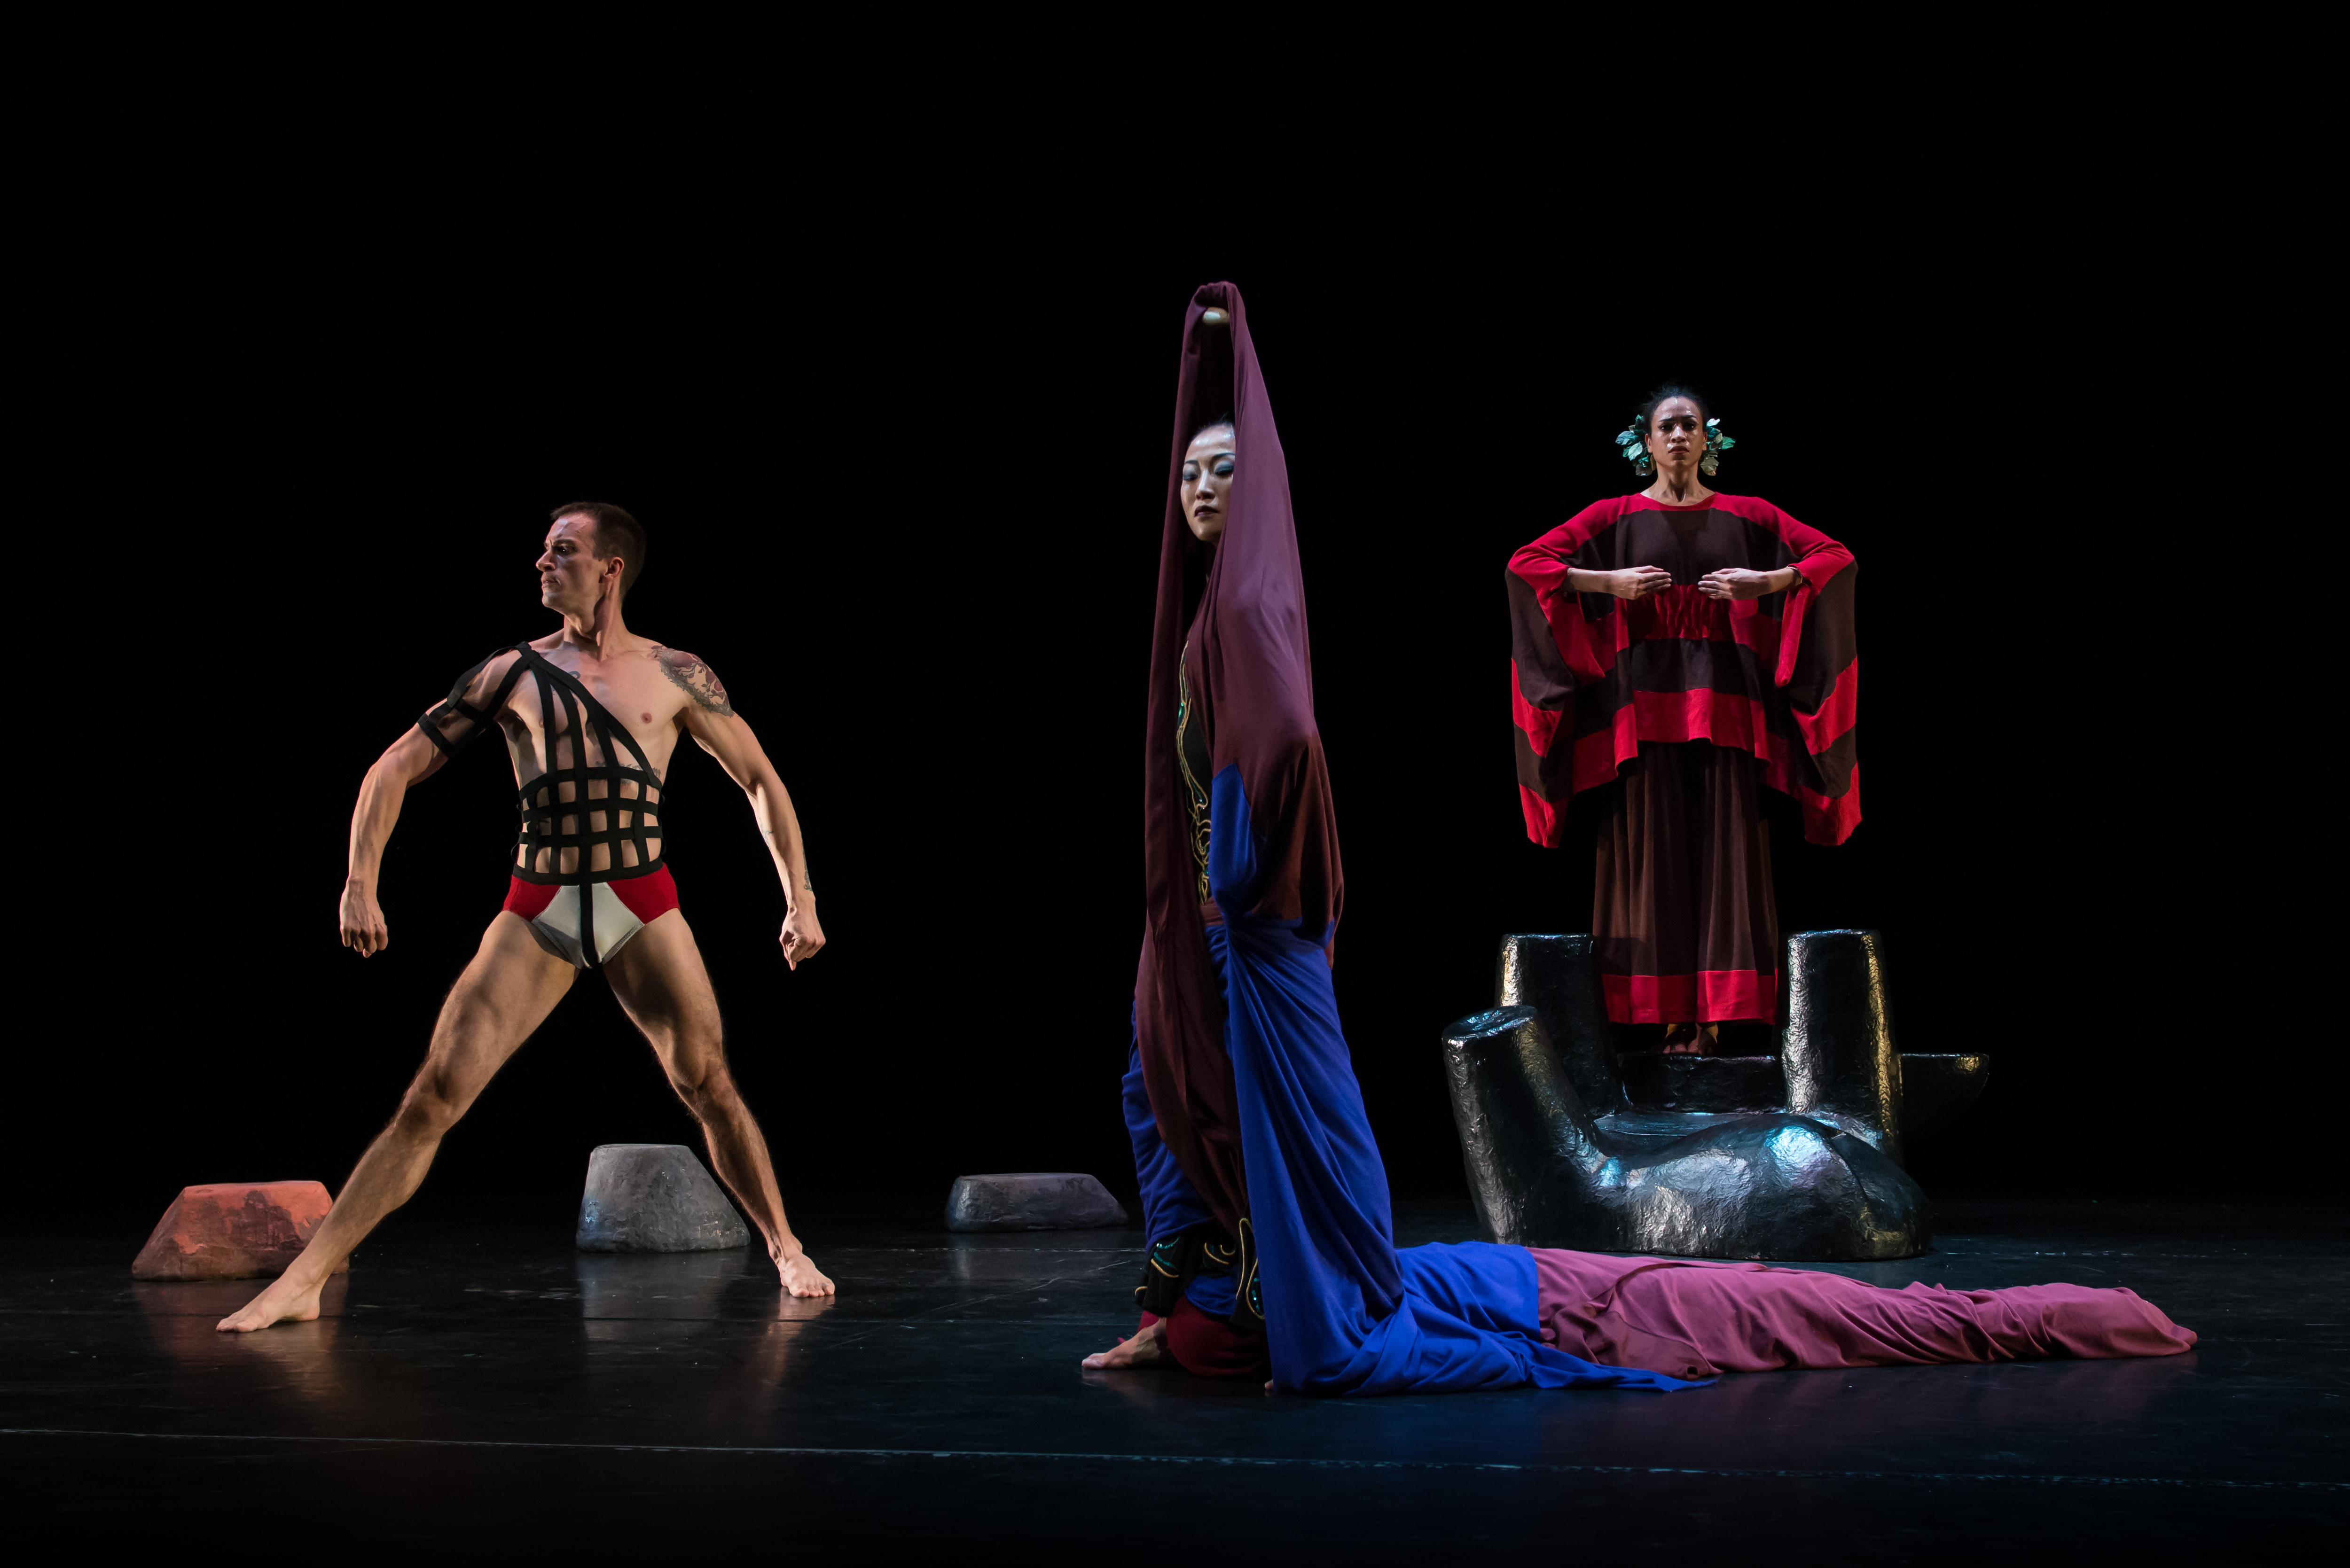
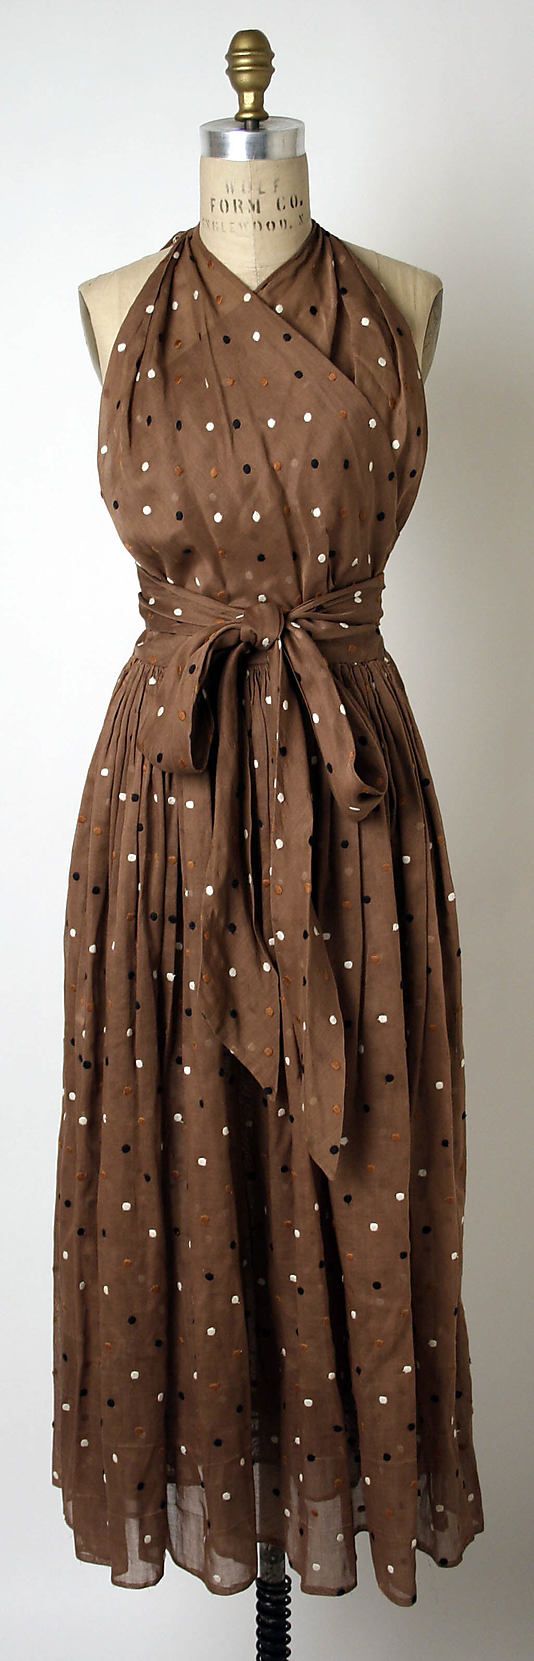
But the origins of this design are earlier–the end of the 19th century and beginning of the 20th century–when wearing a toga-style gown was an act liberation for women. In the late 1800s, the “Aesthetic Dress Movement” encouraged women to lose the corsets and dress in a more bohemian way, in loose, simple dresses with a more Renaissance look. Here’s an example from the 1880s, by Liberty and Co., in The Metropolitan Museum’s online collection:

86.172_front_CP4

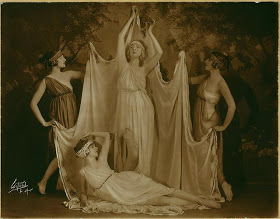
The style caught on in the U.S., as women began performing amateur theatricals with “tableaux vivants” that resembled the artwork on Grecian urns. In the vaudeville halls, Ruth St. Denis was performing dances evoking ancient cultures, though nothing about the dances was particularly culturally accurate. (Apparently she got the idea for one dance when she saw an Egyptian illustration on a pack of cigarettes.)

IMG_2947

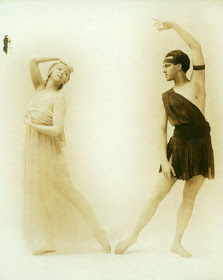
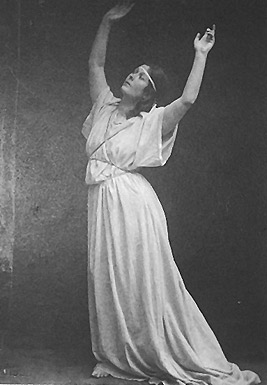
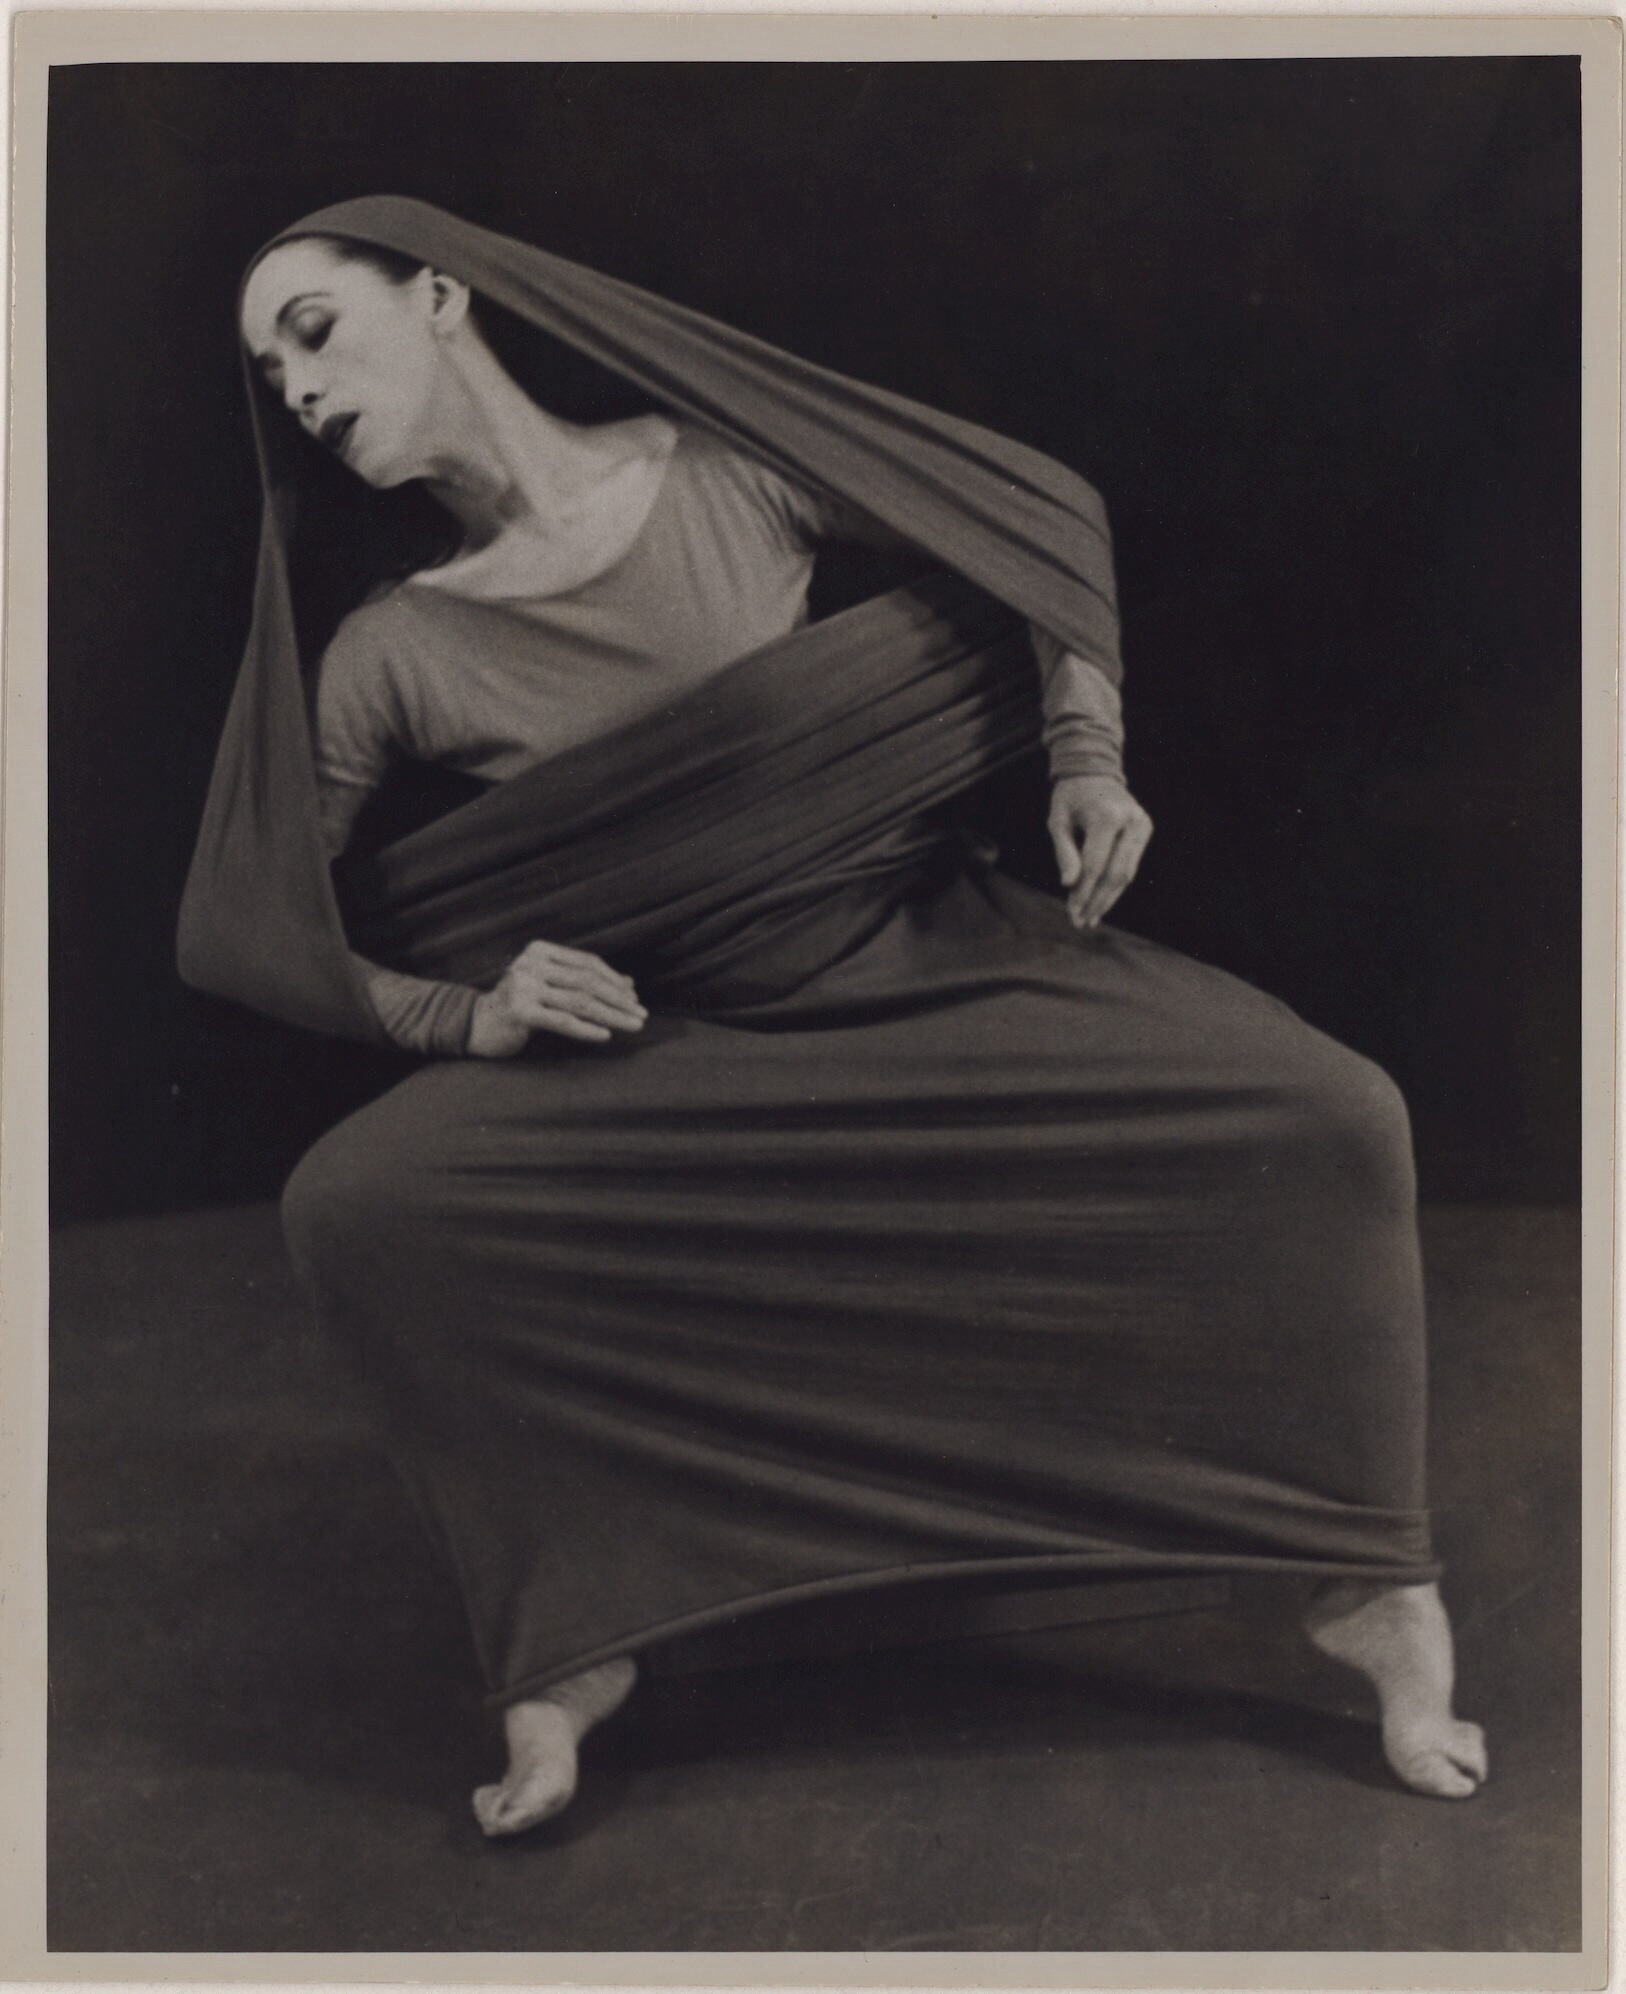
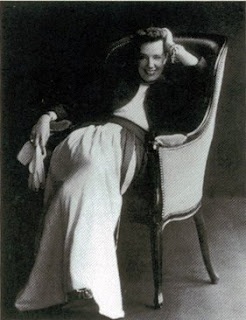
In Europe, people performed “Eurythmy” in togas (a form of movement to music):

IMG_3002

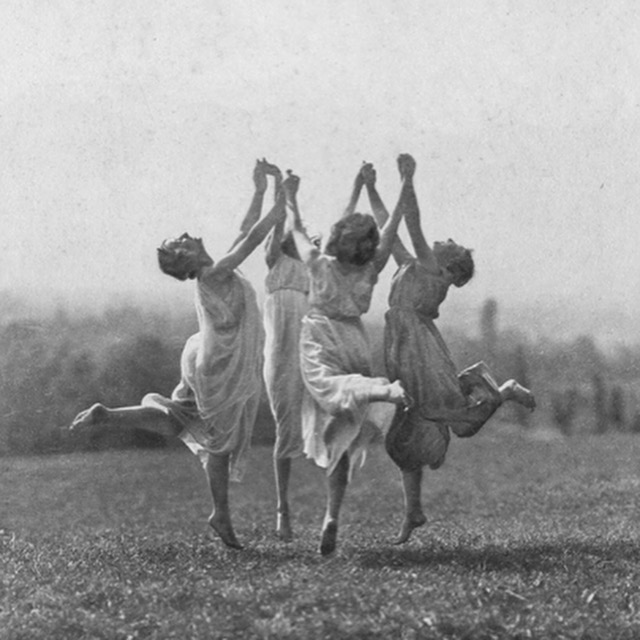
And Isadora Duncan’s performances popularized this free-spirited look throughout the world.

isadora04

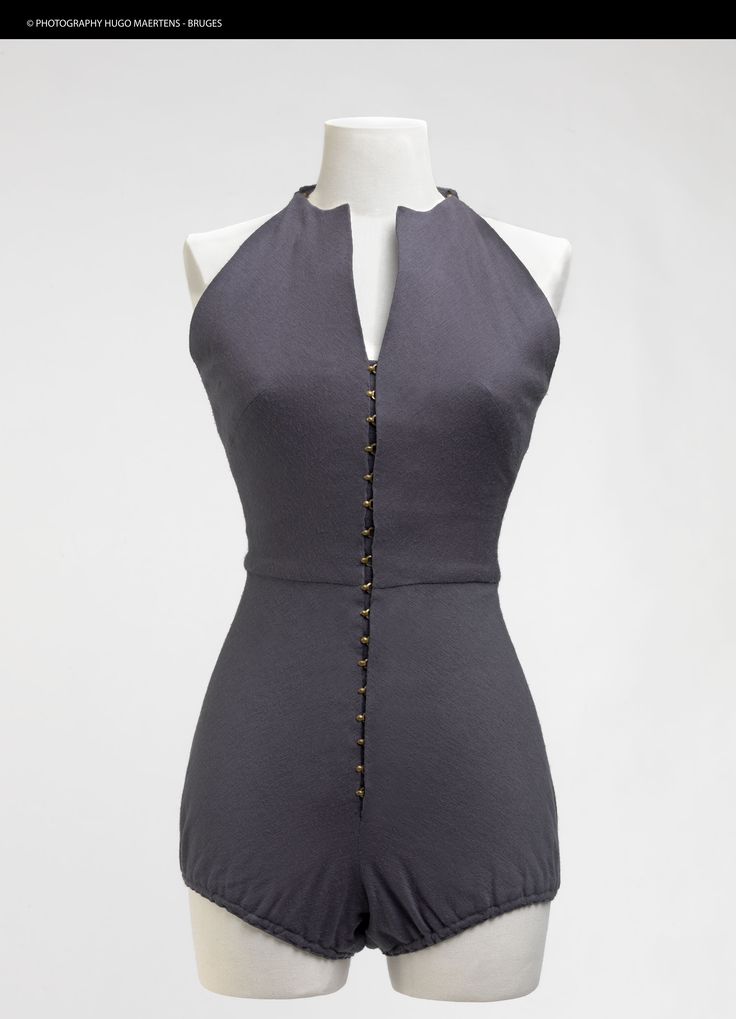
Soon, this style of toga-like design, worn without much in the way of undergarments, showed up in the day and evening clothes of the time, one example being the form-fitting pleated “Delphos” gowns by Fortuny:

IMG_3179

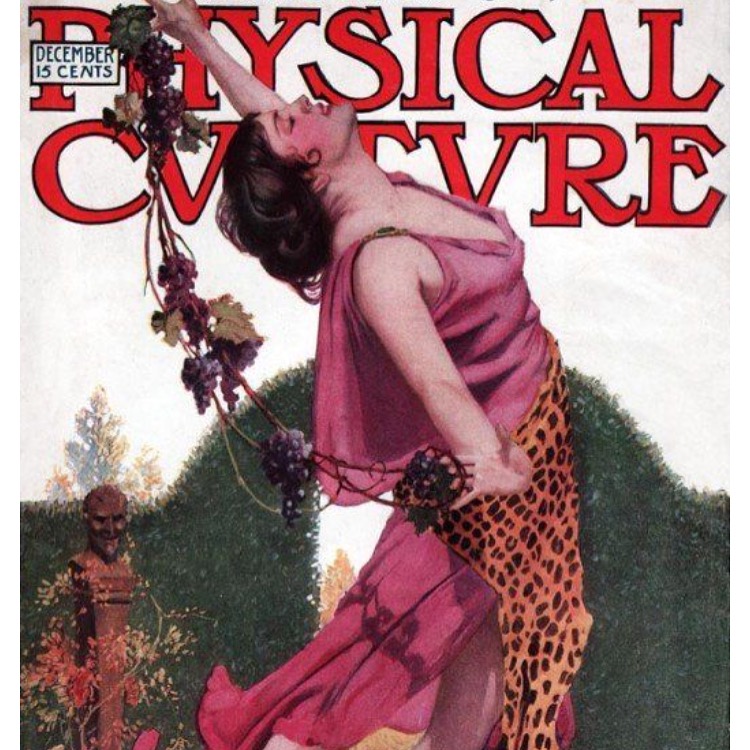
The toga look was part of the “Physical Culture” movement in the U.S., which encouraged women to get out of the corset, get out of the house, and exercise for health.

IMG_2972

“That’s going to be meee in the backyard!” I shouted. My husband and son looked up briefly, nonplussed, and then went back to their iPads. McCardell herself was a fan of Fortuny, and she owned one of the Delphos dresses, which were so highly pleated they were kept coiled up in what looked like a small hatbox. So I figured  this was the right pattern to mimic the toga style.

Having made this dress before. (here’s the scoop on that) I learned a few things:

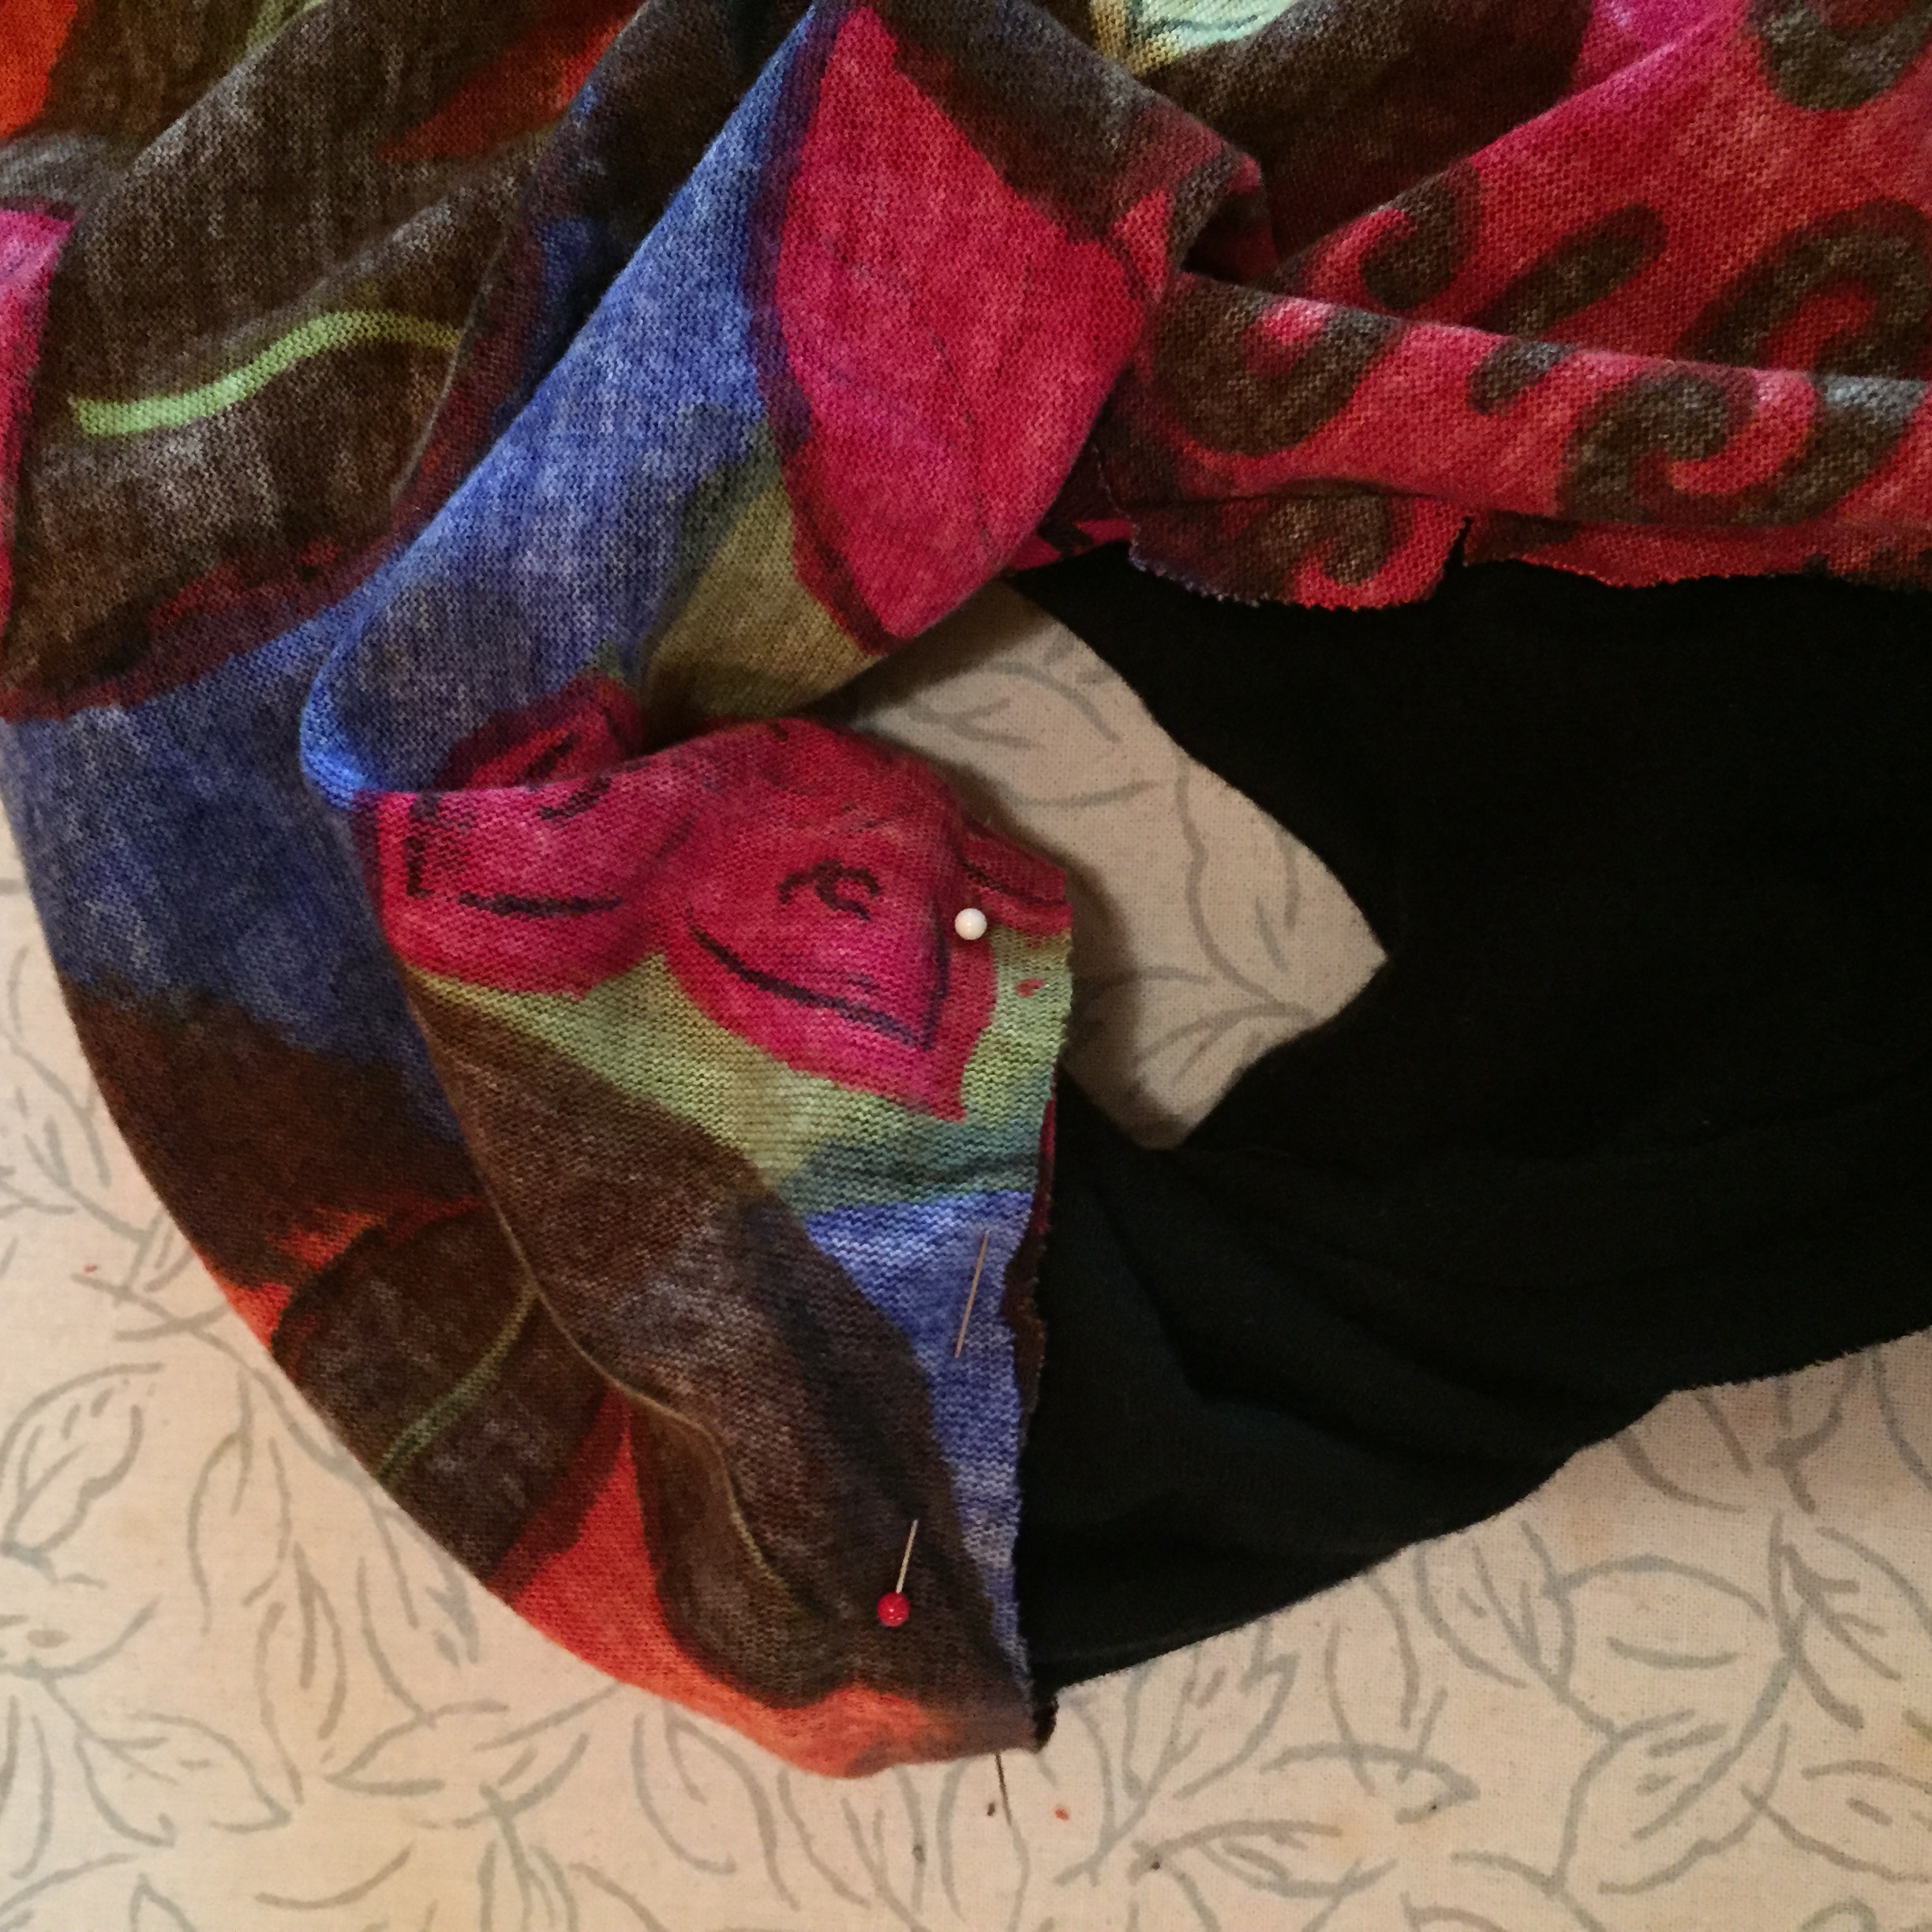
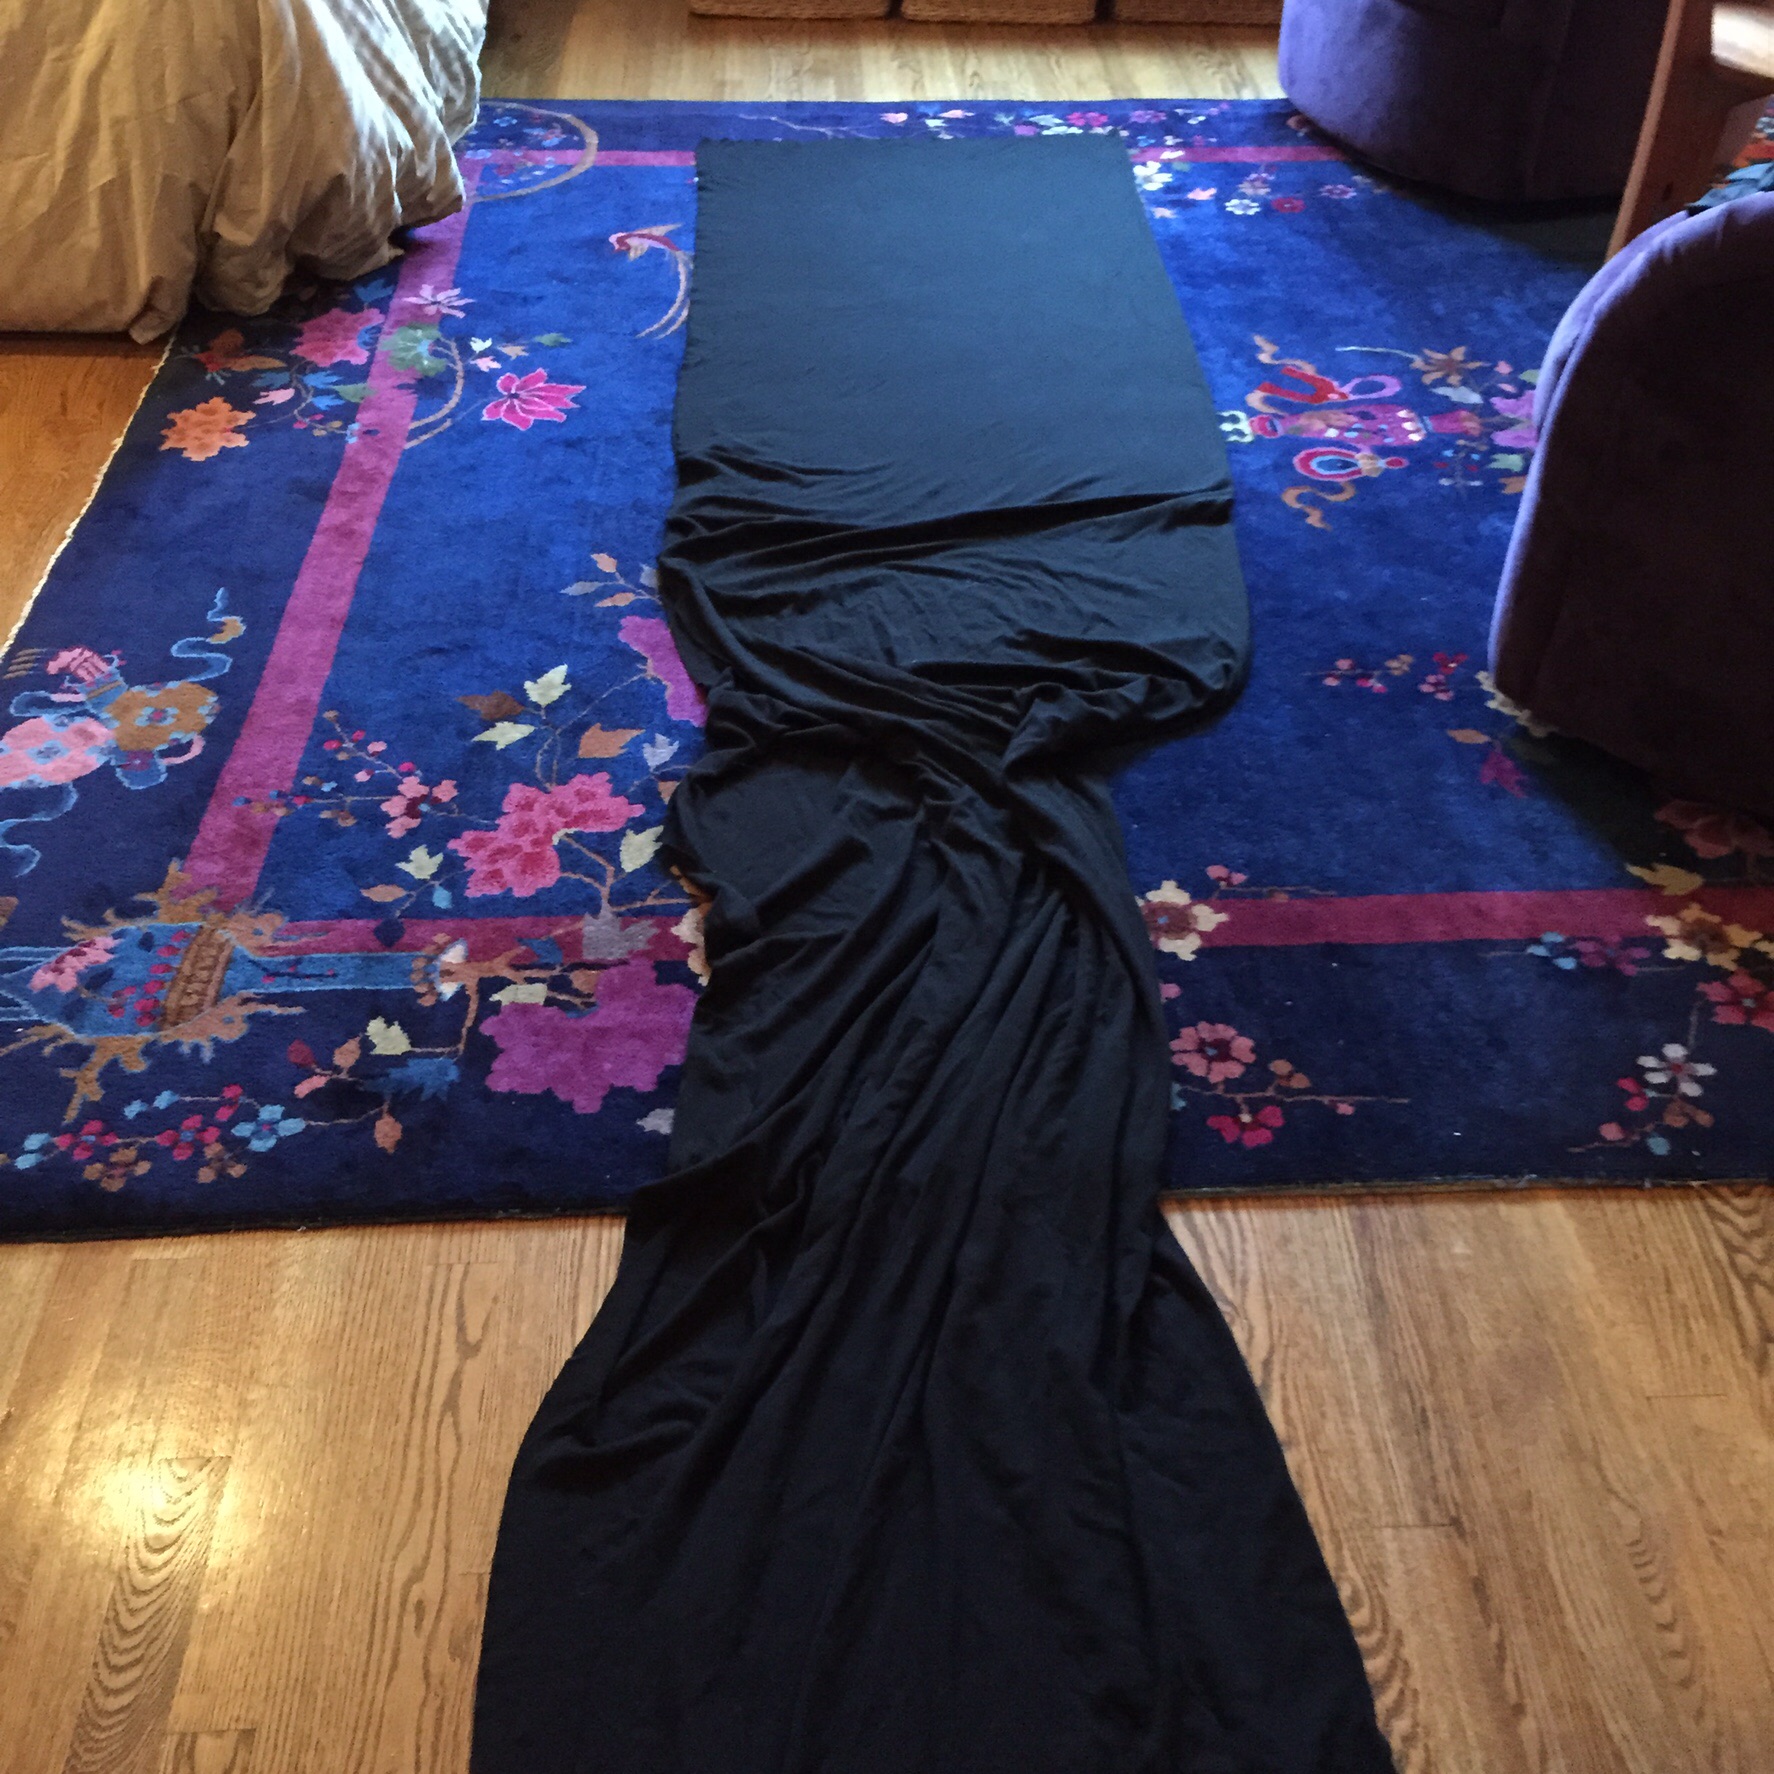
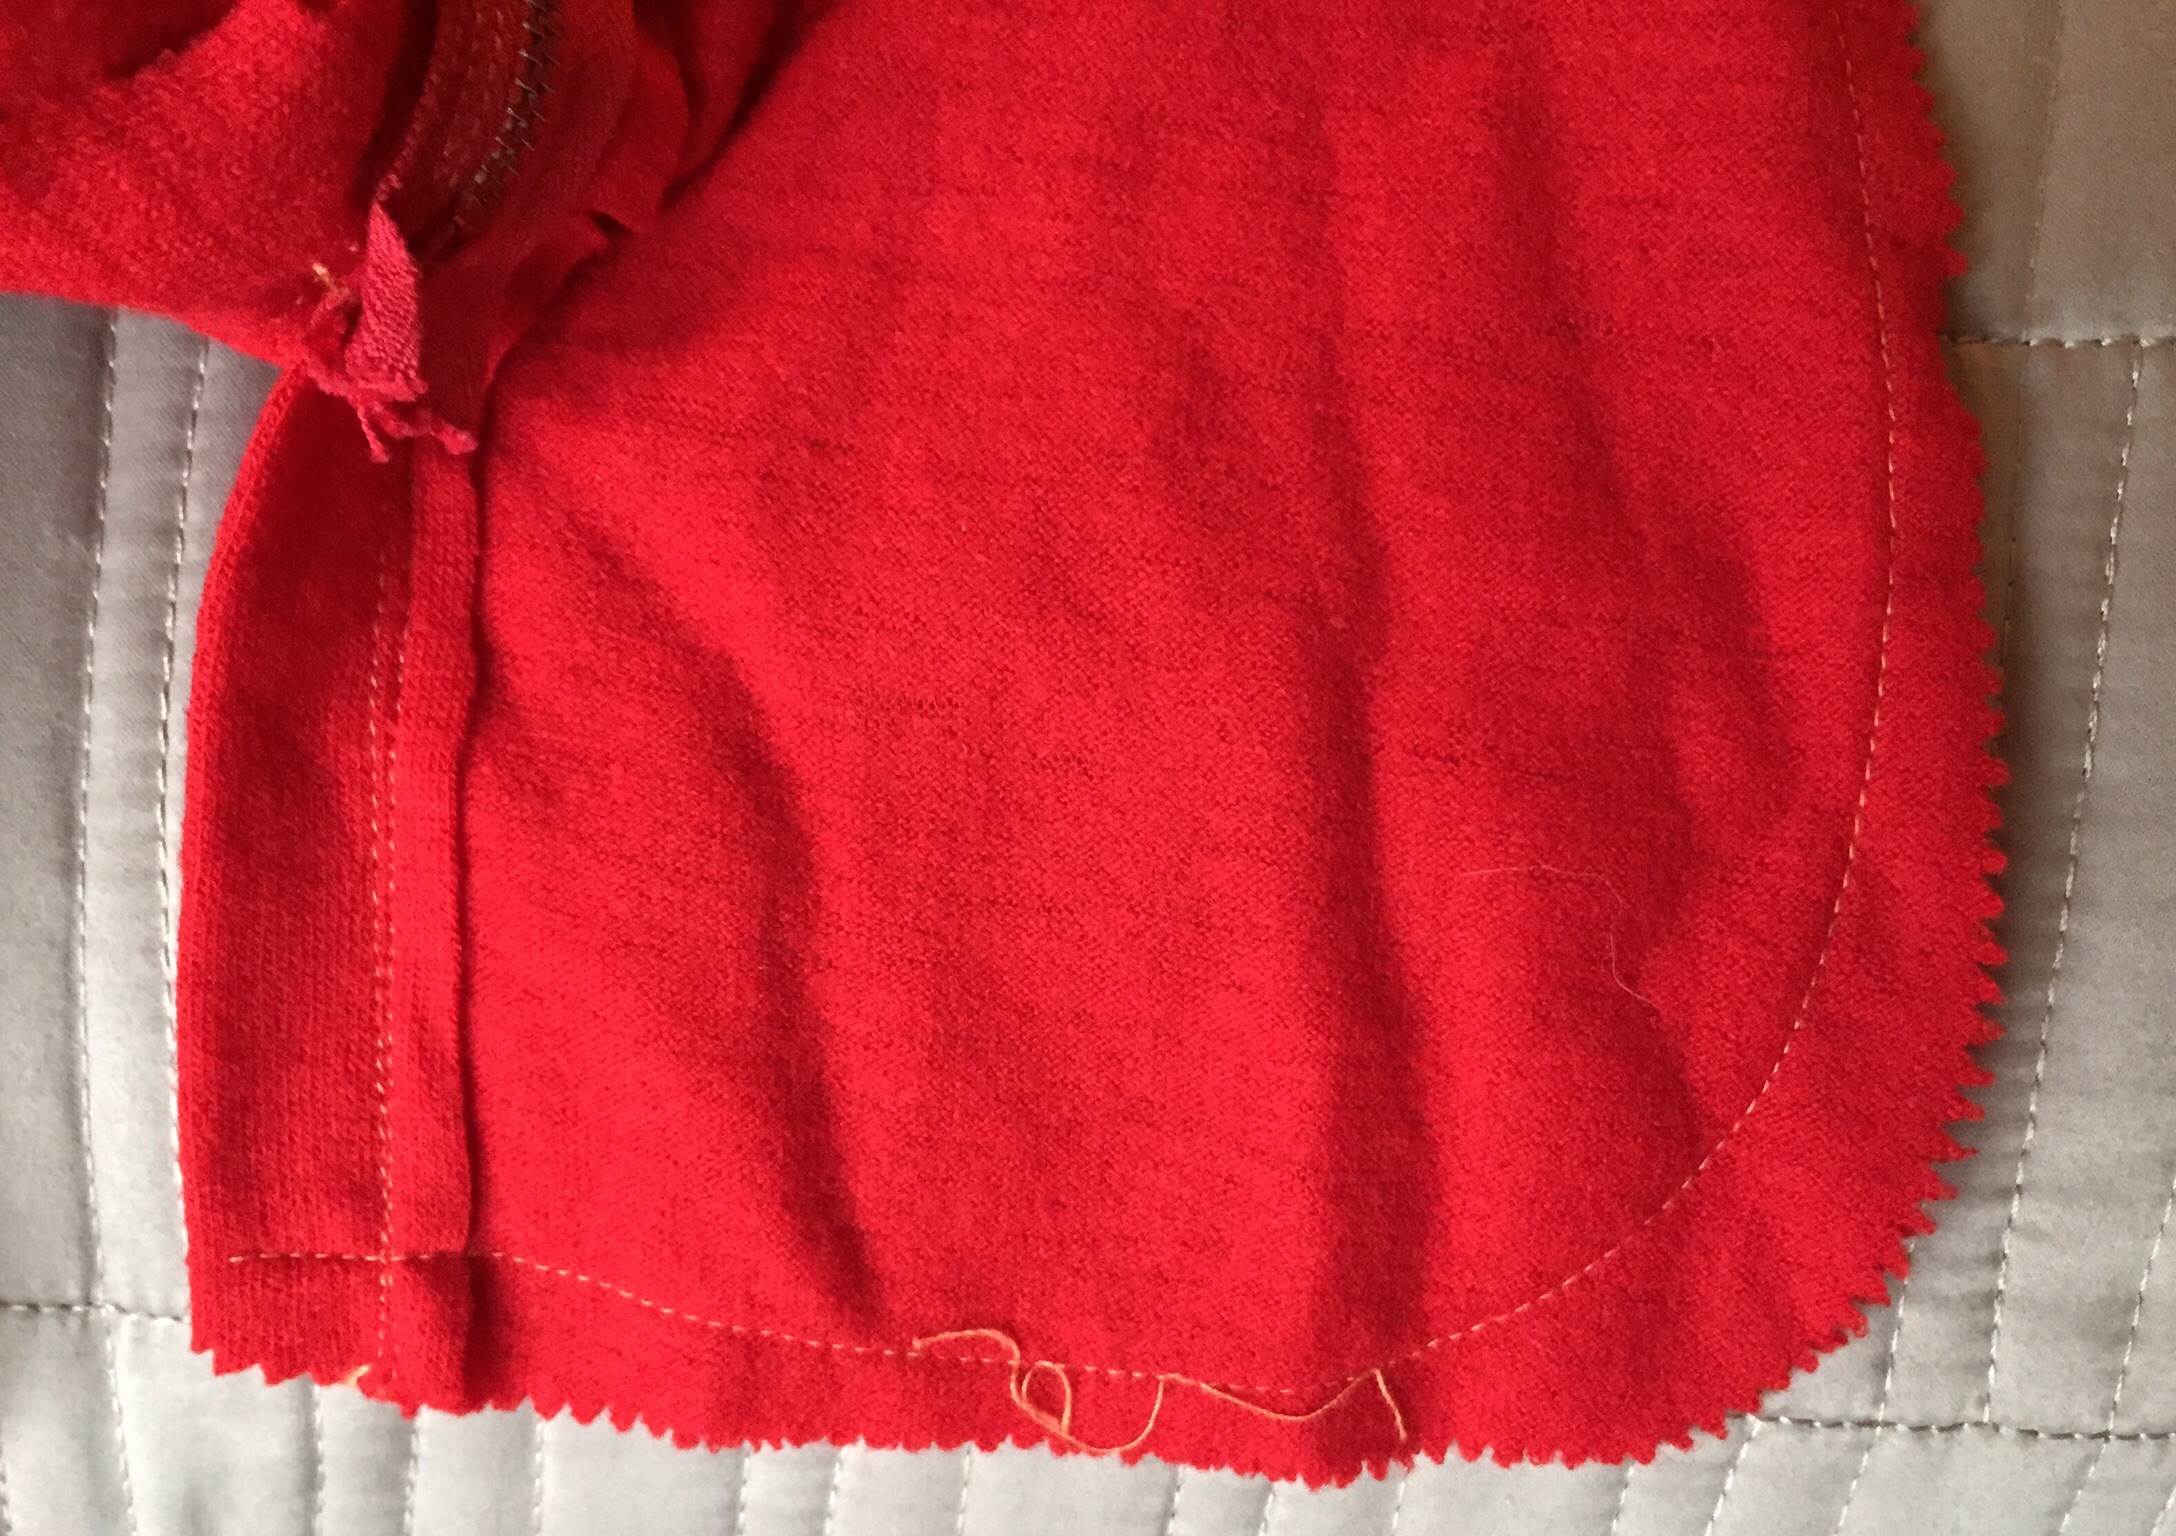
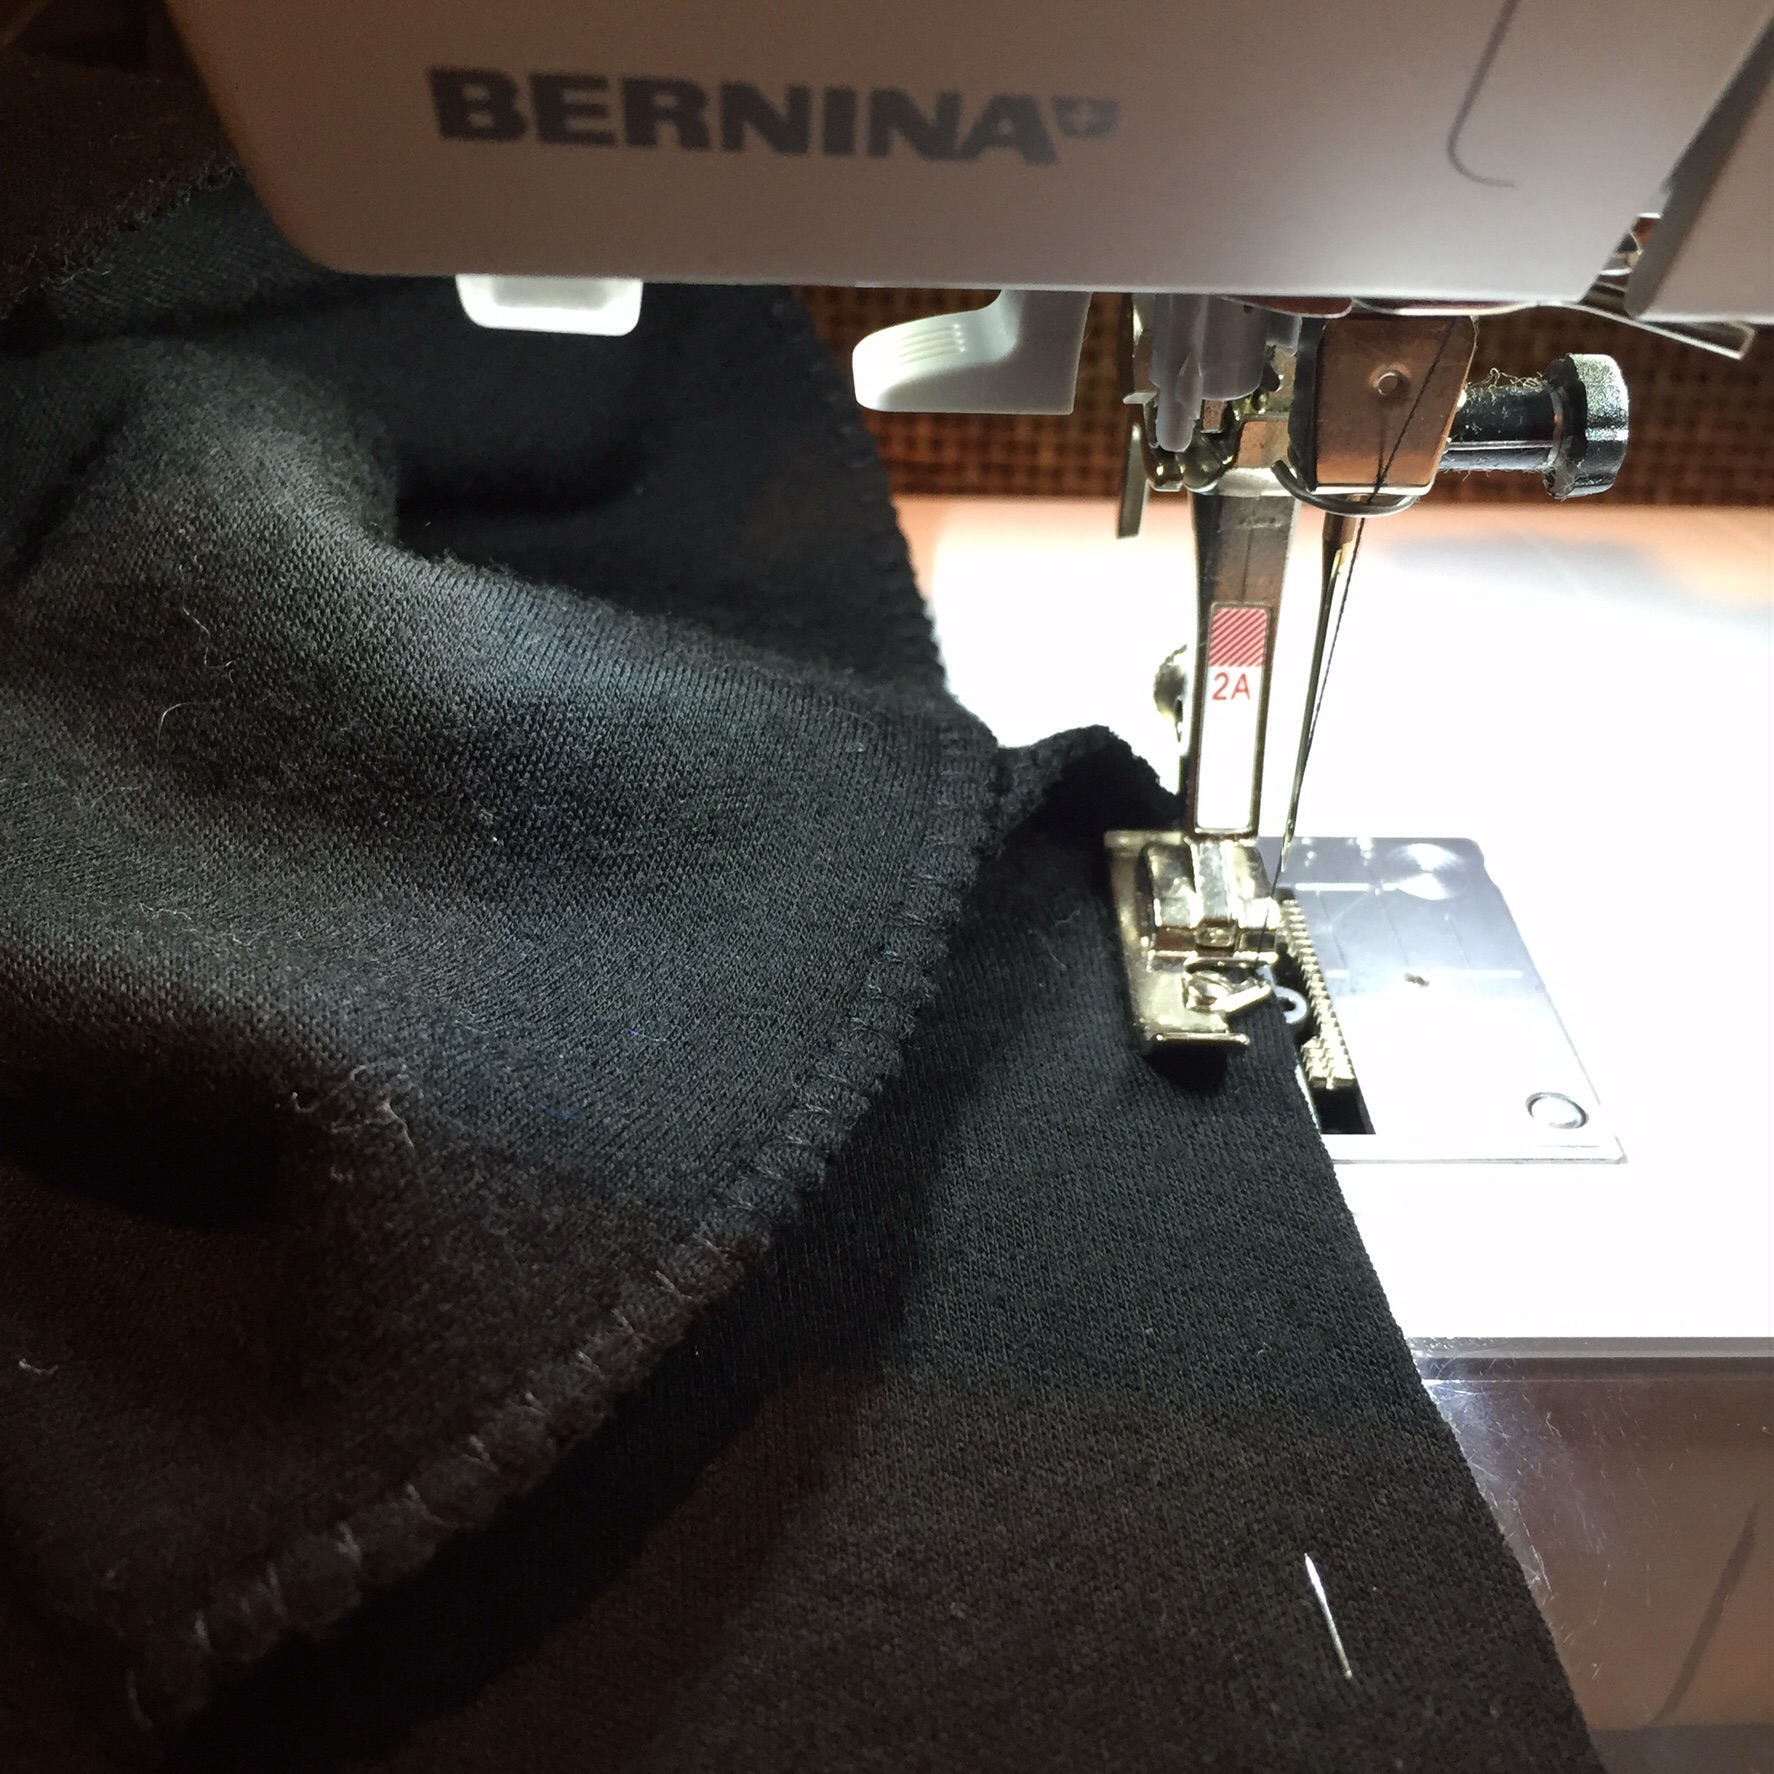
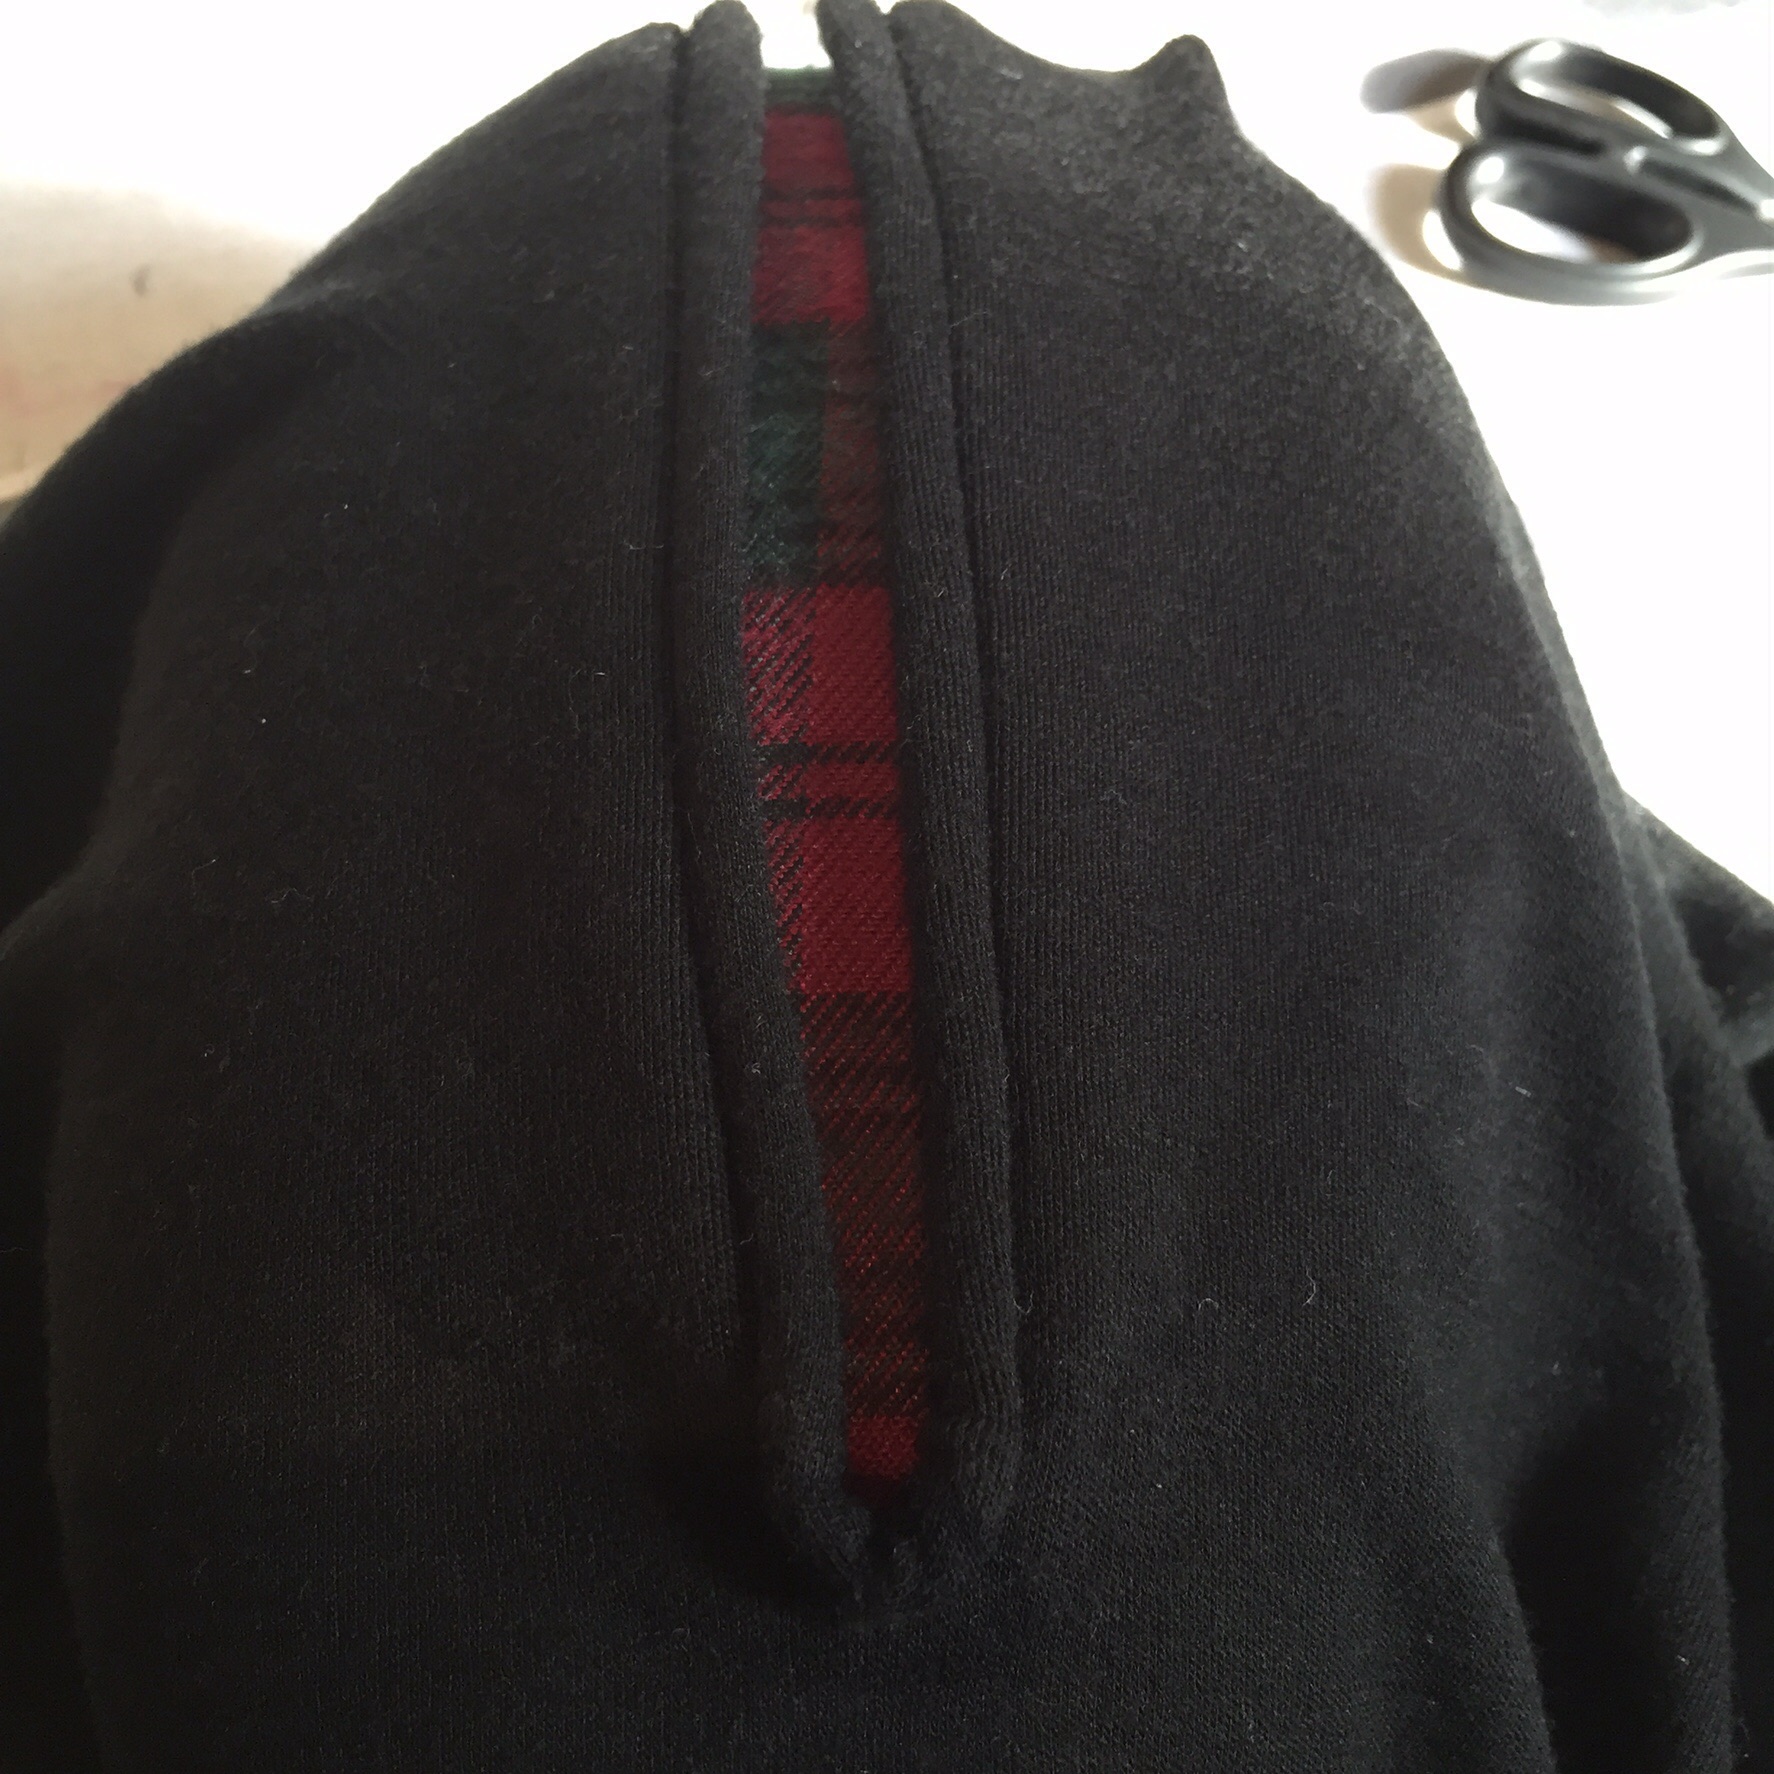
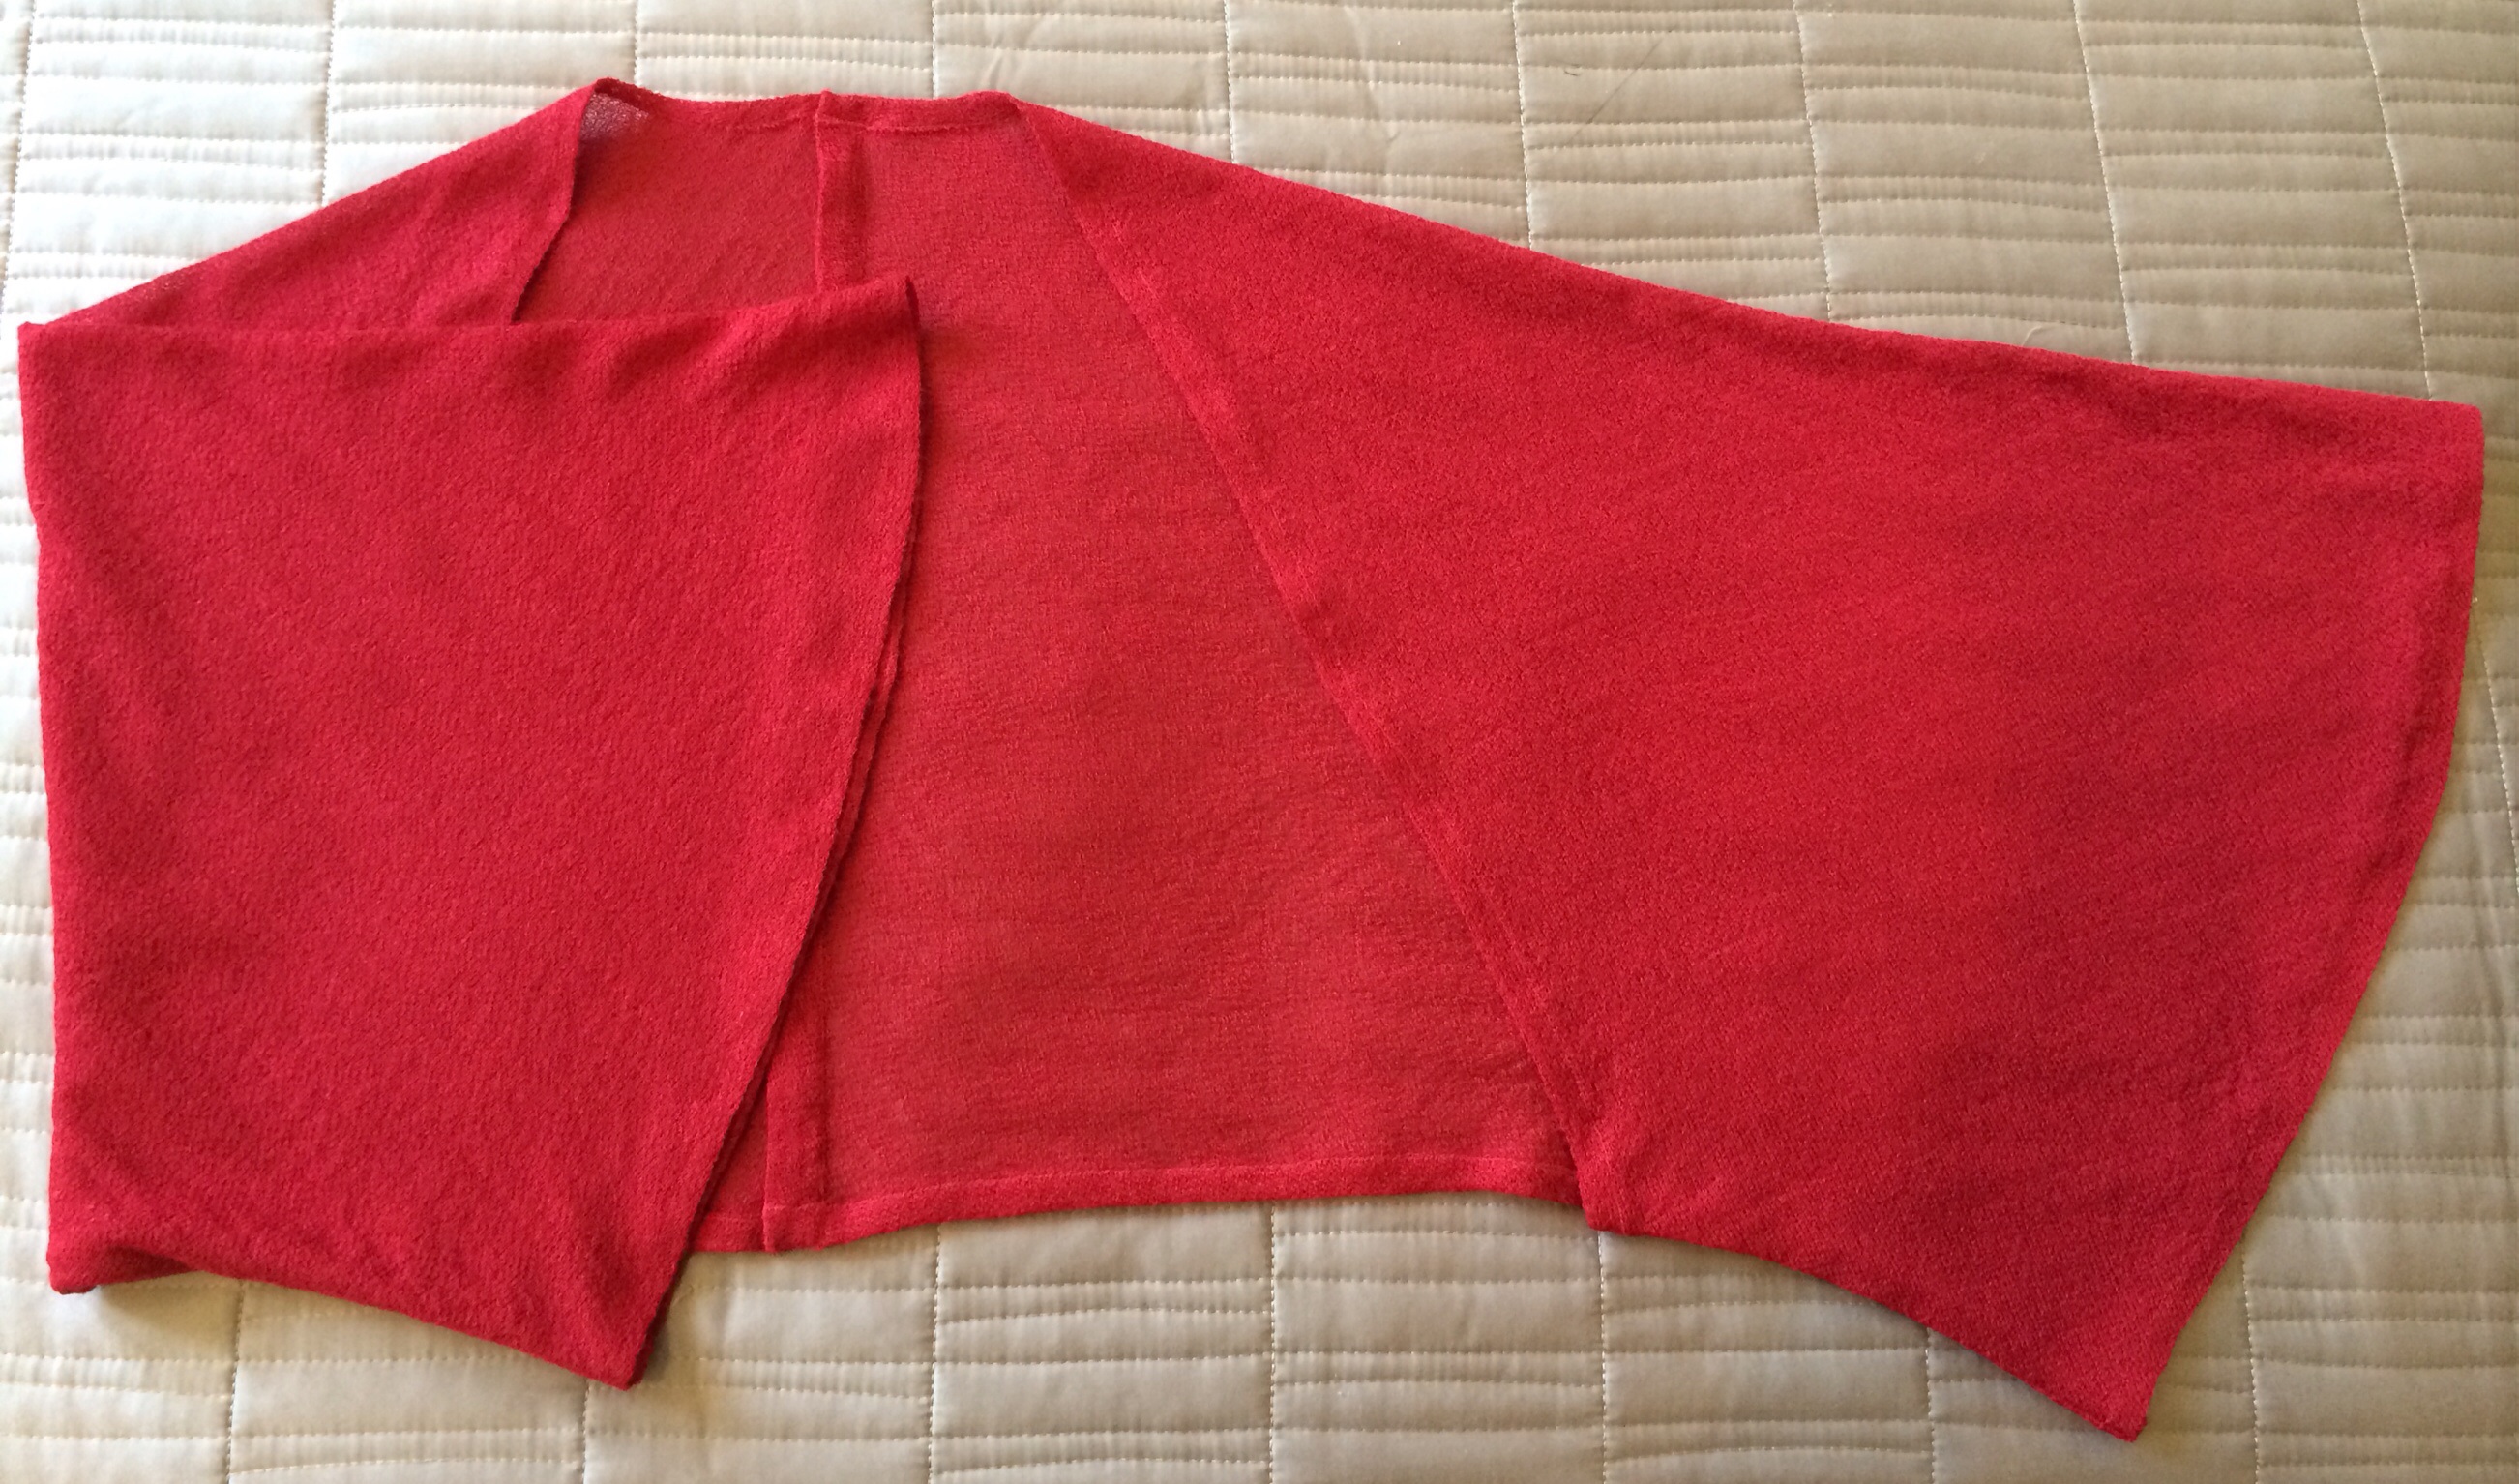
1. Don’t put the pocket in upside down:

image

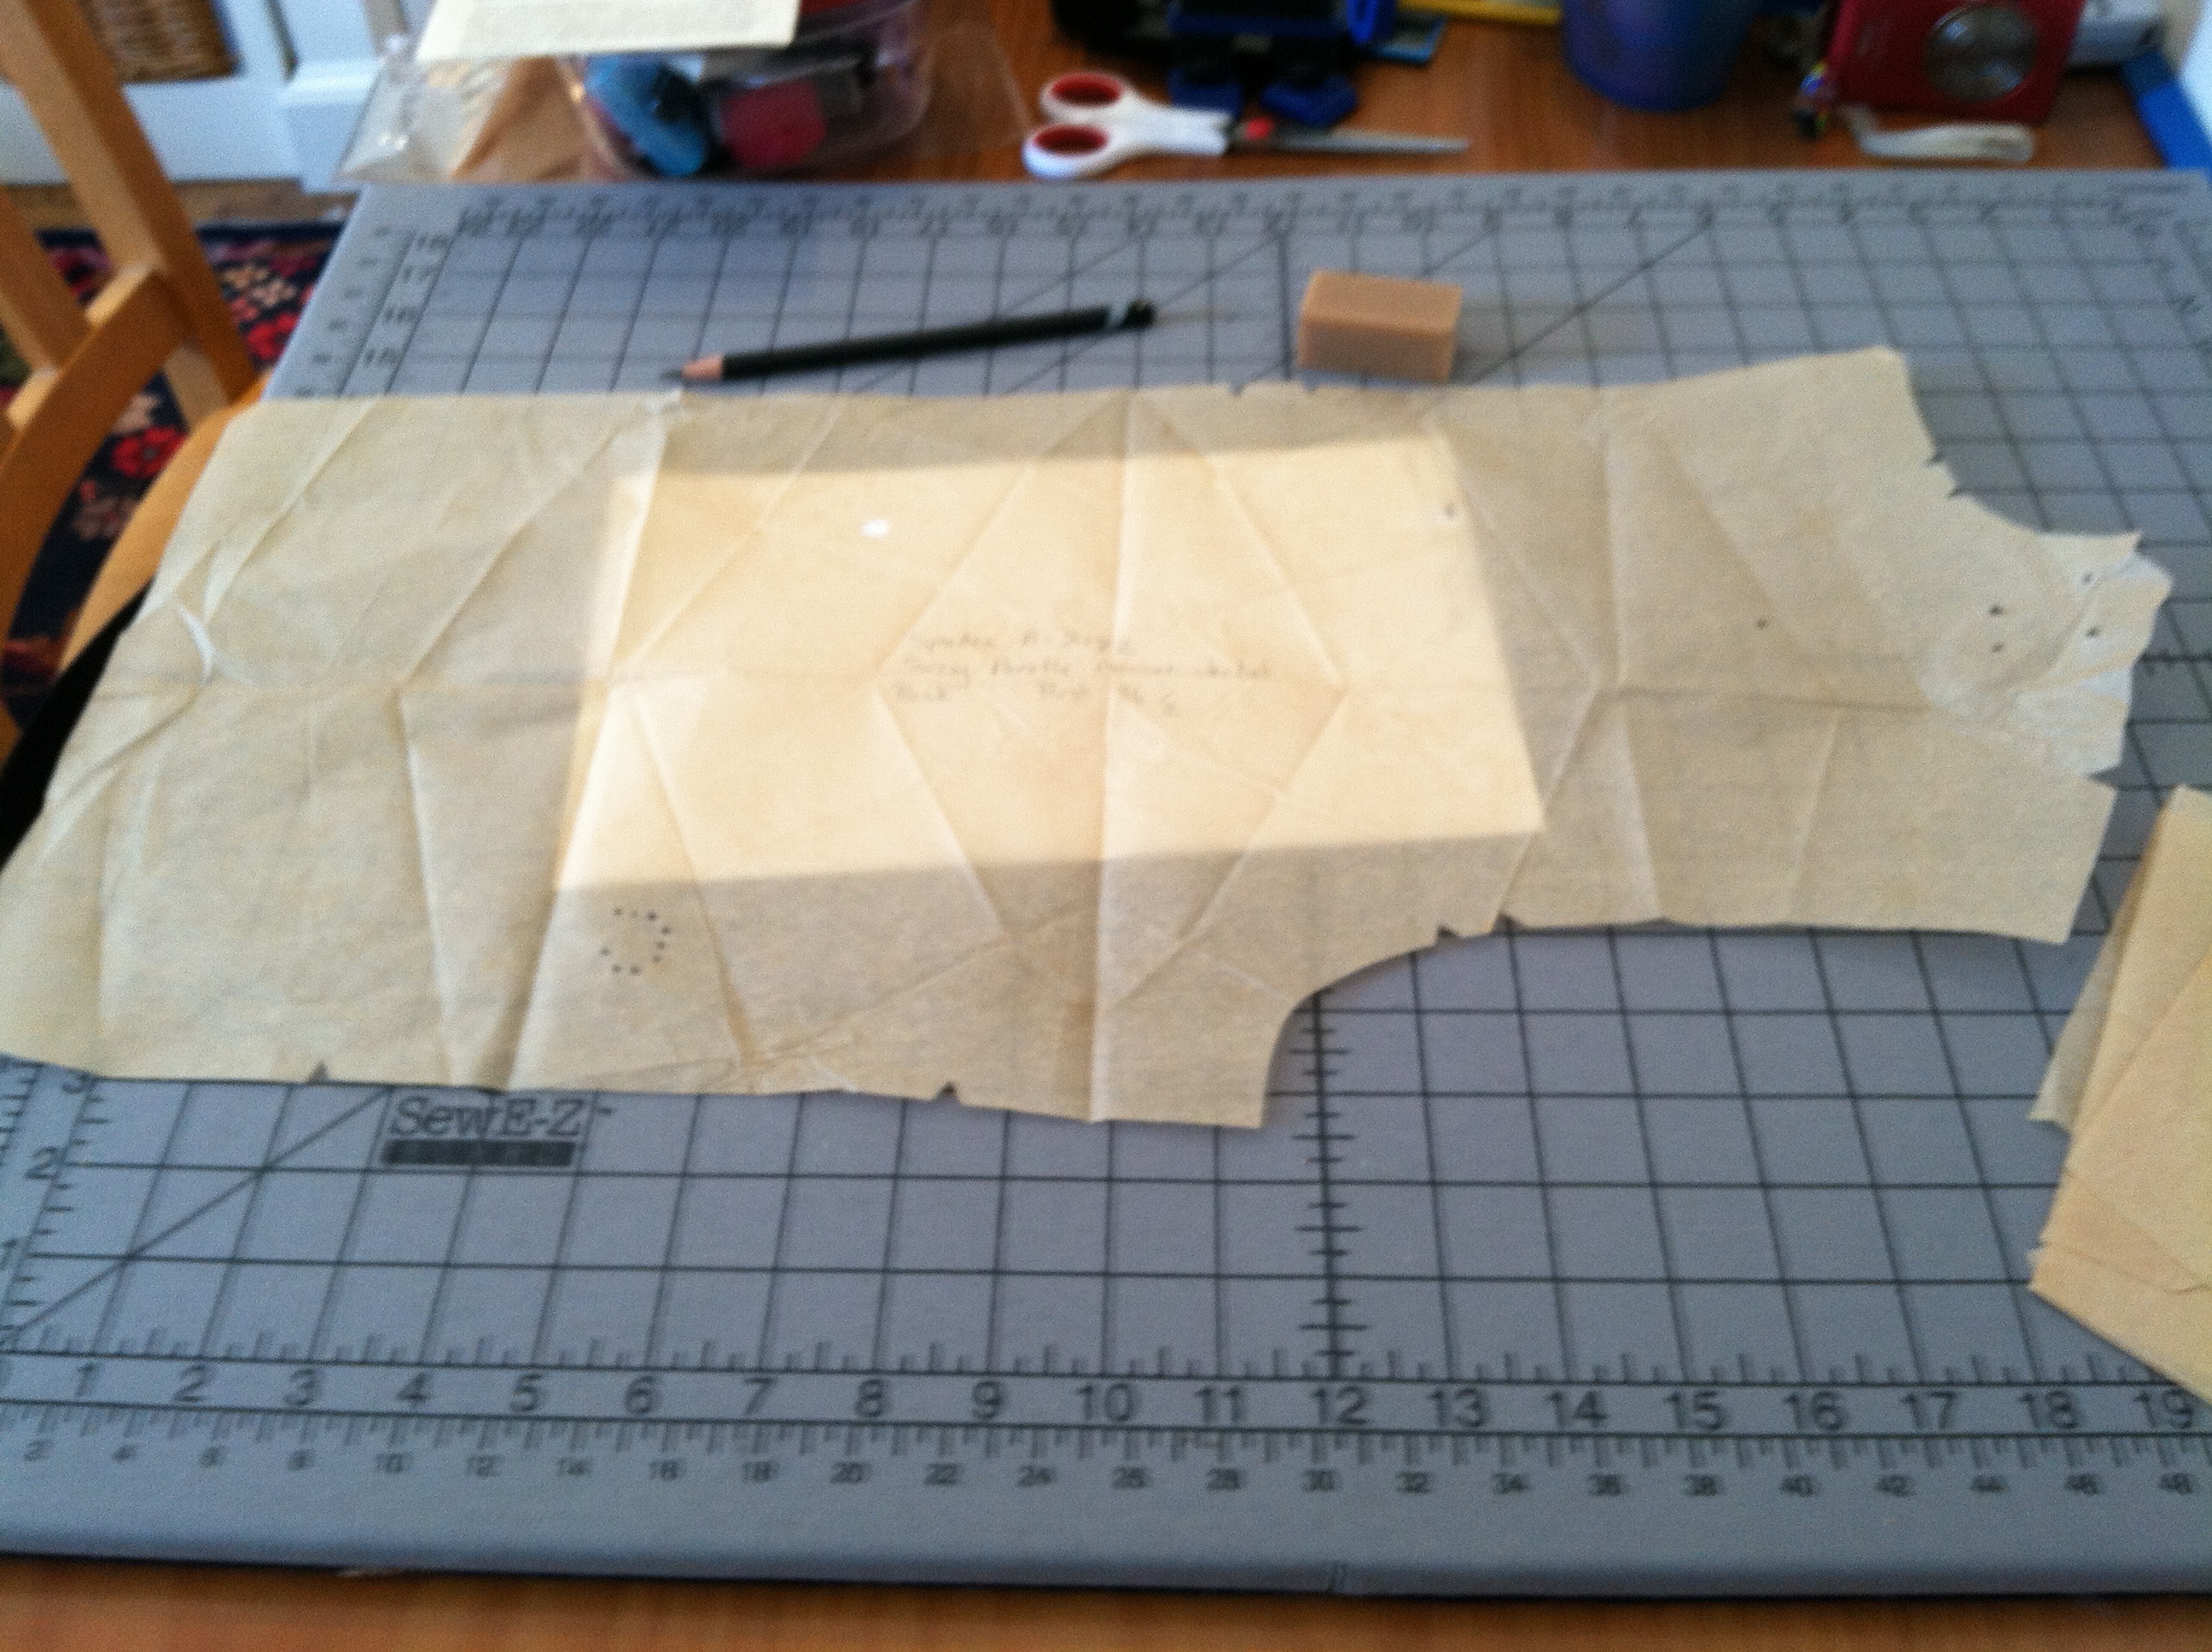
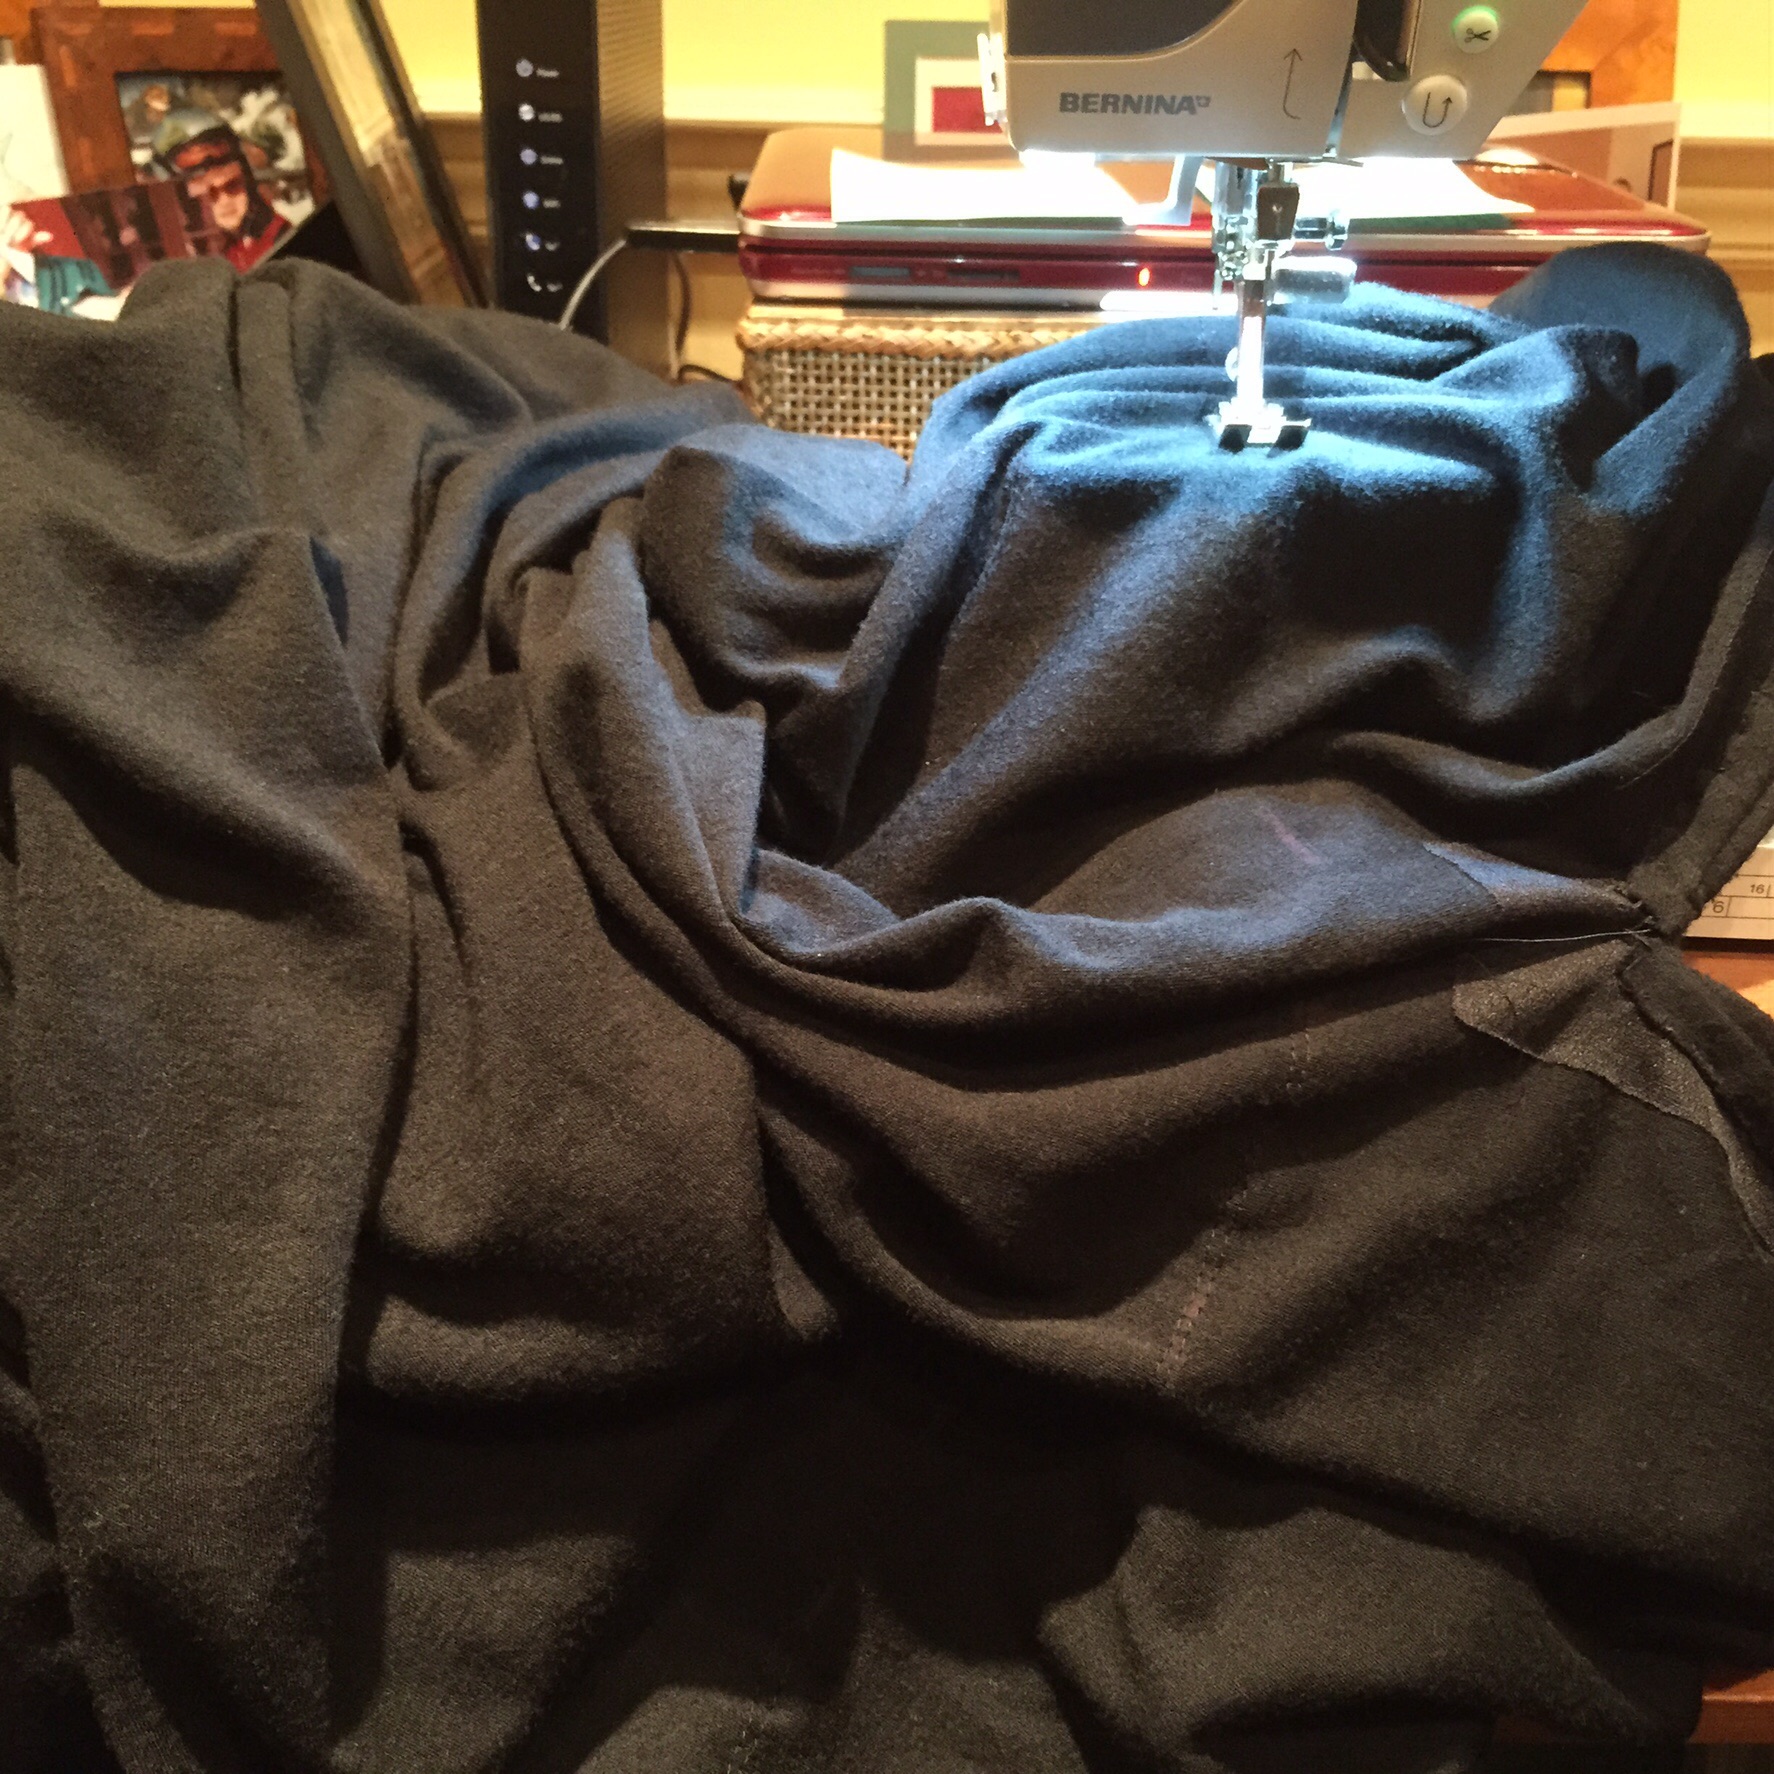
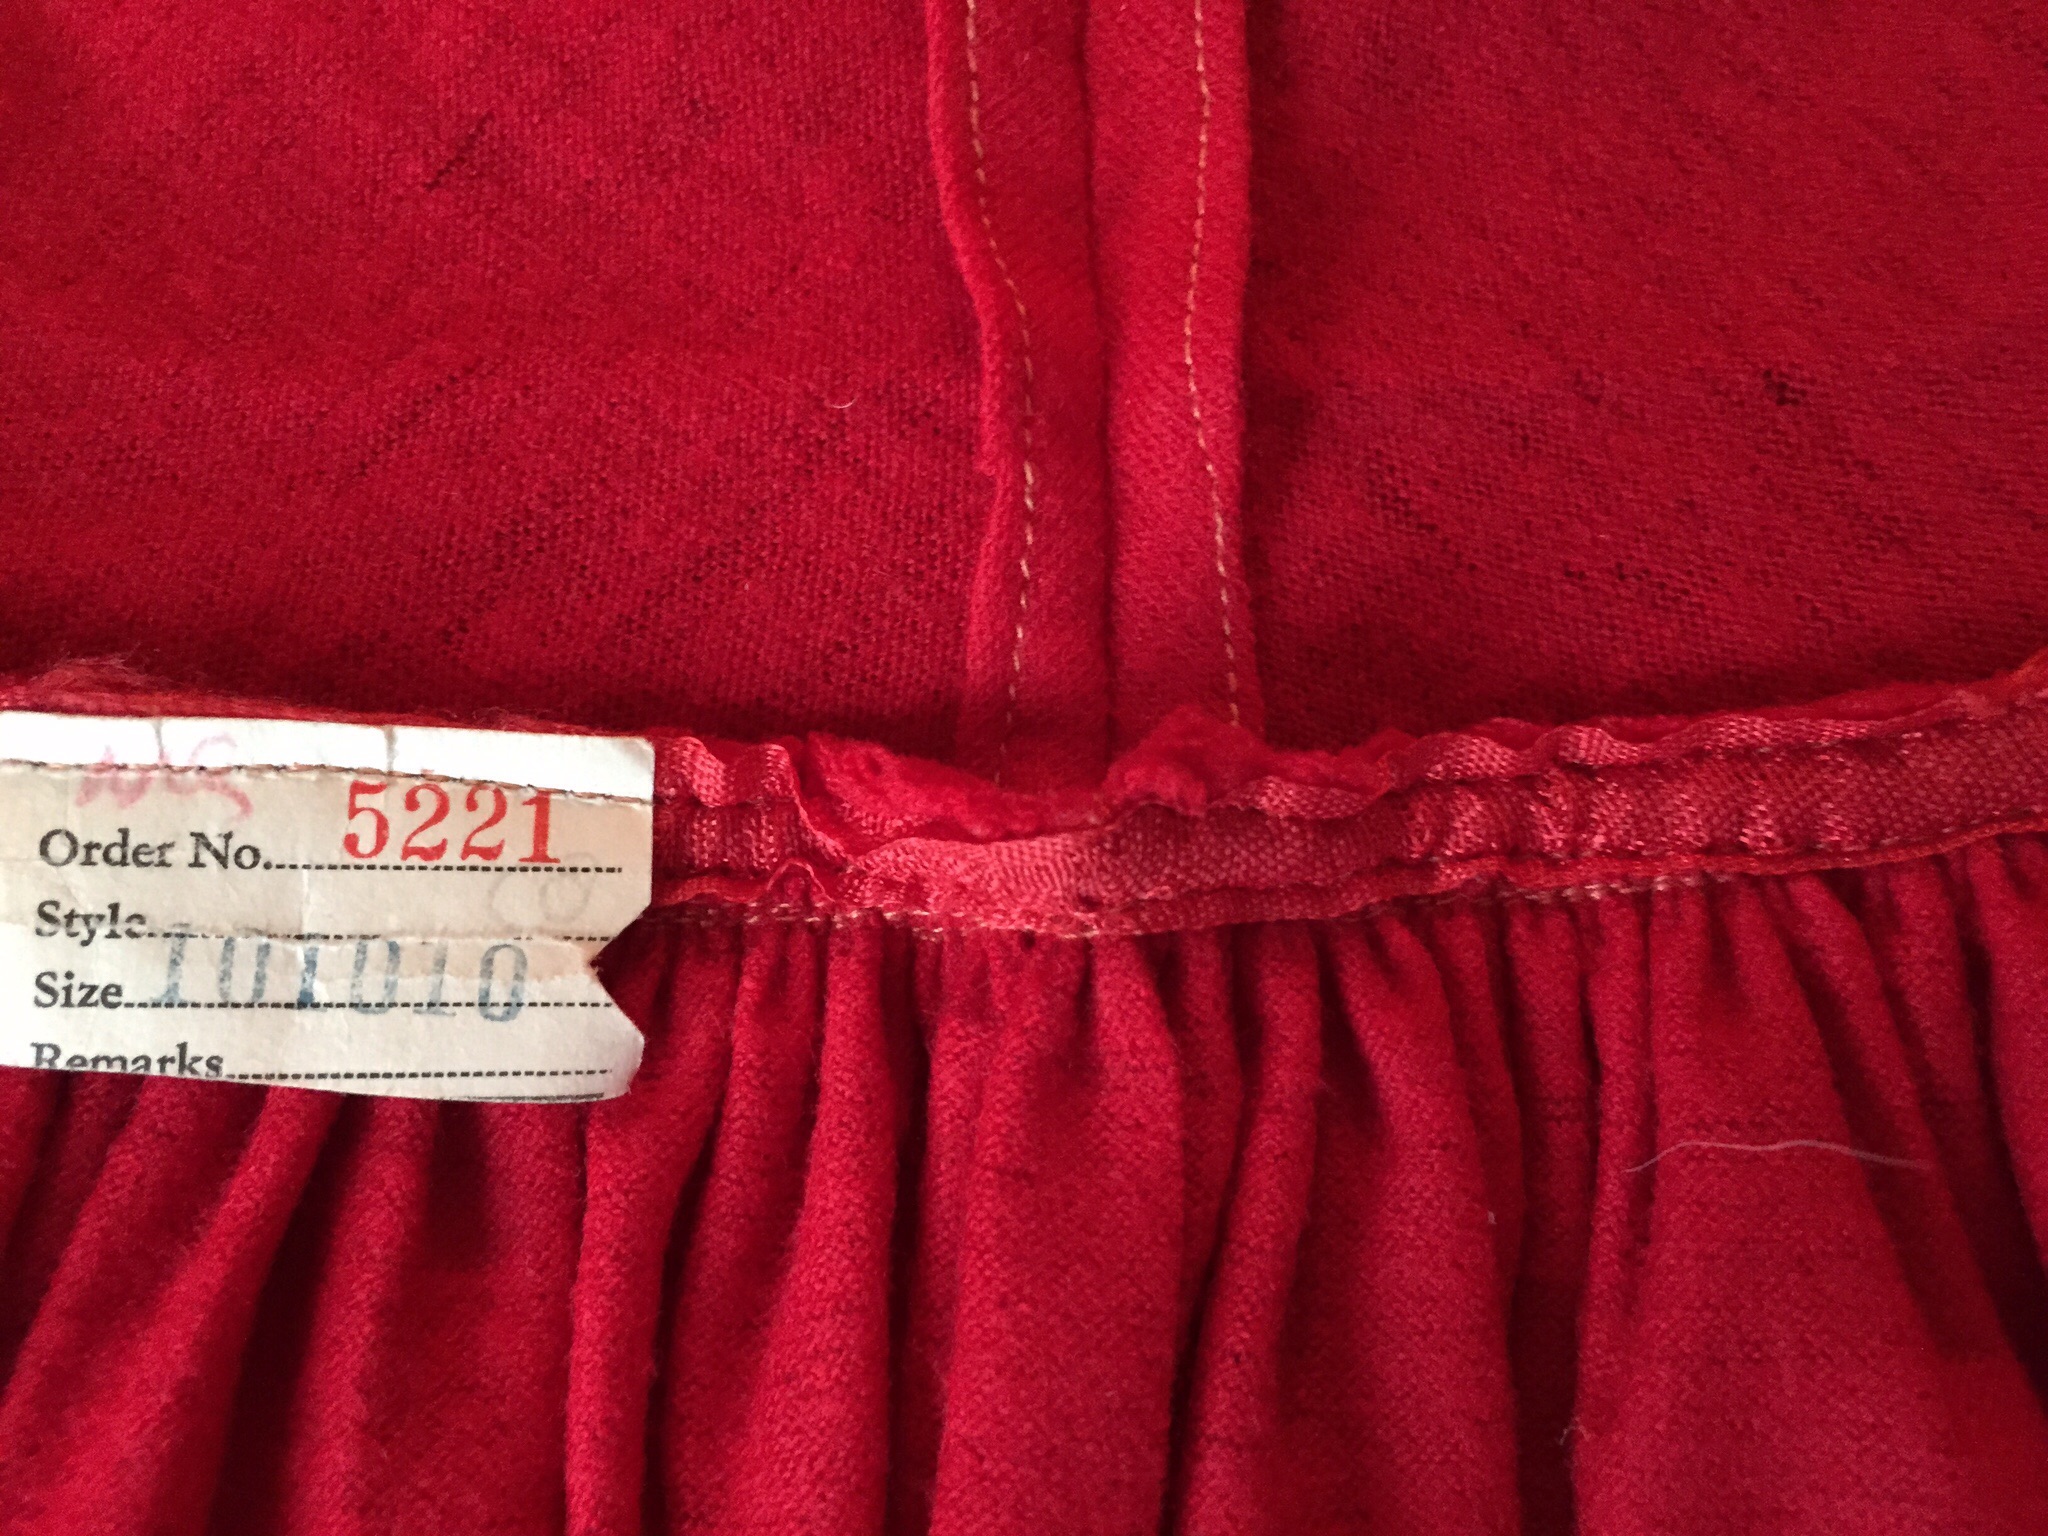
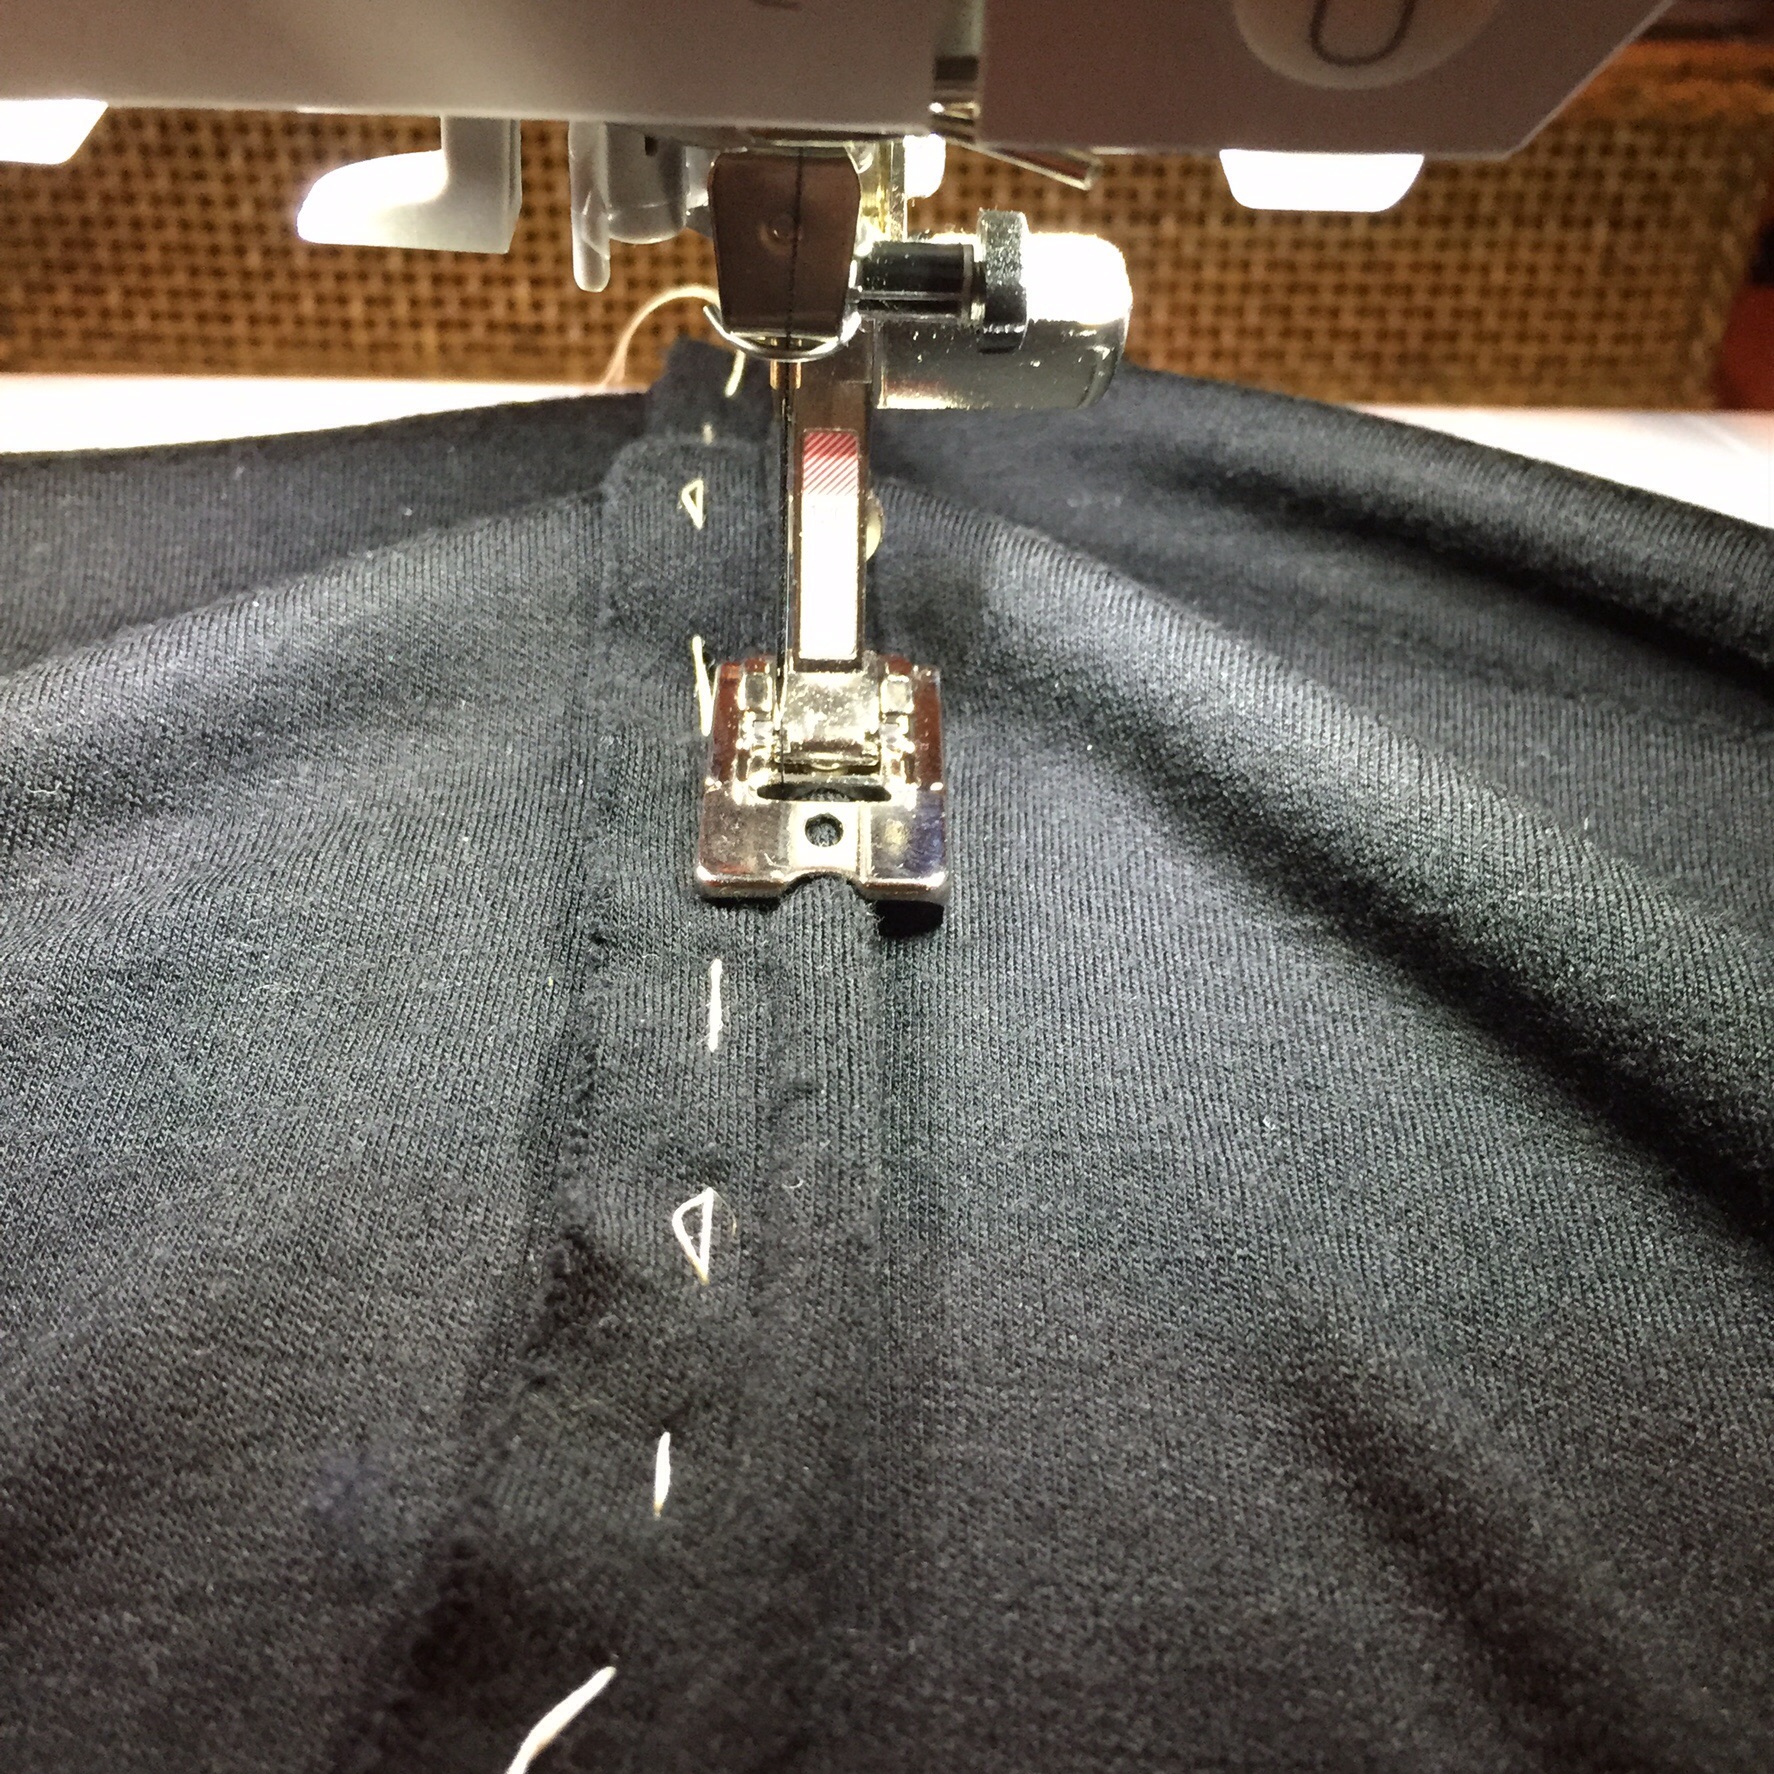
It’s a big dress. You can get lost! This time I used chalk to mark the pieces so I could keep track of where I was.

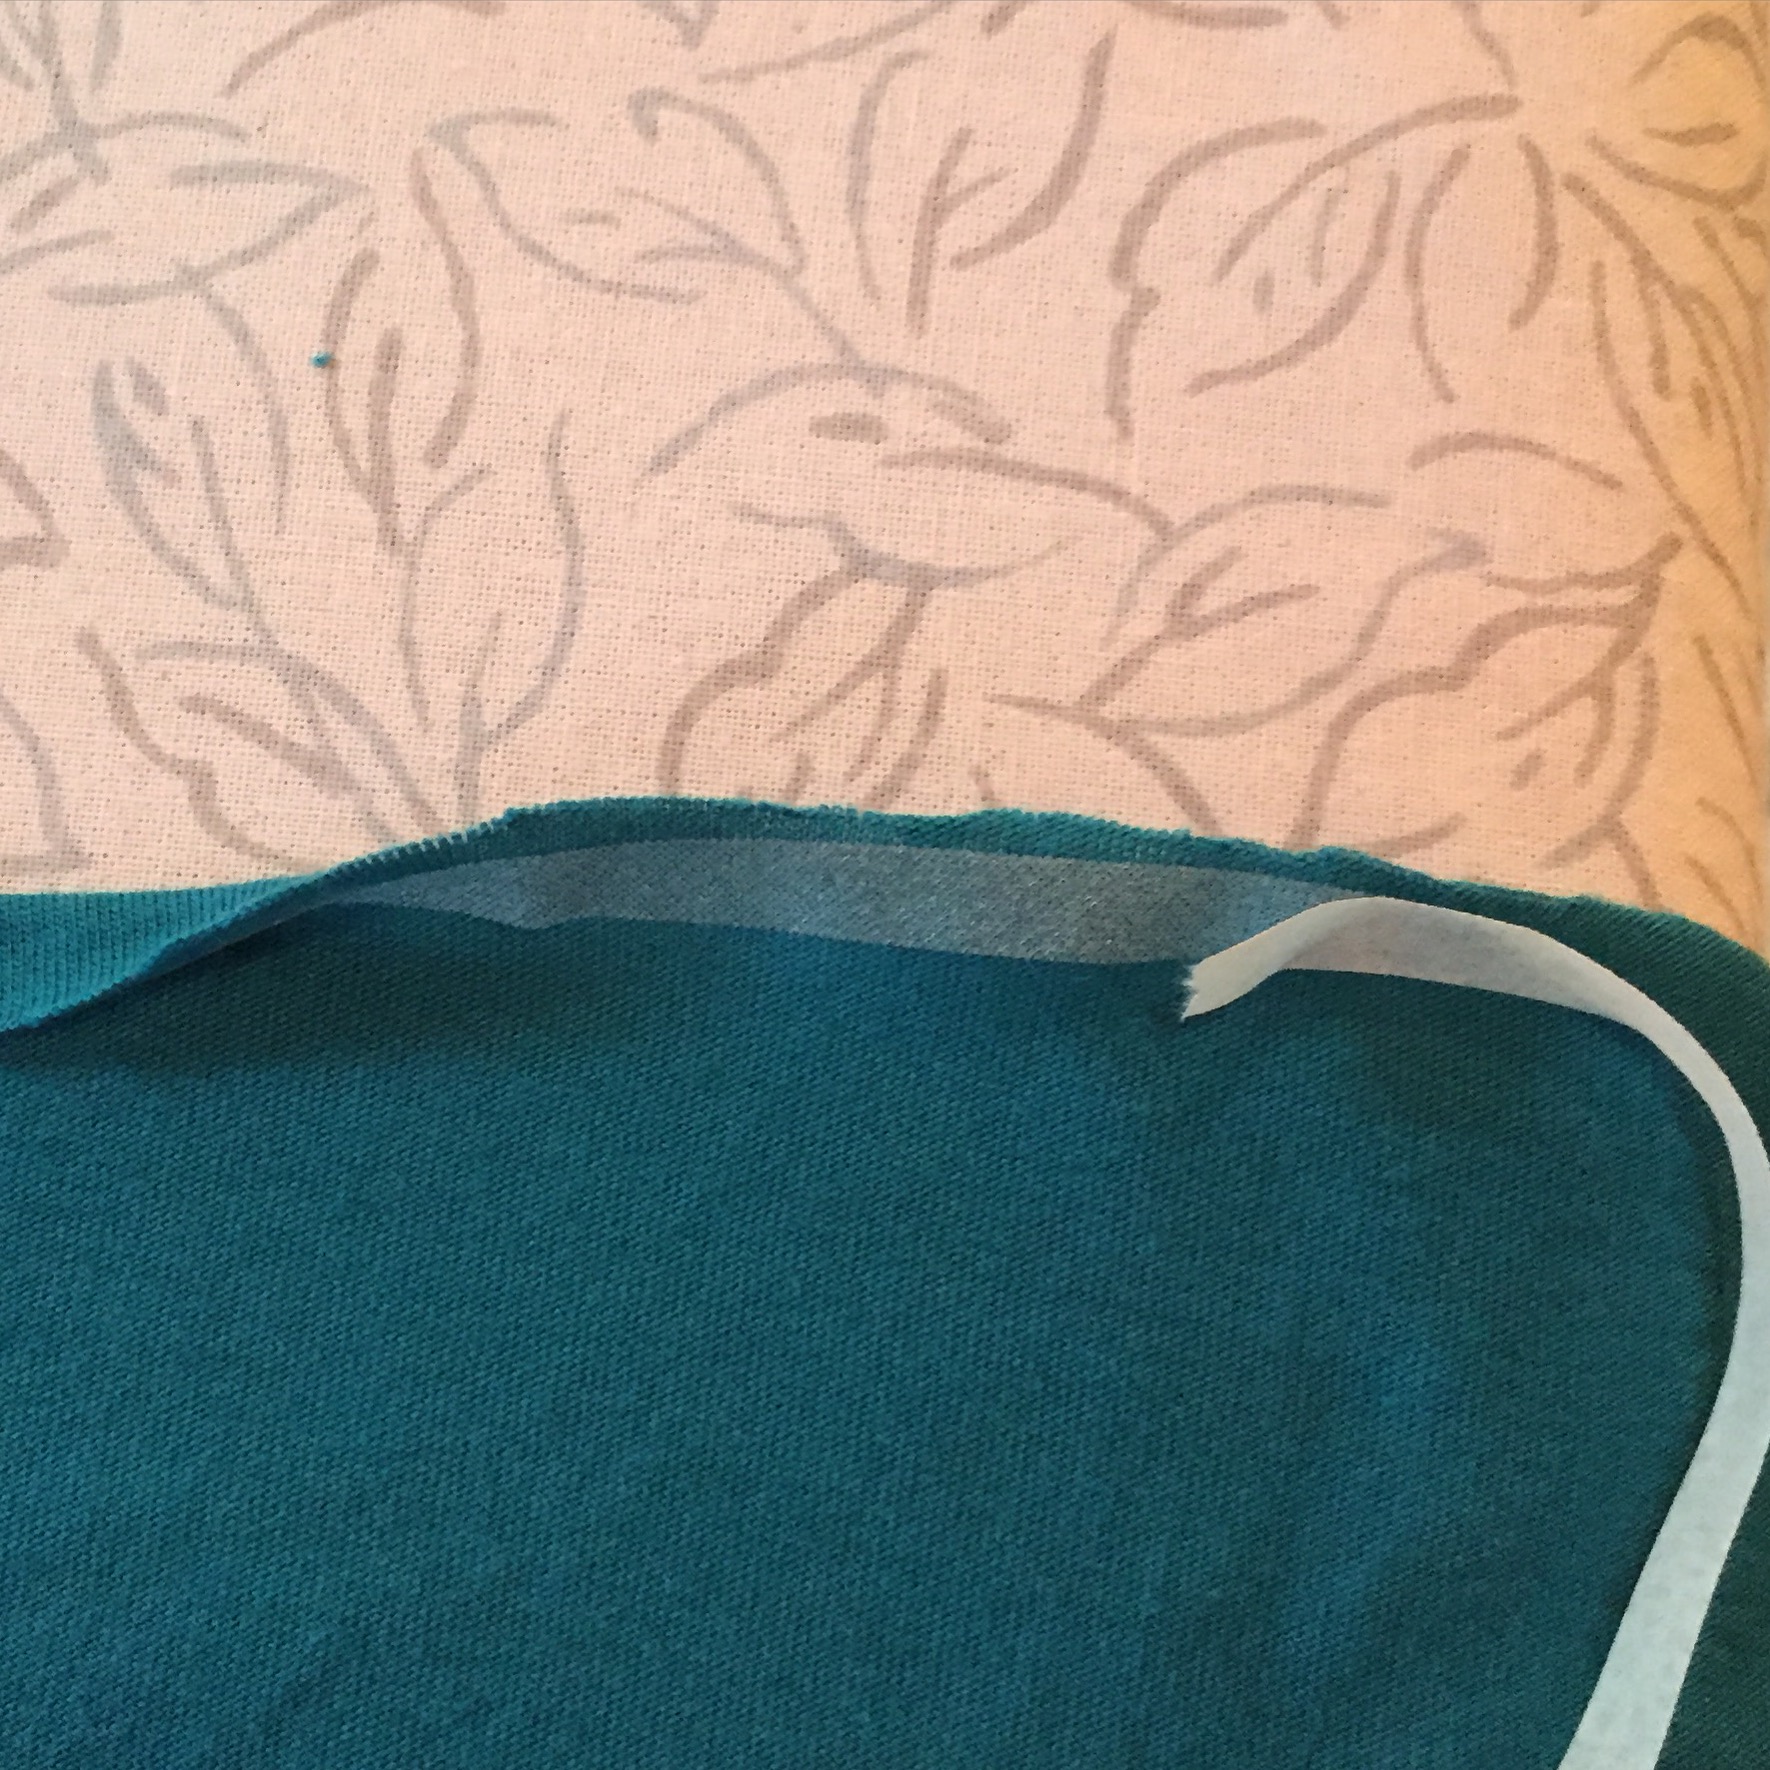
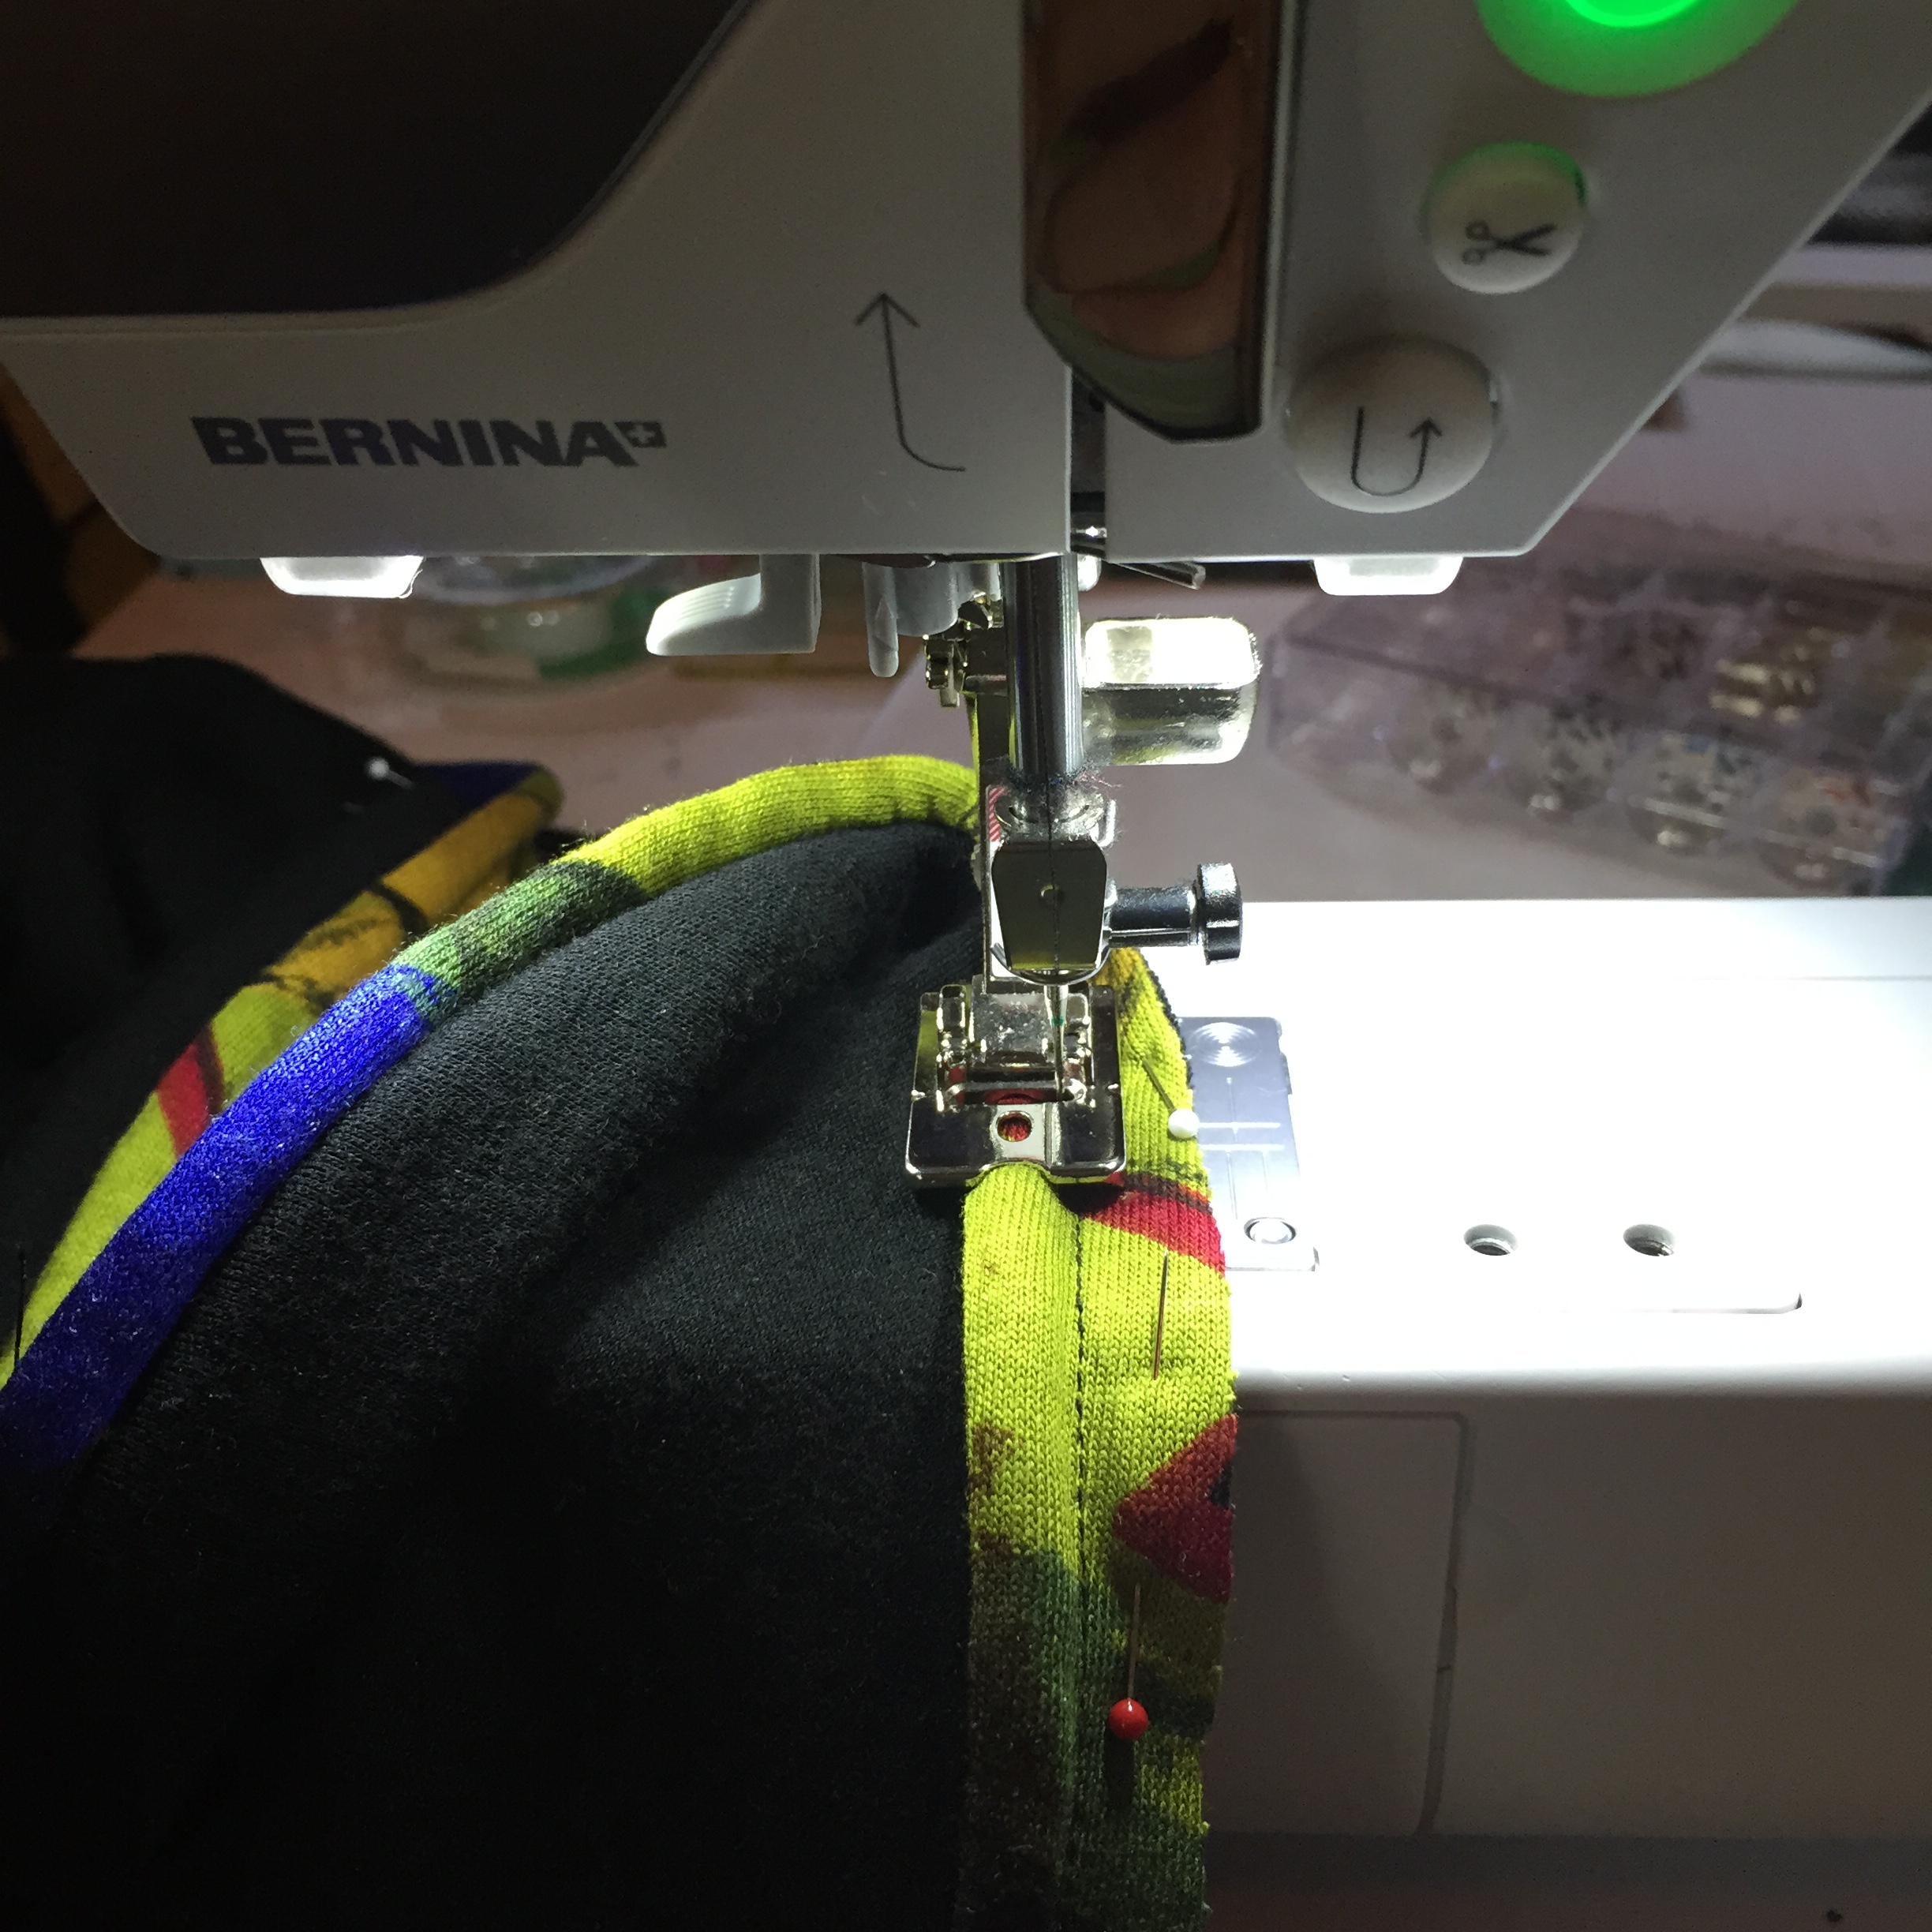
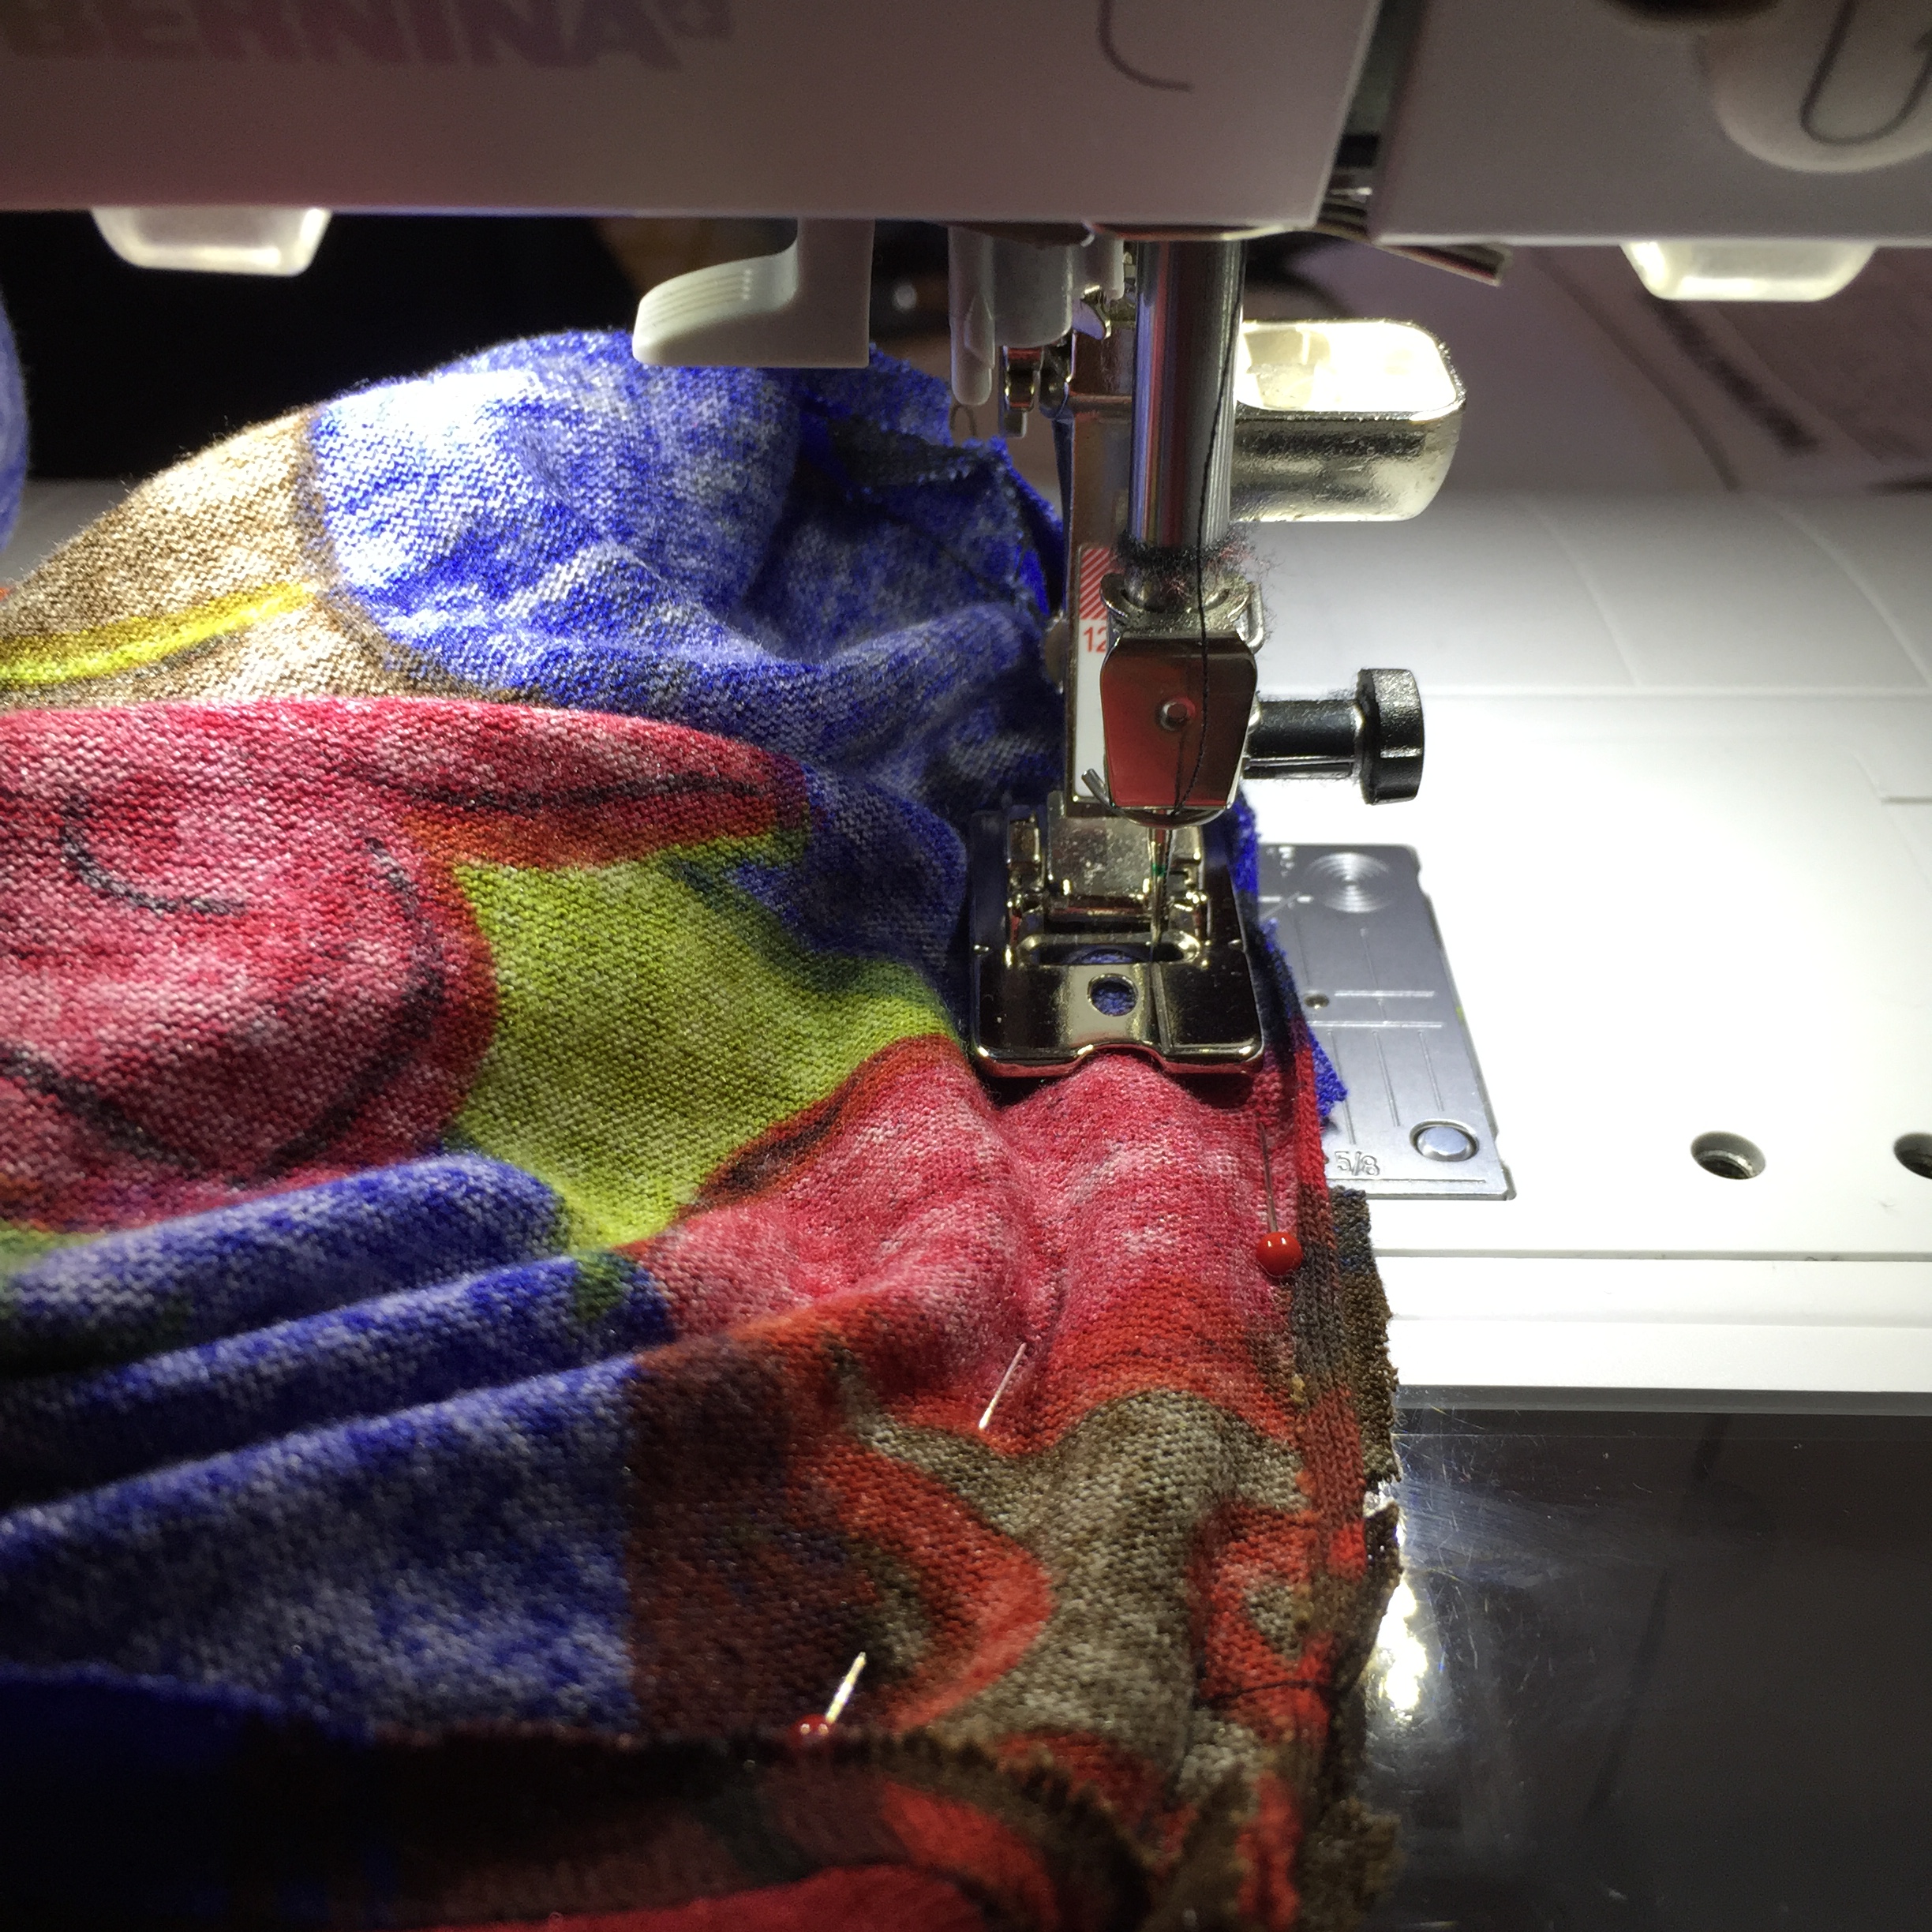
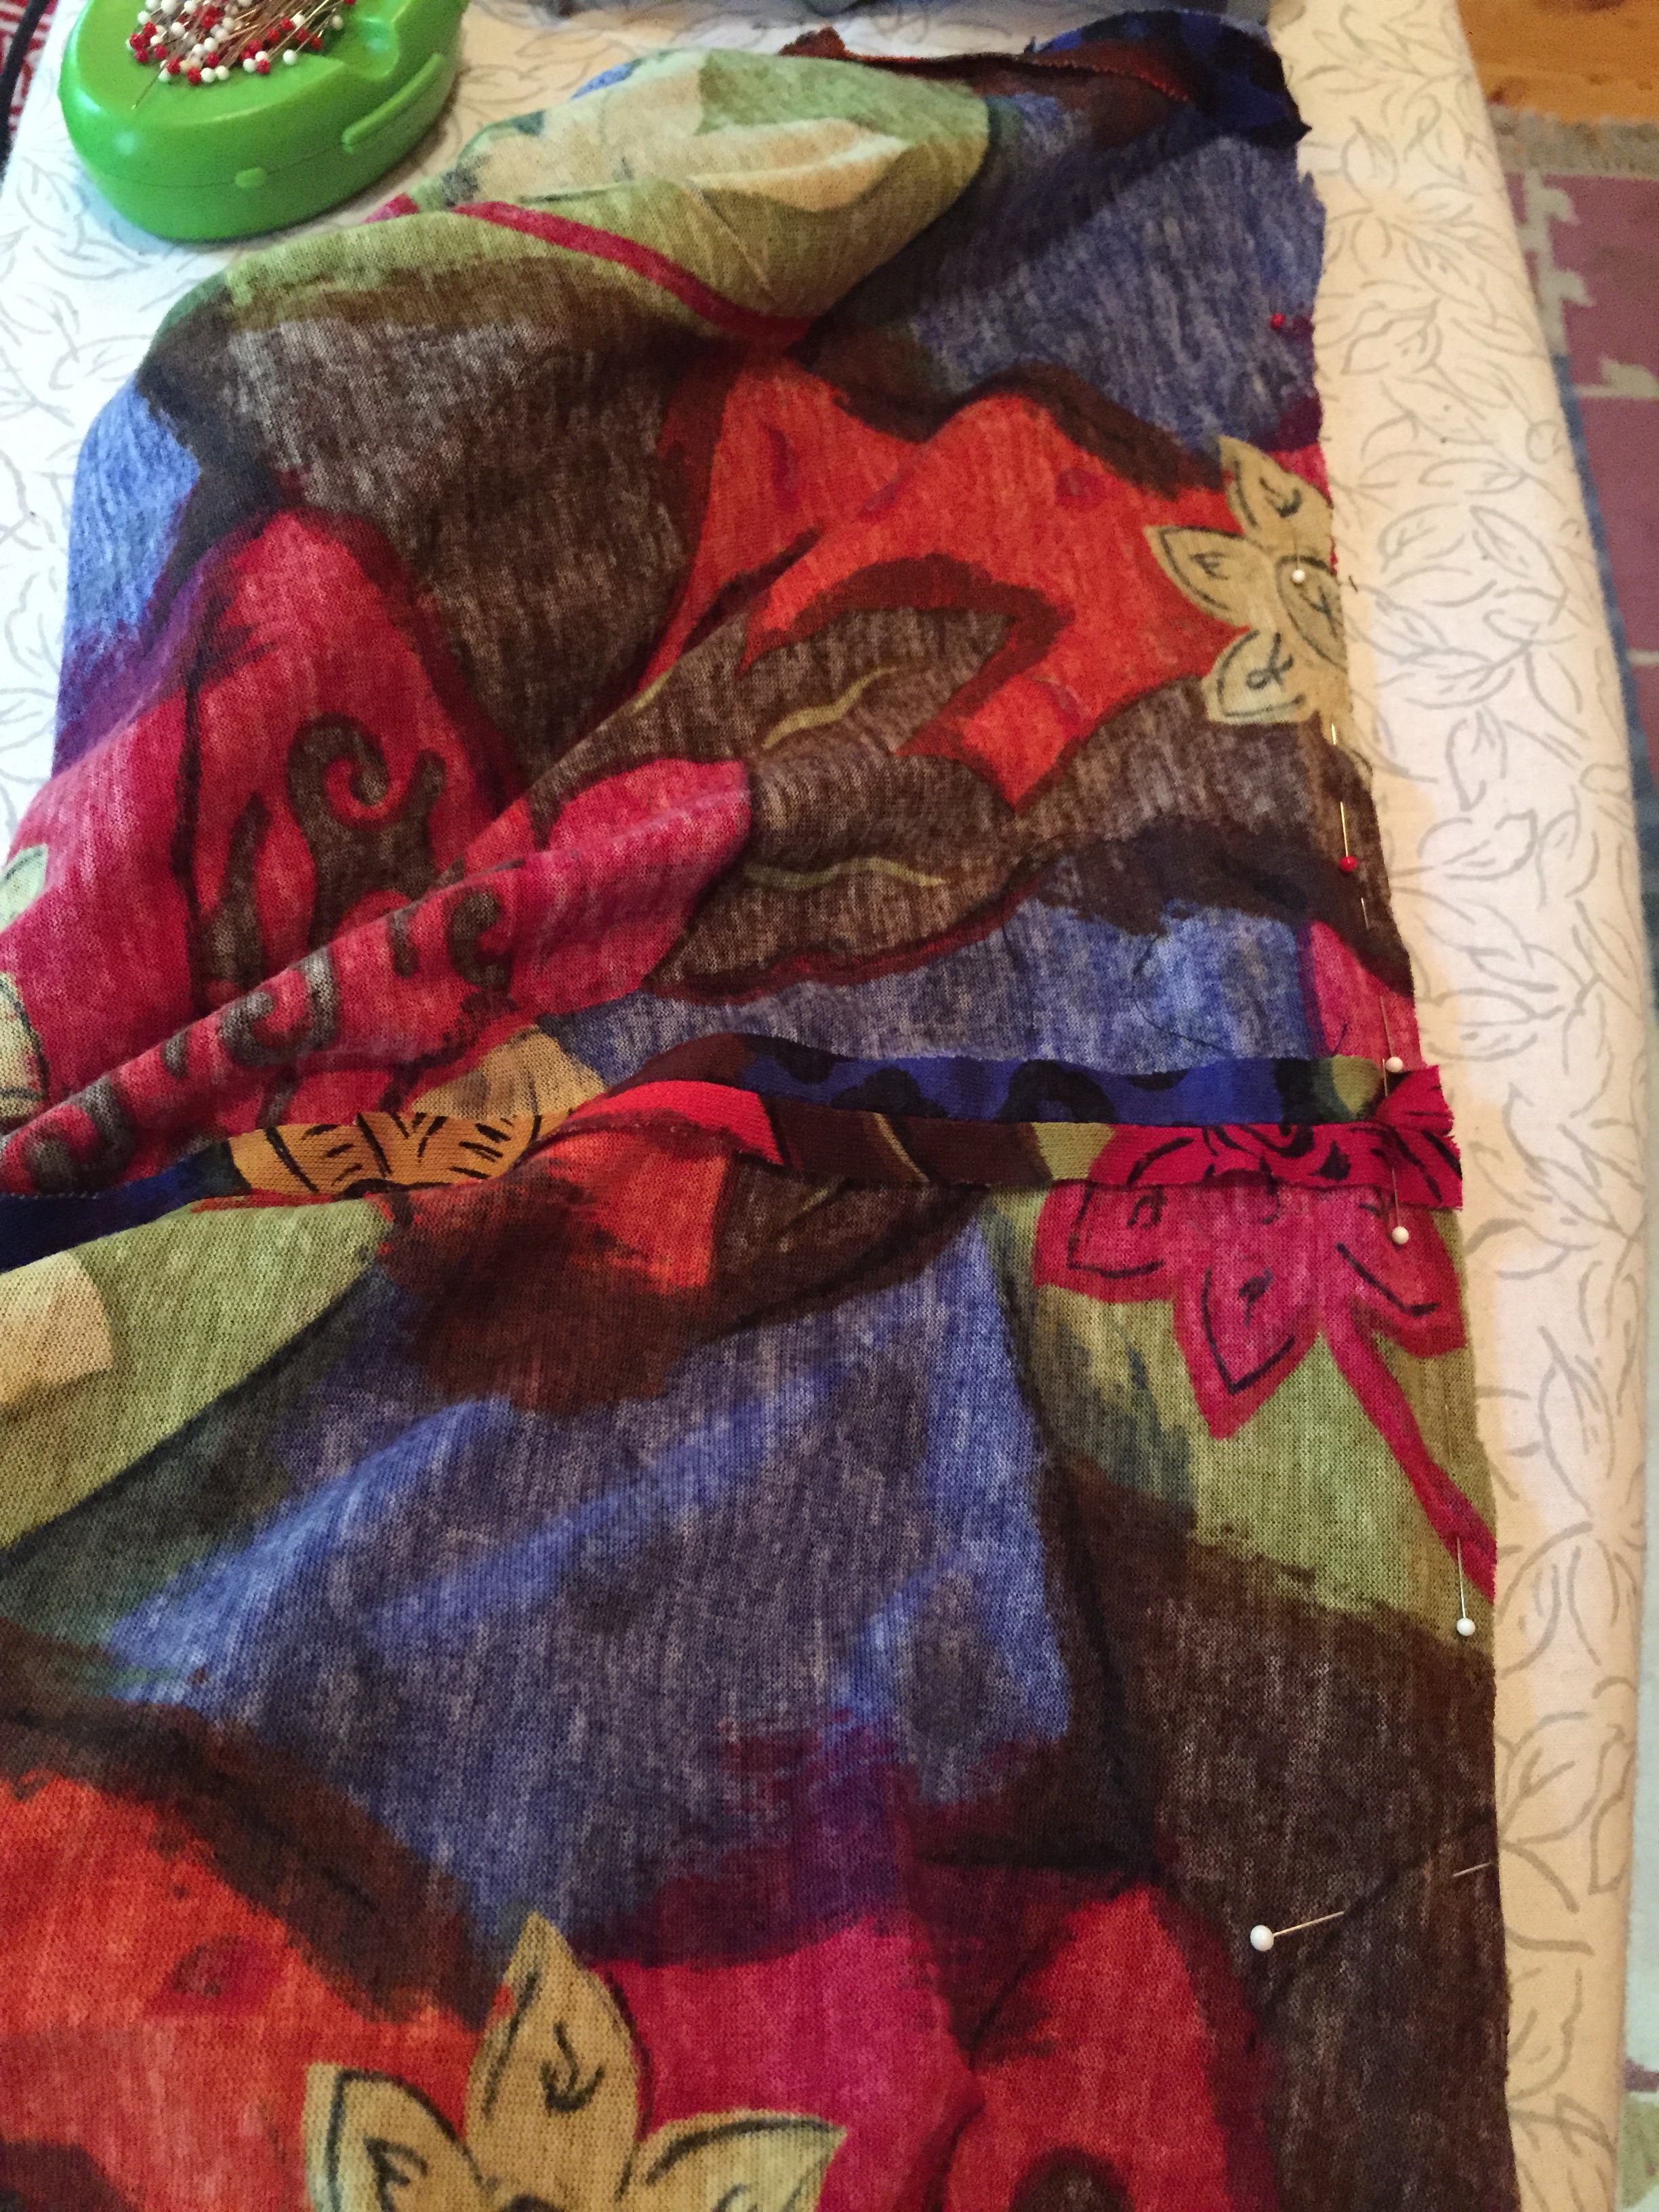
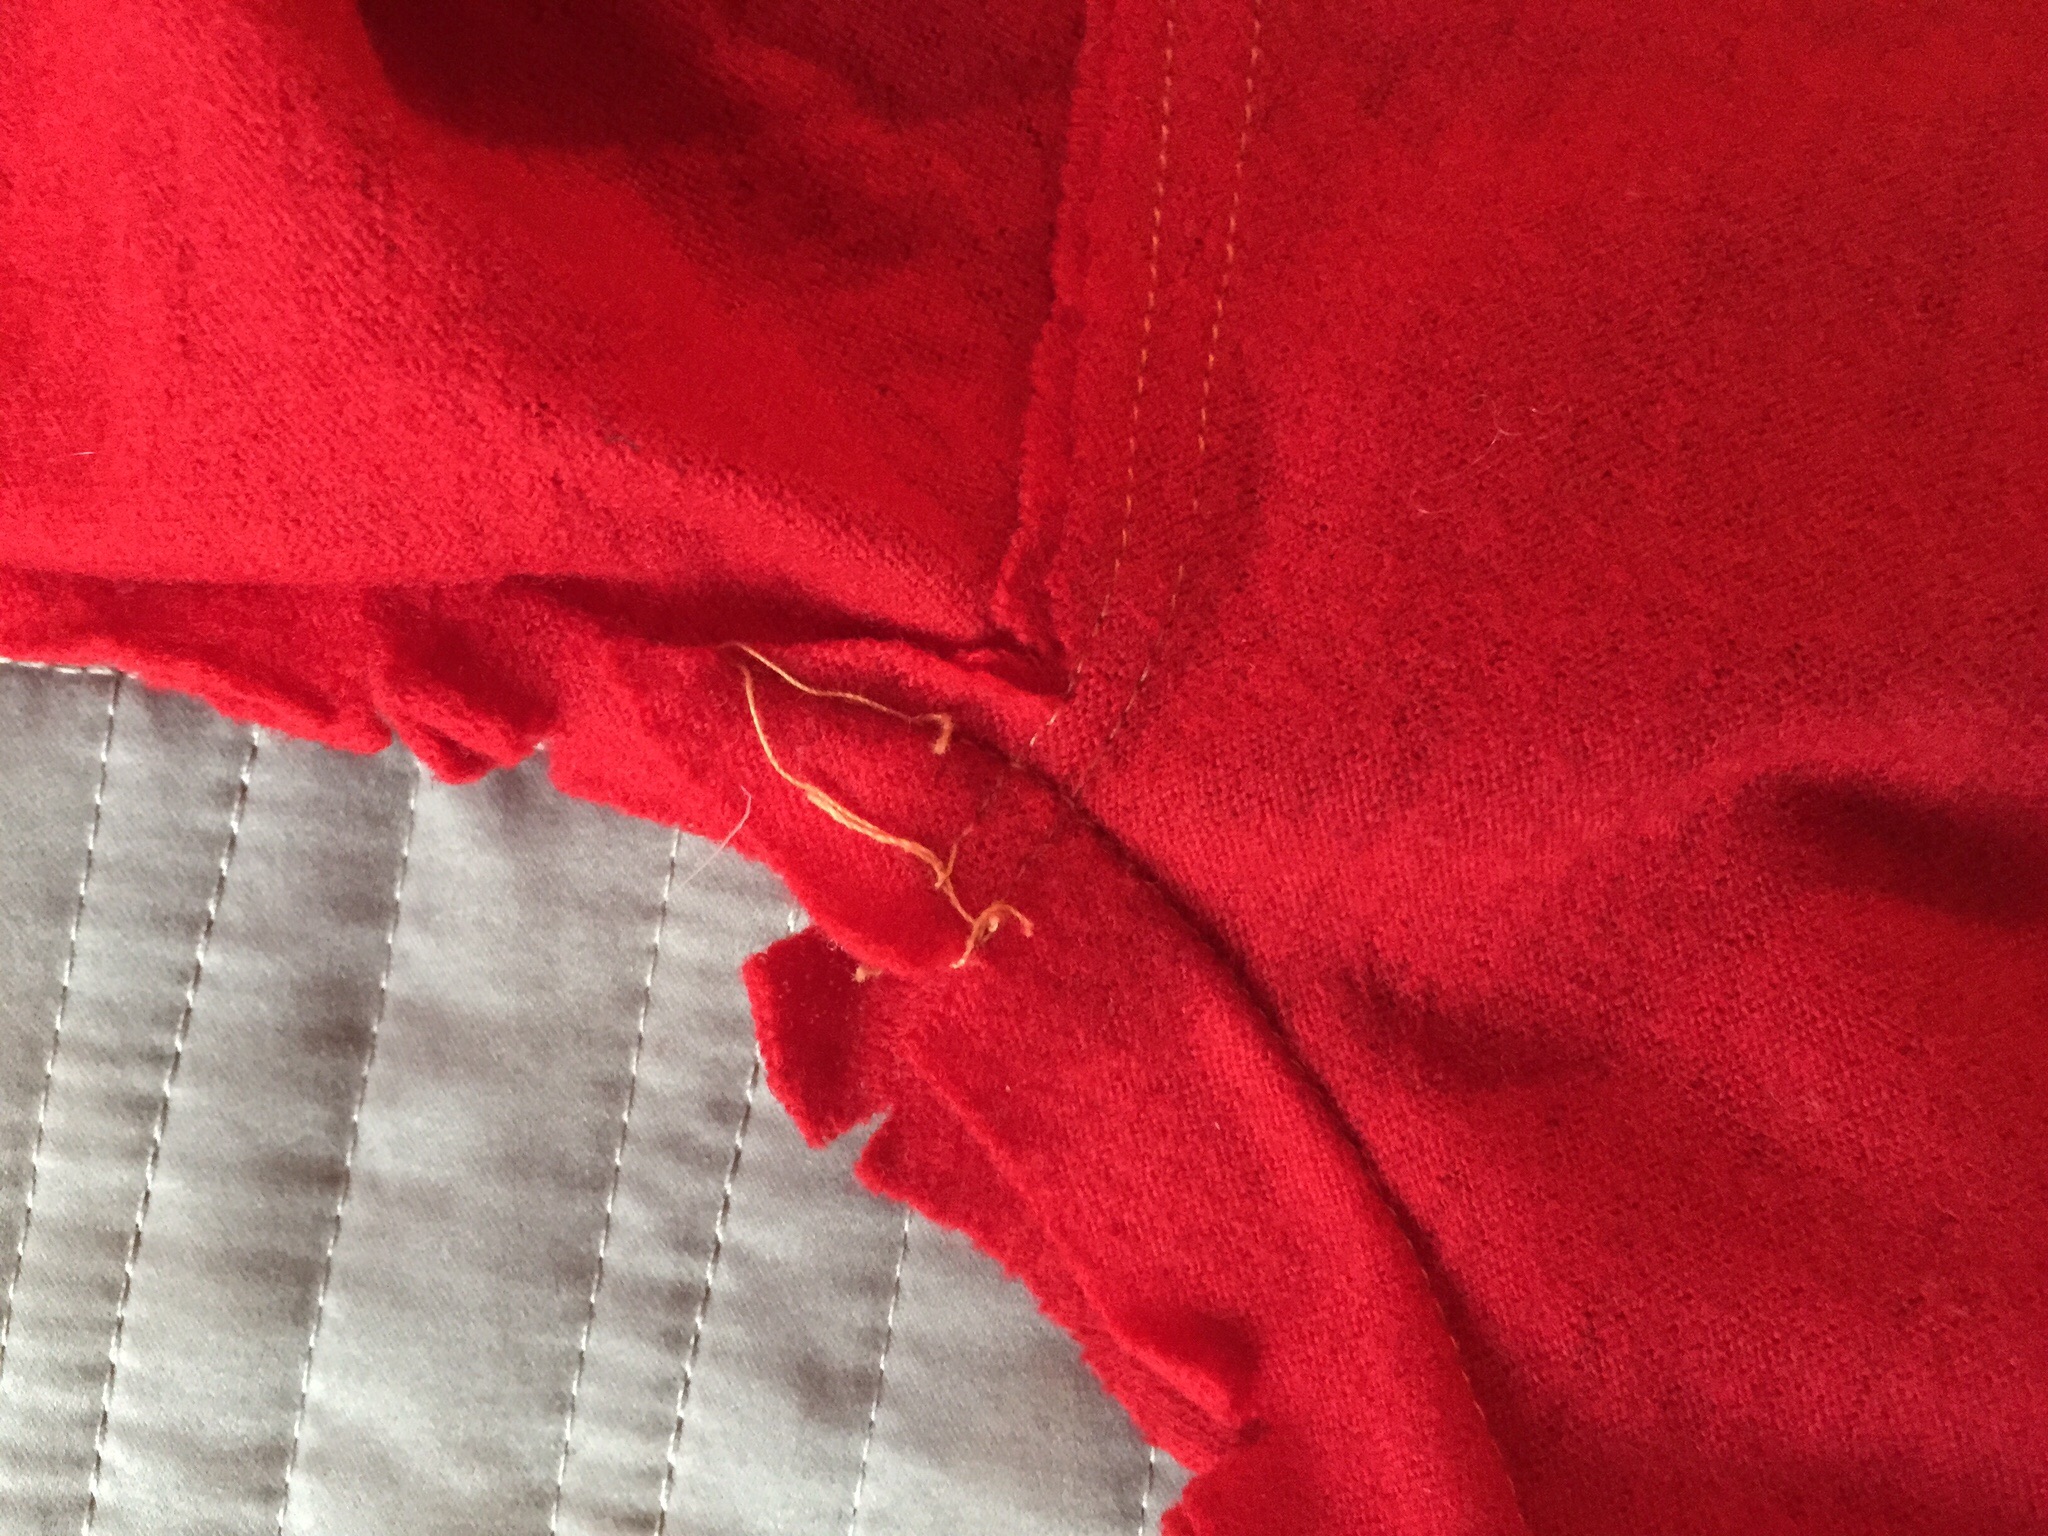
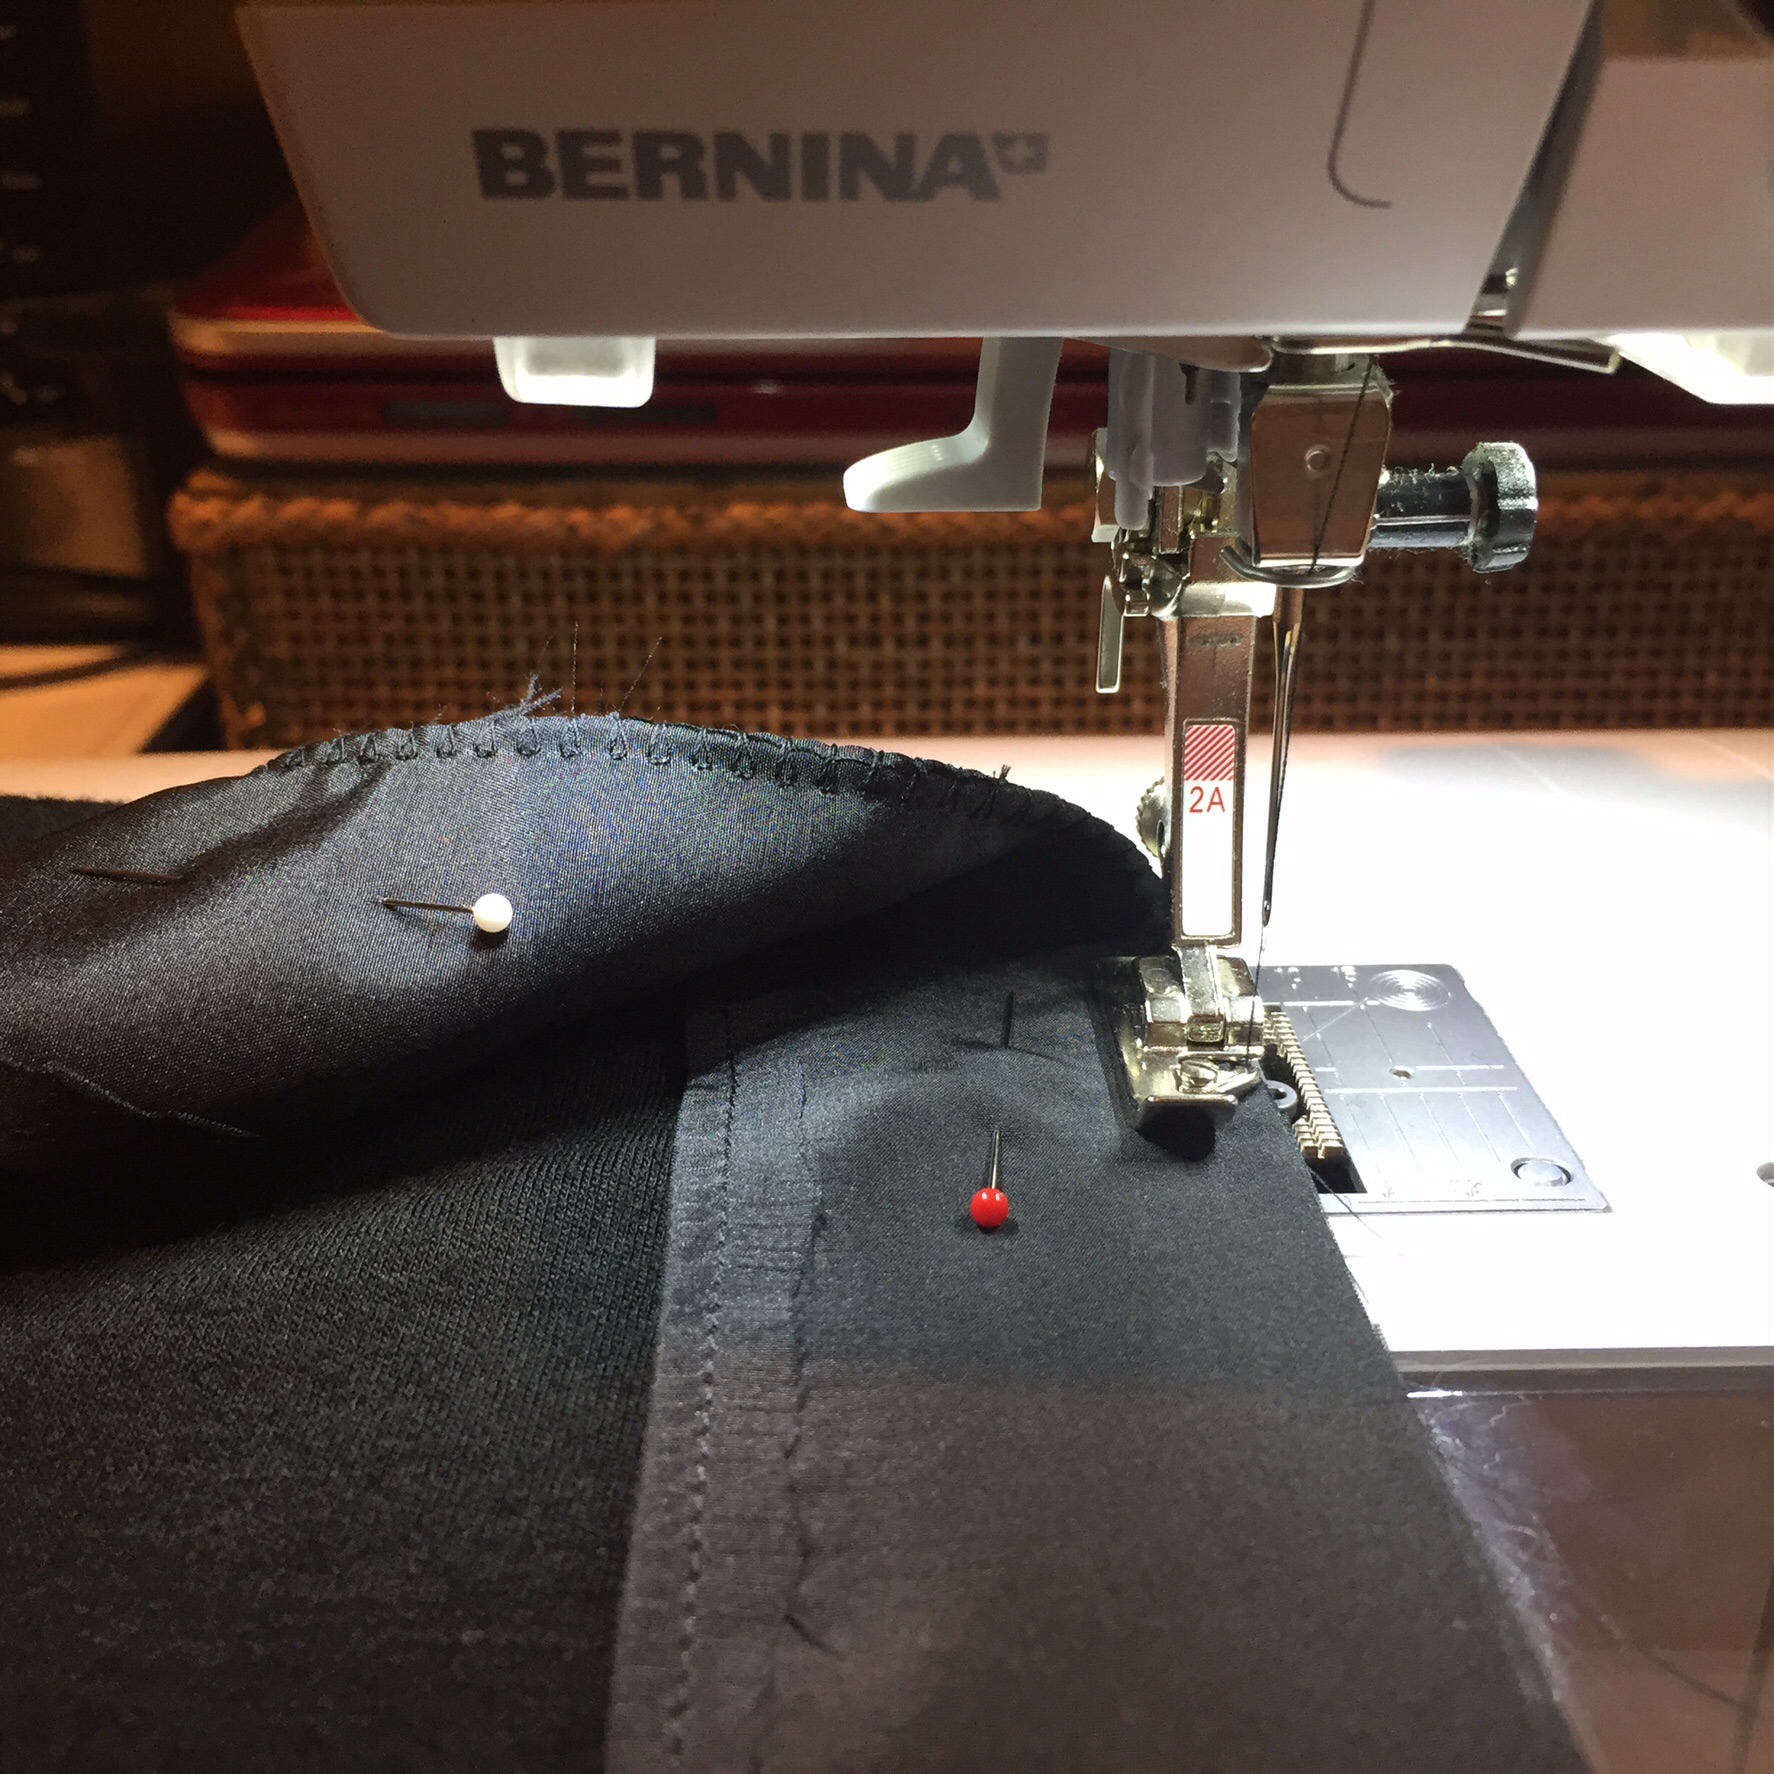
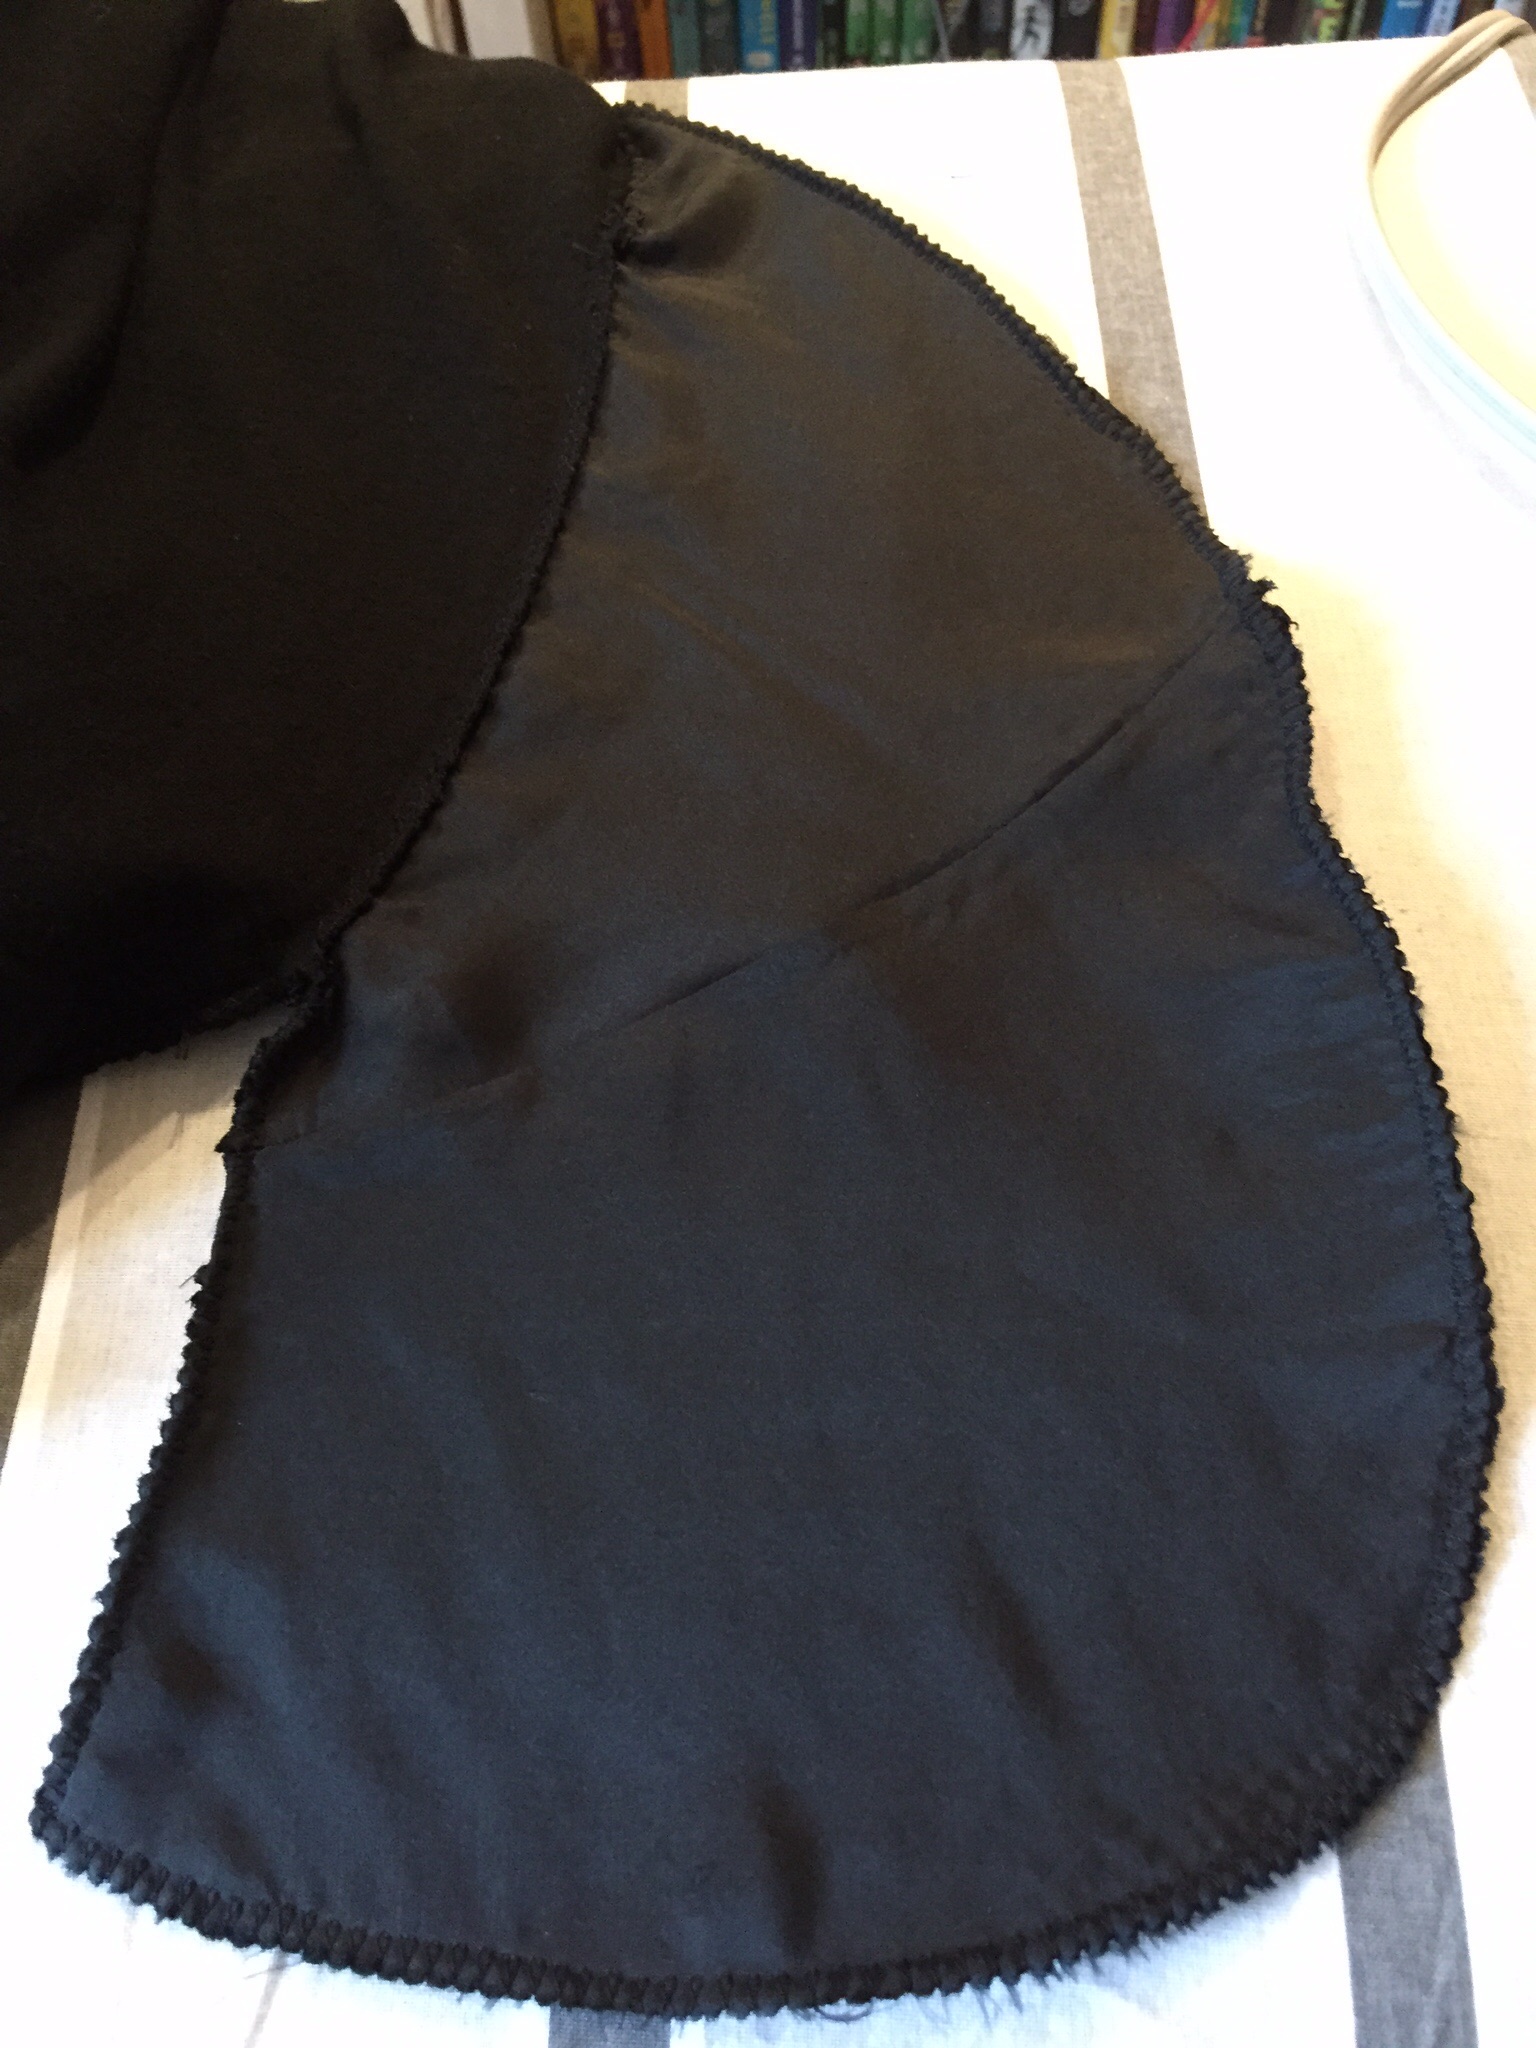
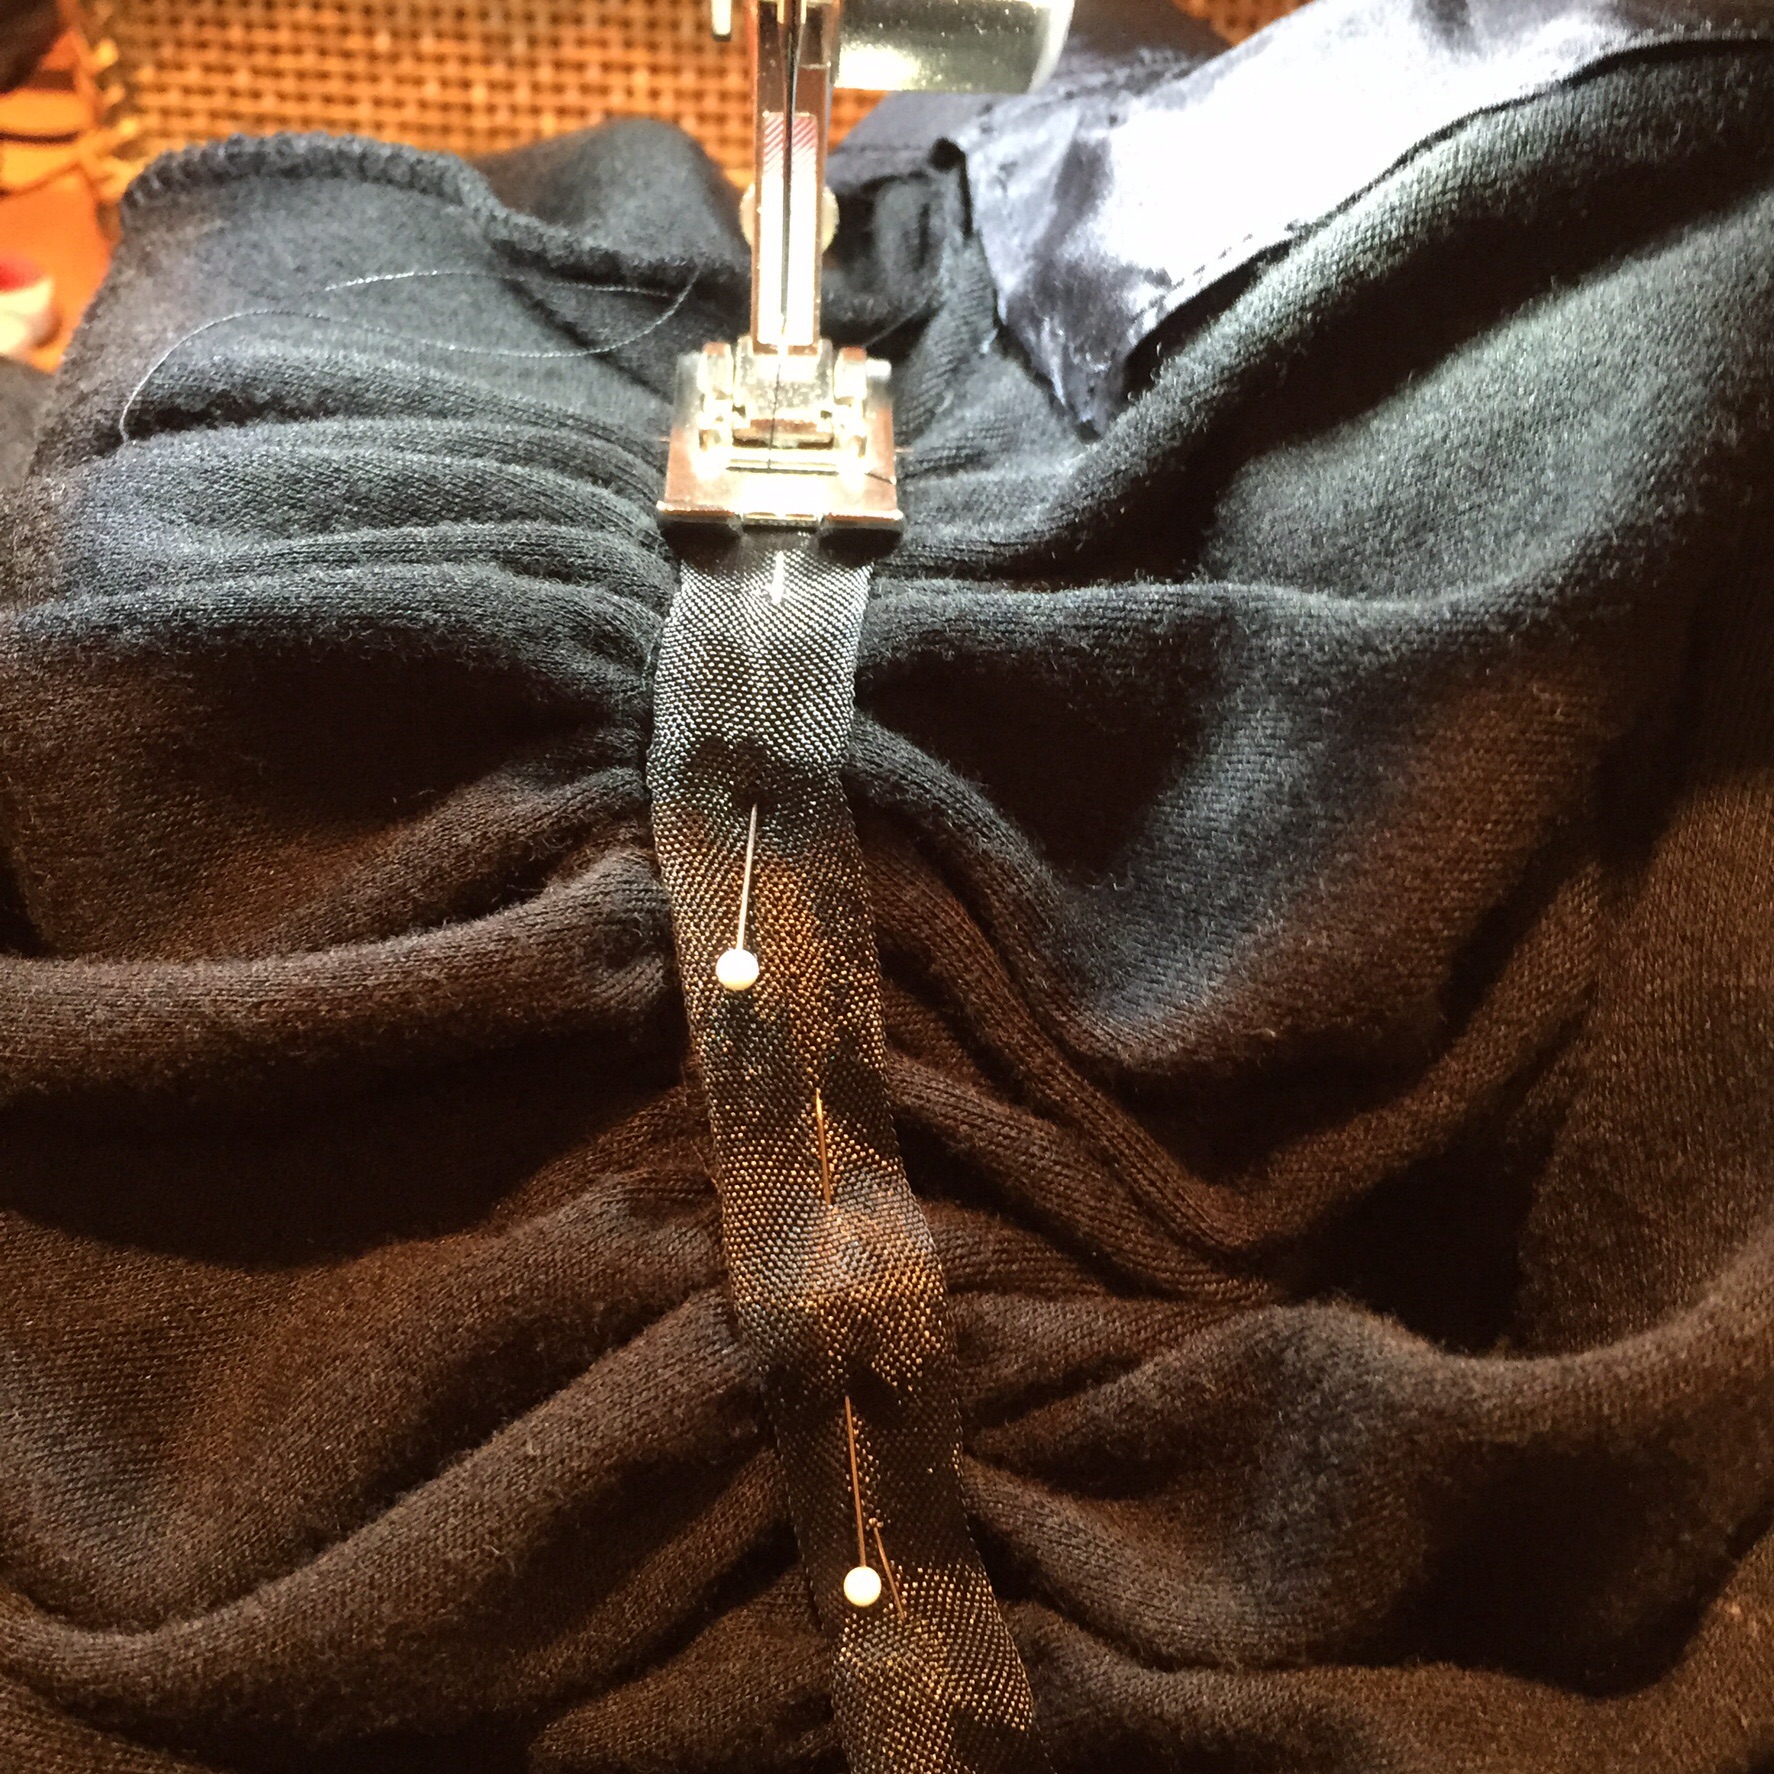
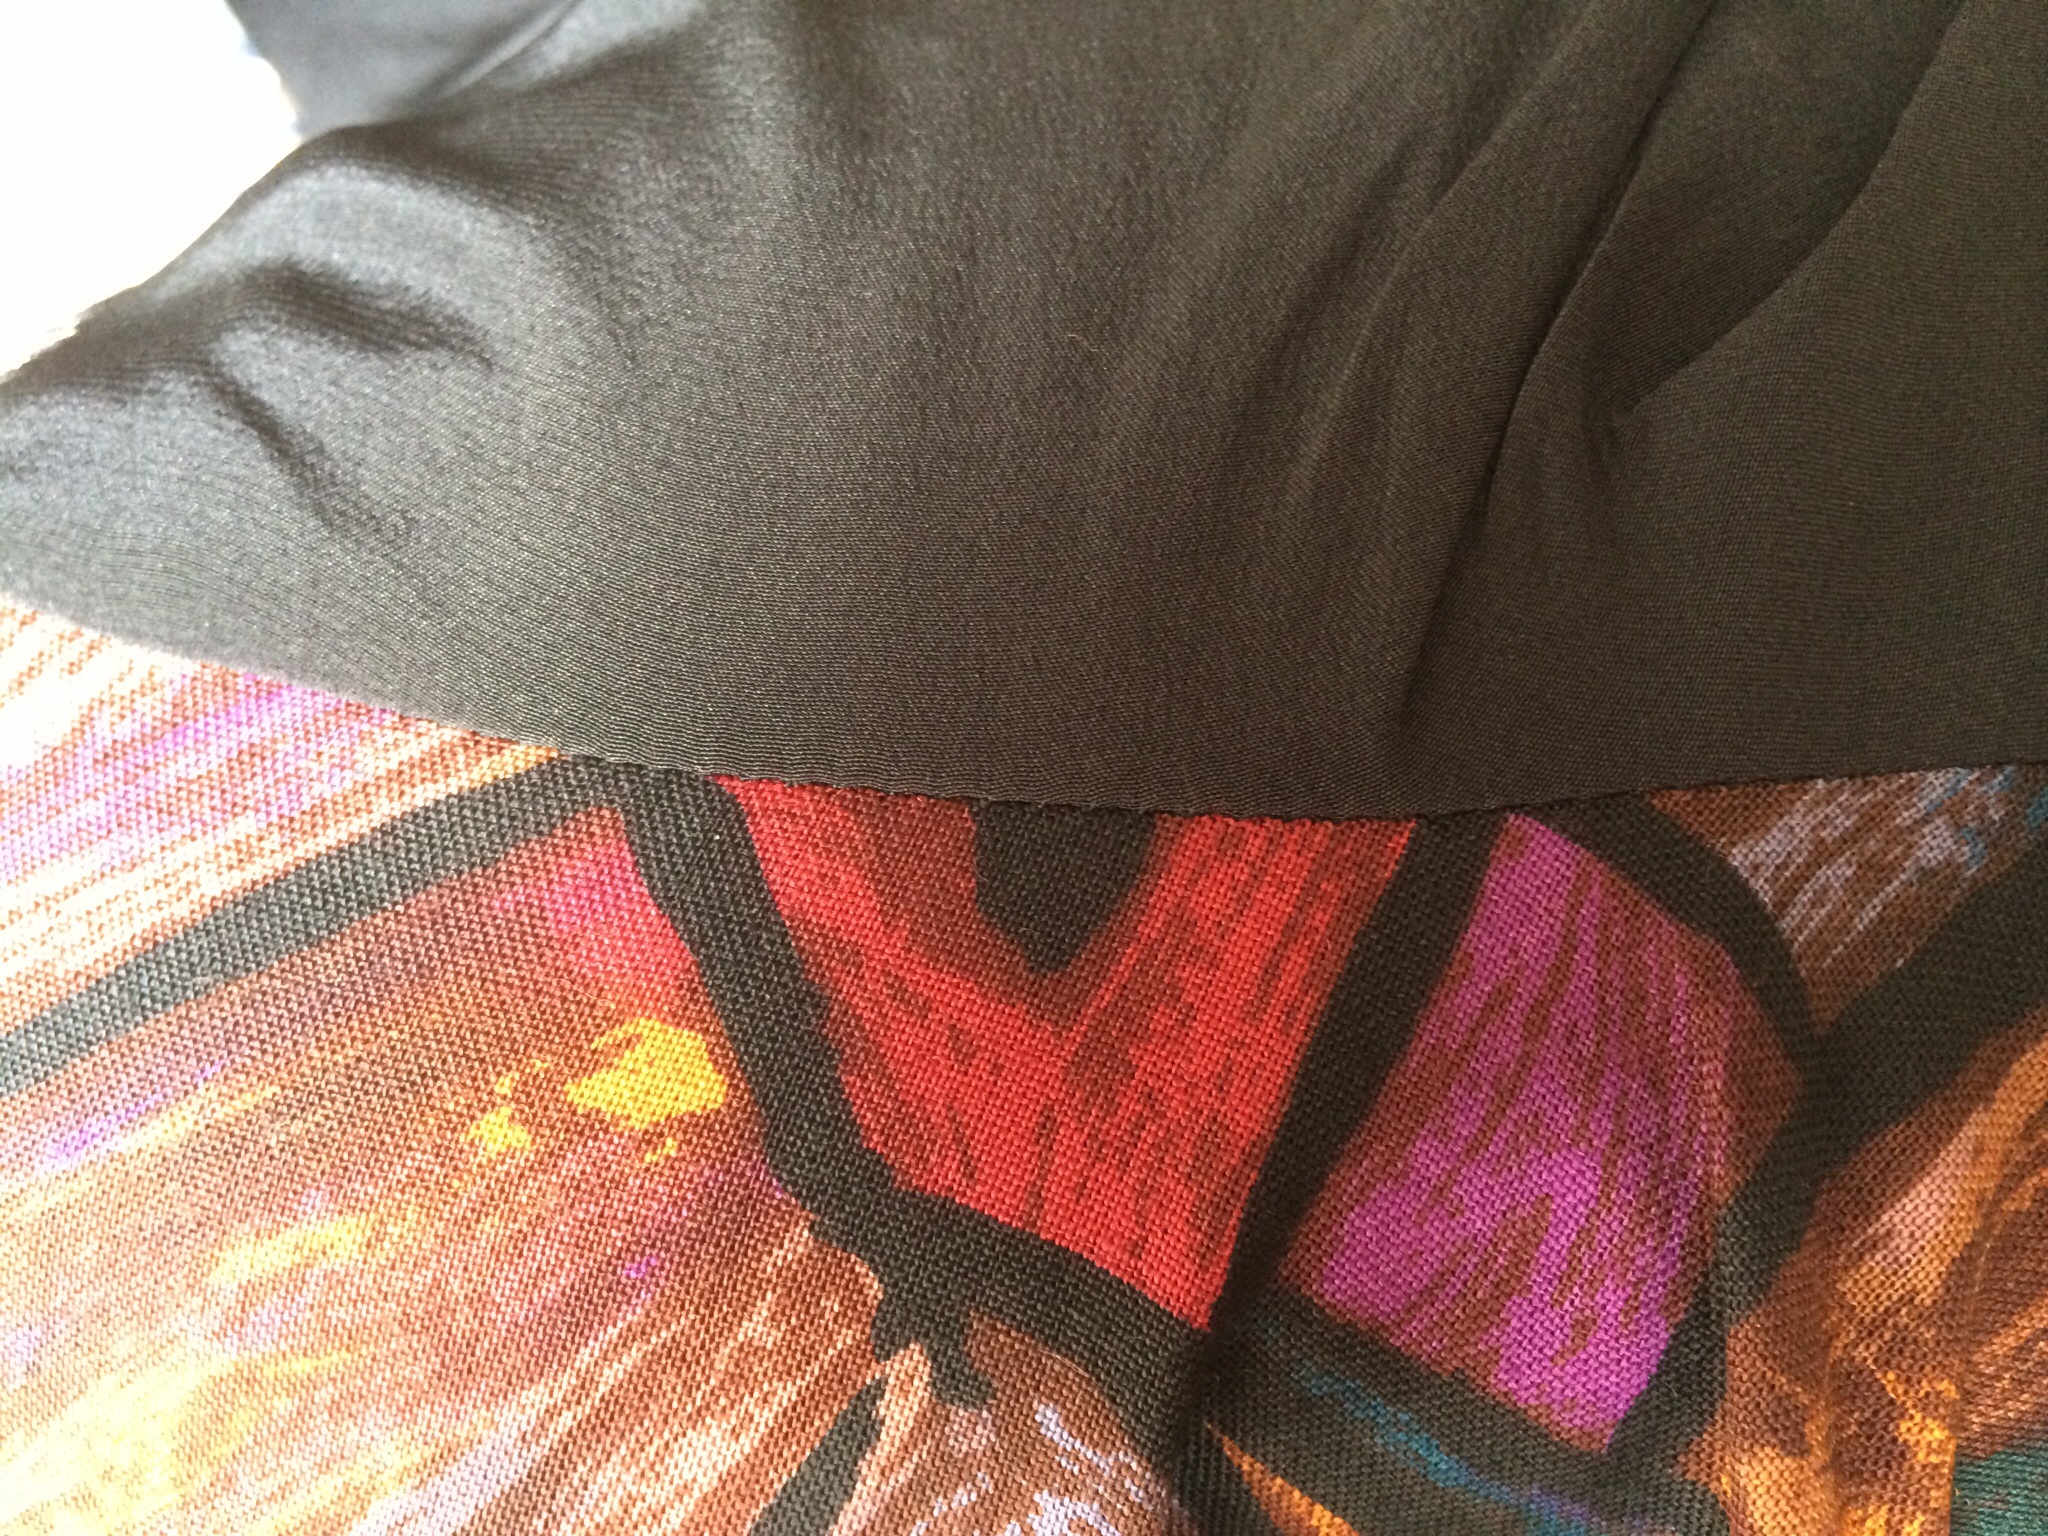
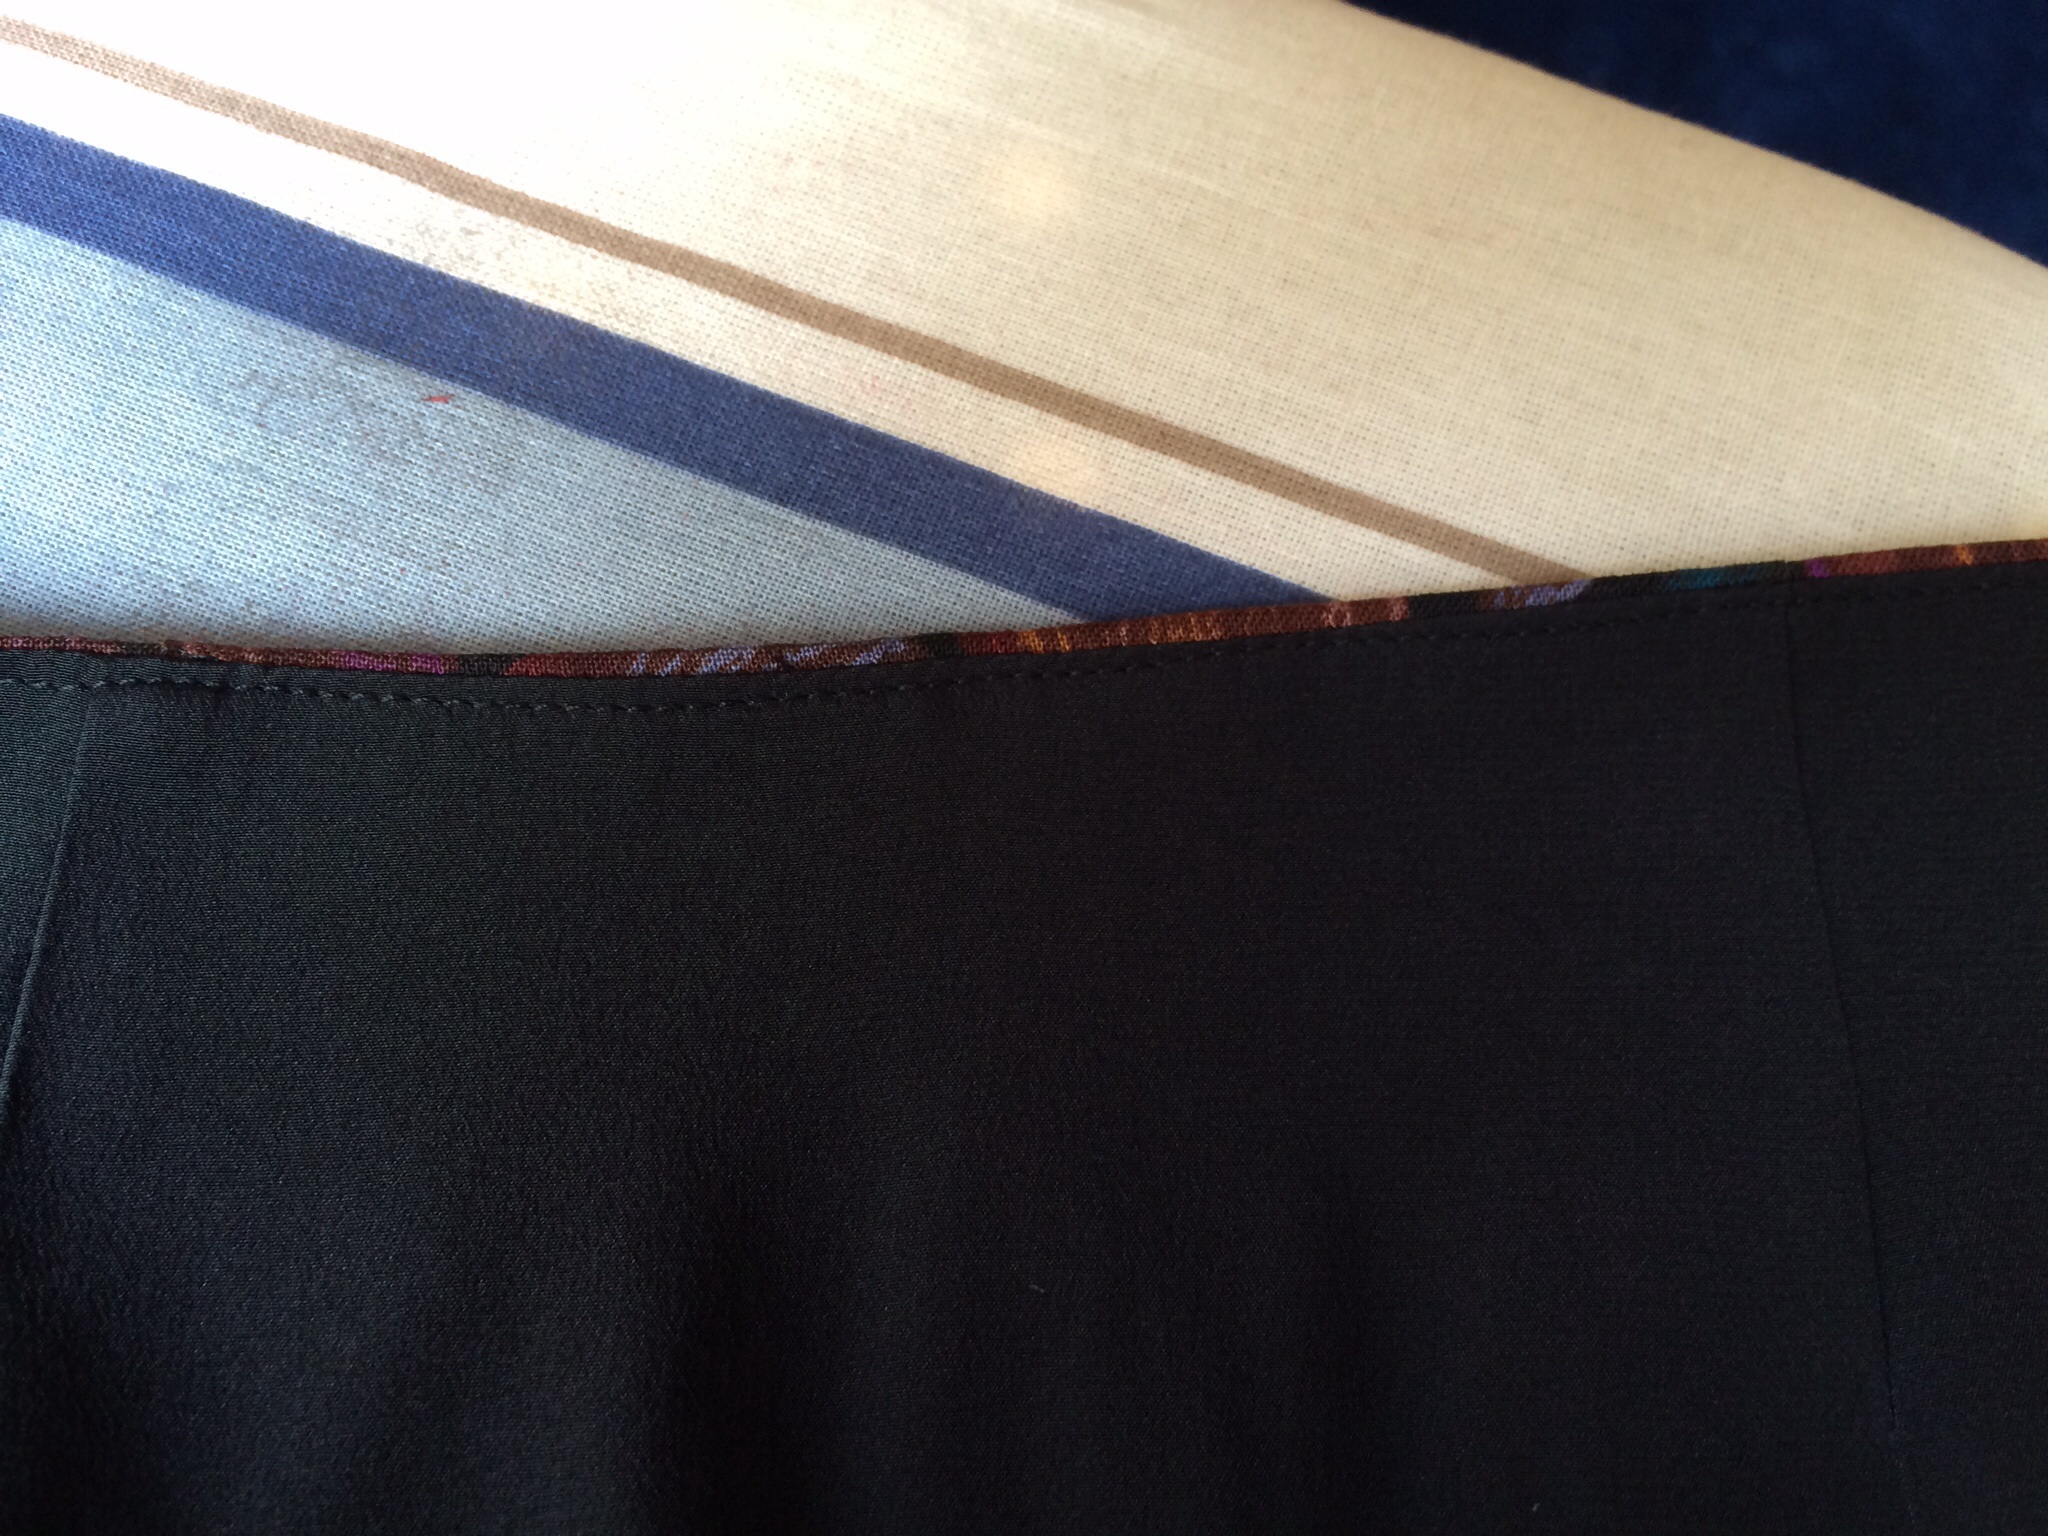
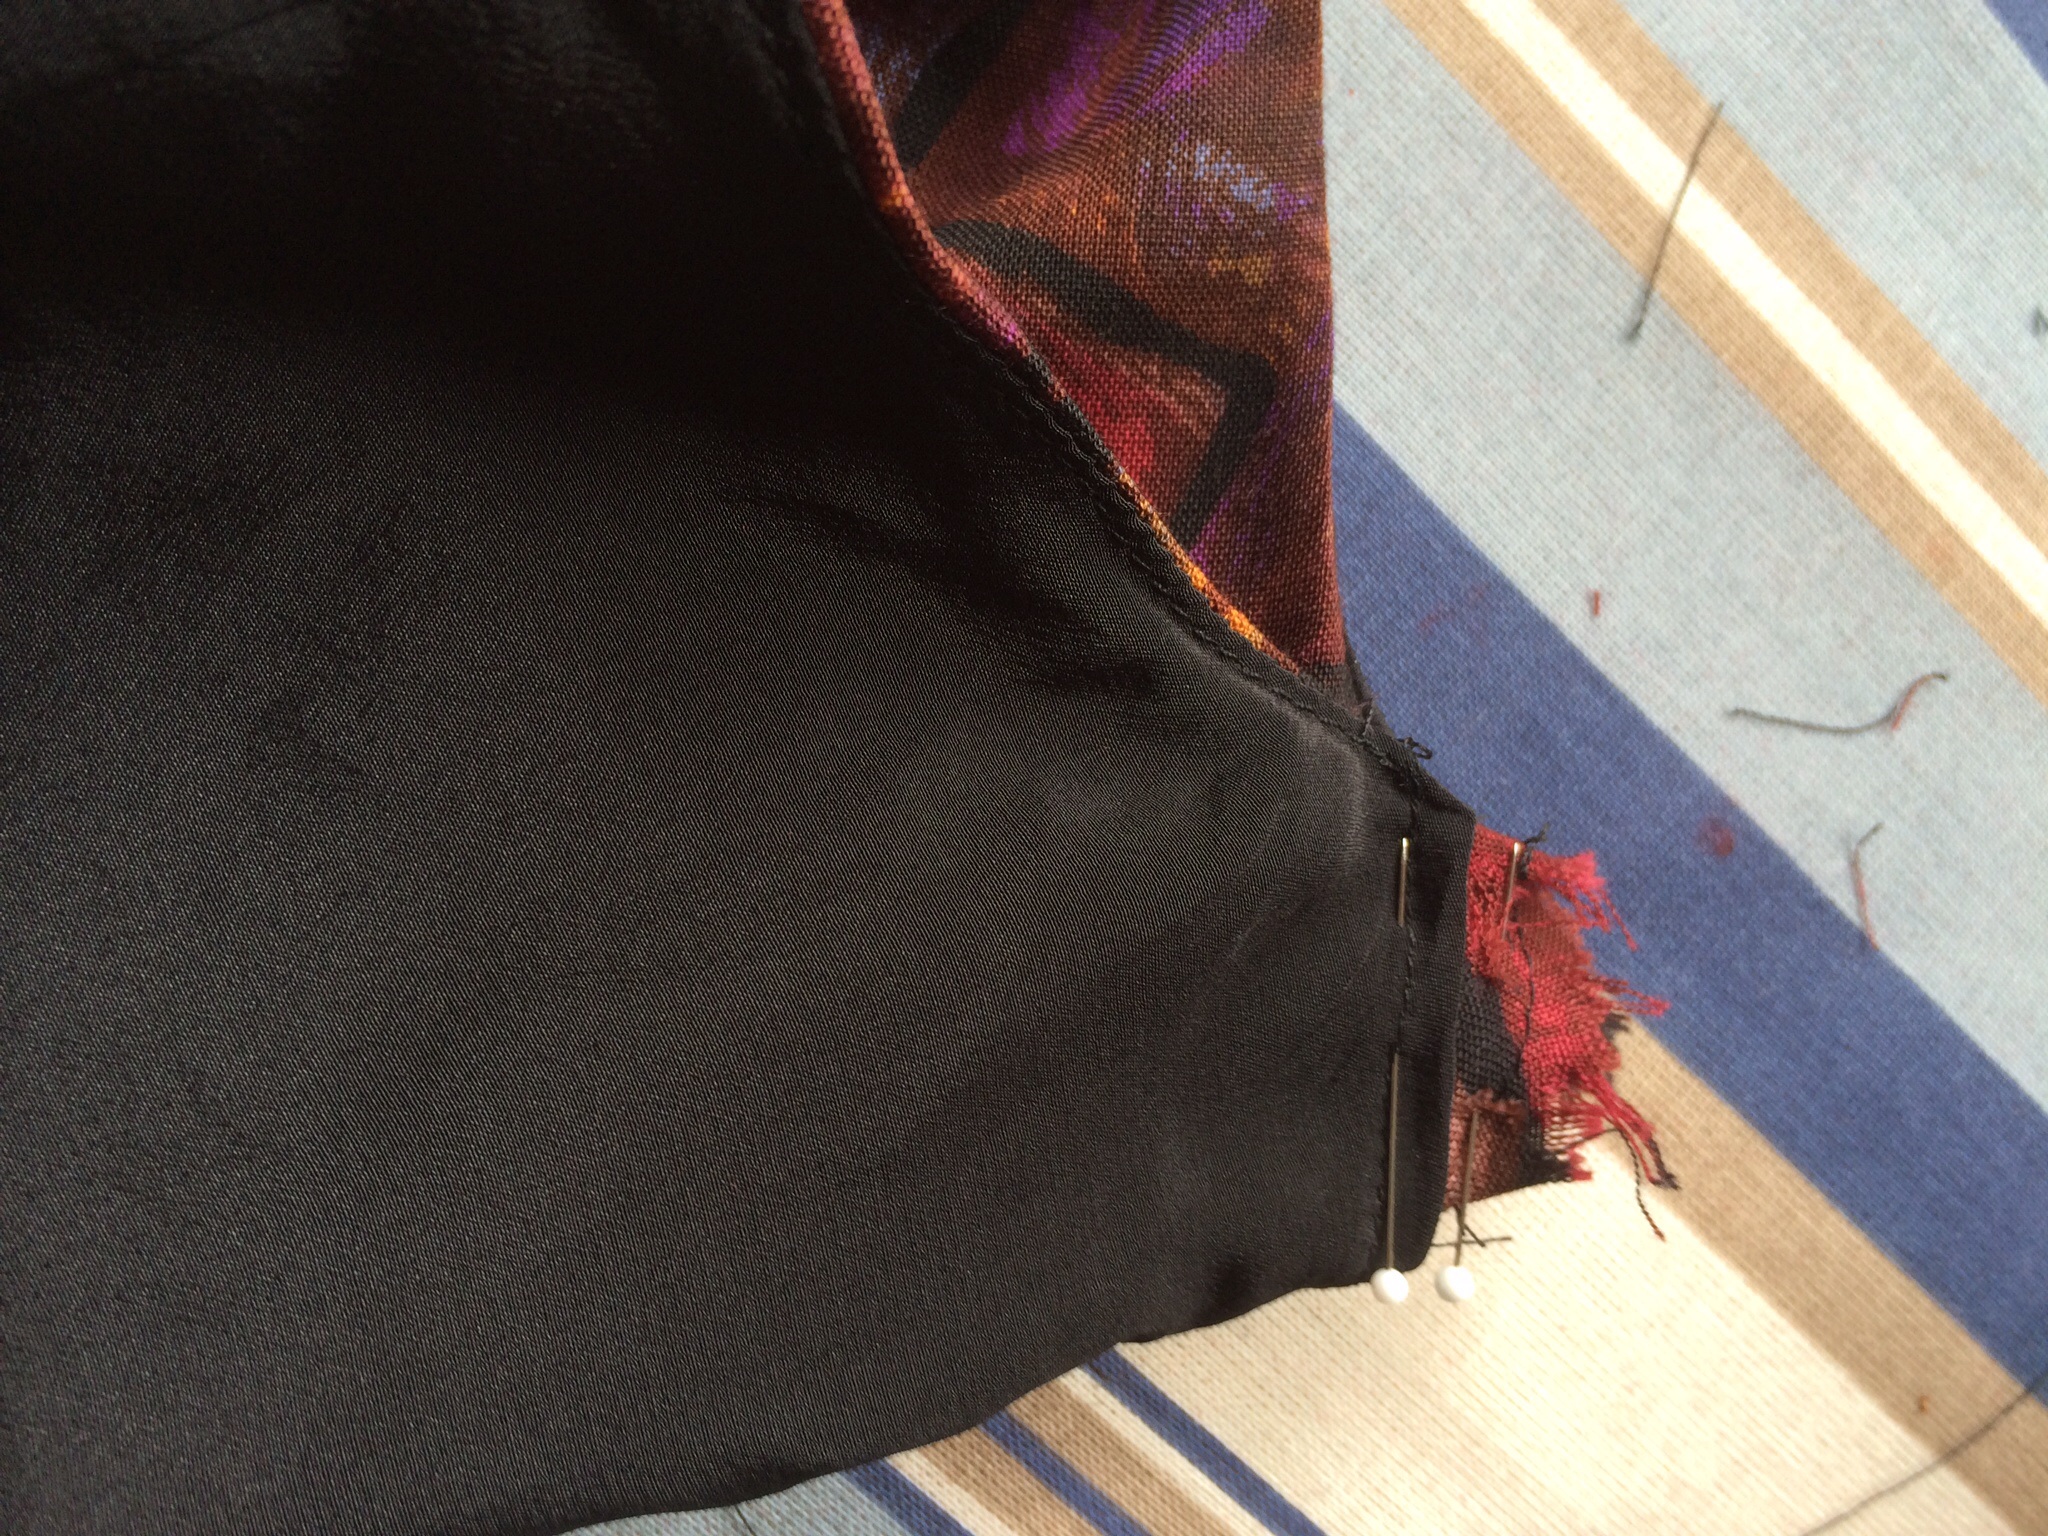
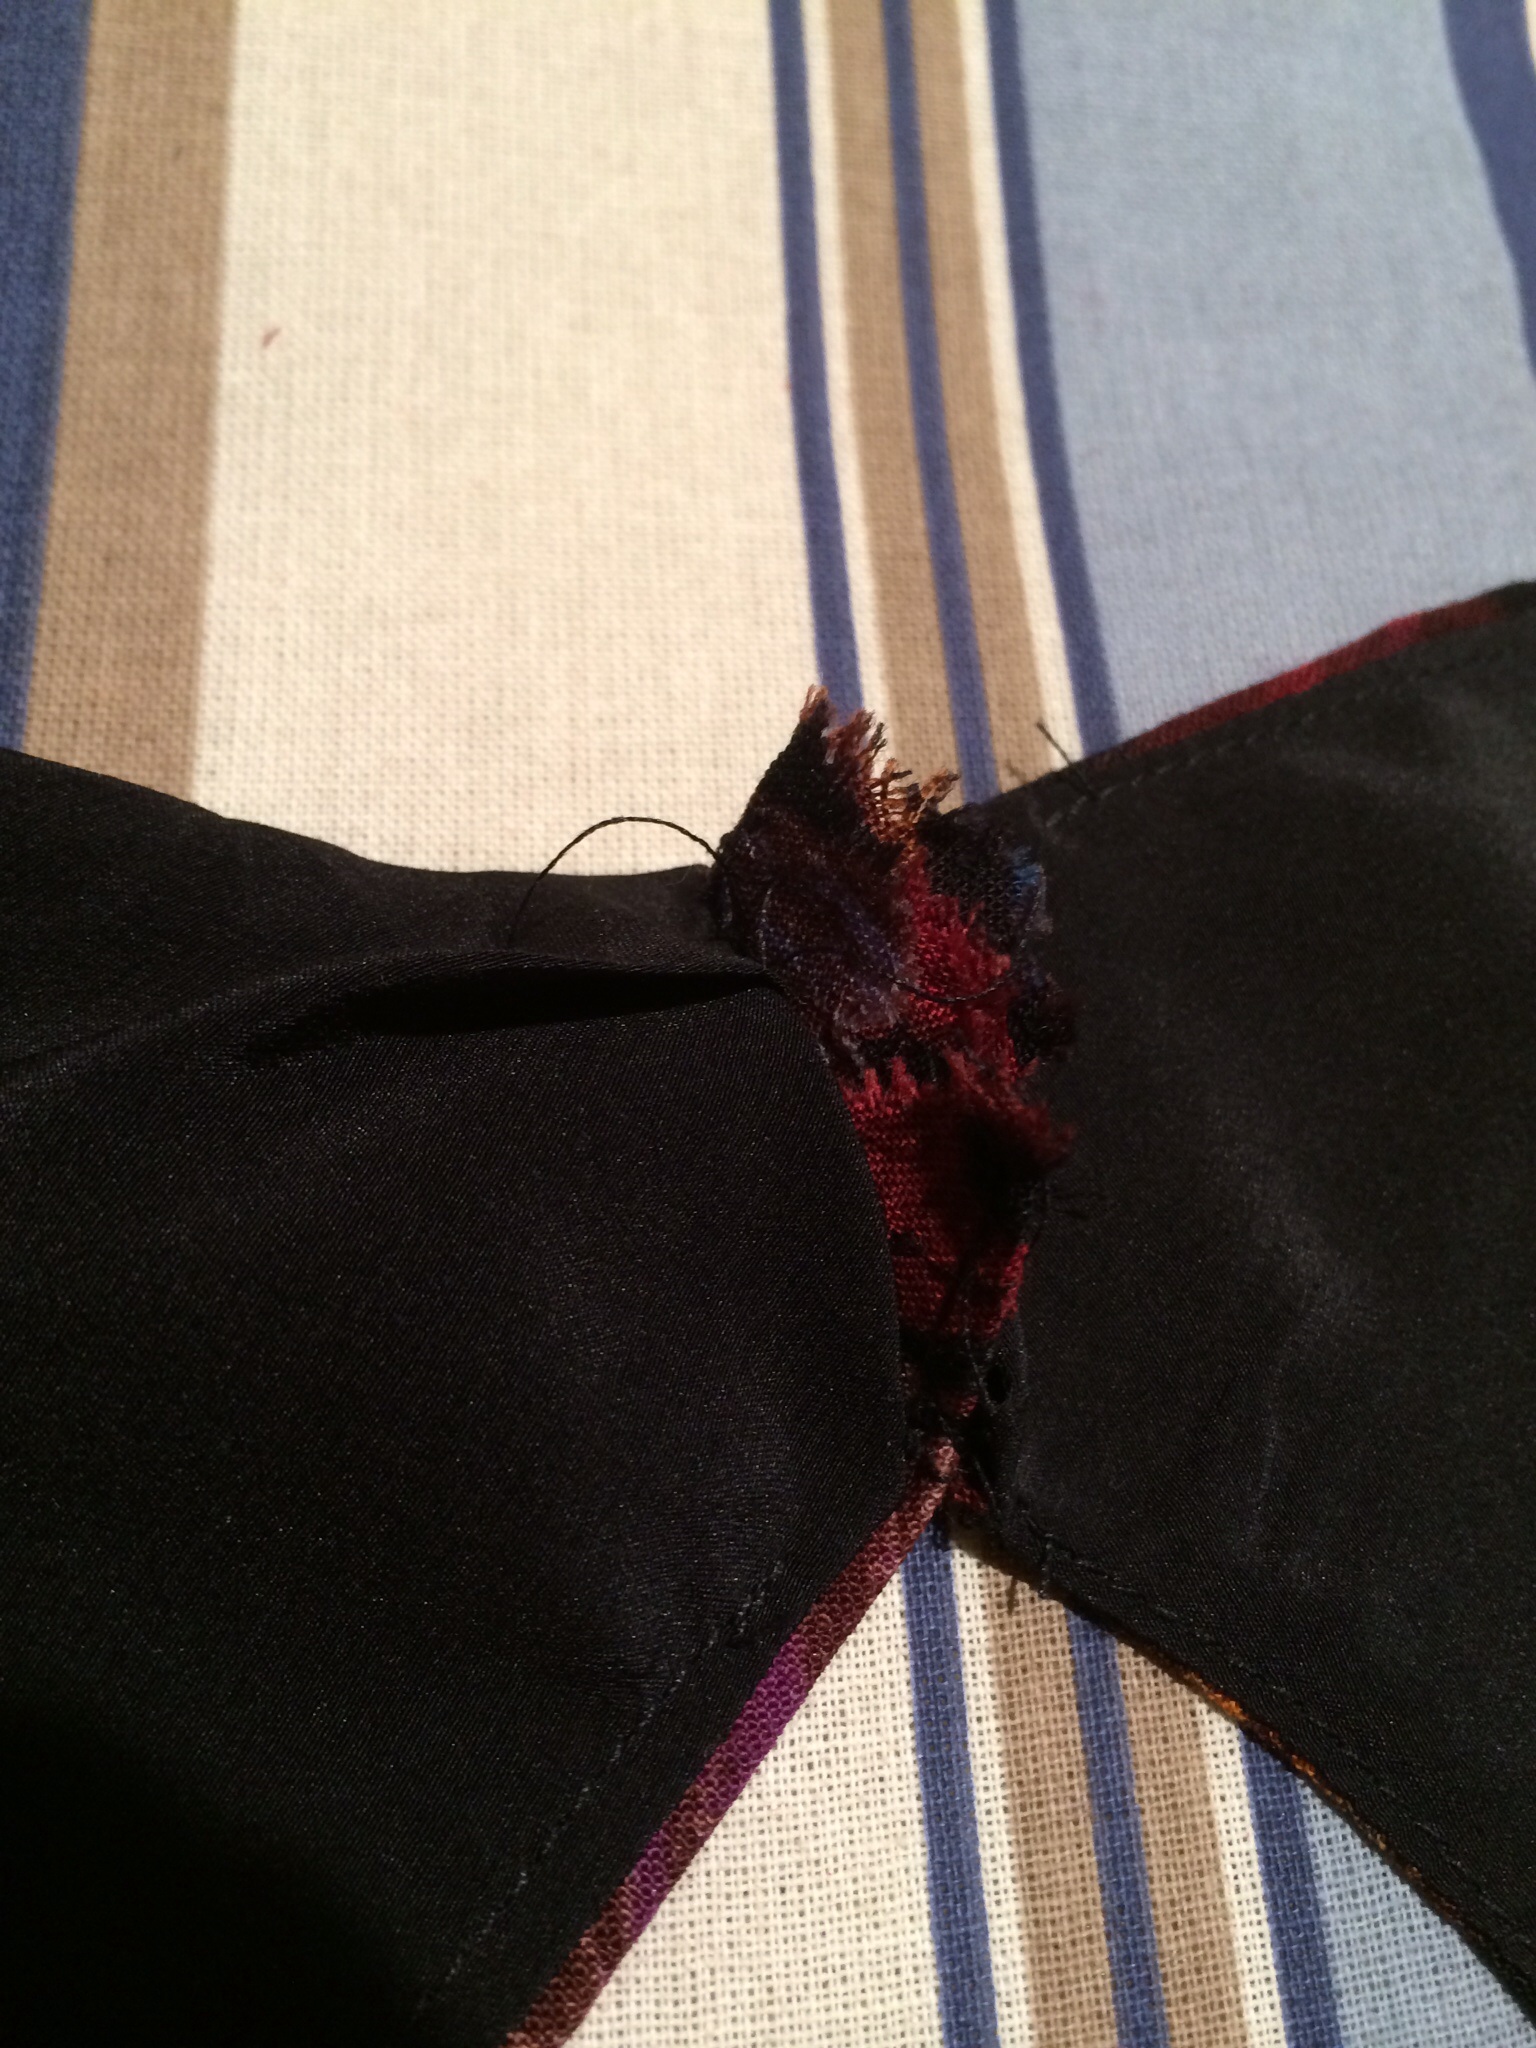
2. Do the piping and other details before the dress is assembled to avoid this:

image

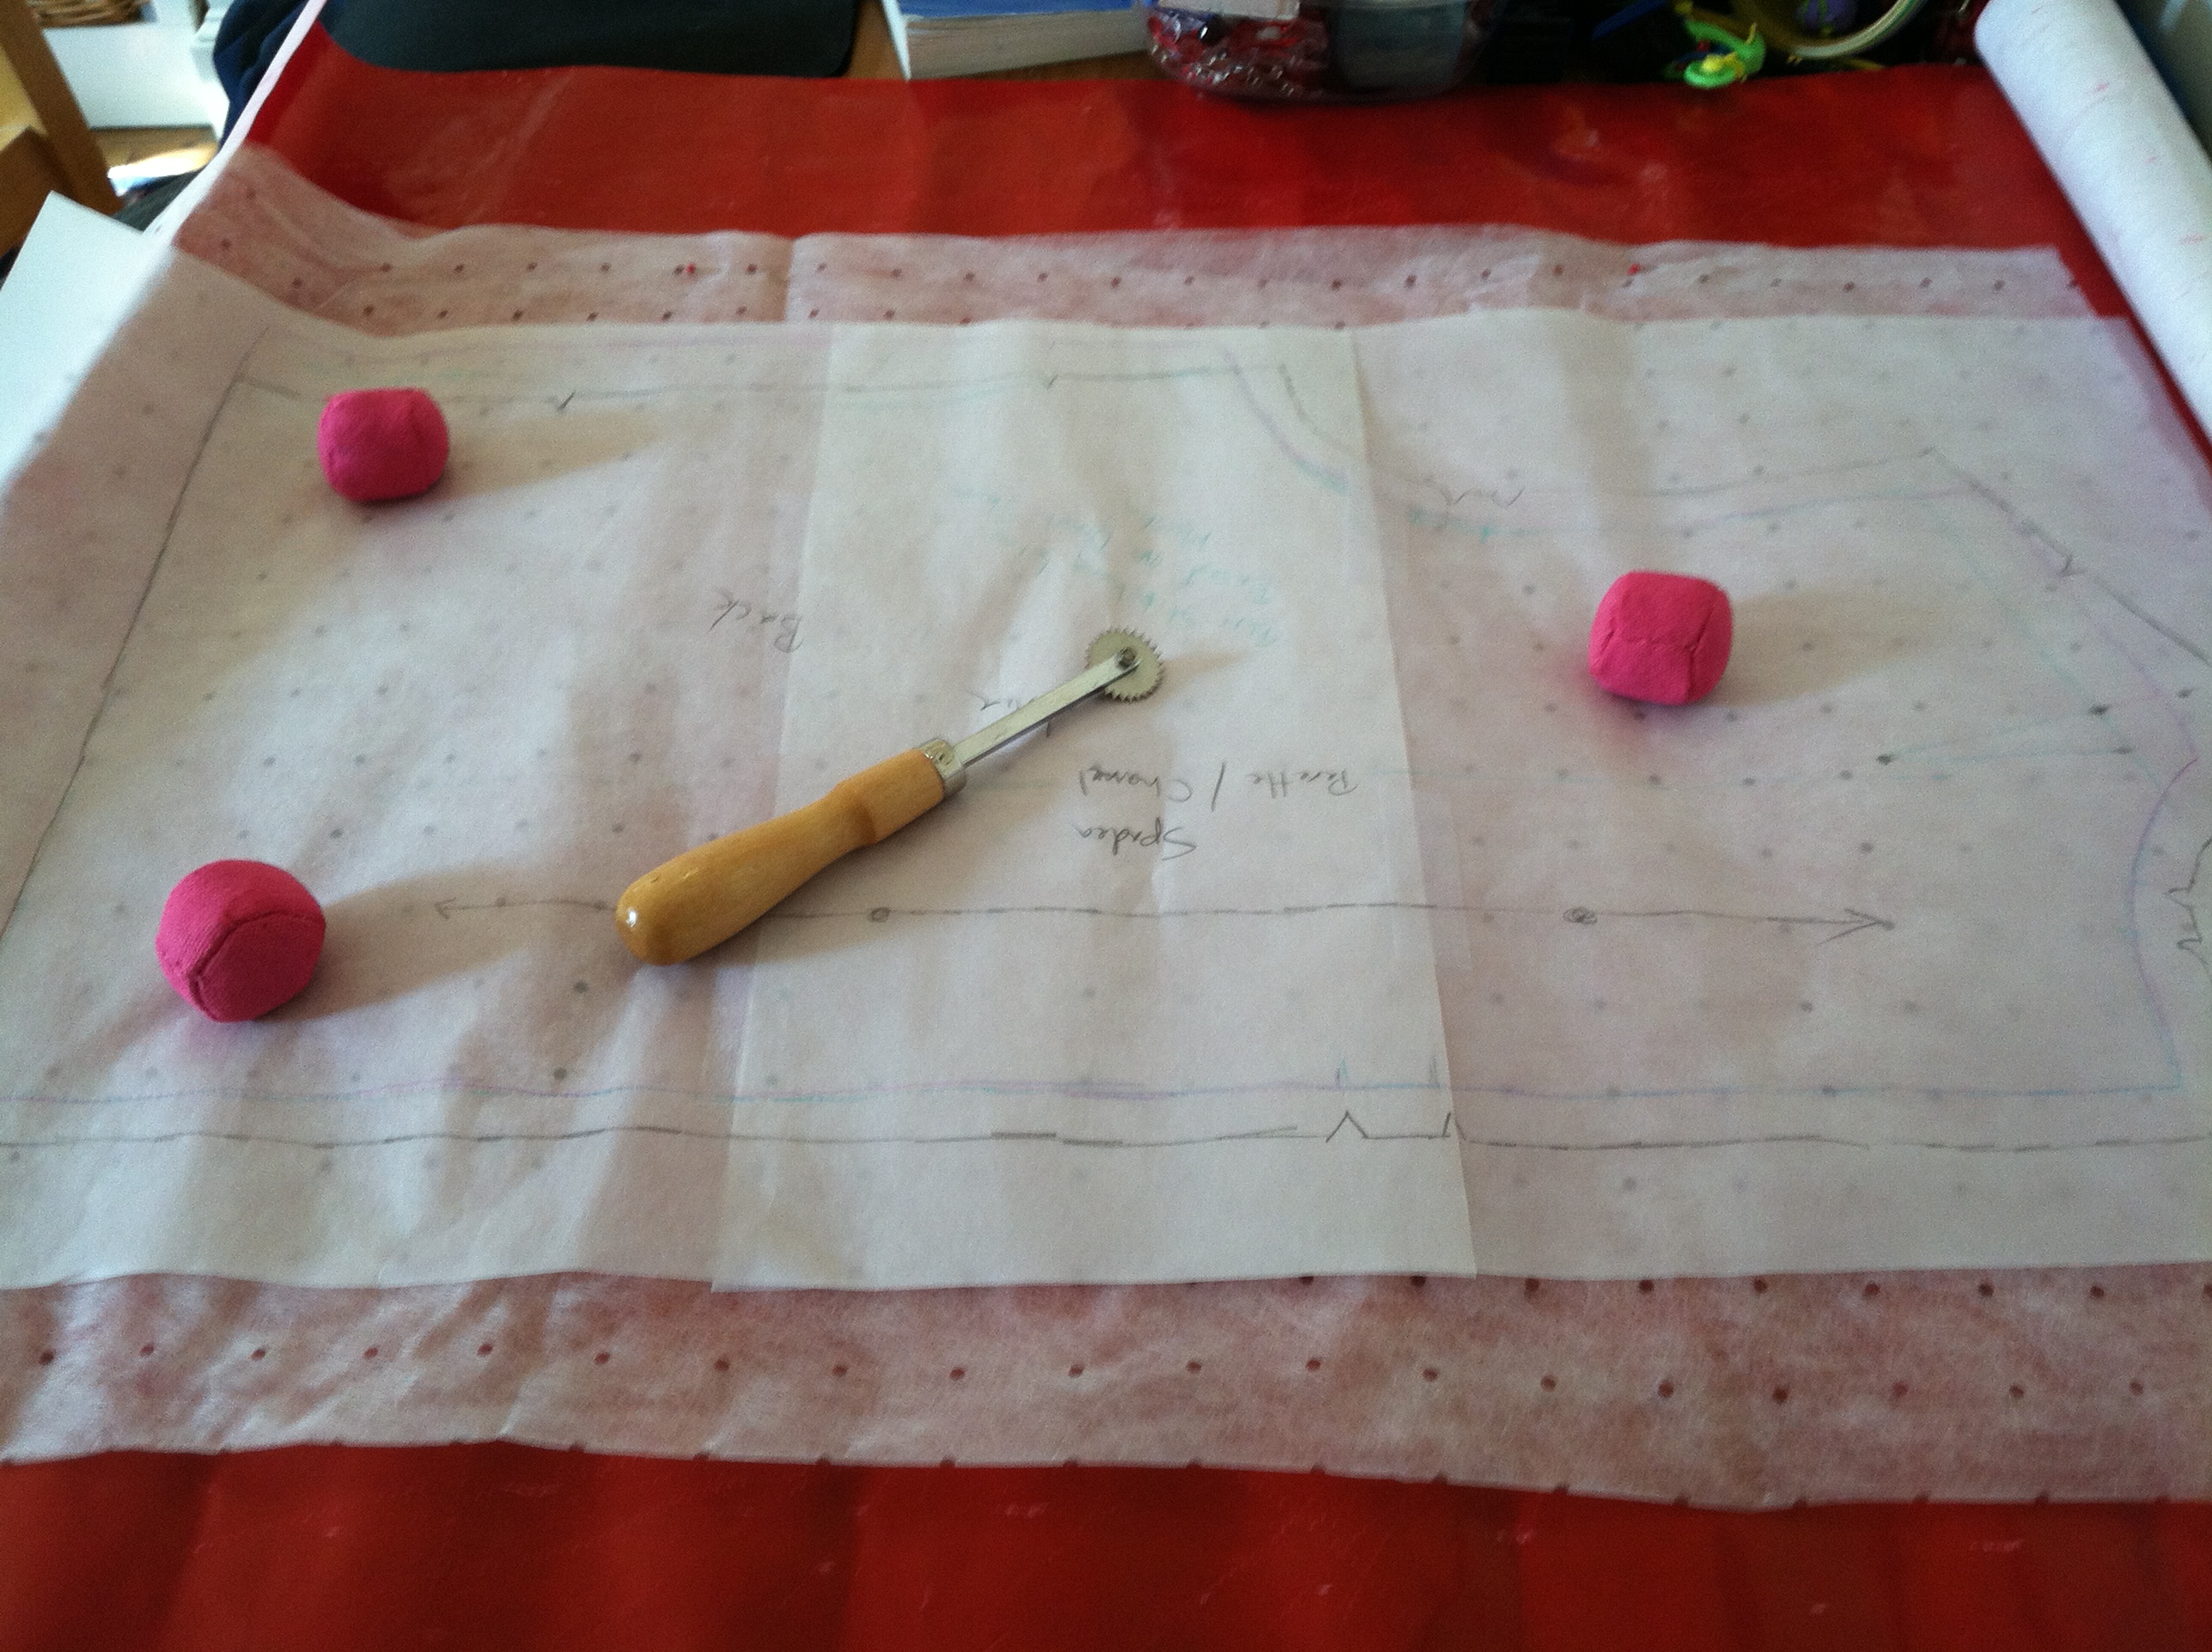
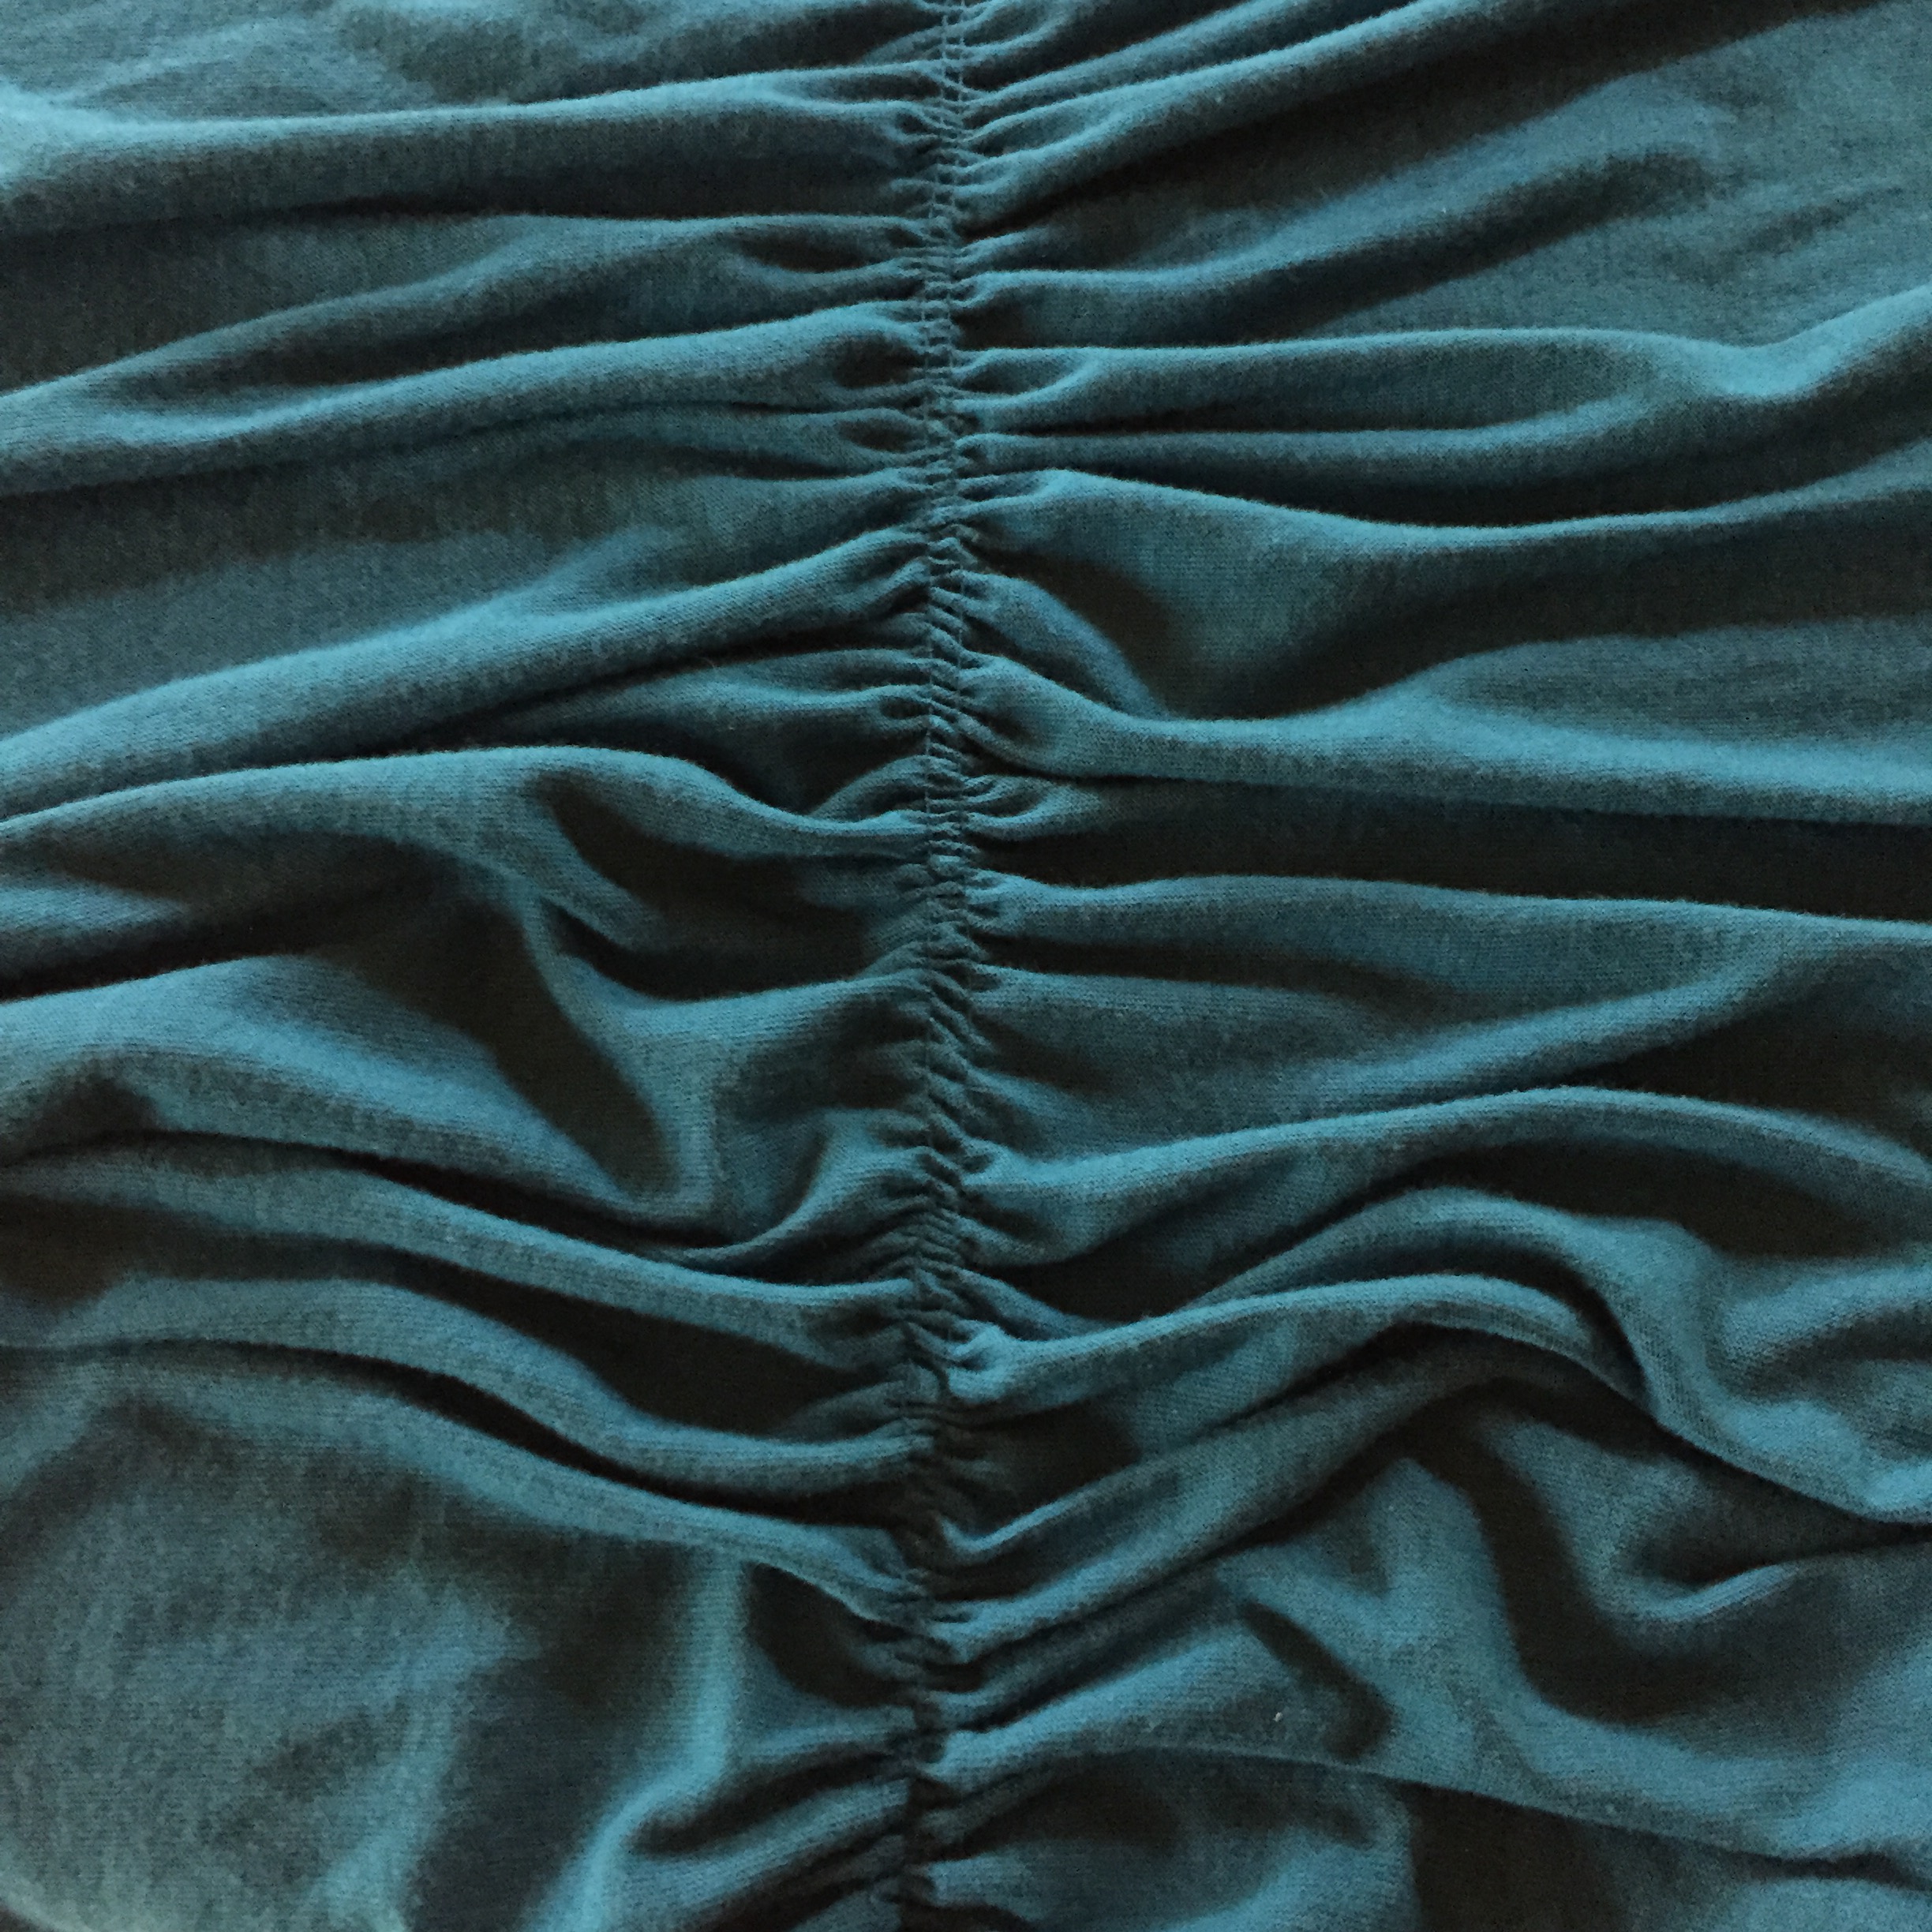
3. Gather and assemble the neckline before doing the side seams, because the dress below it is so big that the fit can be modified during the construction. I was able to use the same size pattern that fits my size Medium sister, though I’m a retail XL, because most of the fit takes place in the underbust gathering.

IMG_3182

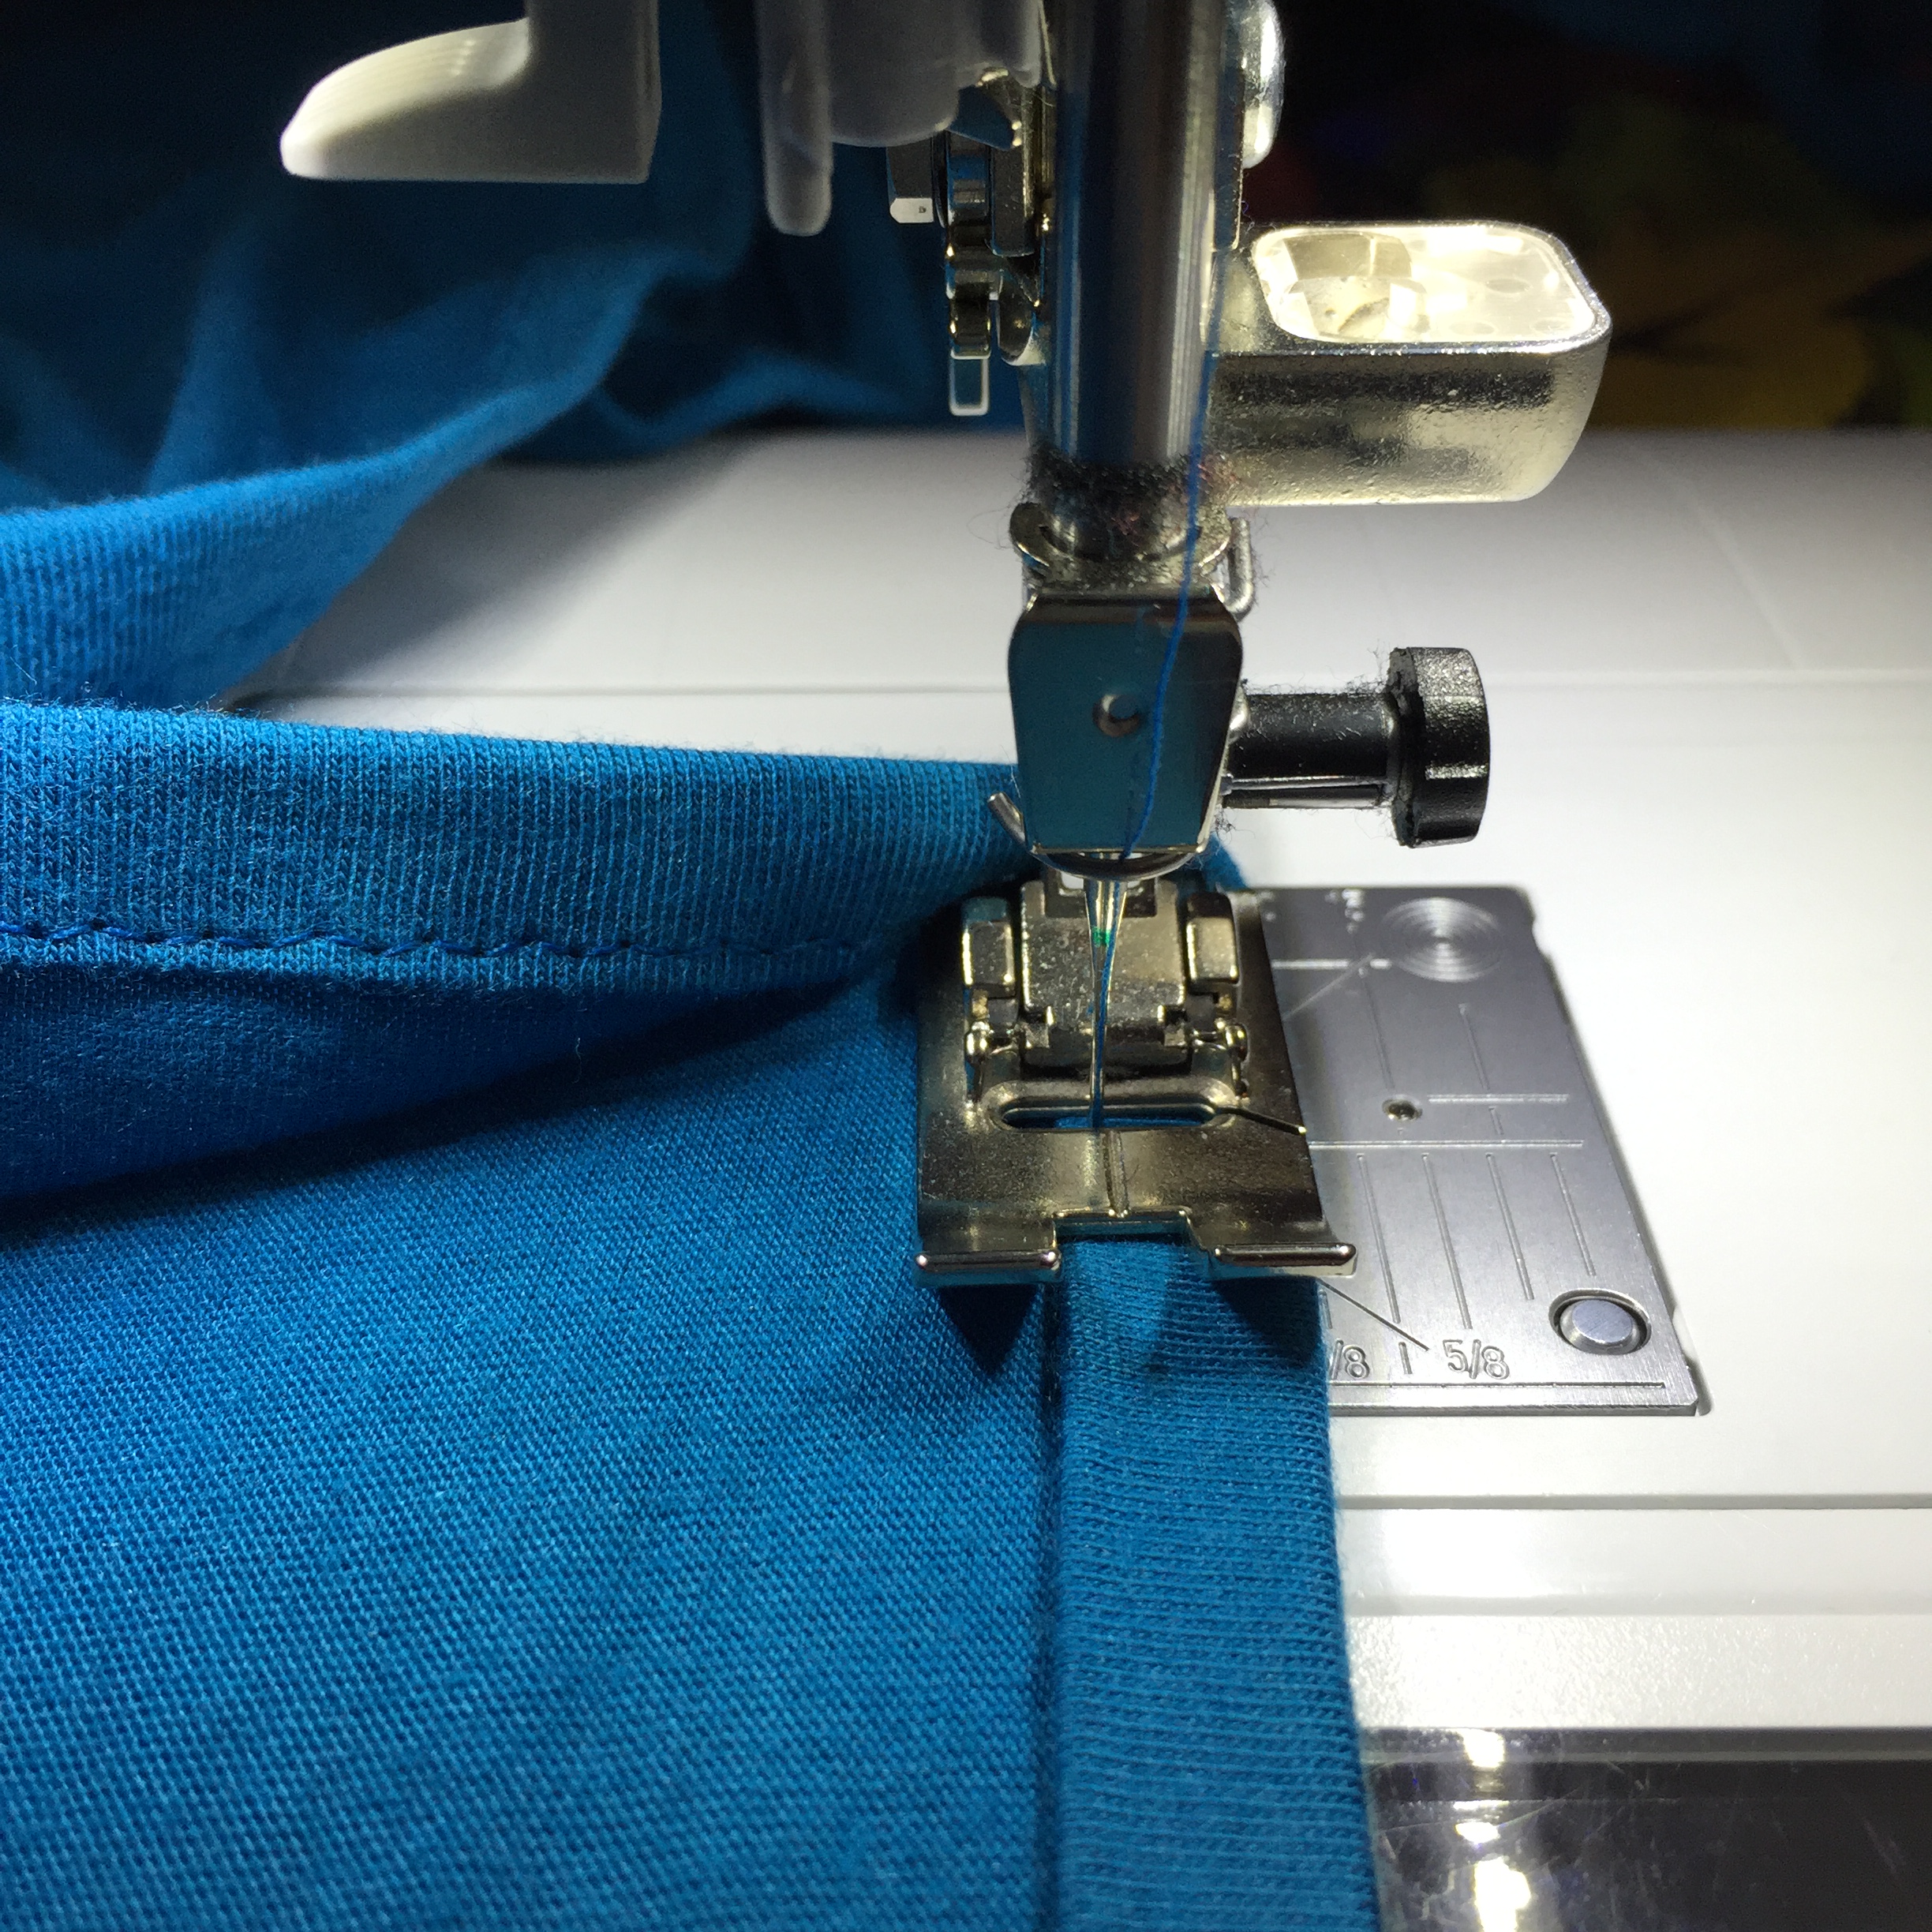
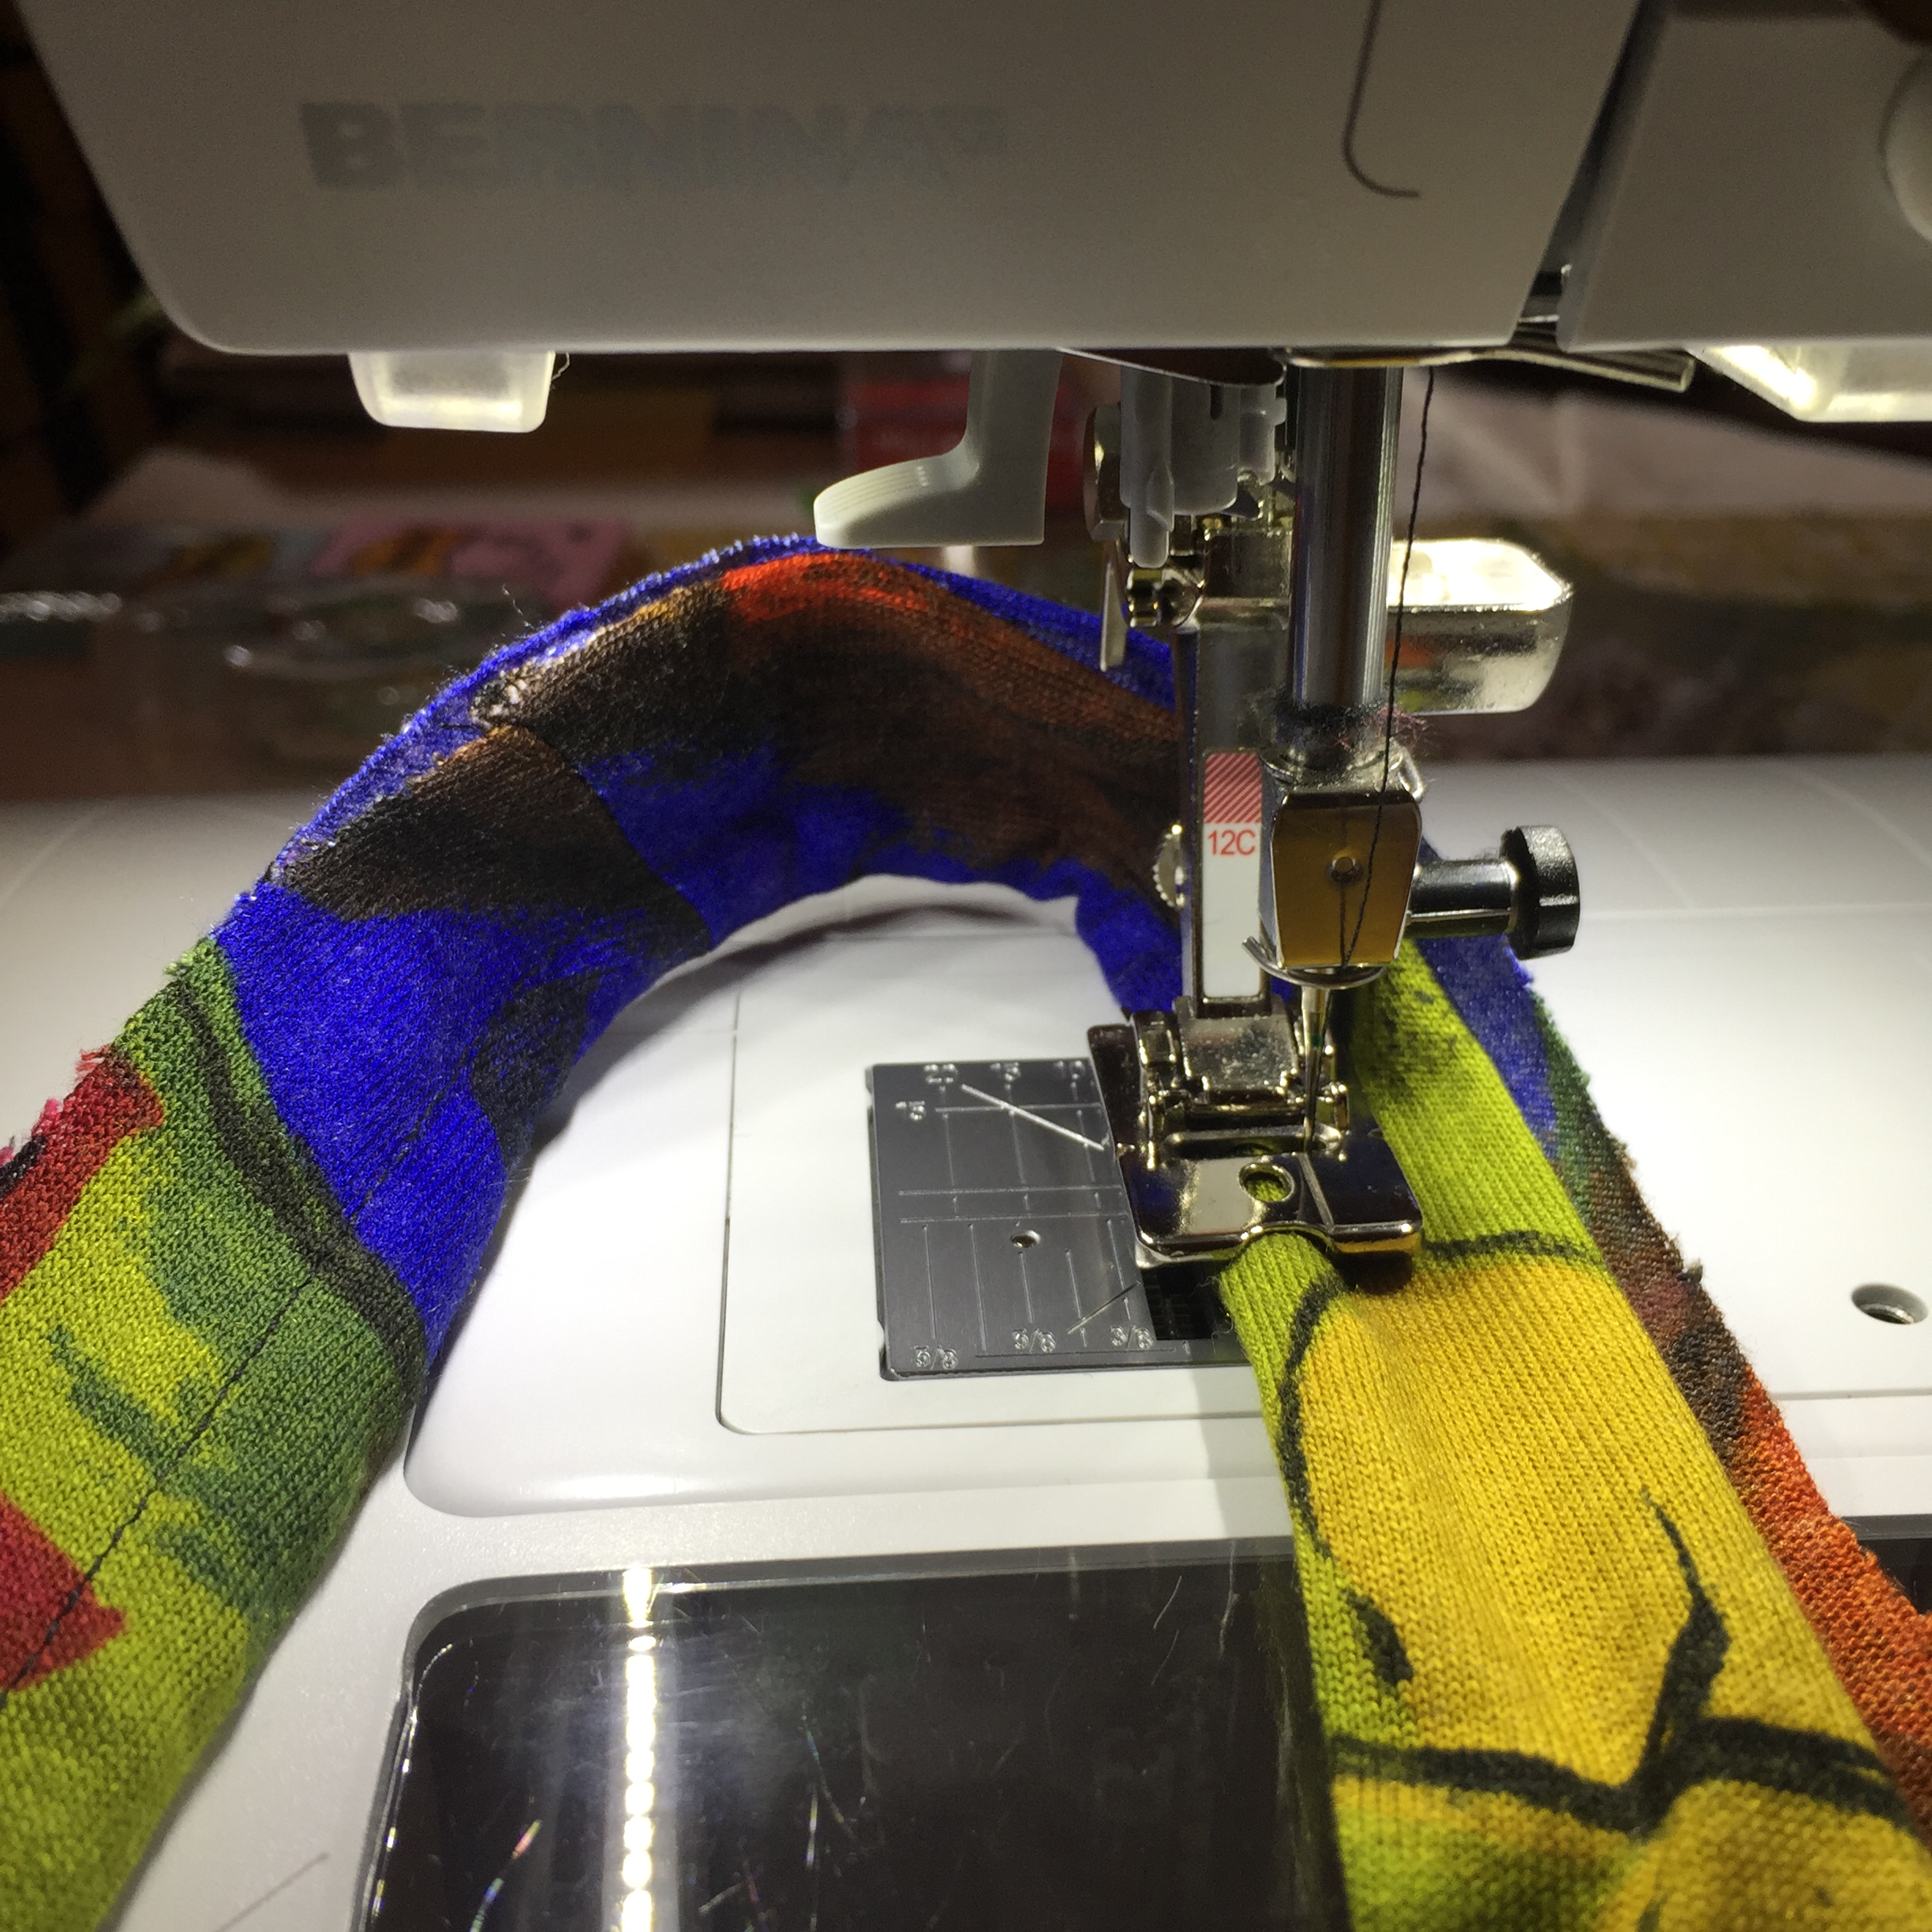
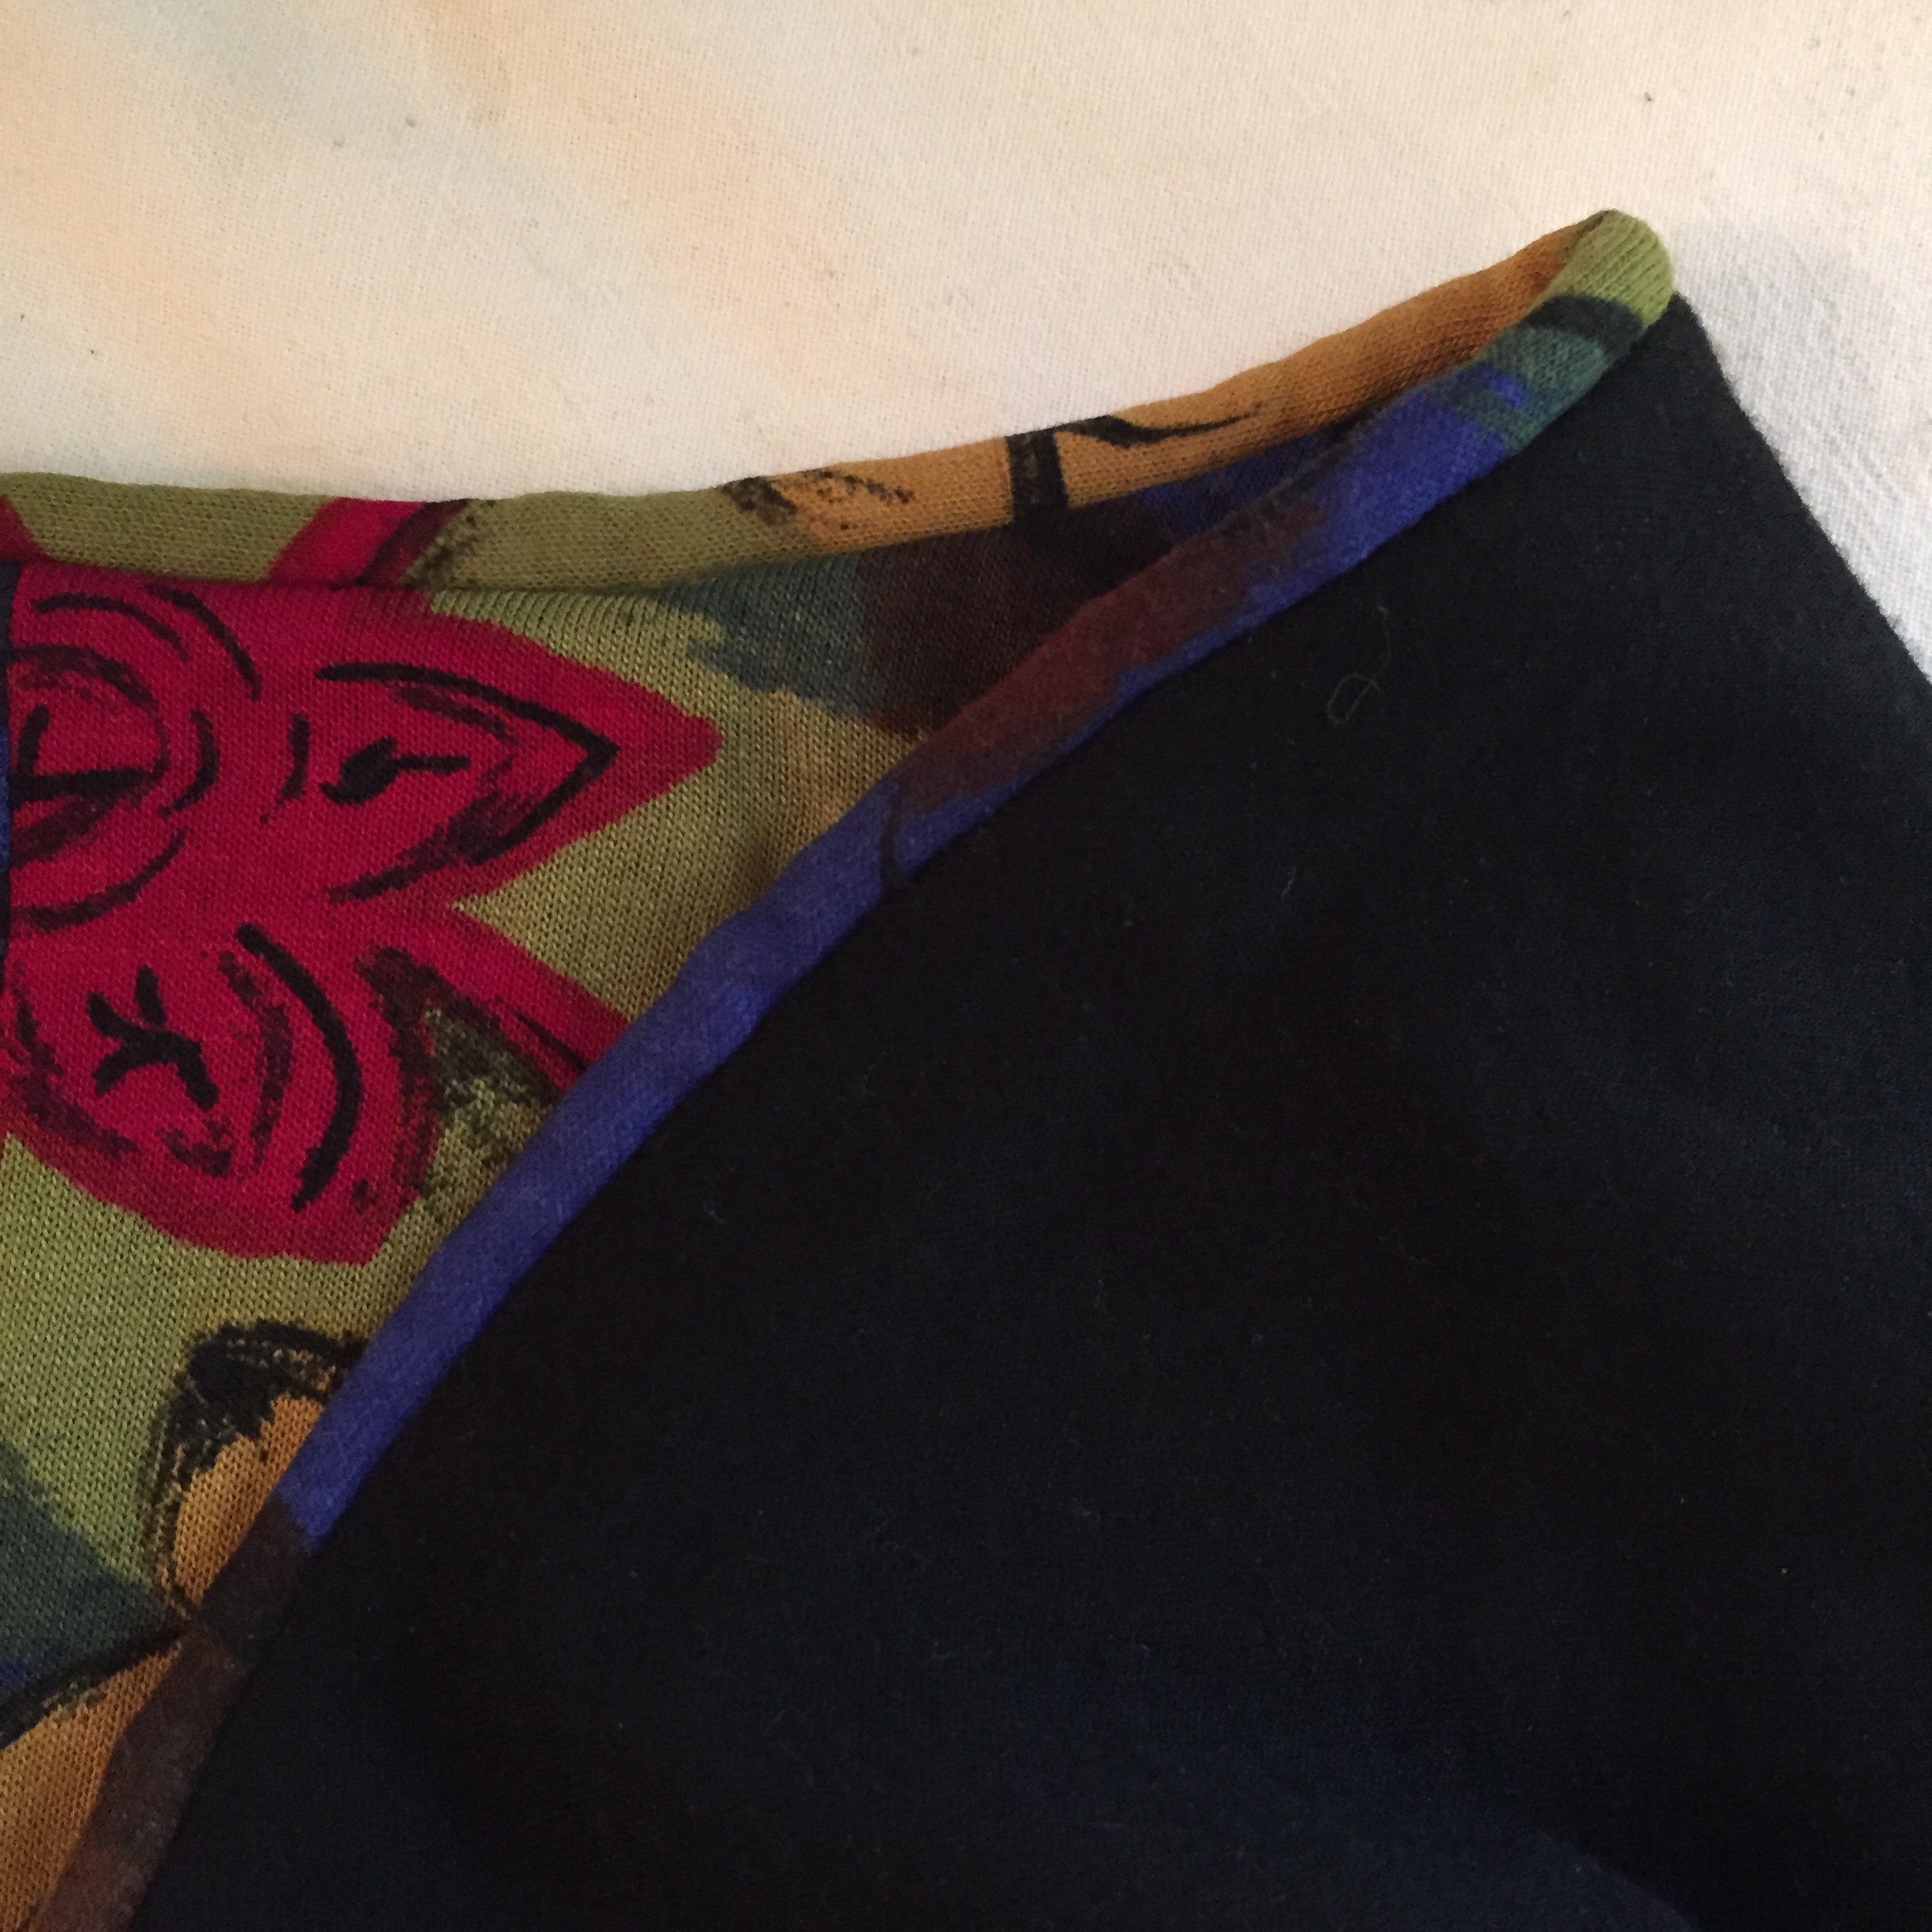
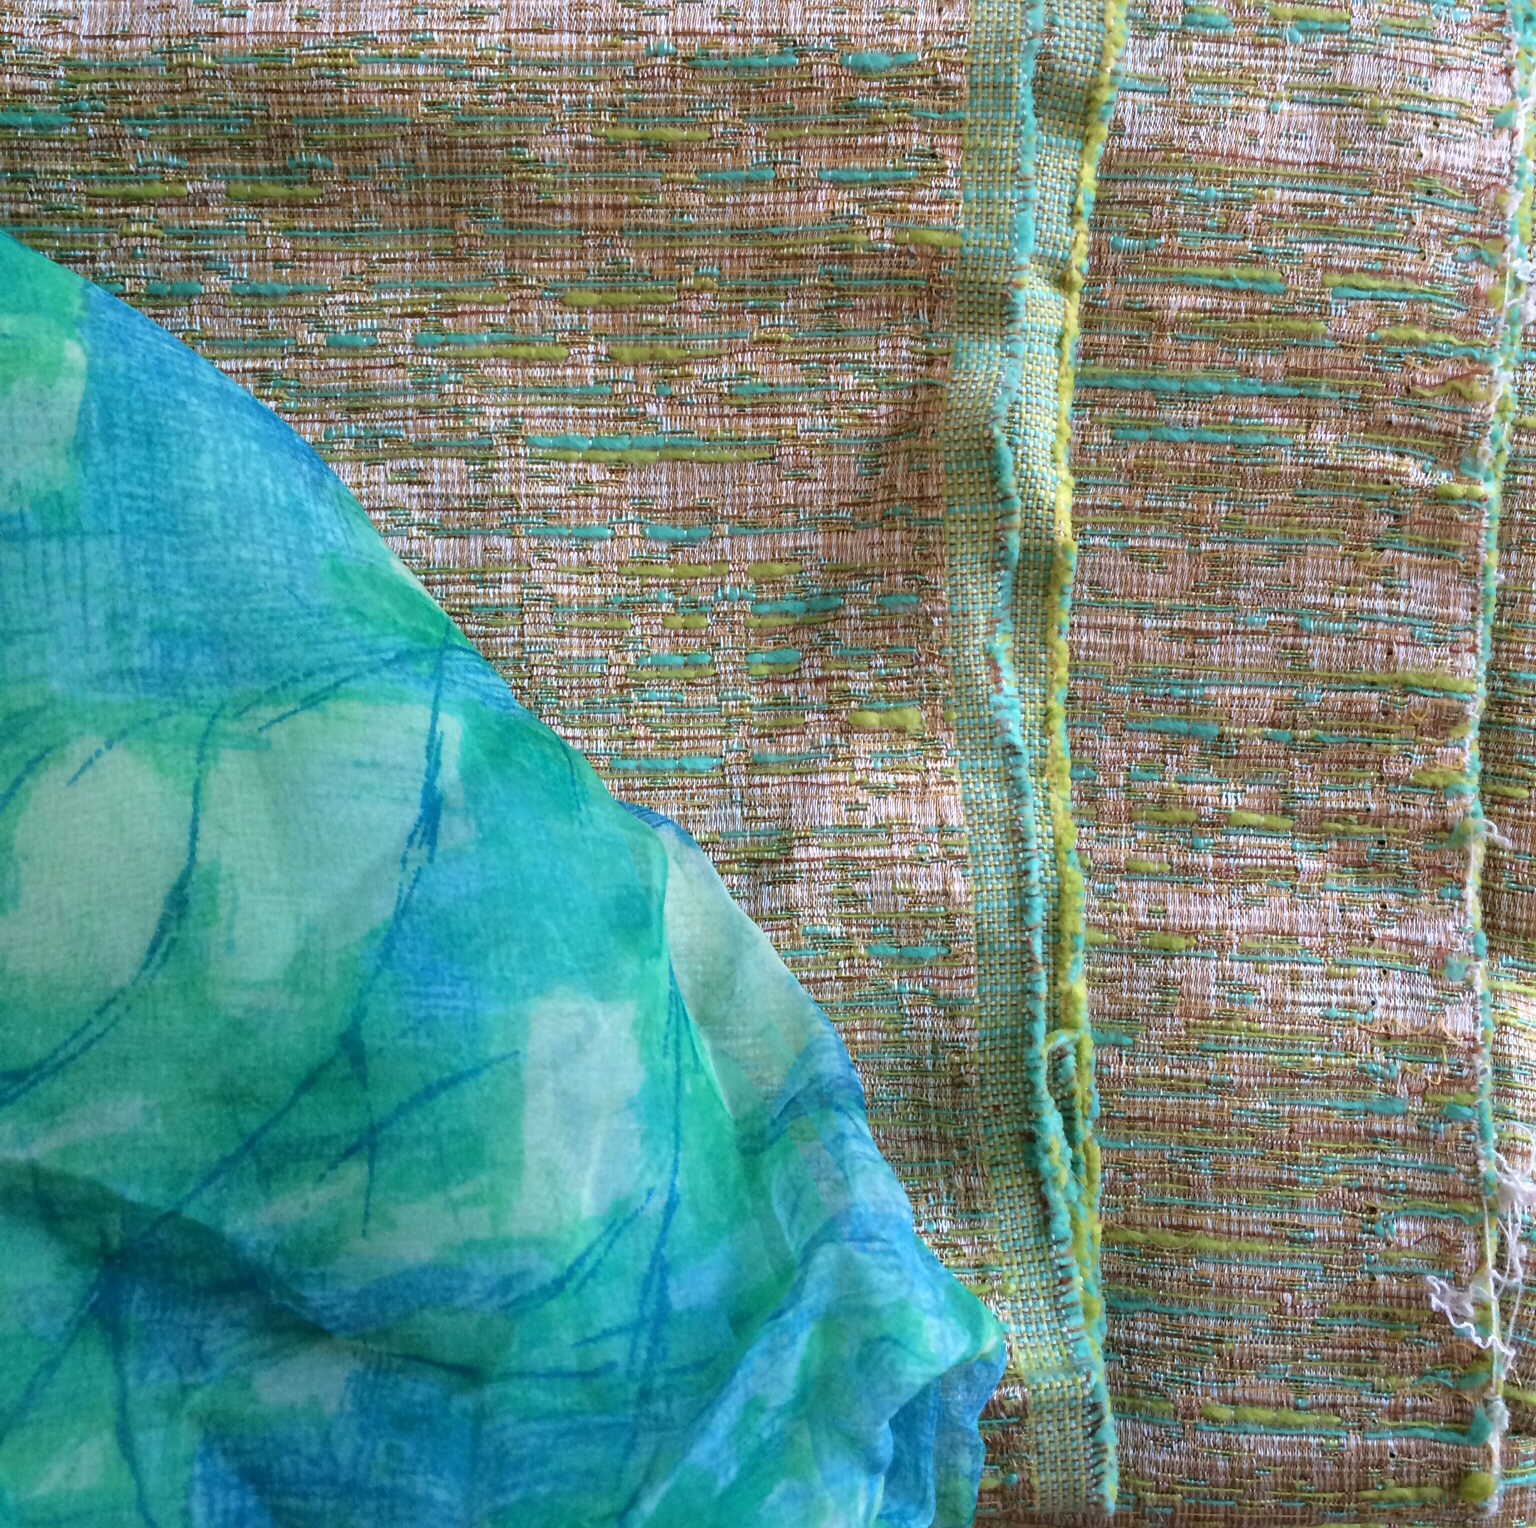
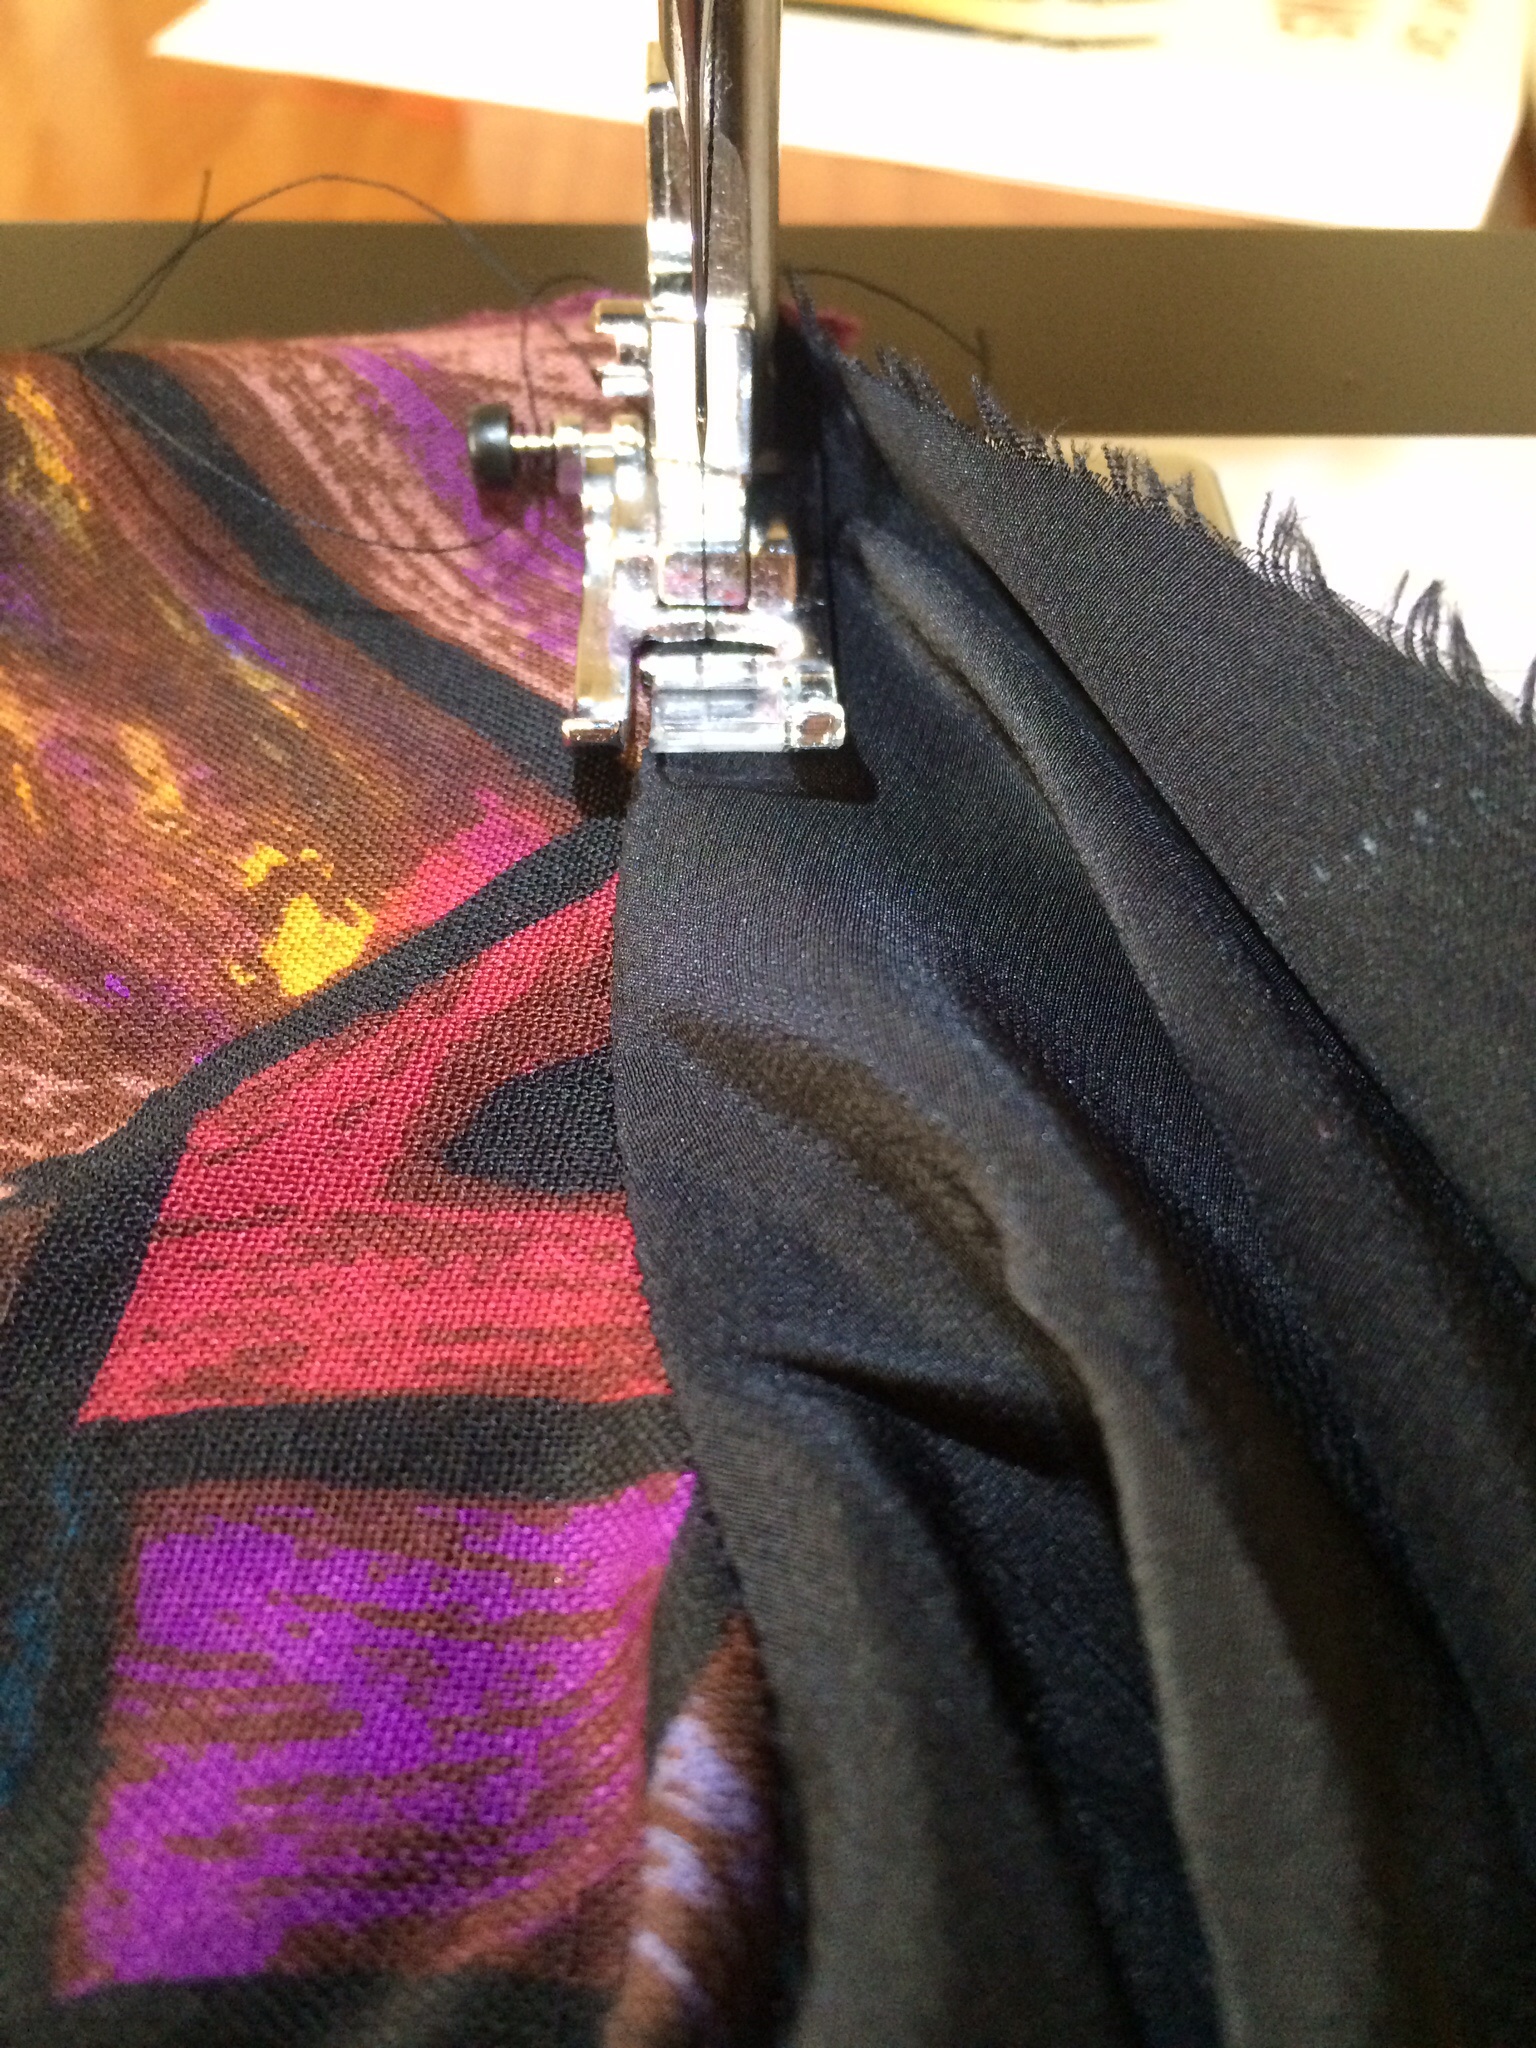
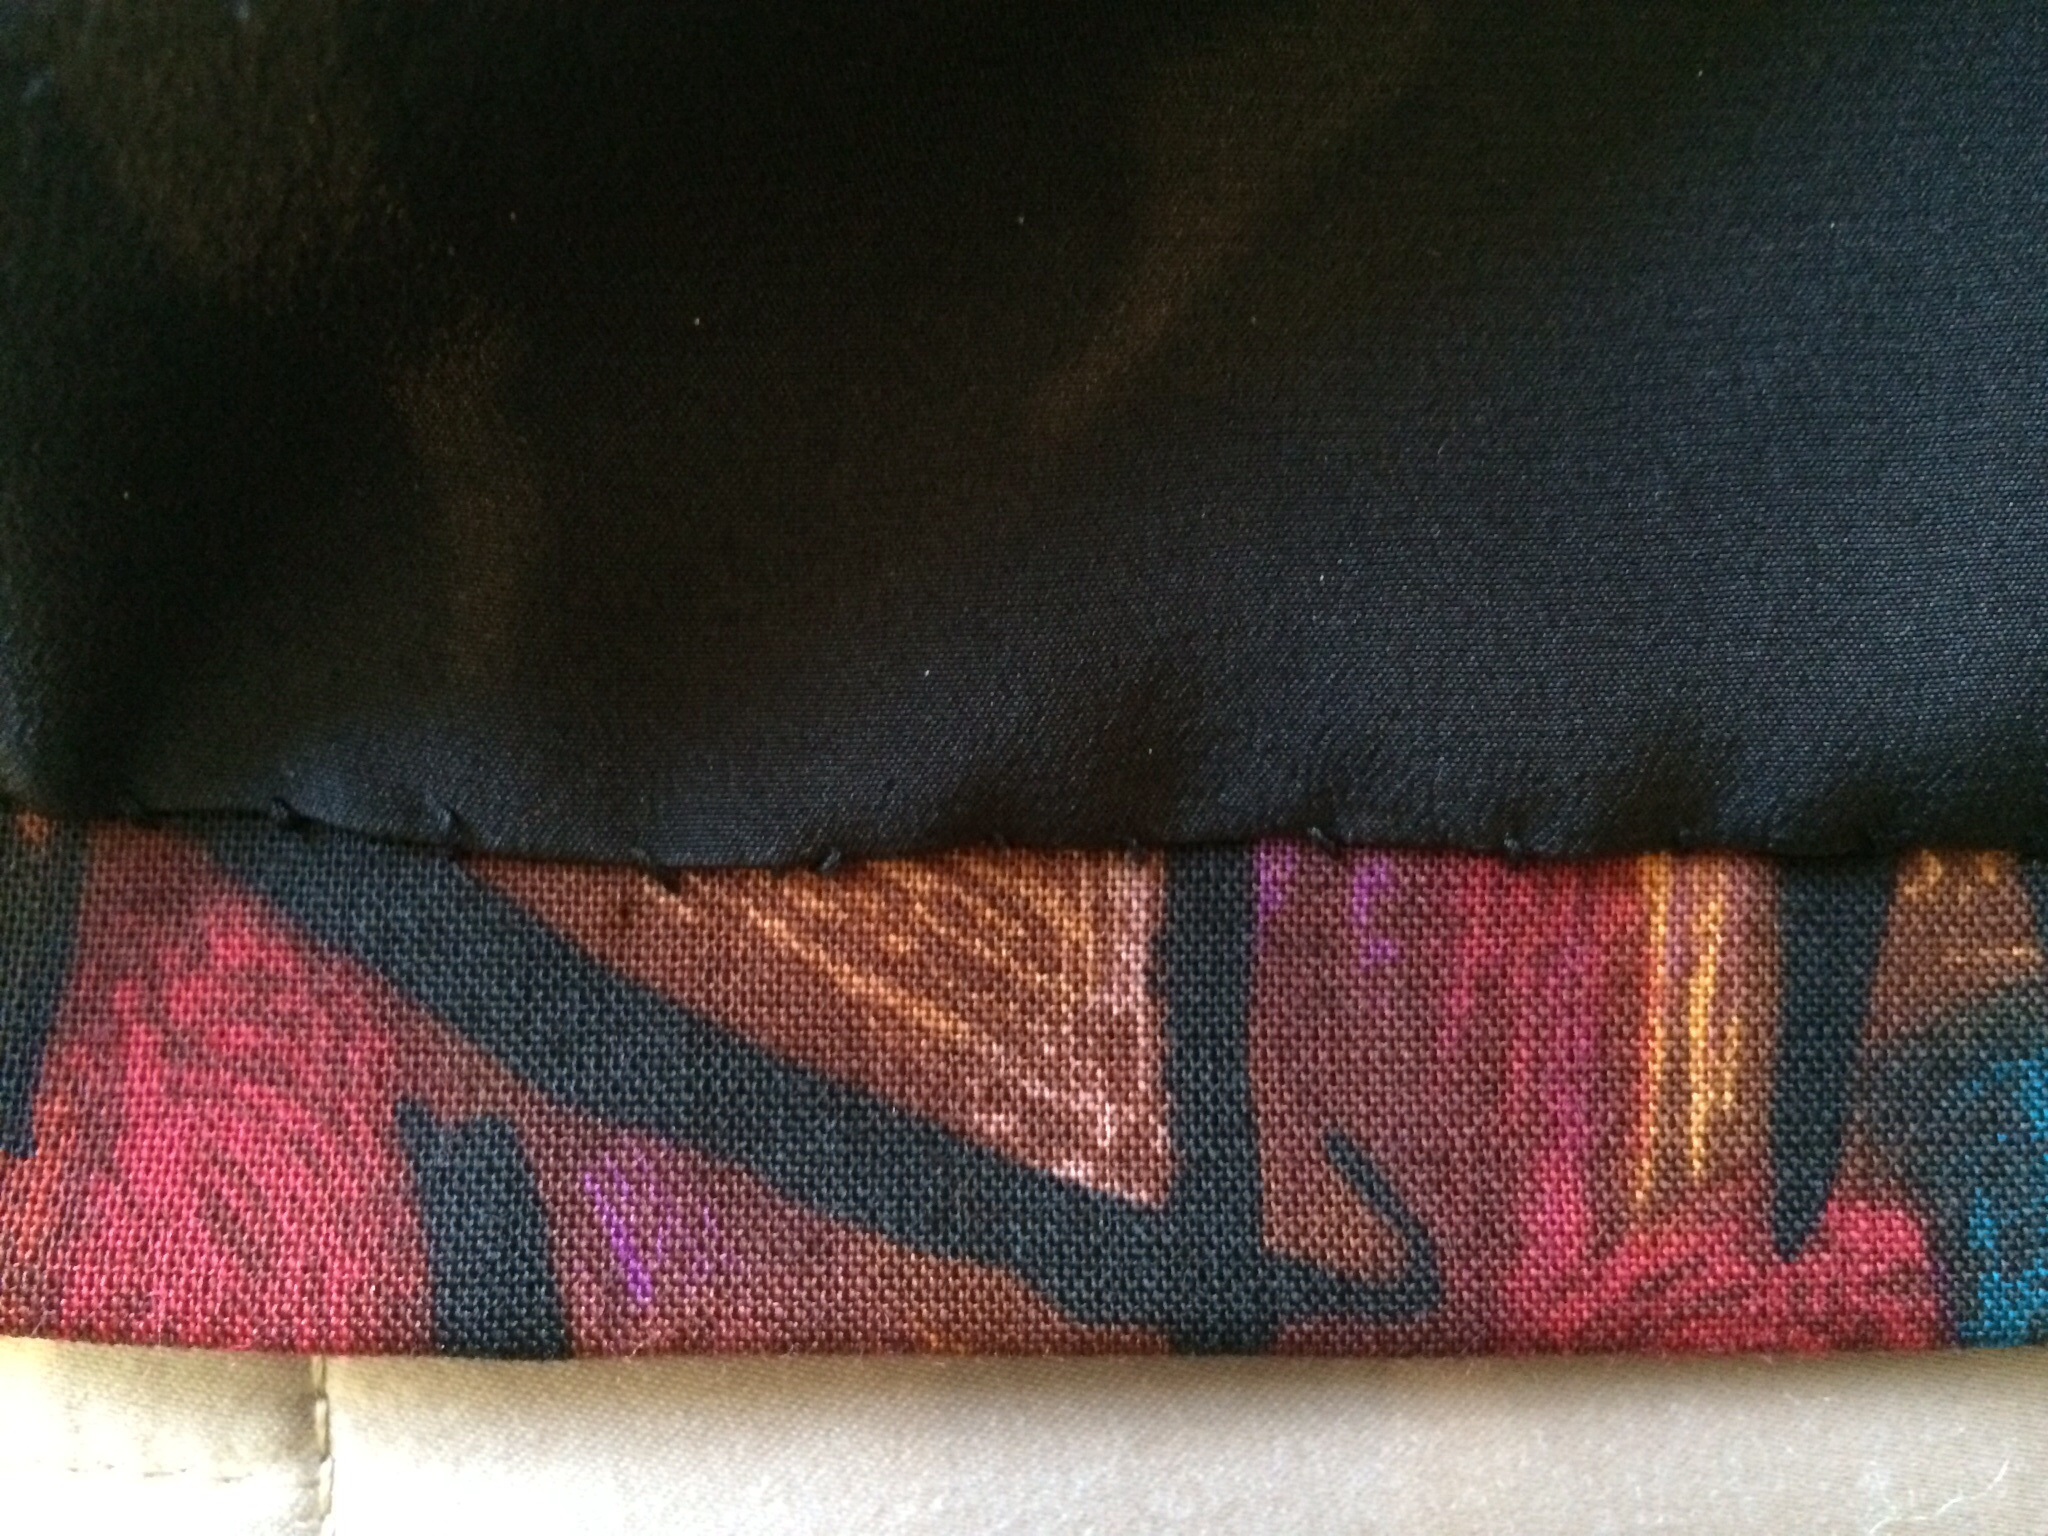
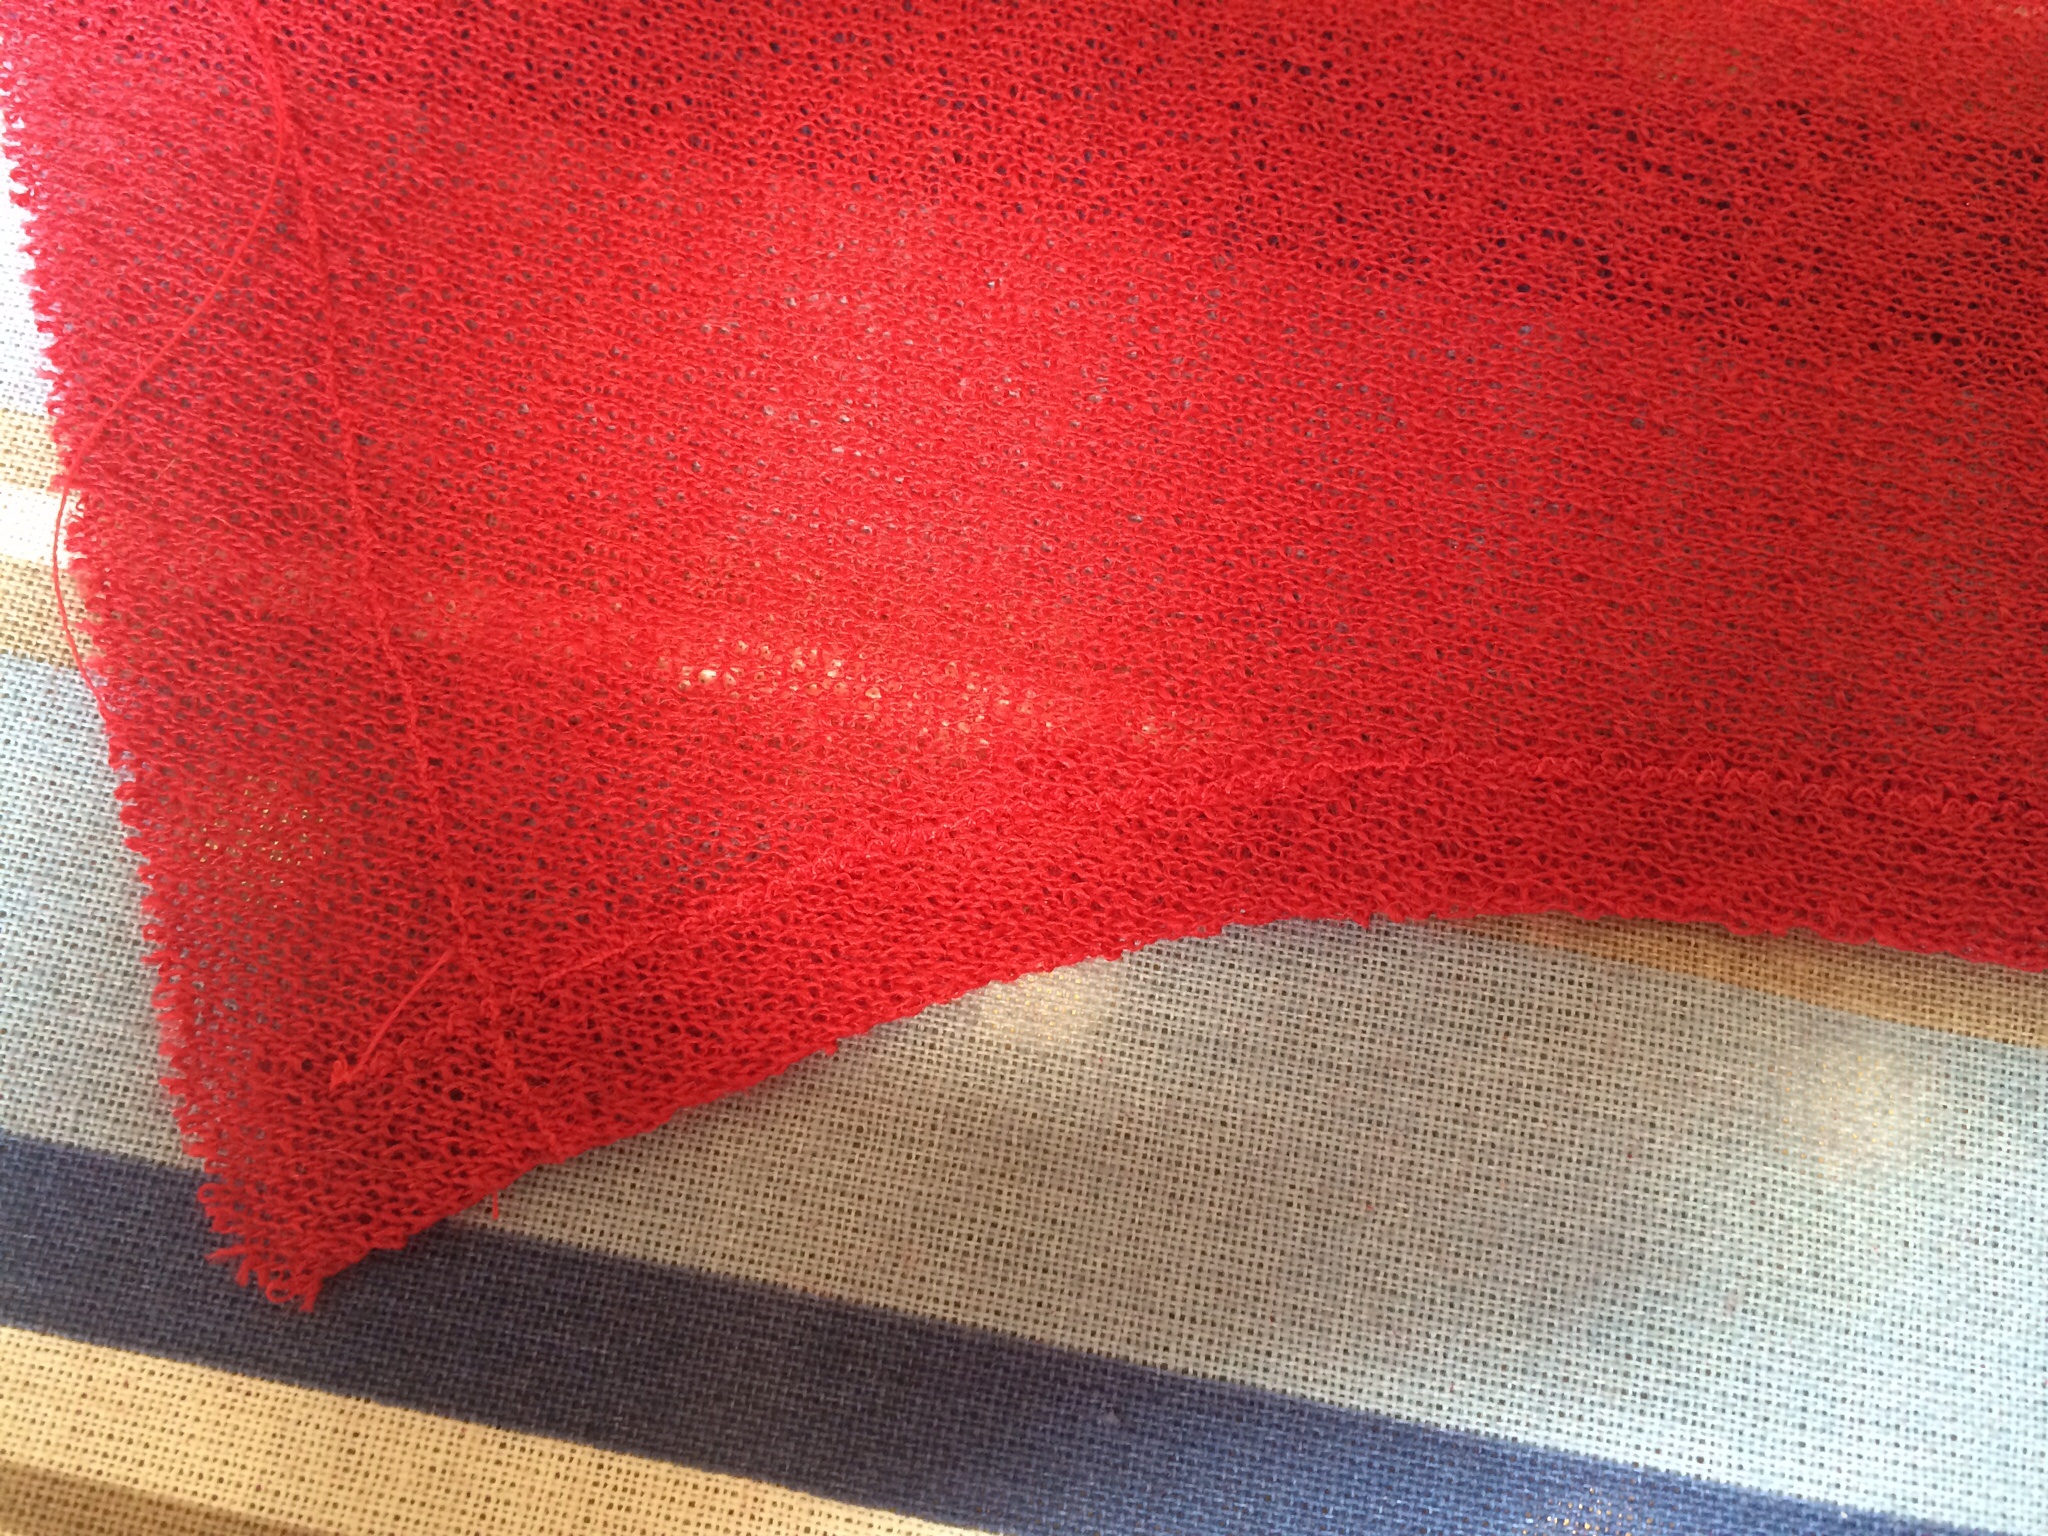
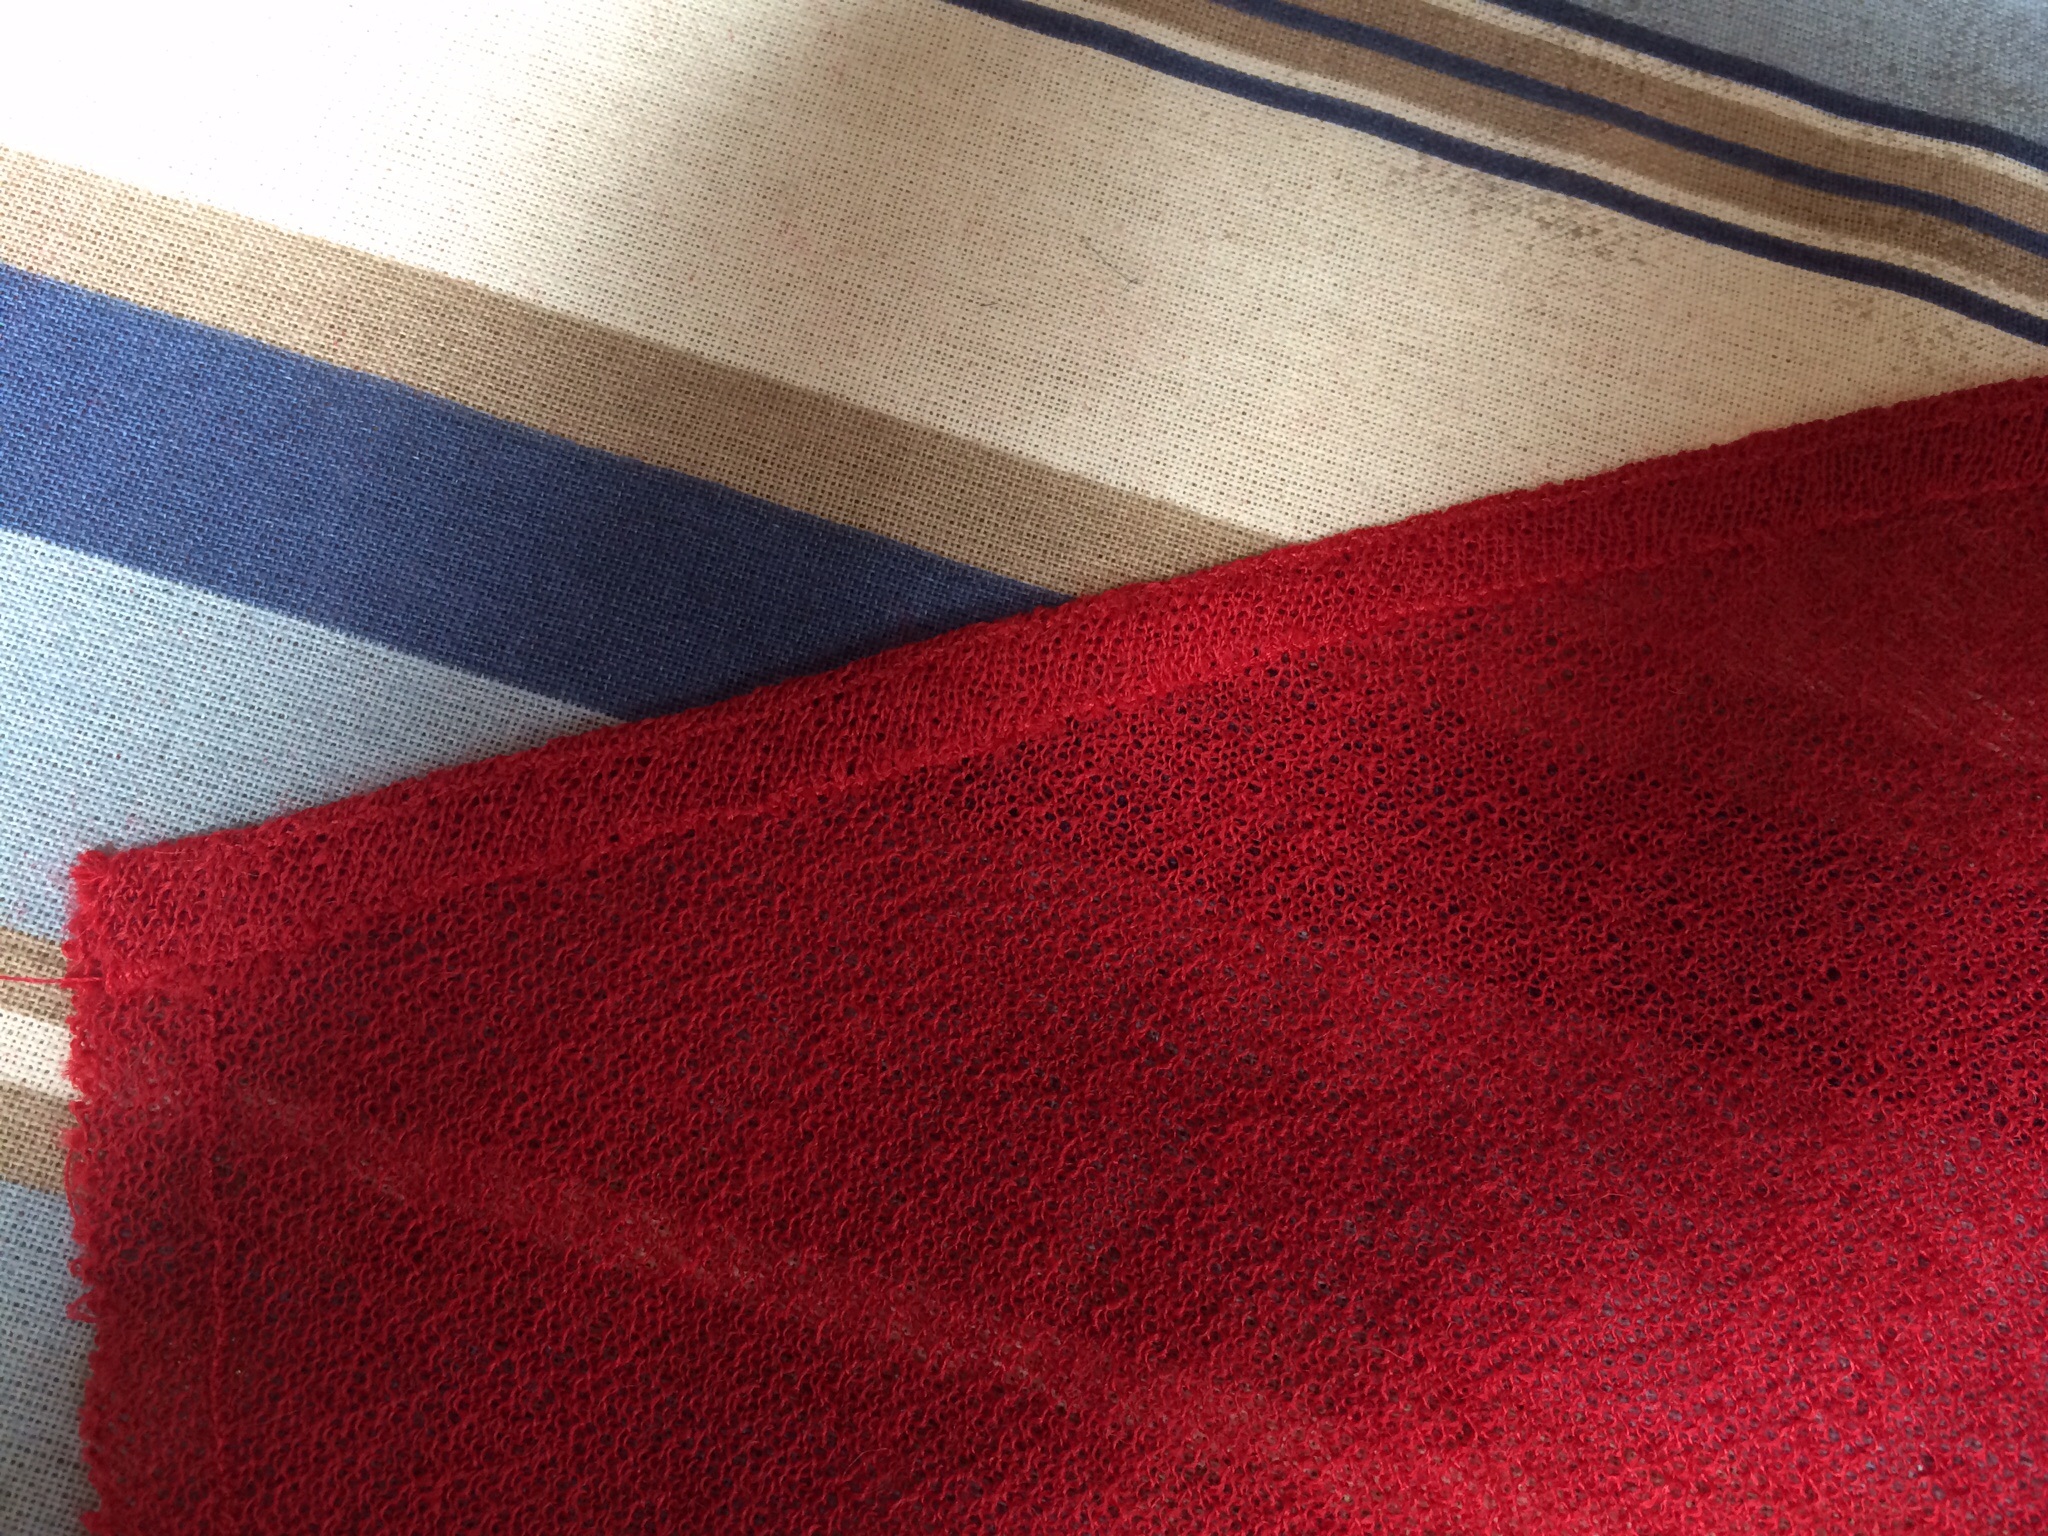
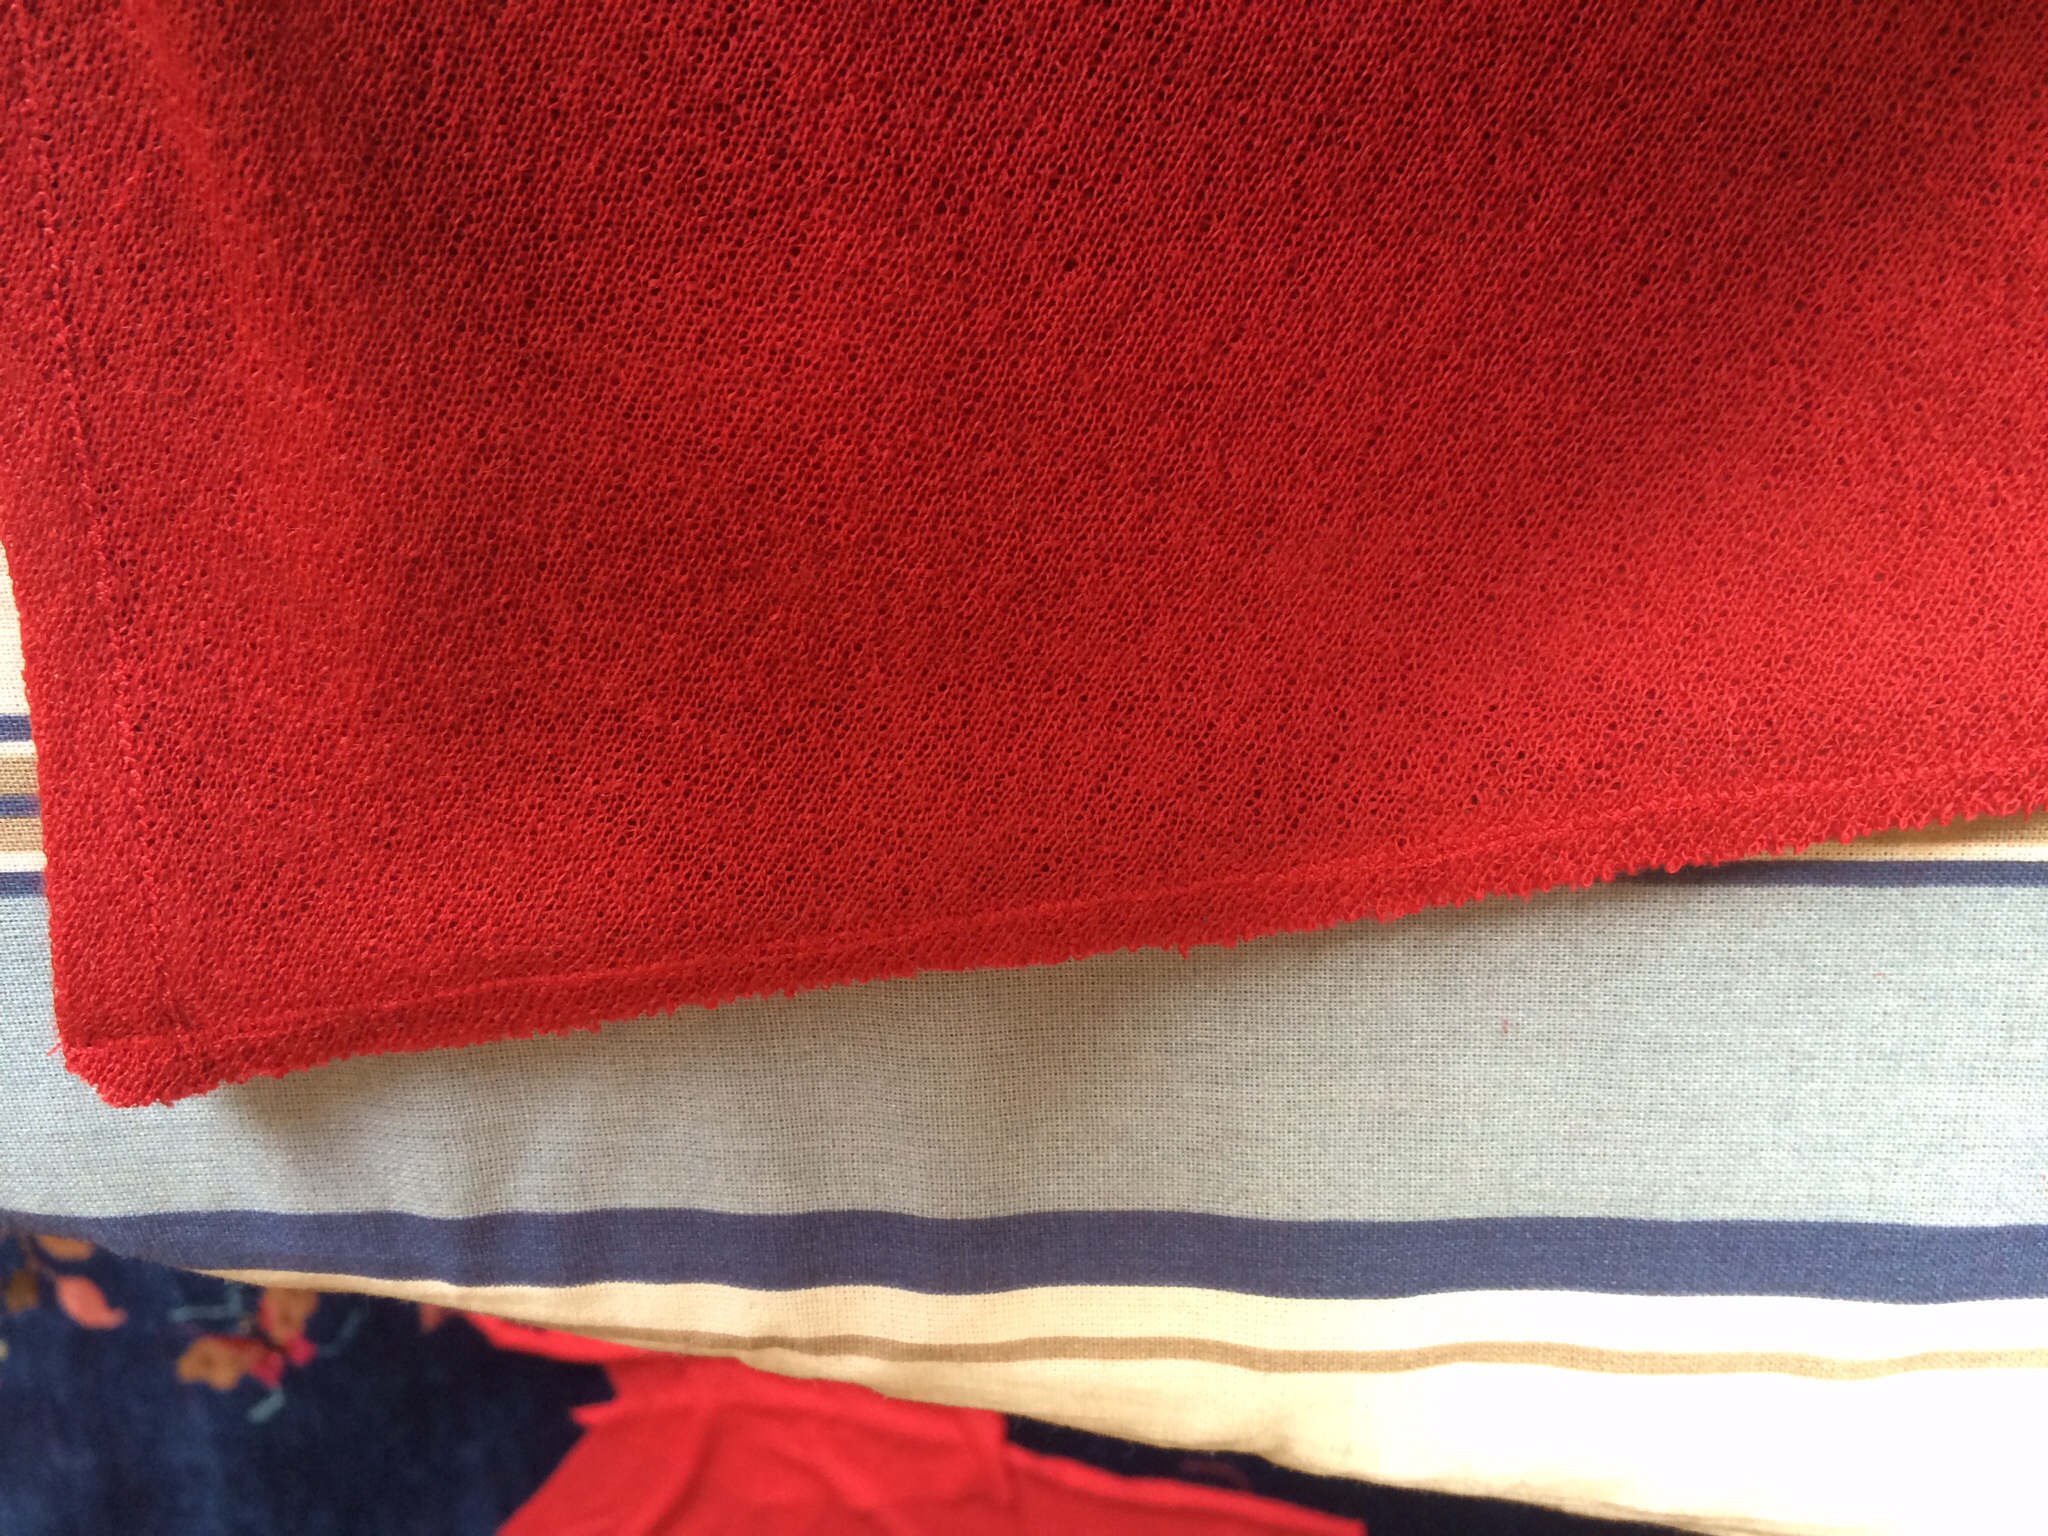
The most challenging part of remaking this dress was working with lightweight cotton jersey. Those little roll-y edges! I had worked with wool jersey plenty, but if you press those edges before sewing, they’ll stay put for awhile. All I had to do was breathe on the cotton jersey and the edges rolled back up again, making the seams very difficult to sew. (I don’t use a serger.) Grrrr! I finally ended up using Steam-a-Seam to stabilize the seams and hems, because it’s what I had around.

IMG_3234

It does give you nice hems on knits!

IMG_3242

This dress has a very similar structure to the bodice of Marilyn Monroe’s “Seven Year Itch” dress, designed by William Travilla, which starts with pleats at the neckline and is gathered again under the bust.

Seven Year Itch on Marilyn

The good thing about all of the volume in the gathers, though, is that jersey doesn’t cling to your lumps and bumps.

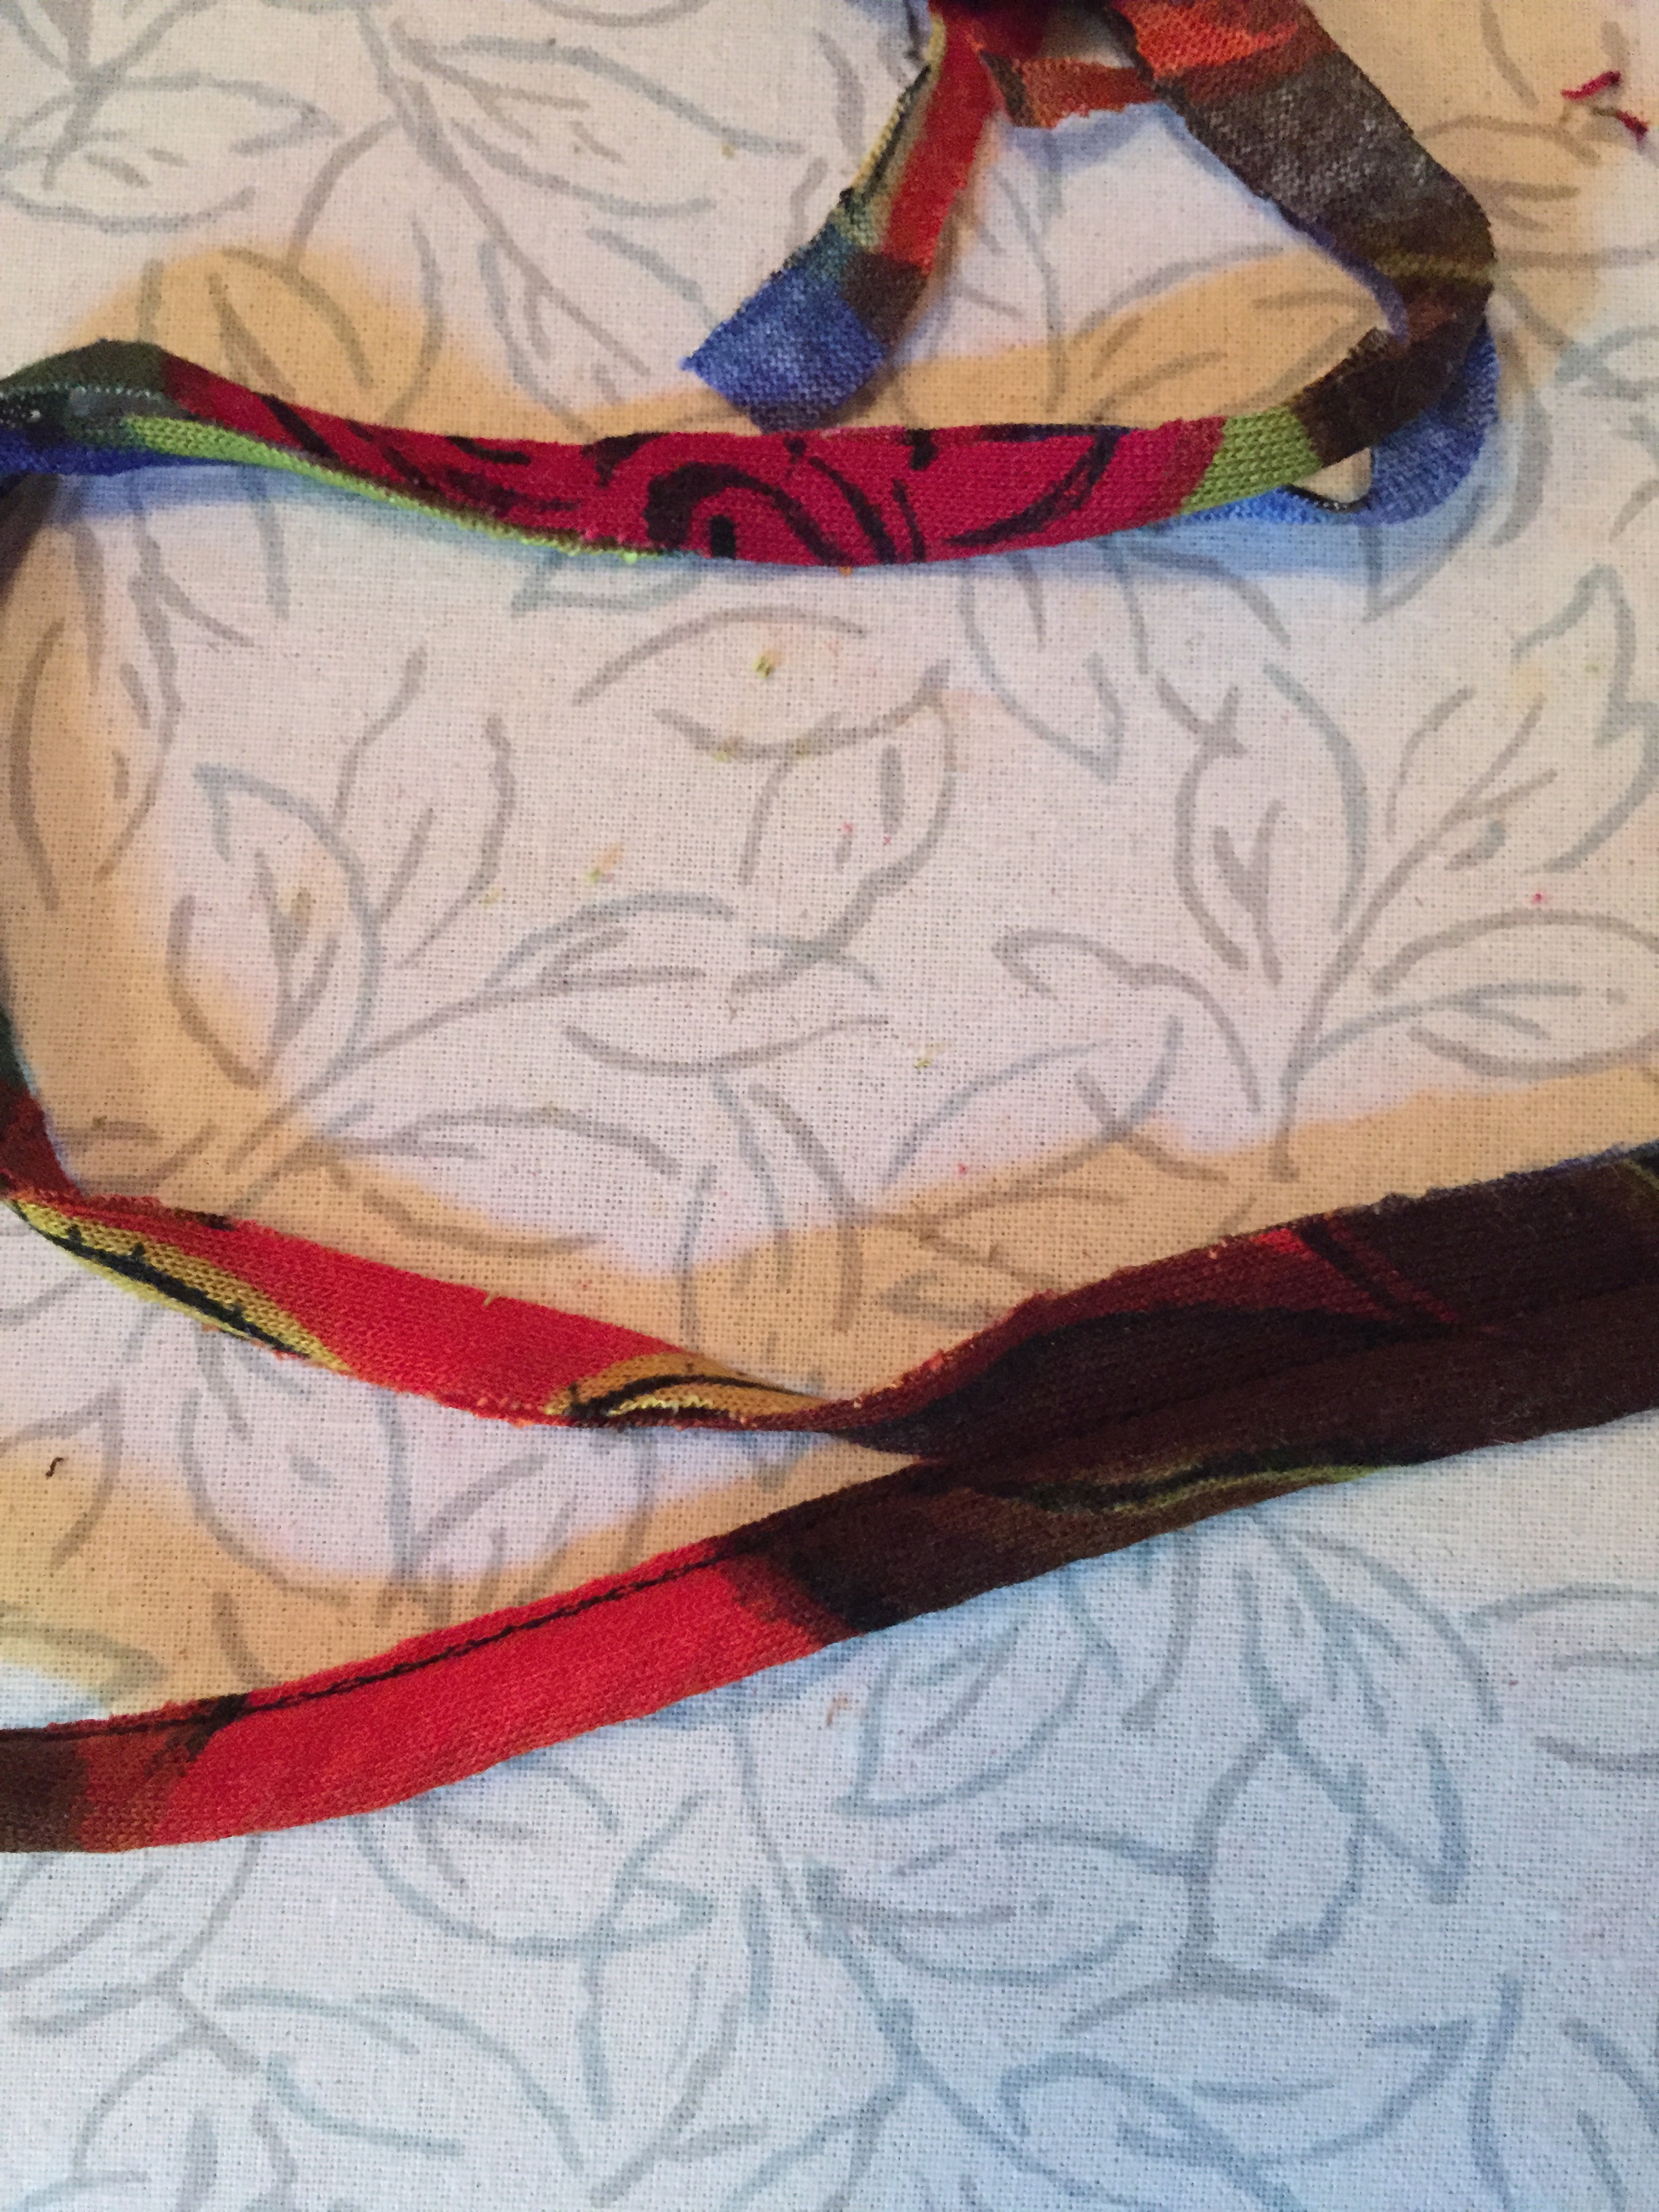
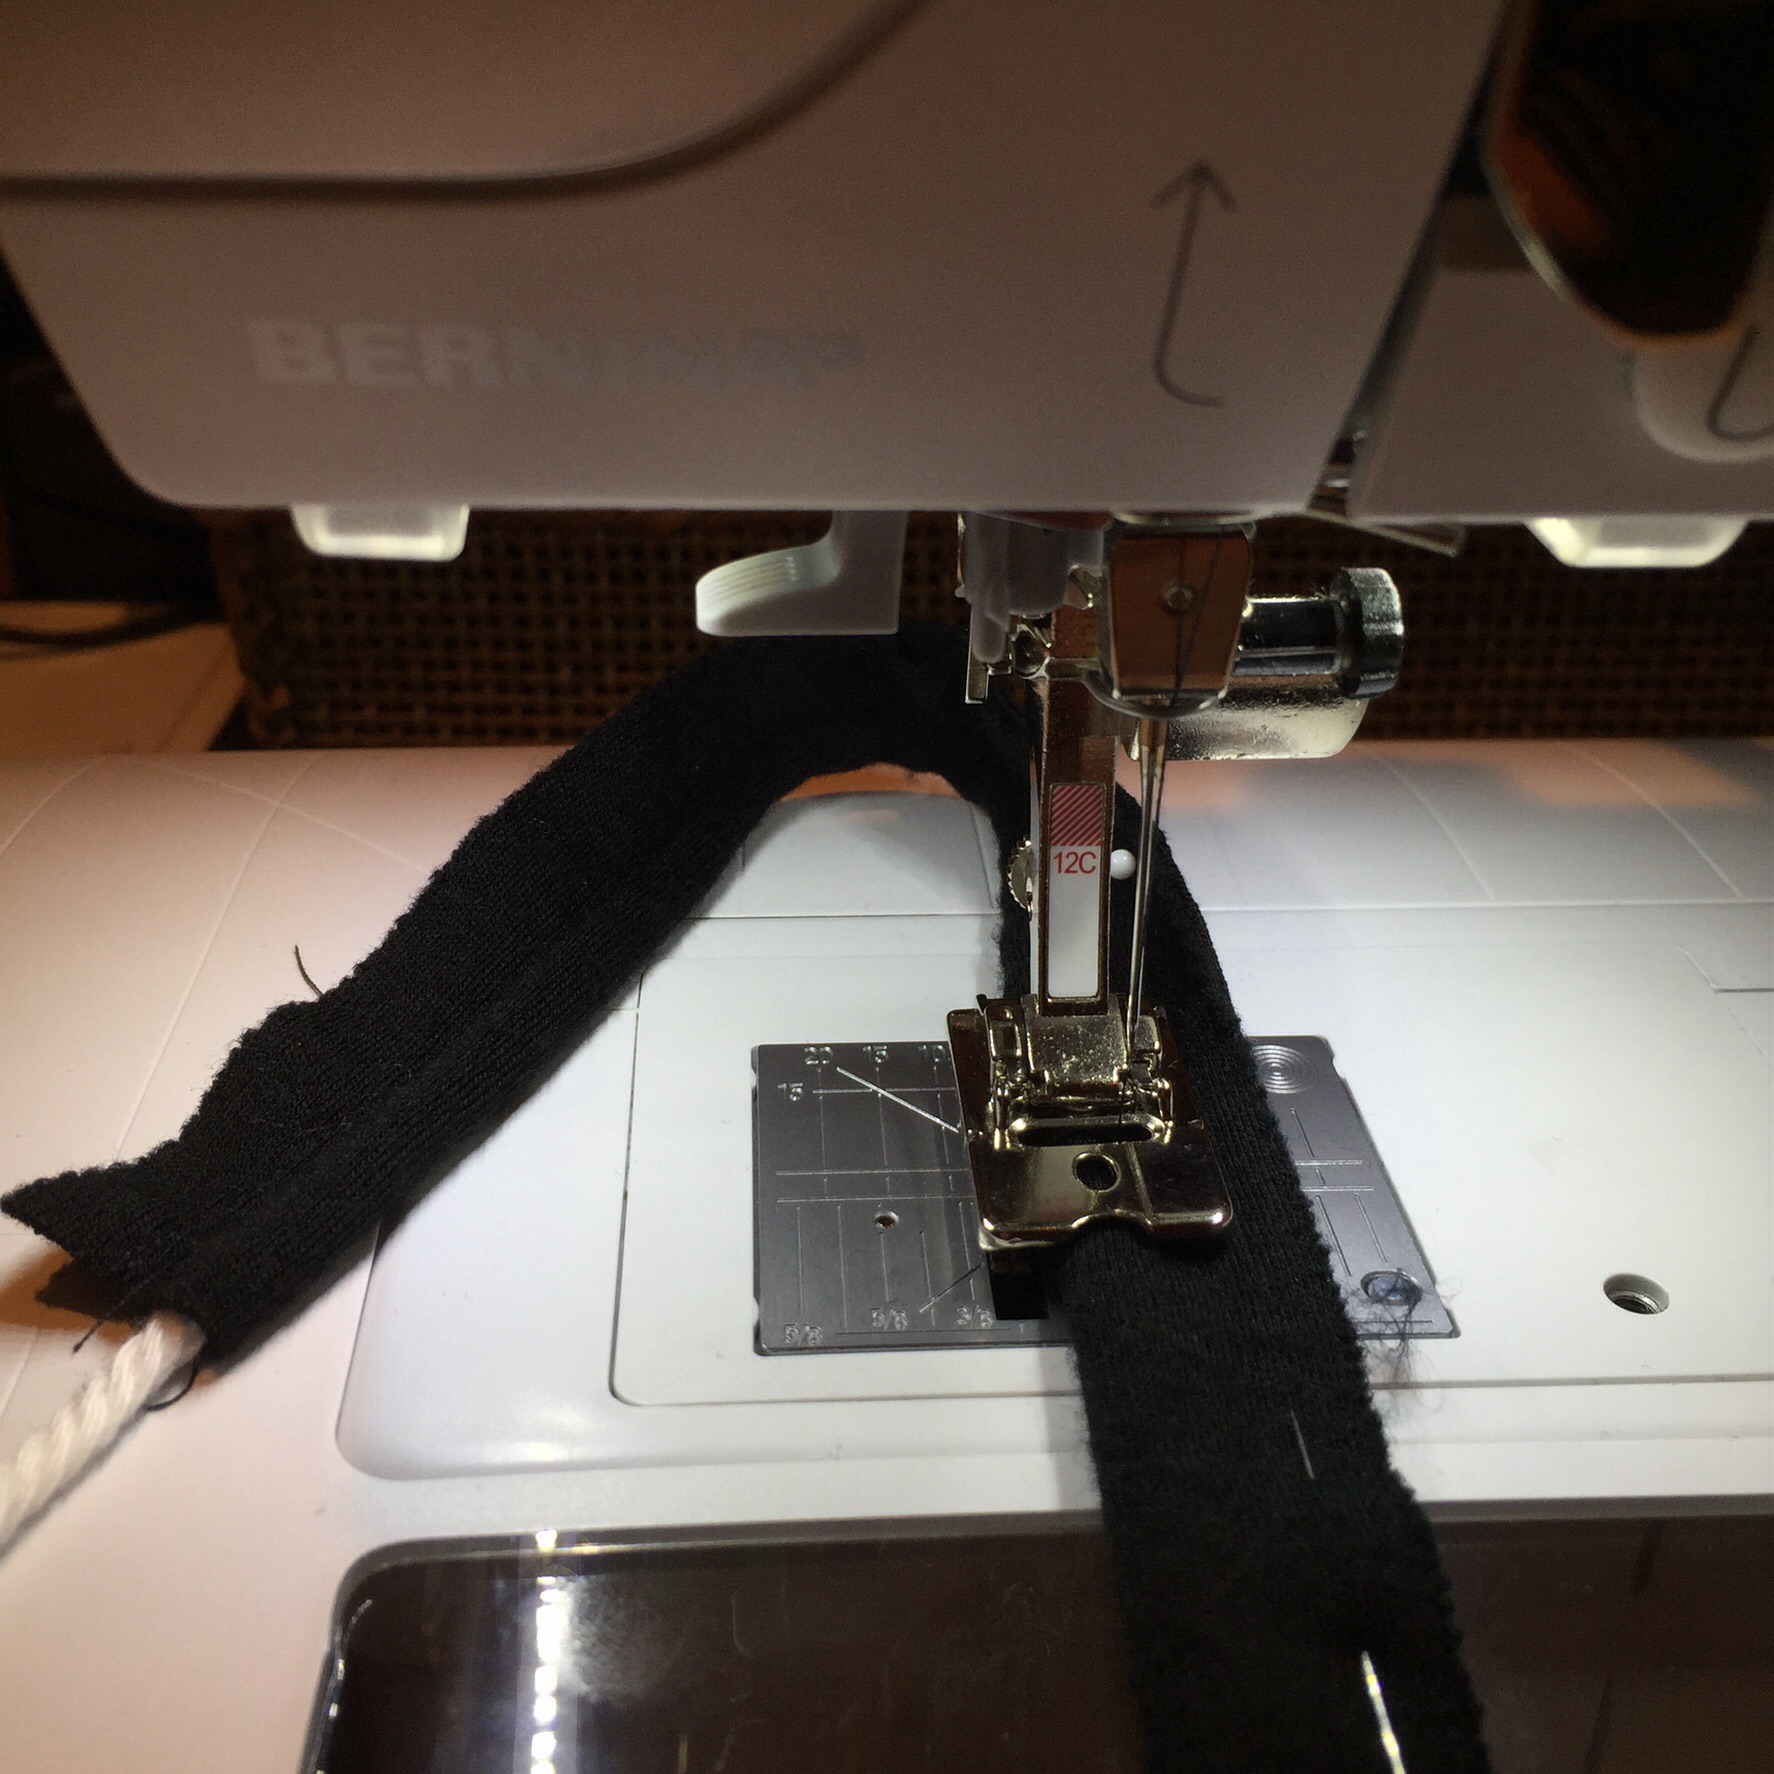
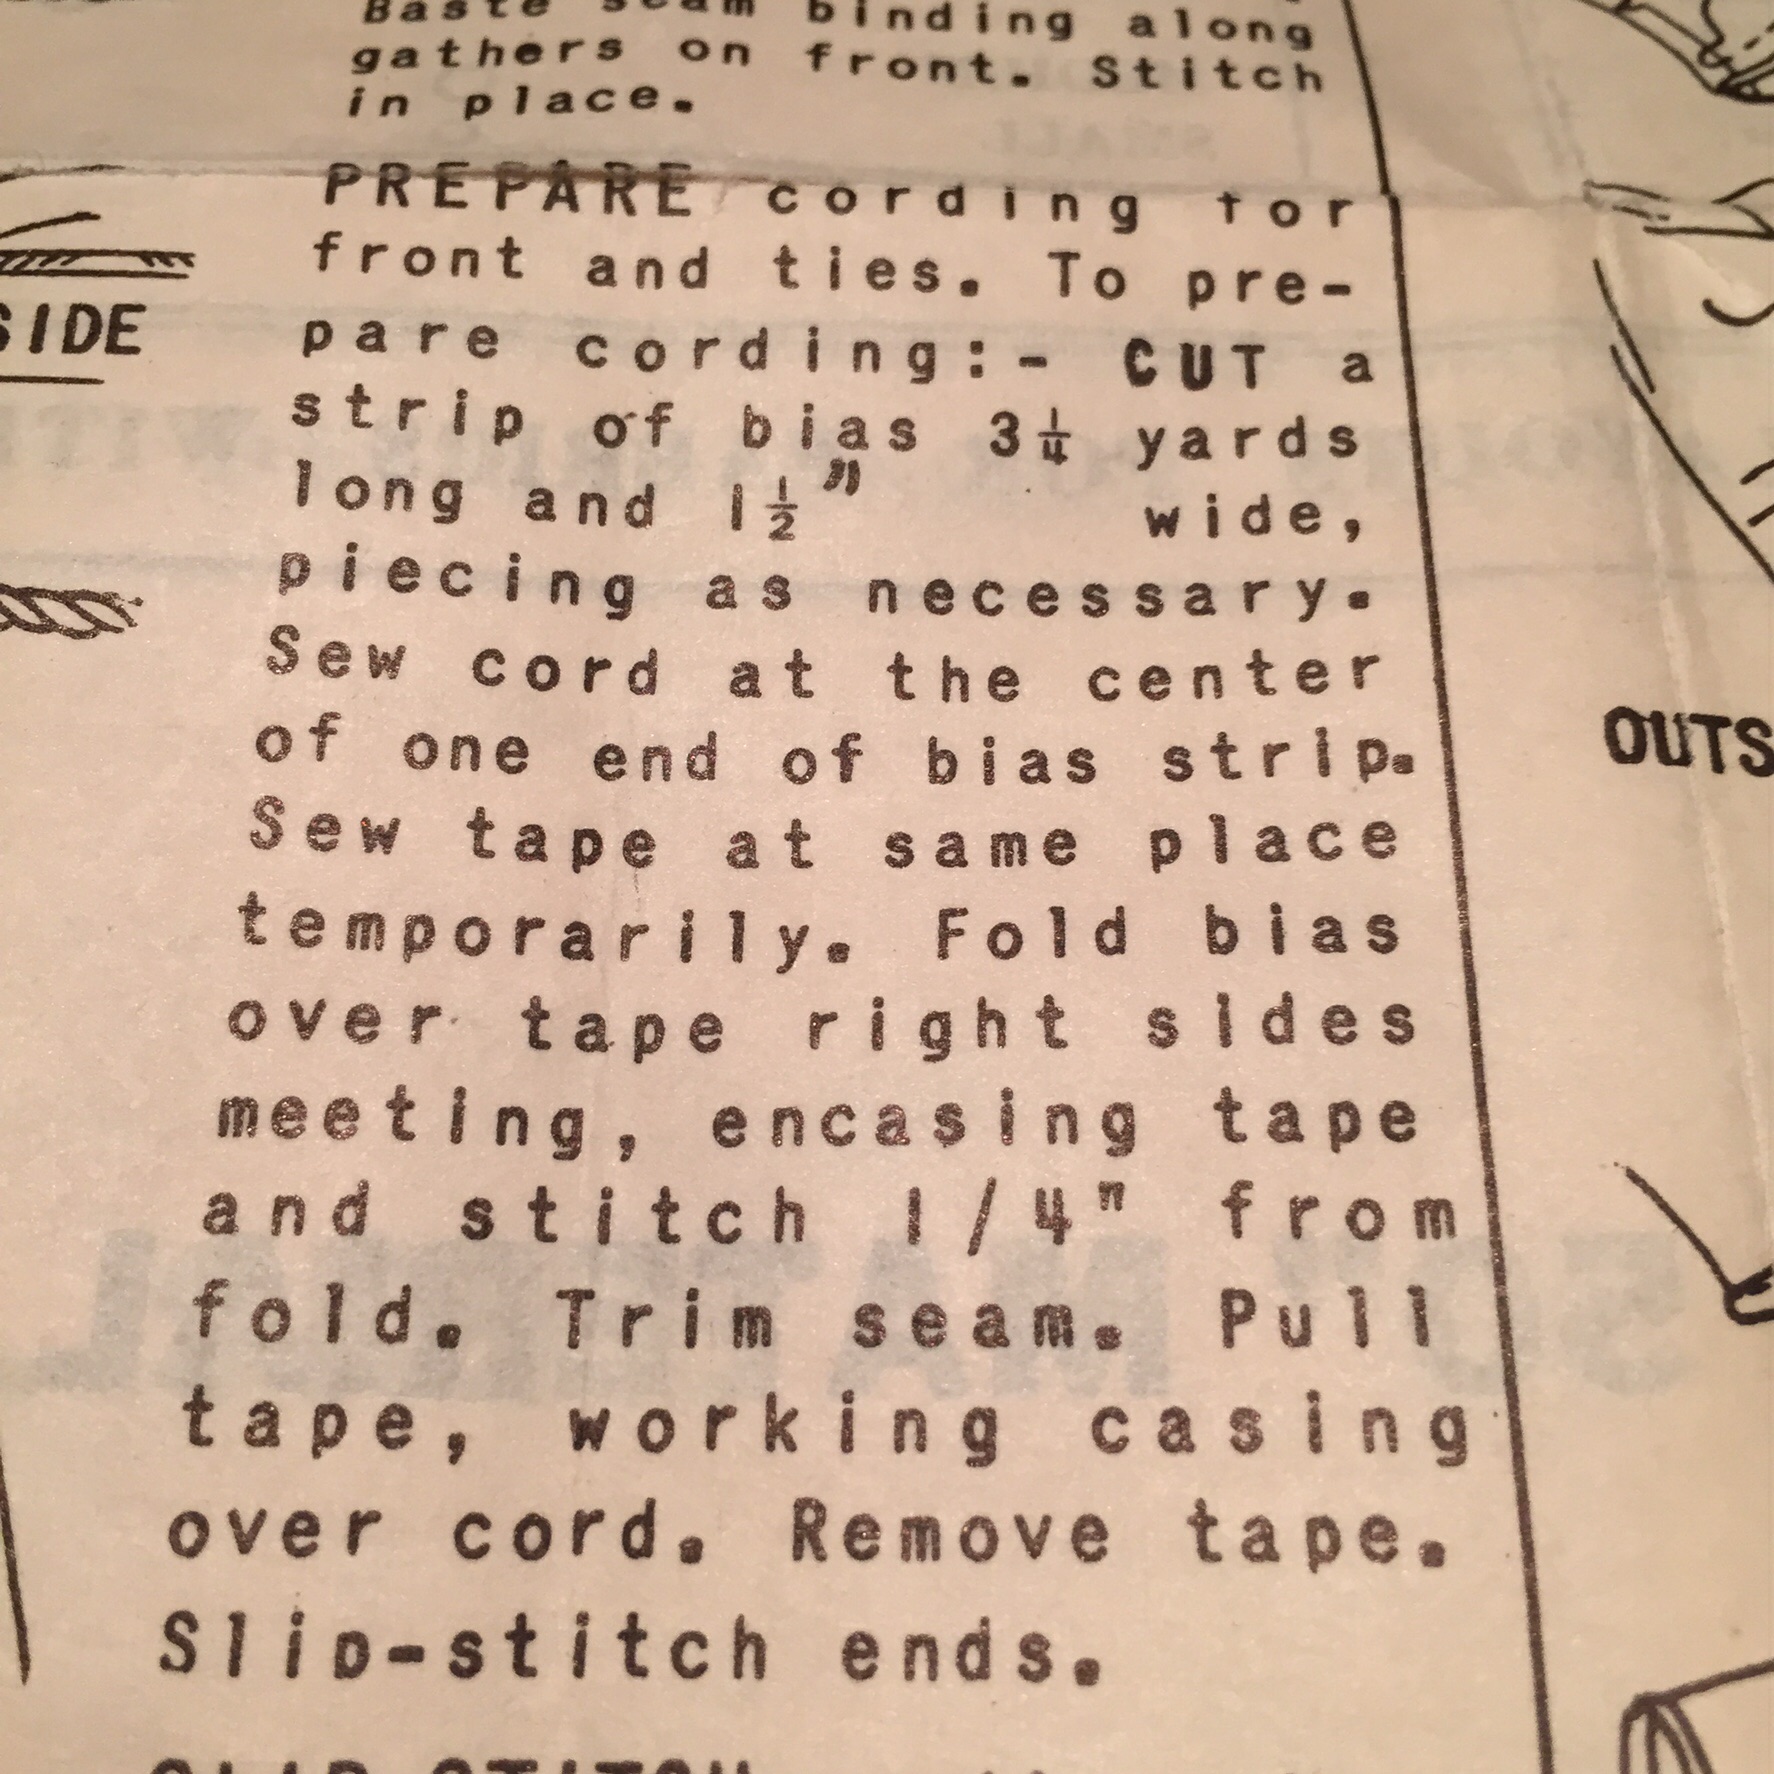
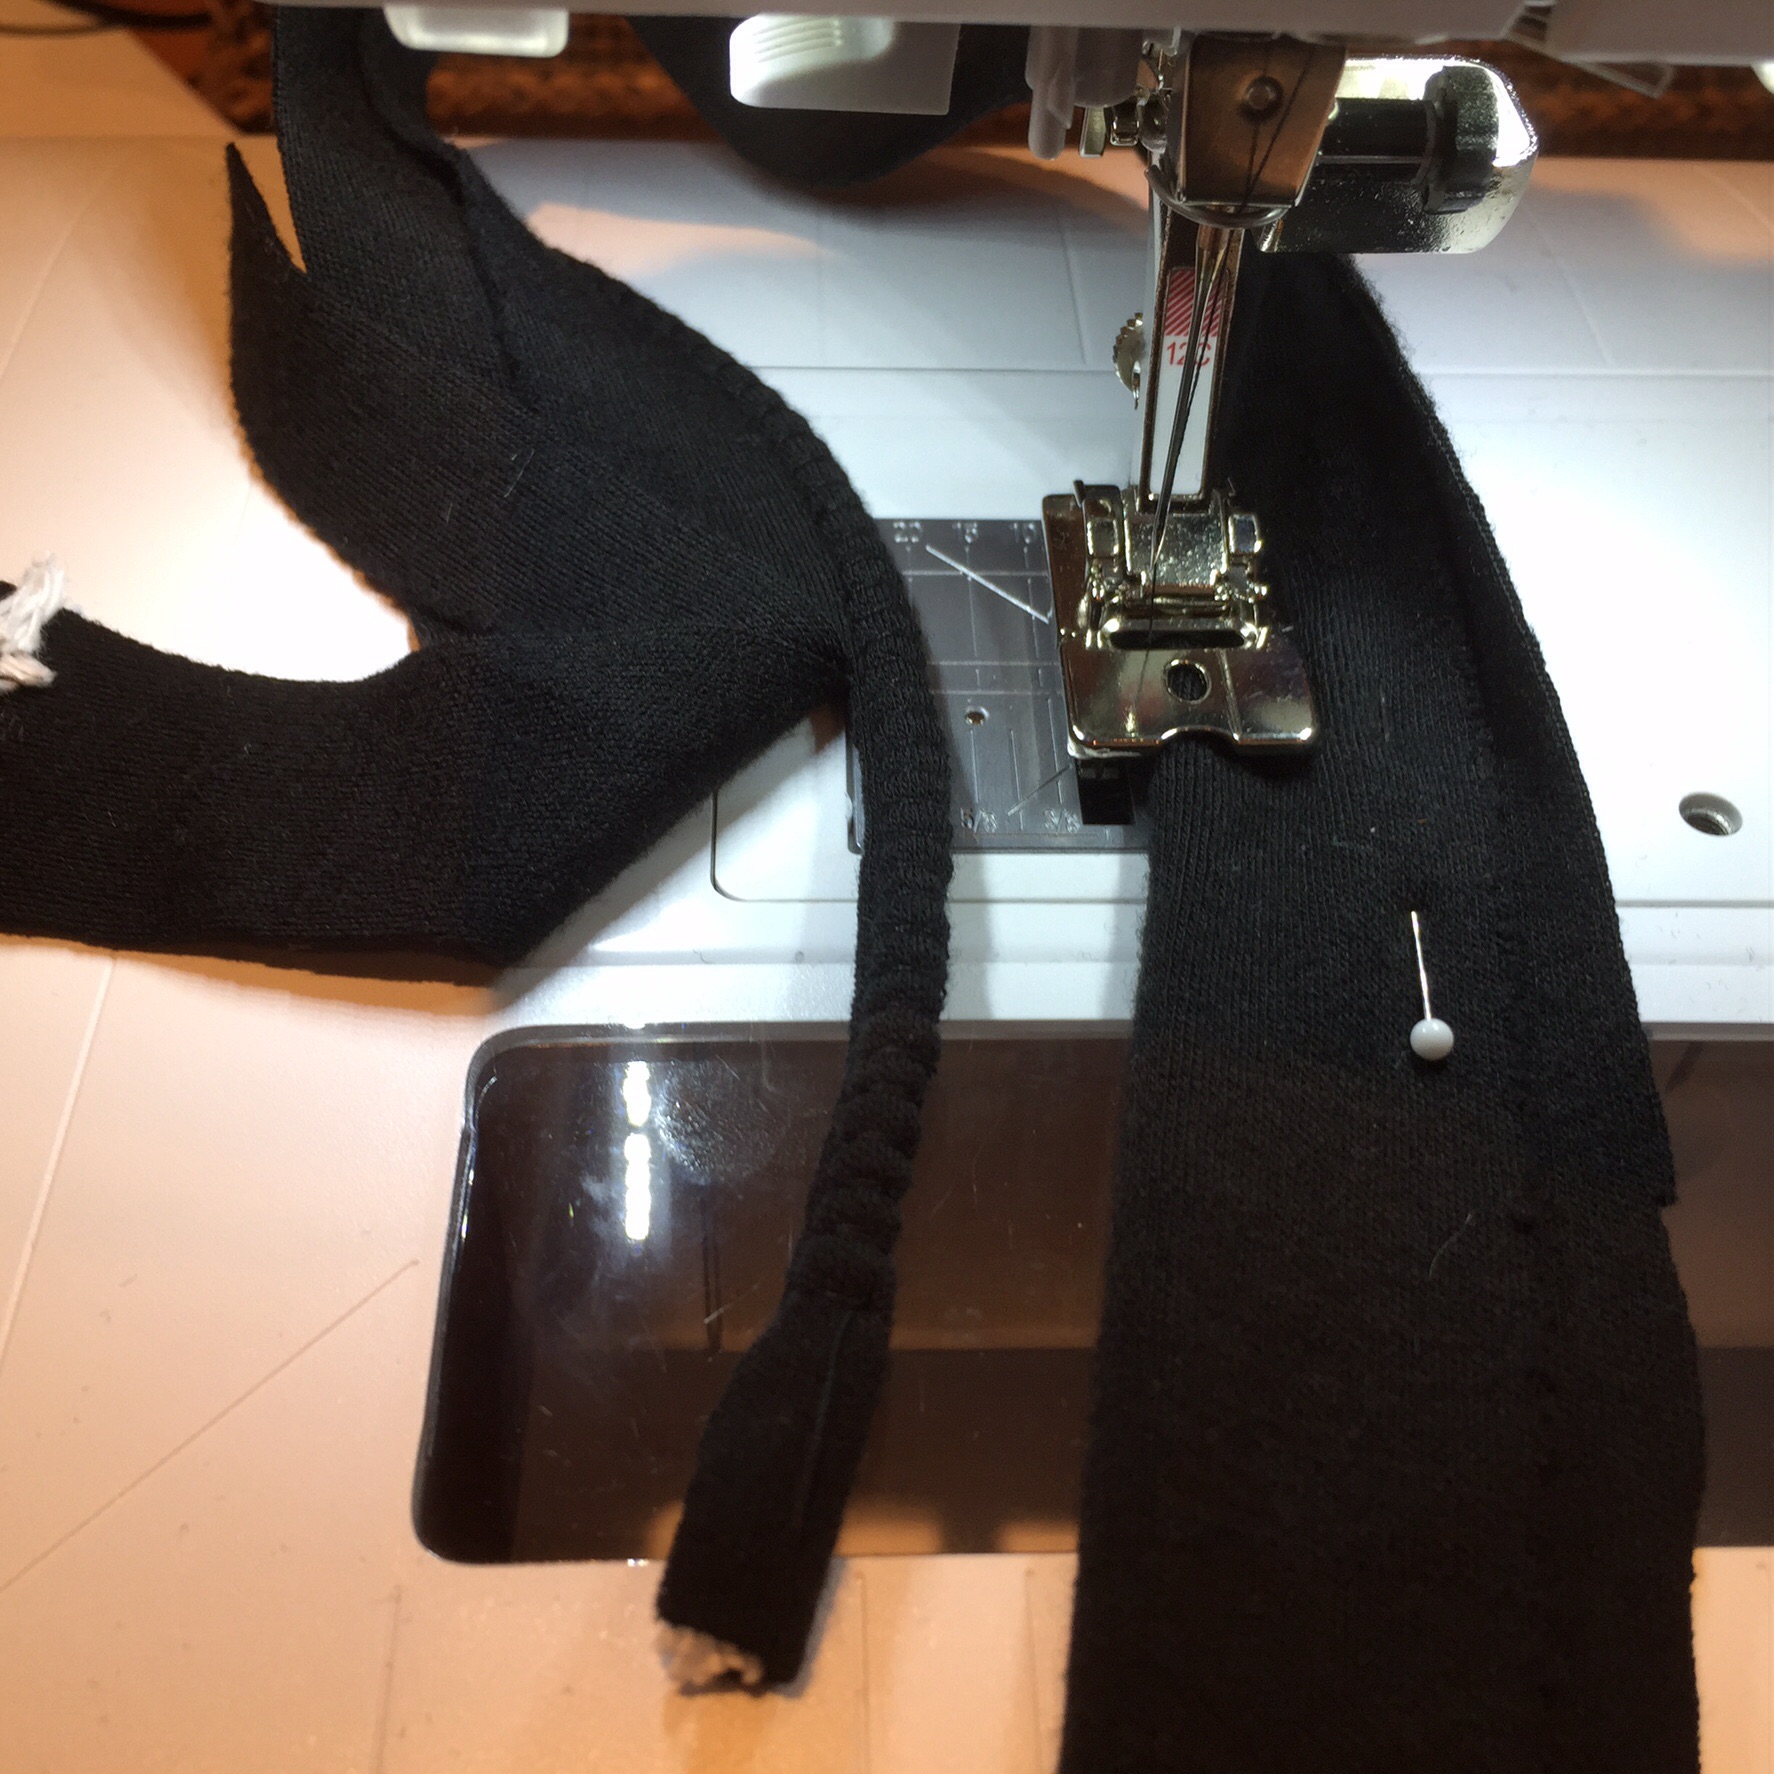
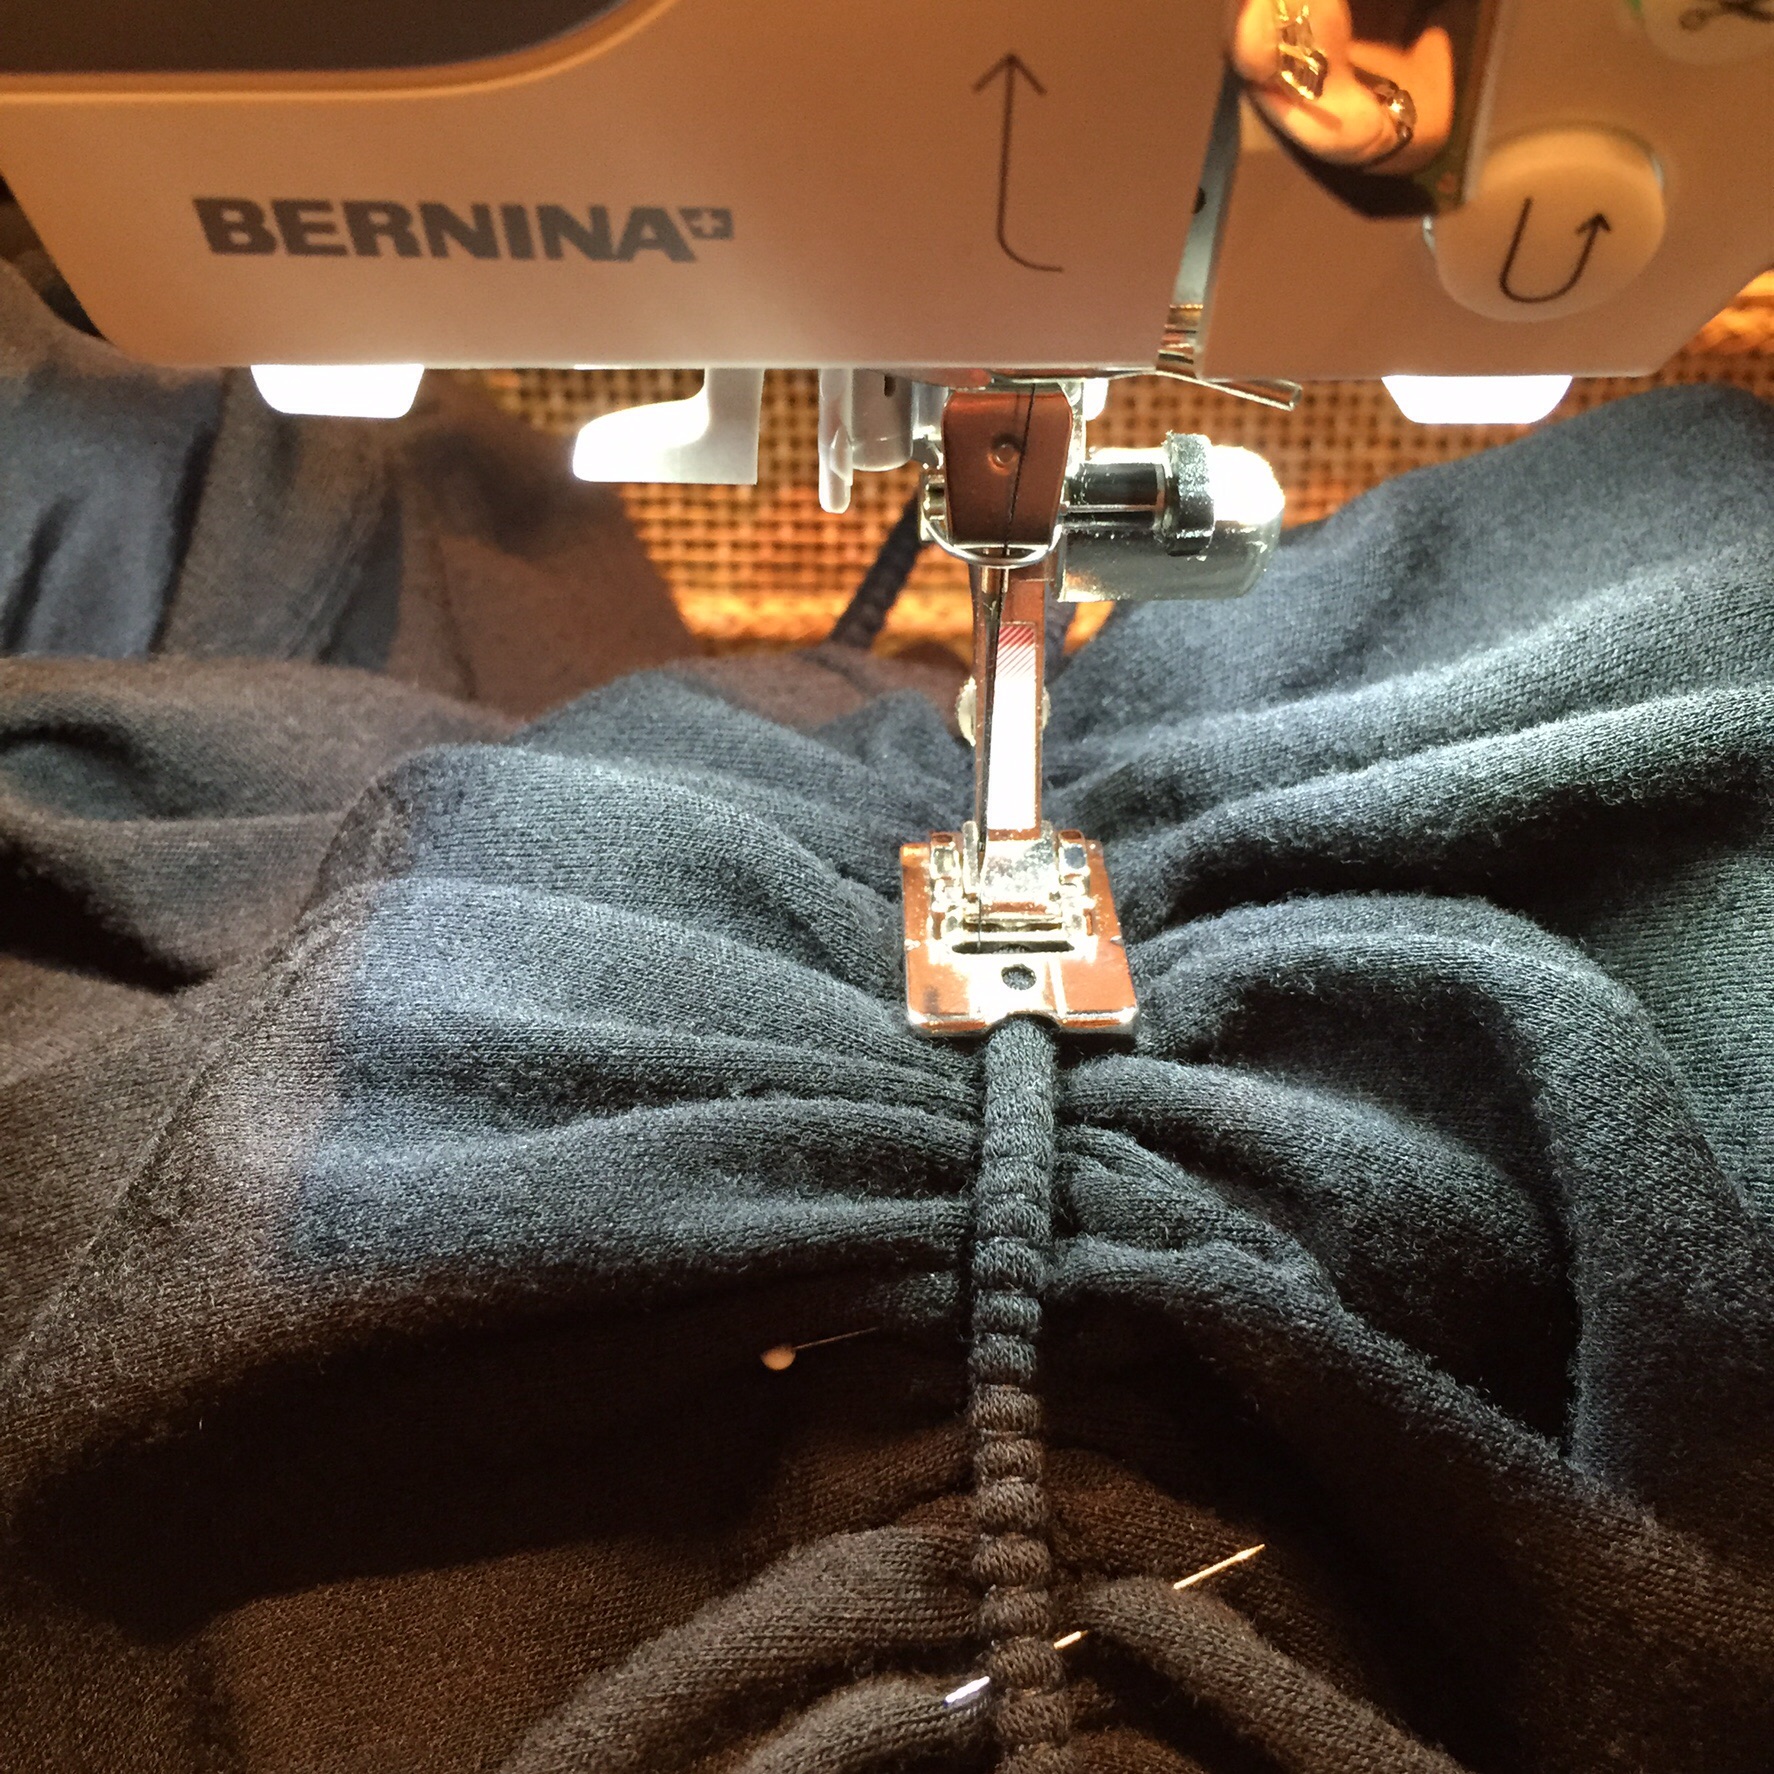
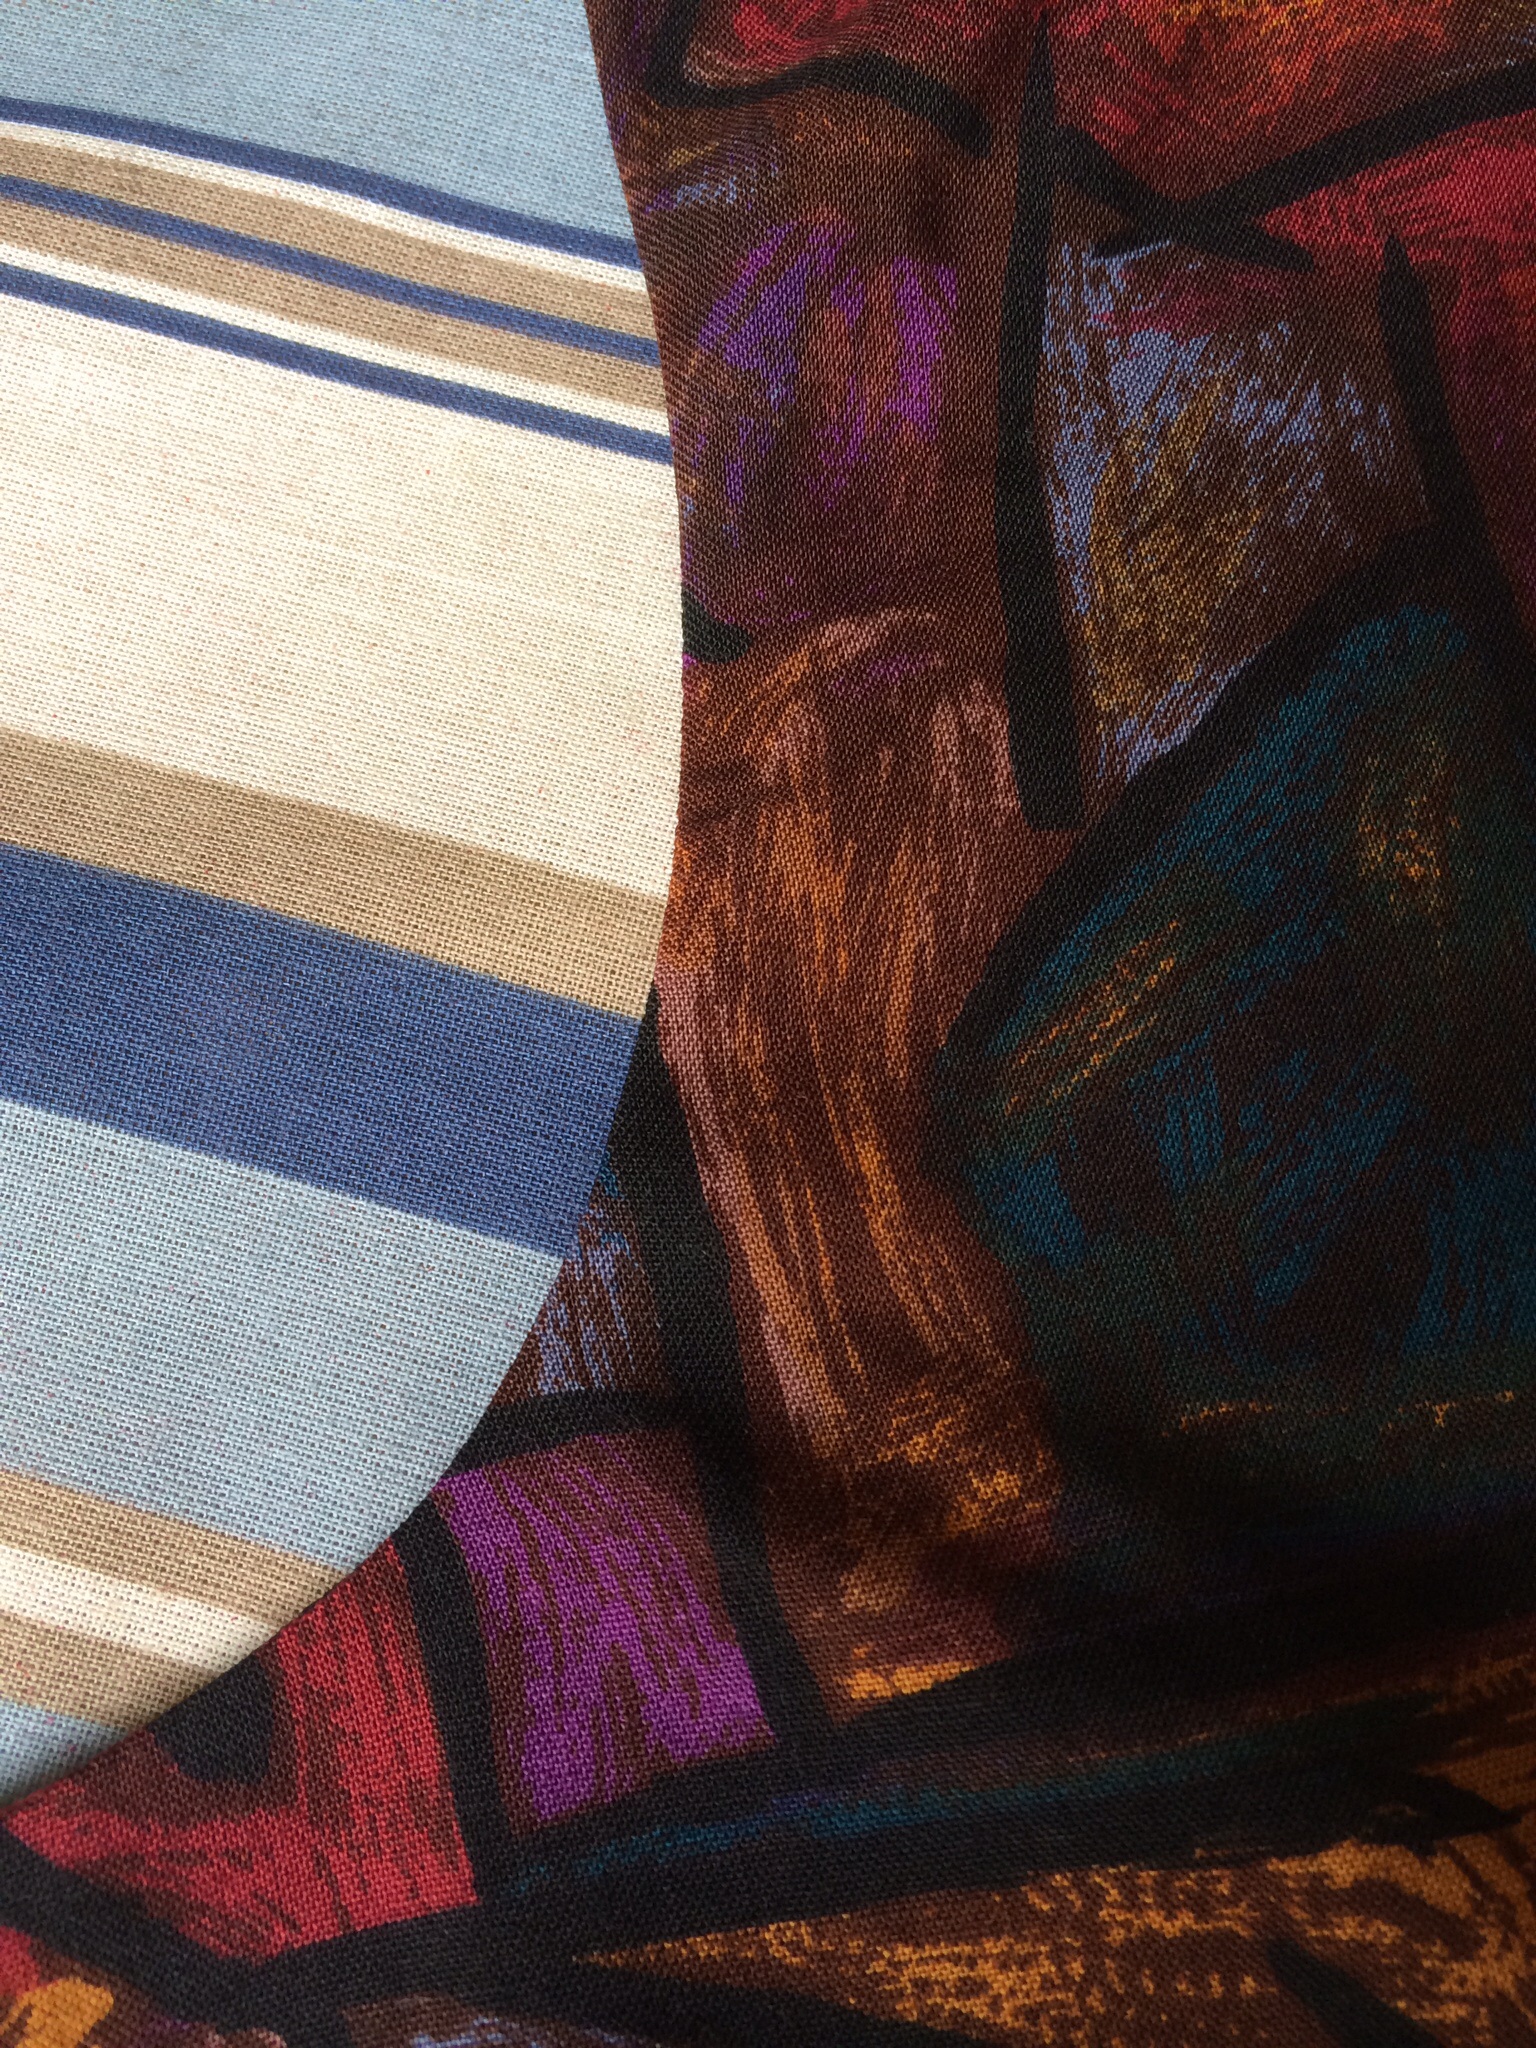
I made McCardell’s famous “spaghetti strings” using some scraps of vintage fabric to create more than 5 yards/meters of piping:

IMG_3381

I stitched it twice, then trimmed close to the stitching:

IMG_3383

So comfortable to wear! The volume of the gathers really gives it movement.

image

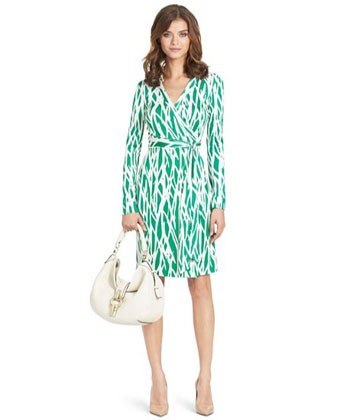
Here’s Writer/Actress Mindy Kaling, wearing a similar look in InStyle Magazine a few months ago.

IMG_2544

It never goes out of style! Now out to the backyard, to thoroughly embarrass my family with some Isadora Duncan dance moves! Tra la! How’s your sewing going?

A Claire McCardell Bolero UFO has landed, just in time for International UFO Day!

34

Do you ever have that experience where you’re rooting through your stash, and you find some fabric pinned to a pattern piece that’s already cut out? And then you think, “what the heck is this?”

In honor of “International UFO Day,” (on Thursday, and thanks for the heads up about that, Instagrammer “mesewgood”) here’s a report about a Claire McCardell bolero, cut out in October, finished in June!

I don’t have a lot of UFO’s (Unfinished Objects) because I don’t have a lot of space during the winter, and my sewing things are constantly coming in and out of a closet. The only exception is my husband’s “Christmas Tie,” renamed his “Birthday Tie,” then his “Father’s Day Tie,” and now, his “Next Christmas Tie.” Someday I’ll be feeling it.

But back in the fall, when I made this Claire McCardell dress for my sister:

imageIMG_0567

(Here’s the post about making that dress.)

I had also cut out some pieces for the matching bolero, but ran out of time to put it together.

So that’s what was sitting in my stash. Already cut out? Why not finish it?

Well, one reason is that the exterior “fashion” fabric is the wool jersey that I used for the dress, and right now, this guy is Public Enemy #1:

IMG_2918

But I figured I could keep the pieces in a plastic bag when I wasn’t sewing, to stop Morris Moth and his many, many friends from munching my delicious merino. Mmmmm…

Reason #2, which I’d forgotten about since I’d made the Edith Head bolero, (here’s that post) is that a lined bolero is every bit as tricky as a lined jacket. Fortunately, this one has cut-in sleeves, as many McCardell designs do, so I didn’t have to set in sleeves four times.

So I forged ahead.

For lining, I used knit jersey from International Silks and Woolens in L.A., which has vintage fabrics on the third floor. This is some kind of acrylic from either the 50s or the 80s, but it feels like cotton jersey.

IMG_0122

I bought it because it reminds me of the “Modern Masters” fabrics, issued in the 50s, which used designs from famous artists like Picasso and Chagall. McCardell designed a number of garments made from that fabric. Here’s some info about Modern Masters fabric from the Cooper Hewitt museum in New York. Lizzie of The Vintage Traveler has also written about Modern Masters.

The bolero pattern is cut as just one piece that connects via a center back seam, goes over the shoulders and is sewn under the arms. It’s a very clever pattern draped in McCardell’s unmistakeable style.

And did I mention that it has piping? Sandwiched between the layers? “Hunker down over that ironing board and start pinning, sister,” I heard a little voice (Karl) say.

Actually, it’s pretty easy to make piping with this Bulky Overlock foot, so I stuck some cording in a 2″ strip of fabric and got going. Since this a knit that will stretch, I didn’t bother putting it on the bias. I read recently that you should make the stitching by the piping loose while you’re making it, then closer when you attach it, to keep the seam along the piping smooth.

IMG_2859

I made the piping in loops to attach to the neckline/front/back and the sleeves.

IMG_2860

So far so good. Then, looking at the directions…la, la, la…whaaaa?!

IMG_2875

This early 50s pattern is telling me to “bag” the lining? And look at those directions. Clear as mud! (“Bagging” a lining is a method where you attach most of the lining to the exterior by machine, and work on parts through a little hole, and it’s kind of like a Mobius strip, and yiiii!)

Fortunately I’d read about bagging linings in the past and then got a headache and drank a glass of wine. But I knew the piping would look better if I bagged it, so I gave it a go.

First I connected the neckline, center front and sides by machine, sandwiching the piping inside. I used lots and lots of pins for this nervous-making endeavor!

IMG_2870IMG_2878

I graded (trimmed the seam allowances at different levels) the four layers of seam allowances between the exterior, piping and lining, and pressed.

IMG_2885

I was a happy girl!

Then the tricky part…figuring out how to get the sleeves and lining put together, with the piping inside, without hollering at everyone in the family, who were stopping by frequently to find out whether they would ever be fed.

IMG_2872

Not for the faint of heart, but it did work! So I graded and pressed the sleeve edge seams, then decided to make a burrito.

IMG_2881

Sadly for my family, the burrito was not for dinner. I used a “sorta” version of the “burrito method” that’s used to make shirt yokes, where you roll everything up and stick it between the exterior and lining, so it looks like a burrito, then stitch it up and pull it right side out through the neckline.

In this case, I stuffed the sleeves and piping inside the bolero and closed up the back lower edge by machine, leaving a 4″ opening. Then I pulled everything out of that opening, and hand-sewed it closed.

Baby!

IMG_2913

It did dawn on me then that I could have done a better job of matching the pattern on the center back seam, as this bolero is reversible. Which of course I never thought of. So if you run into me wearing this inside-out, please don’t bust me. You know our non-sewing peeps will never notice.

The original bolero was black and red, to be reversible with the black dress. McCardell wanted all her pieces to be versatile. Lovely design, Claire!

As for the dress I made my sister, here’s Janet’s daughter, Madeline, modeling it…IMG_2436

My sister is tall and Maddy is petite, so you can see that this design fits a variety of body-types. After Madeline put it on, she said, “Mom, do you think it’s too hot for me to wear this to work this week?”

So I believe the McCardell dress is now “whereabouts unknown.”

As for the bolero, though cut for Janet, it fits me fine, another McCardell miracle…so Janet and Maddy, don’t be looking for it under the Christmas tree. And Mr. Jet Set, I wouldn’t be holding my breath about that tie, either.

Readers, what UFOs do you have in your stash? Confess!

And happy Independence Day to all of you who are stateside with me. What a glorious weekend so far!

IMG_2923

Claire McCardell and Martha Graham

51

After I got back from L.A., I meant to spend some time testing methods for constructing this Claire McCardell dress, from an early 50s pattern by Spadea:

IMG_0567

I intended to sew it up back in August for my sister, who is the Artistic Director of the Martha Graham Dance Company, to wear to an event at the “Dance & Fashion” exhibit, (now running through January 3rd, 2015, at the Museum at FIT in New York). To have a flashback to that whole explanation, click this link. (Cue the Twilight Zone-y flashback music)
I thought Claire McCardell was a good choice for this event, because McCardell and Martha Graham are often mentioned together in books and articles as being similar in their pared-down artistic style. They did meet on at least one occasion, when they both received the Women’s Press Club award in 1950, a very big deal back then.

IMG_0583

Here they are with President Truman (looking dapper in a tuxedo), along with a foreign affairs expert, an educational reformer, and a Hollywood actress (Olivia de Havilland), all in old-school tulle-centered eveningwear. Martha Graham is on the far left looking very chic and modern in her spare little black dress. And Claire McCardell, on the far right? Well, she’s got on one of her wrapped-bodice evening dresses of sari silk, slouchy leather gloves, no bra, no girdle, the ballet flats she invented, and a big American grin on her face. That outfit was so far ahead of its time!

I was doing a lot of thinking about making the dress, as August became September, but now it was October, and little voice inside me (either the spirit of Claire McCardell, or more probably, my Bernina, Karl) whispered, “you better get crackin’ on that dress.”

So, I chose a mid-weight black New Zealand merino knit that I got this spring from The Fabric Store in L.A. (here’s that post), because McCardell was one of the first American designers to popularize wool knits, and Martha Graham often used jersey in her costumes. This fabric is very soft and drape-y, and the quality is wonderful. The Fabric Store now has an online gallery, and will do mail order if you call them. (Here’s The Fabric Store’s USA website)
I washed the wool in cold water, tumble-dried it low, and laid it out.
image
As I was pinning, I was thinking a lot about Martha Graham, and how she often manipulated fabric in her dances to help tell the story.
This long piece of jersey reminded me of a moment in the dance “Cave of the Heart,” which is based on the Greek legend of Medea, and deals with revenge. It’s a favorite dance of mine, particularly now that I’m a “woman of a certain age.” Martha Graham herself designed the costumes, which makes her a “triple threat”: dancer, choreographer, and draper. The dance premiered in 1946.

In the dance, Medea learns that her husband is leaving her for a younger woman, a princess no less, who flits around the stage being innocent and adorable while she’s followed around by the besotted big lug.

Of course Medea, who’s been around the block a few times, is not happy that her husband is having a mid-life crisis, and she gets REALLY mad. Another dancer, representing the “chorus” from classical Greek theater, tries to stop Medea from exacting revenge, to no avail.

In this photo, you can see the Chorus’s robe and skirt, which remind me in particular of a 20s design by Madeleine Vionnet, shown here in the Betty Kirke book “Vionnet”:

141010_MarthaGrahamCo_CaveoftheHeart_QueensTheatre_Christopher Jones_102 (2)image

In a fit of vengeful rage, Medea gives the little homewrecker a poison crown, which of course the princess puts on right away, because she’s a princess, and it’s a crown! For a couple of minutes she’s skipping around really really happy, and then she grabs her head and eeeeeek!

After that, Medea does an intense solo about vengence, where she’s twisting, twirling and even eating a long “snake” of fabric she pulls out of her bodice, so it’s like she’s “eating her heart out.”

141010_MarthaGrahamCo_CaveoftheHeart_QueensTheatre_Christopher Jones_082

A while later, Medea walks regally across the stage wearing a long train of fabric, and when her macho husband (see below) pulls back the train, the dead princess is inside!

141010_MarthaGrahamCo_CaveoftheHeart_QueensTheatre_Christopher Jones_113

In the end, even though Medea has clearly gone mad, she still looks kind of, well, let’s say satisfied. And that’s what I love about Martha Graham’s dances; they really get to the emotional core of these classic stories. Seeing them is so cathartic!
(Okay, I know I’m in trouble with my sister for being flip about this great Martha Graham work, but Cave of the Heart is prime example of how Graham was inspired by fabric and costumes, and used them to advance the story of her dances.)

Just FYI–the Martha Graham Dance Company New York season will be running February 10-22, 2015, at the Joyce Theater. Tickets can be purchased here: (Link to Martha Graham Company tickets). The Graham photos above are by Christopher Jones, and the dancers are:  Medea: PeiJu Chien-Pott, Jason: Ben Schultz, Princess: Xiaochuan Xie and Chorus: Natasha Diamond-Walker.

When it came time to construct the dress, I looked inside an original McCardell that I have in my collection, to see how the seams were finished. I was surprised to see that the finishes were different in different parts of the dress, leading me to believe that several different people worked on the dress using their own methods.

The center back seam allowances were folded under and sewn:

image

The pockets edges were finished with pinking shears (kind of sloppy, too):

image

The armscye seams were double-sewn on the inside, but not top-stitched.

image

Several seams were reinforced with bias tape, which is typical of McCardell dresses, as they are often are cut on the bias and need the tape to stabilize the seam.

image

Meanwhile, the “let’s get crackin'” concept was still in my head, so my Bernina 560, AKA Karl, whispered, “how about forgetting the seam finishes and using the overlock stitch, sister?” This would have been heresy to me as a vintage purist, except I had recently read this post by The Vintage Traveler talking about how overlock stitches were used on sportswear as early as the 1910s. That was my “Get Out of Jail Free” card!

Using the 2A foot, and the #10 overlock stretch stitch, I got cranking. The foot shoves the edge under the needle, so you don’t need a serger for a finished edge.

image

Looks great, no? The wool jersey sewed like a dream.

The great thing about these 50s and 60s patterns released by Spadea, is that they were not taken from designs developed for the home sewing market. These patterns were drafted in reverse: a retail garment was given to the patternmaker, who took apart the garment, drafted the pattern from the pieces, graded the pattern for different sizes, then wrote up the instructions for the home-sewer.

So by sewing from a Spadea pattern now, you truly can recreate designer clothing from that era that look just like the retail garments being sold at the time.

Generally instructions in the Spadea patterns are great, but this one was little backwards in some ways.
The beginning of the instructions tell you to construct the back and side seams of the entire dress, so as you’re doing the more difficult parts, such as attaching piping to a 7″ neckline slash, you have the entire four yards of dress sitting in your lap. I began to feel like I was doing my own version of Martha Graham’s iconic work “Lamentation,” surrounded as I was by what was basically a tube of jersey.

imageimage

I made the piping for the neckline using Bernina Bulky Overlock foot number 12C.

image

That foot absolutely saved me during this project! After I made the piping, I hand-basted it to the neckline slash (which I reinforced with knit fusible), then used the foot again to sew it on.

imageimage

I used silk strips to face the armholes, to make it smoother by my sister’s arms, and to keep the armholes from stretching.

image
I was so proud of how I had inserted and edgestitched the two famous McCardell pockets in the dress (because McCardell wanted to free women from relying on evening bags), then discovered that I had put one in upside down! The dress was so big at this point, it was hard to keep track of what was the top and what was the bottom.

image
After a quick hack, Frankenpocket was born!

image

Then I cut another strip of fabric for the neckline, which was to function as both neck binding and cloth ties.

I used this little thingy to turn the ties right-side out. You put a big tube in the casing and use a smaller tube to push it through.

imageimage

At this point, I tried on the dress, and in the silhouette, I saw this:

IMG_0368.JPG

That’s Claire McCardell herself, in a dress known as the “futuristic dress.” One of these dresses is in the Metropolitan Museum’s online collection. The dress I was making had a very similar cut, so I had an “aha” moment about how the futuristic dress was constructed.

Now I really had to crank to get the dress done in time for my sister’s event. I gathered the dress in the front and reinforced the gathering with Hug Snug rayon bias tape.

image


Then I looked at these instructions. Eeeek!

image

It would probably work, but I was running out of time. Instead, I used the bulky overlock foot again, and basically made the ties by running an overlock stitch over the piping and then trimming it, so I didn’t have to turn anything right side out.

image

I used the same foot to attach the ties to the front of the dress, rather than hand sewing. It saved me so much time!

image

I threw on a blind hem, pressed and defuzzed the whole thing, and then right before I put it in my suitcase to New York, I tried it on one last time.

image

Why am I giving this to my sister!?!?! (Actually, I would adjust the fit for myself anyway, so let’s just say I’m giving Janet a “wearable muslin” for my dress. Shhhh!)

I put the dress in my bag and headed to New York, where I was attending a memorial service for legendary jazz singer and family friend, Jimmy Scott. While seated in the pews at Abyssinian Baptist Church in Harlem, I handed my sister a bag with the dress in it. Would she like it? I was sweating that one.

We parted ways after the service, and not long after, a picture popped up on my phone with the caption “It’s mine now!”

image

Score another one for stunt sewing! Looks great on her, doesn’t it?

It was such a great experience to recreate this piece of fashion history. The only other version of this dress I’ve seen is here, in the Metropolitan Museum of Art’s Costume Institute collection. I was so glad I’d found that Spadea pattern, because I learned so much about the construction of this classic McCardell design.

In my next post, I’ll be writing about the event where she wore it, and give a report about the Dance and Fashion Exhibit at the Museum at FIT, as well as (finally) details of the Hollywood Costume exhibit.

Hope your sewing’s going well. I’m cooked!


Hollywood Costume Exhibit and what I’m making for it…

30

Here’s a piece of good news…later this month, my husband and I are invited to a soiree celebrating the opening of the “Hollywood Costume” exhibit, featuring a number of classic movie costumes that I am very eager to eyeball.

So of course my first thought was, what am I going to make? I’ll get to that.

The exhibit is presented by the Victoria and Albert Museum and the Academy of Motion Picture Arts and Sciences (the folks who bring you the Oscars), and it will be held at the historic art deco Wilshire May Company building in Los Angeles, soon be the location of the new Academy Museum of Motion Pictures. The exhibit runs from October 2nd, 2014, to March 2nd, 2015. (Here’s more info about the exhibit, from the Academy’s website.)

There will be more than 150 movie costumes to ogle, by revered designers such as William Travilla, Gilbert Adrian, and of course, Edith Head.

Yes, I’m excited.

In my overflowing stash of patterns, I have a few that were released by the better known costume designers, some of whom had their own ready-to-wear lines at the time.

This pattern, released by Spadea:

image

was designed by movie and television costumer Travilla, creator of Marilyn Monroe’s famous “Seven Year Itch” dress.

Seven Year Itch dress

Marilyn’s dress, which became part of Debbie Reynolds’ costume collection, was recently auctioned for $4.6 million, according to the L.A. Times blog.

Another Spadea I have in my collection is this pattern designed by Charles LeMaire, known for costuming movies such as “All About Eve.”

image

On the pattern it says “Katherine Hepburn wears it in a film, but it has a place in everyday life.” It appears to be this dress from Desk Set.

deskset

Katherine Hepburn could make a librarian look chic. I wonder if I have enough of that gold Tyvek in my stash to pull it off?

The designer known as “Adrian” released at least one pattern in the 50s, which is on sale on Etsy now, for $175! (Pattern by Adrian) At that price, you can see why I’m reluctant to share details of my rare patterns.

The ruby slippers that Gilbert Adrian designed for Wizard of Oz will be featured in the exhibition as well. A girl knows she’s not in Kansas anymore, when she’s got those glitzy pumps on her feet.

rubyslippersstillcopy

According to the Hollywood Reporter, Leonardo DiCaprio helped the future Academy Museum of Motion Pictures acquire the shoes for their permanent collection.

Several costume designers created patterns for an obscure mail order line called “California Couture,” including Jean Louis, who designed Marilyn Monroe’s dress in which she sang “Happy Birthday, Mr. President” to JFK:

220px-Marilyn1962image

That pattern would make a good “Megan” dress for next year’s “Mad Men Challenge” hosted by blogger Julia Bobbin.

And Helen Rose, who designed, among many other things, wedding dresses for both Grace Kelly and Elizabeth Taylor, released several patterns for Spadea and California Couture:

Helen Rose Spadeaimage

There’s lots of information about Hollywood costume designers such as Adrian, Helen Rose and Jean Louis in this fun book about the vintage California look (I think I found it on Amazon):

image

I’ll admit, having grown up in snowy northern Michigan, watching “Wonderful World of Disney” and dreaming of sunny California, I have a highly romantized view of vintage Cali style.

And, of course, no costume exhibit would be complete without the diva of Hollywood costume design, Edith Head.

edith-head-vogue-28oct13-rex_b

She put out a number of sewing patterns from the 50s through the 80s, like these “Hitchcock Blonde” suits:

imageimage

Ooo, I’m going to make that turban!

Among those patterns is this fab “reverse shrug” with a pointed fold-over collar and buttons in the back, which I’m going to attempt to make for the event, to wear with a little black dress.

image

I’m torn between using this 50s-looking raw silk I bought from Mood in L.A., underlined with 60s silk organza, (requiring seam finishes, grrrr) or some drapey gold Italian wool-viscose from Elliott Berman Textiles, lined with something or other. The wool might be too hot for fall in L.A., though.

image

Whatever way I go, I’ll be busting my stash, and I get to pick out buttons!

More to come on this exciting exhibit!


An Epic Road Trip and Meeting Susan Khalje!

22

Okay, despite the title, there was only one thing truly epic about my road trip to Maryland, and that was meeting haute couture sewing expert and master teacher Susan Khalje!

When I contacted Susan, she graciously invited me to visit her studio, north of Baltimore, where her popular haute couture sewing classes are held. I wanted to hear about her recently-launched online video series, which includes “The Cocktail Dress” course (now available), and a number of other courses in the pipeline. (Find details here on SusanKhalje.com)

Susan has given me access to the Cocktail Dress course for review, and I’m very eager to have a look. Here’s the pretty pattern that goes with the course (which comes in a range of sizes, up to a 50″ bust):

image

Susan even gave me a sneak peek at the French jacket pattern she’s currently tweaking, which will be released in conjunction with her highly-anticipated “French Couture Jacket” online course:

image

Between you and me, I think it will be the go-to pattern for a lot of sewing enthusiasts, so if making a Chanel-style jacket is on your bucket list, you may want to hold off until that course launches in the fall.

Susan and I talked about the sleeve alone for about 20 minutes, during which I learned its little secret… (Shhh…I’ve taken a vow of silence on that subject until the course is launched.)

Susan very nicely allowed me to interview her for a whopping two hours, giving me enough material for about 10 articles. So in the coming weeks I’ll be going over my notes and writing an article to be featured on Bernina USA’s website WeAllSew.com. (For details about the collaboration between Bernina USA and JetSetSewing.com, please click the “Bernina Collaboration” tab at the top of this post.)

I’ll let you know when that post goes up. Many thanks to Susan Khalje for taking the time to meet up with me!

While I was on the road, I decided to join Instagram, and discovered that most of you sewing peeps were already having a party there without me! So I’ve started daily posts featuring my favorite vintage patterns, using the hashtag #patterndujour.

image

You can find me on Instagram under the name “jetsetsewing.” Let me know if you’re a reader, and I’ll be happy to follow you!

Though I was torn away from my dear Bernina 560, “Karl,” for a week, sewing was still on my mind, so I visited G Street fabrics in Rockville, Maryland, which is right outside of Washington, DC.

image

I’ll admit that I’m a little spoiled having shopped for fabrics in L.A. and Paris this year, but I did find a few fun things among the fabrics rolls.

imageimage

I really liked this selection of vintage-style oilcloth yardage, but just couldn’t get in the mood to make a tablecloth.

image

They do have a nice selection of fabrics for both basic garment sewing and high-end dress-making, as well as some quality suit fabrics and designer fabrics, like this brocade from Anna Sui.

image

While I was there, I picked up supplies for my next project, which is to make a Claire McCardell dress and bolero jacket from this 50s Spadea pattern.

image

This style of Grecian-inspired design, with long adjustable strings cinching the waist, is a recurring theme in McCardell’s collections, and in fact there’s a black rayon version in the Metropolitan Museum’s Costume Institute collection.

image

(Claire McCardell Dress in the Metropolitan Museum Costume Institute’s Collection)

Though this style may look familiar now, the dart-free, adjustable-waist concept pioneered by McCardell was radical in its time.

I’ve written in the past about how the Spadea pattern company took existing garments that were being sold in stores, deconstructed them, and drafted patterns from the pieces. So by using this pattern, I should be able to create a clone of the dress in the Met. Here’s a brief history of the Spadea company, written by Lizzie of The Vintage Traveler blog: (Article about Spadea Patterns)

The pattern has a matching bolero, and in researching McCardell, I found this description of the outfit in an ad: “Evening Elegance: black crinkle-crepe sheath, red and black reversible jacket, $55.” Sounds great, huh? I’ve also seen modified versions of this dress in wool jersey, another McCardell signature.

So if all goes well, I’ll be putting together this dress from black merino jersey bought during my mad dash through The Fabric Store in L.A., (L.A. Fabric Stores), and lining the bolero with the red wool jersey I just bought at G Street Fabrics.

And the dress will be worn by…my sister?!?! No fair!

Well, here’s what we’re cooking up.

I’ve mentioned before that my sister, Janet Eilber, is the artistic director of the Martha Graham Center of Contemporary Dance, AKA The Martha Graham Dance Company. You can peruse Janet’s impressive bio here.

Like McCardell, Martha Graham knew her way around a length of jersey, and one of her most famous dances, Lamentation, is danced entirely inside a jersey tube. Graham used the fabric to give the feeling of “stretching in your own skin” from grief. Janet also told me that Martha designed many of her own costumes, via draping.

I’ve always thought that Claire McCardell’s designs, which use a recurring set of pared-down “American Look” elements, have a lot in common with Martha Graham’s spare choreography, which uses a recurring language of movement to reveal the emotional core of the dances.

So, when my sis told me that she would be speaking at the upcoming DANCE & FASHION (!!) exhibit held by the Museum at the Fashion Institute of Technology in New York, and that she needed a dress to wear, I said “have I got a designer for you!”

Here’s a link that describes the exhibit in depth: (Dance & Fashion MFIT exhibit details) The exhibit will feature actual dance costumes as well as dance-inspired designer gowns and streetwear. It sounds fantastic, so I’ll definitely be there!

The exhibit opens at The Museum at FIT on Monday, September 12th, 2014, and runs through January 3rd, 2015. On Tuesday, October 28th, dancers from the Martha Graham Company will be performing Graham’s works “Lamentation” and “Spectre-1914,” to be followed by a panel discussion including Janet, designer Doo-Ri Chung, and Melissa Marra of MFIT.

So we’re going to find out if this ingeniously simple design can be easily adjusted to fit a variety of figures, which was McCardell’s intention. I’ll be making up the dress here, then sending it to my string-bean sister to see if we can fit it via photos and sister mental telepathy. (Or possibly via Skype, as my blogging pal CarmencitaB does with some of her clients in France.)

If the whole thing’s a bust, I have some original McCardell dresses in my collection that I just might be willing to loan to my sister. Considering how many times I raided her closet as a teen, it seems only fair.

Speaking of L.A., the West Coast branch of Mood Fabrics has just reopened, after sustaining earthquake damage in the spring. I’m glad they had the opportunity to work on their roof, as the day I was there (during an early March deluge) there were garbage cans everywhere to catch the raindrops dribbling in from the old skylights.

Phew, that’s it for me! How’s your sewing going?

Charles James, meet Claire McCardell

20

Okay, I’ve had my fling with Charles James, paid homage to Madame Vionnet and gotten in a catfight with Coco Chanel. Now it’s time to give Claire McCardell her due. This red shrug is one of her designs.

image

As a wrap-up to all of the Charles James hyperventilation going on at Jet Set Sewing this month, some details of the completed outfit: with the 50s wool challis I used to line the kick pleats on the Charles James skirt (seen here), I made yet another version of the crushed boatneck frankenpattern I came up with this winter. (Details of that pattern are here and here). This time I made it sleeveless and lined it with silk crepe de chine ordered online from Mood.com.

Since I was getting bored with this project the third time around, I researched how to line a tank top by machine, so I wouldn’t have to hand-stitch the lining to the neckline and armholes. I’ve learned the hard way that your tank will quickly turn into a twisted mobius strip if you don’t do it right.

I decided to go with this method: rather than construct the exterior and the lining and stick them together, you sew the front piece of the fashion (exterior) fabric to the front piece of the lining, right sides together, at the armhole and neckline only. Before you stitch, fold back the lining seam allowance at the shoulder seams by 5/8″. Leave the shoulder seams, side seams, and hem unstitched.

Here’s the front of the armscye (armhole) sewn to the front of the lining armscye.

image

Trim the seams, clip the curves, sandwich press (press as is) then open it up and press the seam allowance toward the lining.

image

“Understitch” about 1/8 inch away from the seamline, on top of the lining, catching the seam allowance in the stitching.

image

Turn the lining under and press, a little back from the edge.

image

Oh yeah! Nice and clean without the dreaded topstitching.

image

You do the same with the back fashion fabric and lining. Then, turn both the front and back pieces right side out and stitch the shoulder seams of the fashion fabric right sides together. (You can see that the lining seam allowance is folded under so you don’t catch it in the stitching.)

imageimage

Clip and press the seam you just stitched, and tuck the seam allowance inside the lining. Then slipstitch the lining together at each shoulder seam.

I wish I had a picture of the rest of the method, but I was in a hurry so of course I forgot. But basically you do the side seams one at a time, sewing the back and front fashion fabric side seam right sides together, passing the underarm seam, and then sewing the back and front lining side seam right sides together, all in one long sew. Then you do the other side the same way. Flip the whole thing right side out and do whatever hem floats your boat. I decided to hand catch-stitch up the fashion fabric hem, then slip stitch the lining over it, leaving a little room in the lining so it wouldn’t pull up the hem.

image

Silk crepe de chine is the best, most decadent lining, and worth every penny.

And now to my fashion girlcrush, Claire McCardell.

McCardell with modelsMcCardell in Chair

Though McCardell is no longer a familiar name in fashion (due to her untimely death in the late 50s), she was one of the top American designers of the 40s and 50s, and the primary inventor of the style known as the “American Look.” Her spare, sporty, architectural clothes were designed so the modern woman could move around and have a life while wearing them.

McCardell windowpane dress Claire McCardell SundressClaire McCardell evening dress

If you’ve worn any of the following items recently, you have Claire McCardell to thank for either designing or popularizing them:

ballet flats,

McCardell ballet flats

jersey hoodies,

McCardell hoodieMcCardell hoodie bike

wrap dresses,

McCardell Popover Dress

peasant dresses,

McCardell Hostess Dress FIT

fitted bathing suits,

McCardell bathing suit

fashion sunglasses…

McCardell sunspecs

The real appeal, for me, is how incredibly modern and wearable many of her designs remain.

Here’s a brief bio of Claire McCardell from “Voguepedia”: Claire McCardell bio

And a bunch of McCardell eye-candy from the Metropolitan Museum Costume Institute’s online collection: (Met Museum McCardell collection)

I’ll get into more of McCardell’s history in upcoming posts, but long story short: it was my desire to make myself a Claire McCardell that got me into this crazed vintage re-creation jag.

The shrug is taken from this 1951 Spadea pattern:

image

featuring one of McCardell’s famous wrap “popover” dresses, which was designed for ease of donning and wear. Since this is a halter version of the dress, the shrug covers the bare back.

Though we’re accustomed to seeing shrugs like this nowadays, this simple design was revolutionary in it’s time, as it’s made from one pattern piece (doubled) with one center back seam and two short seams under the arms creating the sleeves.

image

McCardell was the first American designer to use jersey to make dresses and separates, so I used lightweight wool jersey, again from Mood.com, to make the shrug.

After cutting the jersey on the bias (and giving my thumb a nice slice with those Kai shears I’m always raving about) I stabilized the seam allowances using stretch stitch #9, which gives you a seam that almost looks like a straight stitch, but still has some give:

image

Here’s how the stay-stitching turned out:

image

Where the edge would be exposed, I folded it under and stitched again to finish it:

image

I decided to use old school French seams to finish the interior seams, since the fabric is so lightweight.

I started out by sewing the seam wrong side together, then trimmed the seam allowances.

image

I pressed open the seam, turned it so the pieces were right side together, then stitched the seam again, enclosing the raw edge of the first seam.

image

A nice clean finish for a nice clean design.

More to come on Claire McCardell, but right now I have to start packing up my sewing projects, tools and machine to decamp for Martha’s Vineyard for the summer.  I hope you’ll join me there for some stitching at the beach!

Finding a “Fitting Shell” to fit those !$%#! vintage patterns

33

In the past couple of years, I’ve become the proud owner of some pretty fab vintage designer patterns that I’m dying to make up. Here are a few examples:

A 1930’s Schiaparelli bias-cut dress pattern with label:

image

A 1962 Officially licensed Chanel Jacket pattern:

Chanel pattern

I did make that one up, and here’s the finished product: (And here are my posts about how I made it.)

10597356983_069525009b_z[1]

A number of Ceil Chapman patterns by Spadea:

image

Laura Mae from “Lilacs and Lace” has been blogging about making that “Skylark” style pattern in the middle, and it looks mighty tricky. (Lilacs and Lace blog)

Here’s an example of an original Ceil Chapman “Skylark” dress, with a narrow inner skirt and an over-skirt in the back:

Ceil Chapman Skylark dress

No wonder Chapman was a favorite designer for stars like Marilyn Monroe and Elizabeth Taylor. The dress played up the bust and made the wearer look like a beautiful bird. As an aside, here’s a link to the Hoagy Carmichael/Johnny Mercer tune that was popular in that era: “Skylark” sung by Ella Fitzgerald

And here’s the true Skylark dress pattern by Spadea, drafted from the dress above (I’d really like to find this one):

Ceil Chapman Spadea Skylark pattern

I’ve also been snapping up patterns designed by Claire McCardell, released by Spadea, McCalls, and Folkwear. Now I have more than a dozen.

image

Here’s a rare Charles James skirt pattern:

image

The inner workings of these skirt patterns show his genius for garment shaping through structure. There’s going to be a Charles James retrospective at New York’s Metropolitan Museum of Art starting this May 2014, which I’m now scheming to attend (waving my pattern…). (Charles James exhibit info)

Not to mention several boxes of patterns by Pauline Trigere, YSL, Diane Von Furstenberg, Halston, Kenzo, Tiziani (by Lagerfeld) and a number of more obscure designers from the 50s and 60s such as Claire Potter, Jane Derby, Norman Hartnell (the Queen’s couturier), Tina Leser (the original Boho designer), Joset Walker, Jo Copeland, Vera Maxwell, Biki (friend and designer for Maria Callas), and Toni Owen:

image

Also patterns by Hollywood costumers such as Edith Head, Charles LeMaire, and William Travilla, who designed the iconic pleated dress Marilyn Monroe wore over the grate in “Seven Year Itch.”

image

I’ll be the first to admit that I have a pattern problem, and my husband will be the second to admit it.

Most of these patterns are way too small for me, and cut for the different body shapes that were popular at the time. For example, many of the 50s patterns assume that you’re wearing a girdle (which was basically Spanx crossed with a Michelin tire) and a bullet bra that raised the bust point by several inches. It was all about boobs and hips with a tiny short waist, like Elizabeth Taylor in the era.

Elizabeth Tayler

In contrast, the 70s DVF and Halston patterns basically assume that you might possibly be wearing slinky bikini underwear but probably not a bra (because you burned it at a feminist rally before you went to the disco), and the look was super-skinny with a small chest and hips, long torso and really long legs. Nobody worked out (it was pre-Jane Fonda aerobics) and a lot of women smoked and did coke, so the ideal was skin and bones. Here’s Lauren Hutton in that era:

Lauren Hutton

In the picture, she’s wearing a dress by Halston that’s very similar to this late 70s pattern:

Halston pattern #2

Of course a woman’s body can’t morph into new shapes to fit the fashions of the times, so we mainly just beat ourselves up over it.

I’ve gotten tired of starting from scratch in terms of fitting every time I take on a vintage pattern, particularly because my middle-aged body has fit issues of it’s own. So I’m going to see if making a “fitting shell” will help.

If you’re obsessively combing the internet for sewing fun facts (as I do to procrastinate about pinning and cutting fabric), you will see the terms “block,” “sloper” and even the haute couture “moulage” (Kenneth King’s Moulage book) bandied about to describe a basic pattern that is used by a designer to create new patterns.

I didn’t want to get my terminology wrong, so I consulted Kathleen Fasanella’s excellent blog about professional design and manufacturing, Fashion Incubator. There, I found out that patterns without seam allowances, called  “slopers” or “blocks” in the sewing enthusiast world, are generally not used in the industry, and if you use those terms in a pro environment, you’ll be snickered at. She refers to the thing I want to make as a “fitting shell,” so that’s what I’m going to call it.

Basic fitting shell patterns have been available from pattern companies as far back as the 40s or 50s from what I’ve found online, and you can still buy them today. The idea behind these patterns is that if you make up the Vogue Patterns Fitting Shell and get it fitted closely to your body, then you can compare the fitting shell pattern pieces to any other Vogue pattern and easily adjust the fit.

Vogue patterns fitting shell

I want to make myself a fitting shell so that I have a basic flat pattern pieces, fitted for me, to compare with the pattern pieces of the vintage patterns I own. That way, I can ballpark how much I need to increase the dimensions of the smaller pattern to fit my shoulders, bust, waist and hips.

Sounds great in theory, we’ll see how it goes in practice.

I looked at the modern fitting shells released by the Big 4 pattern companies, but nowadays modern patterns tend to have more ease built in, particularly in the armscye, and I want those high and tight vintage Chanel armholes.

So I decided to buy some fitting shell patterns from the 50s and 60s, to see if they would work better. Here’s one from the late 60s, judging from the hairdo and squared-off pumps:

image


And here’s one that looks like late 50s:

image

This one in particular is for half-sizes, which nowadays I think would be referred to as “Petite Plus.” The “half-size” range is described in Connie Crawford’s current Grading Workbook as cut for a “more mature, short-waisted woman with a shorter, heavier body-type.” I can’t say I was terribly happy with that description, but at least now I know I have a “half-size” body with “full-size” legs.

And I was very excited to find out what “The Bishop Method” (written on the back of the pattern) might be.

image

I eagerly looked throughout the instructions but was bummed to discover that there was no mention of The Bishop Method inside.

After a quick google, I found “Bishop Method” books all over the internet, and discovered that they were Home Ec manuals from the 50s and 60s. People were raving about them on Amazon! So of course I ordered one, because I need more sewing stuff.

image

Holy smoke, The Bishop Method is the best flippin’ bible of vintage sewing techniques for the novice that I’ve ever seen! It takes you from square one (learning about the machine and making an apron)…

image

(that looks like the straight-stitch Singer 15 sewing machine I learned on.)

image

and goes all the way through making a tailored and lined suit with bound buttonholes and a hand-picked, lapped zipper.

imageimage

It’s filled with clear, comprehensive instructions and a whole bunch of pictures. If vintage-style sewing with wovens is your thing, it’s worth getting a copy for your library.

There’s a lot of fitting info in The Bishop Method, and also in modern books like this:

image

(Threads “Fitting for Every Figure” book), which is extremely comprehensive and pretty text-heavy and labor-intensive, if that’s what you’re into, which I’m not.

With all of the schmancy sewing books in circulation right now, I’m kind of embarrassed to admit that my favorite book on basic fitting is this one by Nancy Zieman (of “Sewing with Nancy” fame), as it gets right to the point and illustrates the “pivot and slide” method of pattern fitting, which, though based on solid pattern-grading principles, is easy and fast and doesn’t require you to cut up your pattern.

image

She starts out by explaining the importance of finding a pattern that fits in the shoulders, and gives you the formula you need to figure out the proper size pattern to buy. (This helps if you use vintage patterns because even though the sizing varies, you can choose a pattern by bust measurement.) Then she shows you how to modify that pattern to fit the rest of your body by moving it around and tracing parts of it based on your measurements. There’s also specific fitting info, with illustrations, for dealing with issues such as broad shoulders, sway back, and bust adjustment.

So this is the method I’ve been using to fit paper pattern to muslins, and then I eyeball it from there. Since most commercial patterns are cut for someone with a “B” cup (I’m a “C”) and my waist and hips are a larger size than my shoulders, this method has worked well for me.

I recently read a review of Nancy’s life story, Seams Unlikely, on Gertie’s New Blog For Better Sewing (Review from Gertie’s New Blog…). The book talks about how Nancy embraced sewing in 4-H, and started her business from home back the bad old days when a woman was expected to get her husband to co-sign a business loan for her–even if he wasn’t involved in the business. It’s an inspiring story.  Gretchen, thanks for giving us the heads up on that book.

Back to my fitting shell quest. In the end, I got lazy and decided to spring for a pattern drafted directly from my measurements, by String Codes.  They take the five basic measurements you input and a create custom a fitting shell pattern for you.

Seemed easy enough, but when I placed the order and asked them to modify the bust measurement for a “C” cup, I was told that the patterns are only available as a “B” cup and that I would have to do a full bust adjustment myself. They did email me instructions with photos for an FBA, and it was a bit of a hassle, but not a deal-breaker. I’m going to make a muslin of the final pattern, and we’ll see how it fits. The pattern comes without seam allowances, so the exterior line is the seamline. You can see where I put in the bust adjustment below, following the directions from String Codes:

image


I ordered the “torso” pattern with a sleeve with a dart, since I often make jackets and tops, and also ordered the skirt pattern. I can overlap them if I’m making a dress.

As soon as I have it made up, I’ll do a little “show and tell” to let you know how it worked out.

And I’ll try to remember Nancy Zieman’s advice to avoid over-fitting, because “it can be exasperating and can take the joy out of sewing.” Amen, sister!

How’s your sewing going?

American Hustle and Wrap Dress Patterns

20

Have you seen the movie American Hustle? Oh honey, in the 70s, I was there. The knit dresses cut down to there. The men with hair everywhere. The whole feeling of “Vietnam’s over, the feminist movement’s started, and we have birth control.  Let’s dress up and have a party!” We would go to the disco and dance for hours. The scene with the two leads in the Studio 54 bathroom stall? Totally could have happened anywhere in the US during that time.

I’m not sure how American Hustle will translate into other eras and cultures, but everything in it resonated with me, particularly the wardrobe.

American Hustle StillAmerican Hustle Wrap

In one scene, Amy Adams tries on an instantly recognizable Diane Von Furstenberg silk jersey wrap dress, which looks like this:

DVF Wrap

DVF’s wrap dress design is now celebrating it’s 40th anniversary. http://www.harpersbazaar.com/fashion/fashion-designers/dvf-wrap-dress-0214  I was happy to see that the reissue of this dress is made of the original silk jersey, which makes these dresses a cut above the countless polyester knock-offs we’ve seen since.

Seeing that wrap dress reminded me that DVF did a number of patterns for Vogue in that era. So people like me who were living on a shoestring could make their own. That led me to Etsy, where I bought this pattern last night.

DVF Wrap PatternI like how they show the dress as reversible.

A lot of people make fun of 70s, but it was a great time for design and for sewing. In the early 70s, Butterick’s “Young Designer” pattern series allowed teens like me, living in the midwest, to make dresses by new designers like Betsy Johnson, whose clothes we’d only seen in Seventeen magazine.

Betsy Johson pattern

Trust me, no one had done slinky tank dresses like this, and there certainly weren’t patterns for them. I had spent all of my grade-school years in uncomfortable dresses with crinolines and smocking, then freezing cold, constricting mini shift dresses. In junior high, I made this dress out of Quiana polyester with pale roses on it. I LOVED it! The Young Designers line also had patterns by new youthful designers such as Kenzo, Mary Quant, Clovis Ruffin, and Willi Smith. The clothes were fun and comfortable.

By the late 70s, everyone in the country had heard about Studio 54, and what a fabulous, hedonistic place it was. Though in reality, it was probably more like this:

Studio 54

That’s the designer Halston on the left, Bianca Jagger in some odd hoodie next, some other guy, Liza Minelli, and yes, PREPPY Michael Jackson. Were they really having fun? I don’t know. The whole era got to be too much after awhile.

Speaking of Halston, in the late 70s and early 80s, he designed some great patterns for McCalls:

Halston pattern #1Halston pattern #2 Very Amy Adams in American Hustle.

I remember making this knit top and skirt in the early 80s, when I was first working as a television producer:

Halston pattern #3

I wore it on a field shoot, one thing led to another, and the guy I was interviewing and I ended up at the Plaza. Those were the days, my friend.

You can see more Halston patterns on my pinterest page: Make Your Own Vintage Halston. The patterns are not too hard to find on Ebay and etsy.com.

Let’s get back to the wrap dress. Diane Von Furstenberg is known for “inventing” it, but it was around for a long time before that:

McCardell Popover

This rare early 50s Claire McCardell pattern, released by Spadea, was drafted from a retail McCardell dress, like this:

McCardell Popover DressMcCardell Popover in the Metropolitan Museum Collection

The bodice is cut on the bias, a technique McCardell learned by deconstructing Vionnet dresses while she was a student in 1920’s Paris. She had wrap dresses in her line from the 40s through her death in the late 50s, though she called them “popover” dresses. More on this design later.

These dresses never really go out of style. Just today, I spotted this new Vogue pattern from Donna Karan:

Donna Karan Wrap Pattern

Bias cut, very nice. Here’s the link: Donna Karan Vogue Wrap Pattern. Many of Donna Karan’s early sewing patterns (including the ones she did for Anne Klein) were influenced by Claire McCardell’s designs.

Hm, I think I have some wrap dresses in my sewing future…after all, when Mad Men returns it will be in the full-on 70s.

What do you think of 70s fashion? Thumbs up or down? Any fashion memories, good or bad?

Working with a vintage unprinted pattern, if you’re lazy.

0
1962 Spadea/Chanel unprinted pattern

1962 Spadea/Chanel unprinted pattern

If you sew from vintage patterns, you may have been nonplussed to open that package and see absolutely nothing printed on the pieces, like in the photo above. Printed patterns only came into vogue in the 50s, and before that people needed to follow the notches and dots cut into the pattern to find their way. The Spadea company continued to hand-cut their unprinted patterns well into the 60s.

Above is a piece of the Spadea/Chanel jacket pattern I wrote about in a previous post. The instructions included with the pattern explain what the markings mean.  Each pattern piece has a letter made of small dots punched in it, to identify the back, front, sleeve etc. The notches are small “v” shapes on the side, three large dots indicate the fold, two large dots indicate the grainline, and medium and small dots are used in the instruction to indicate buttons, buttonholes, ease lines etc.

Marking pattern on to "Kwik Trace" muslin

Marking pattern on to “Kwik Trace” muslin

The first thing I do when I open an unprinted vintage pattern is write the pattern number, name and original bust size measurement on each piece so they don’t get mixed up with other patterns. Since I was using a rare vintage pattern, I traced it onto tracing paper and put the original away. Then I compared the pattern piece with a pattern from a previous jacket I made to make some fit adjustments. You can do this with a pattern block or sloper if you have one. (Those are basic fitting patterns some people make for themselves to fit patterns more quickly. So far I’ve been too lazy to make one.)

I then used a large piece of tracing paper (from the http://www.richardthethread.com/  website in LA) and a tracing wheel to copy the pattern onto my “muslin” version of the jacket. (Though in this case I’m using Kwik Trace tracing fabric rather than actual muslin, again being lazy.) The downside of Kwik Trace is that it’s unwoven and doesn’t have a grain, so I wouldn’t recommend it for projects where you need to know how the fabric will behave, such as a bias cut dress.

Completed "muslin" of jacket

Completed “muslin” of jacket

I cut out the pieces and constructed the muslin loosely using the method outlined in Susan Khalje’s “Couture Dress” course on Craftsy. (Okay, I skipped a few steps, but you get the idea.) I’ve recommended that course in previous posts, and it really helps with vintage projects like this. http://www.craftsy.com/class/The-Couture-Dress/53?_ct=sbqii-sqjuweho-qbb&_ctp=53,1

Once I tweaked the fit, I marked any changes on the Kwik Trace with a sharpie and took the “muslin” apart. Those pieces now became my pattern. At this point I wrote the pattern number and name on each piece and indicated that it had been fitted for me, in case I wanted to reuse it.

Cutting the fabric with large seam allowances

Cutting the fabric with large seam allowances

I pinned the pattern pieces on my fabric and then cut loosely around them to leave plenty of seam allowance. Boucle like this unravels in a huge hurry, and by the time you’re ready to finish the seams, you may have already lost more than 1/2 an inch.

Thread tracing the seam line

Thread tracing the seam line

At this point, if you follow Susan’s Khalje’s instructions in the Couture Dress course, you are supposed to “thread trace” (loosely baste with contrasting silk thread) around all of the seam lines to mark the seams on the front and back. This is a great idea! But I can’t face it at this point in the construction! (Because I’m lazy.) So, despite the fact that Susan warns against this, I marked both sides of my fabric with tracing paper, which I then could not get out of the fabric. Fortunately my fit was pretty good, so I just stitched inside the line and the marks ended up inside the seam allowance. I did thread trace the armscye and sleevecap as it makes it a million times easier to line up.

How about you? Have you ever worked with an unprinted pattern? How did it go? Leave me a comment, and a link if you have one. I’d love to see your projects.

Till next time… (I used to work in TV so I feel like I need a sign-off line) “May your bobbins be full and your tension even?”

Pattern by Chanel

1

Here’s what inspired me to give another tedious, labor intensive Chanel Jacket a go:

1962 Chanel pattern released by Spadea

1962 Chanel pattern released by Spadea (photo (c) Julie Eilber, 2013)

It’s a 1962 Chanel jacket pattern released by the Spadea pattern company. Spadea was a mail-order company that sold sewing patterns, via articles in local newspapers across the country, from 1950 through the 1970s. What made Spadea unique was that the patterns were drafted directly from designer garments currently retailing in U.S. stores. So a housewife in rural Ohio or Salt Lake City could use their patterns to recreate replicas of garments by American Look designers such as Claire McCardell, Ceil Chapman, Tina Leser, Joset Walker, Clare Potter, or international designers such as Biki of Milan, Pierre Cardin, a young Lagerfeld (designing for Tiziani) and the Queen’s couturier, Norman Hartnell. The range of designers fashions represented in the Spadea line is astonishing. In recent years these patterns have become highly collectible in the vintage sewing world, some going for hundreds of dollars.

Look closely, and you’ll see that this particular pattern says “Chanel design reproduced by Suzy Perette.” In those days before off-shore manufacturing, U.S. fashion companies would license designs from French companies and manufacture replicas of the garments in the U.S. for the domestic market. One of those companies was Suzy Perette, who created U.S.-manufactured garments by Euro designers such as Givenchy and Chanel.

This jacket pattern has the hallmarks of Chanel jackets of that era: the high, tight armholes, the bracelet-length sleeves with vents, the center front panels that hang in parallel lines from the neckline, the small Mandarin collar that stands up just so, the slightly boxy, cropped “Jackie” fit.

Even though I was sick to death of making jackets, when I found this pattern online late last summer I just couldn’t resist.