More Faking Vintage Looks with Modern Patterns, and first official Intergalactic Sewing Blog!

24

It’s been awhile since I’ve written about using modern, commercially available patterns to create vintage looks. Some new releases have inspired me, though!

Vogue 9126, for example, is a 40s style that’s wearable in modern life.

IMG_3216

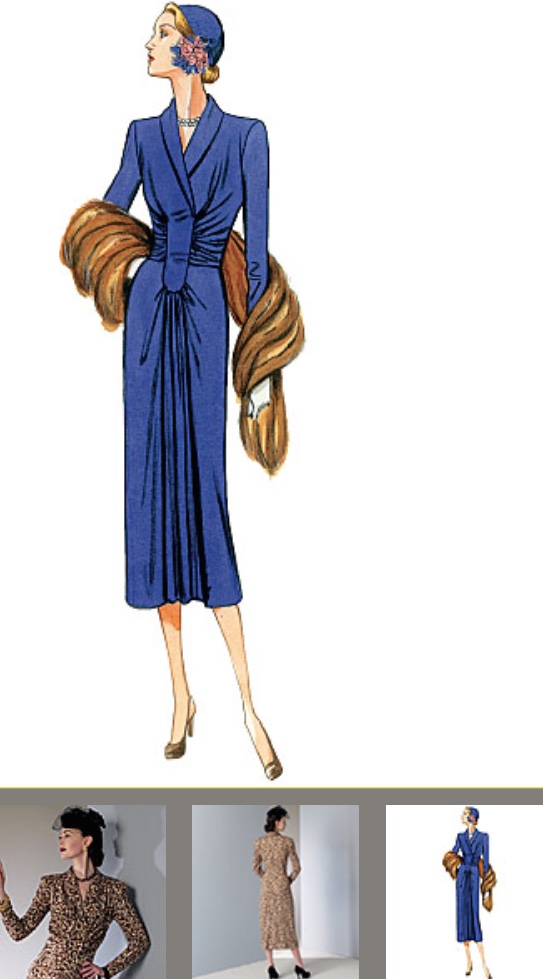
I like to mix vintage in my day-to-day look, as my “true vintage” days are behind me. This would be a fun dress for a mother (or in my case, stepmother) of the bride to wear to a hipster wedding. Comfortable, easy to dance in, and SLEEVES! We like sleeves!

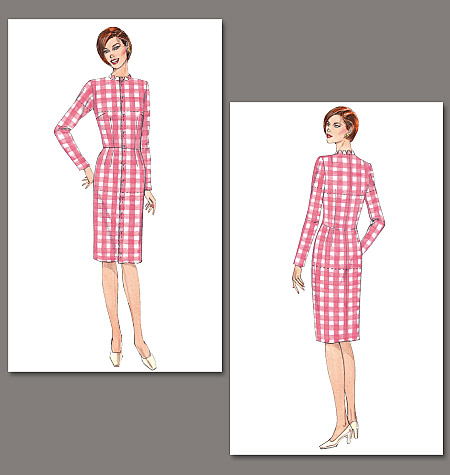
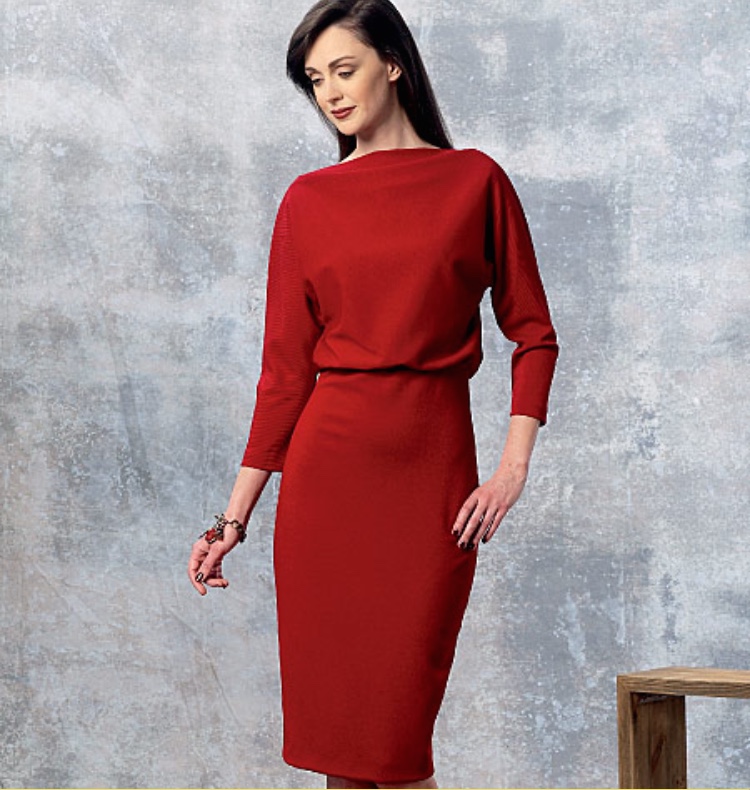
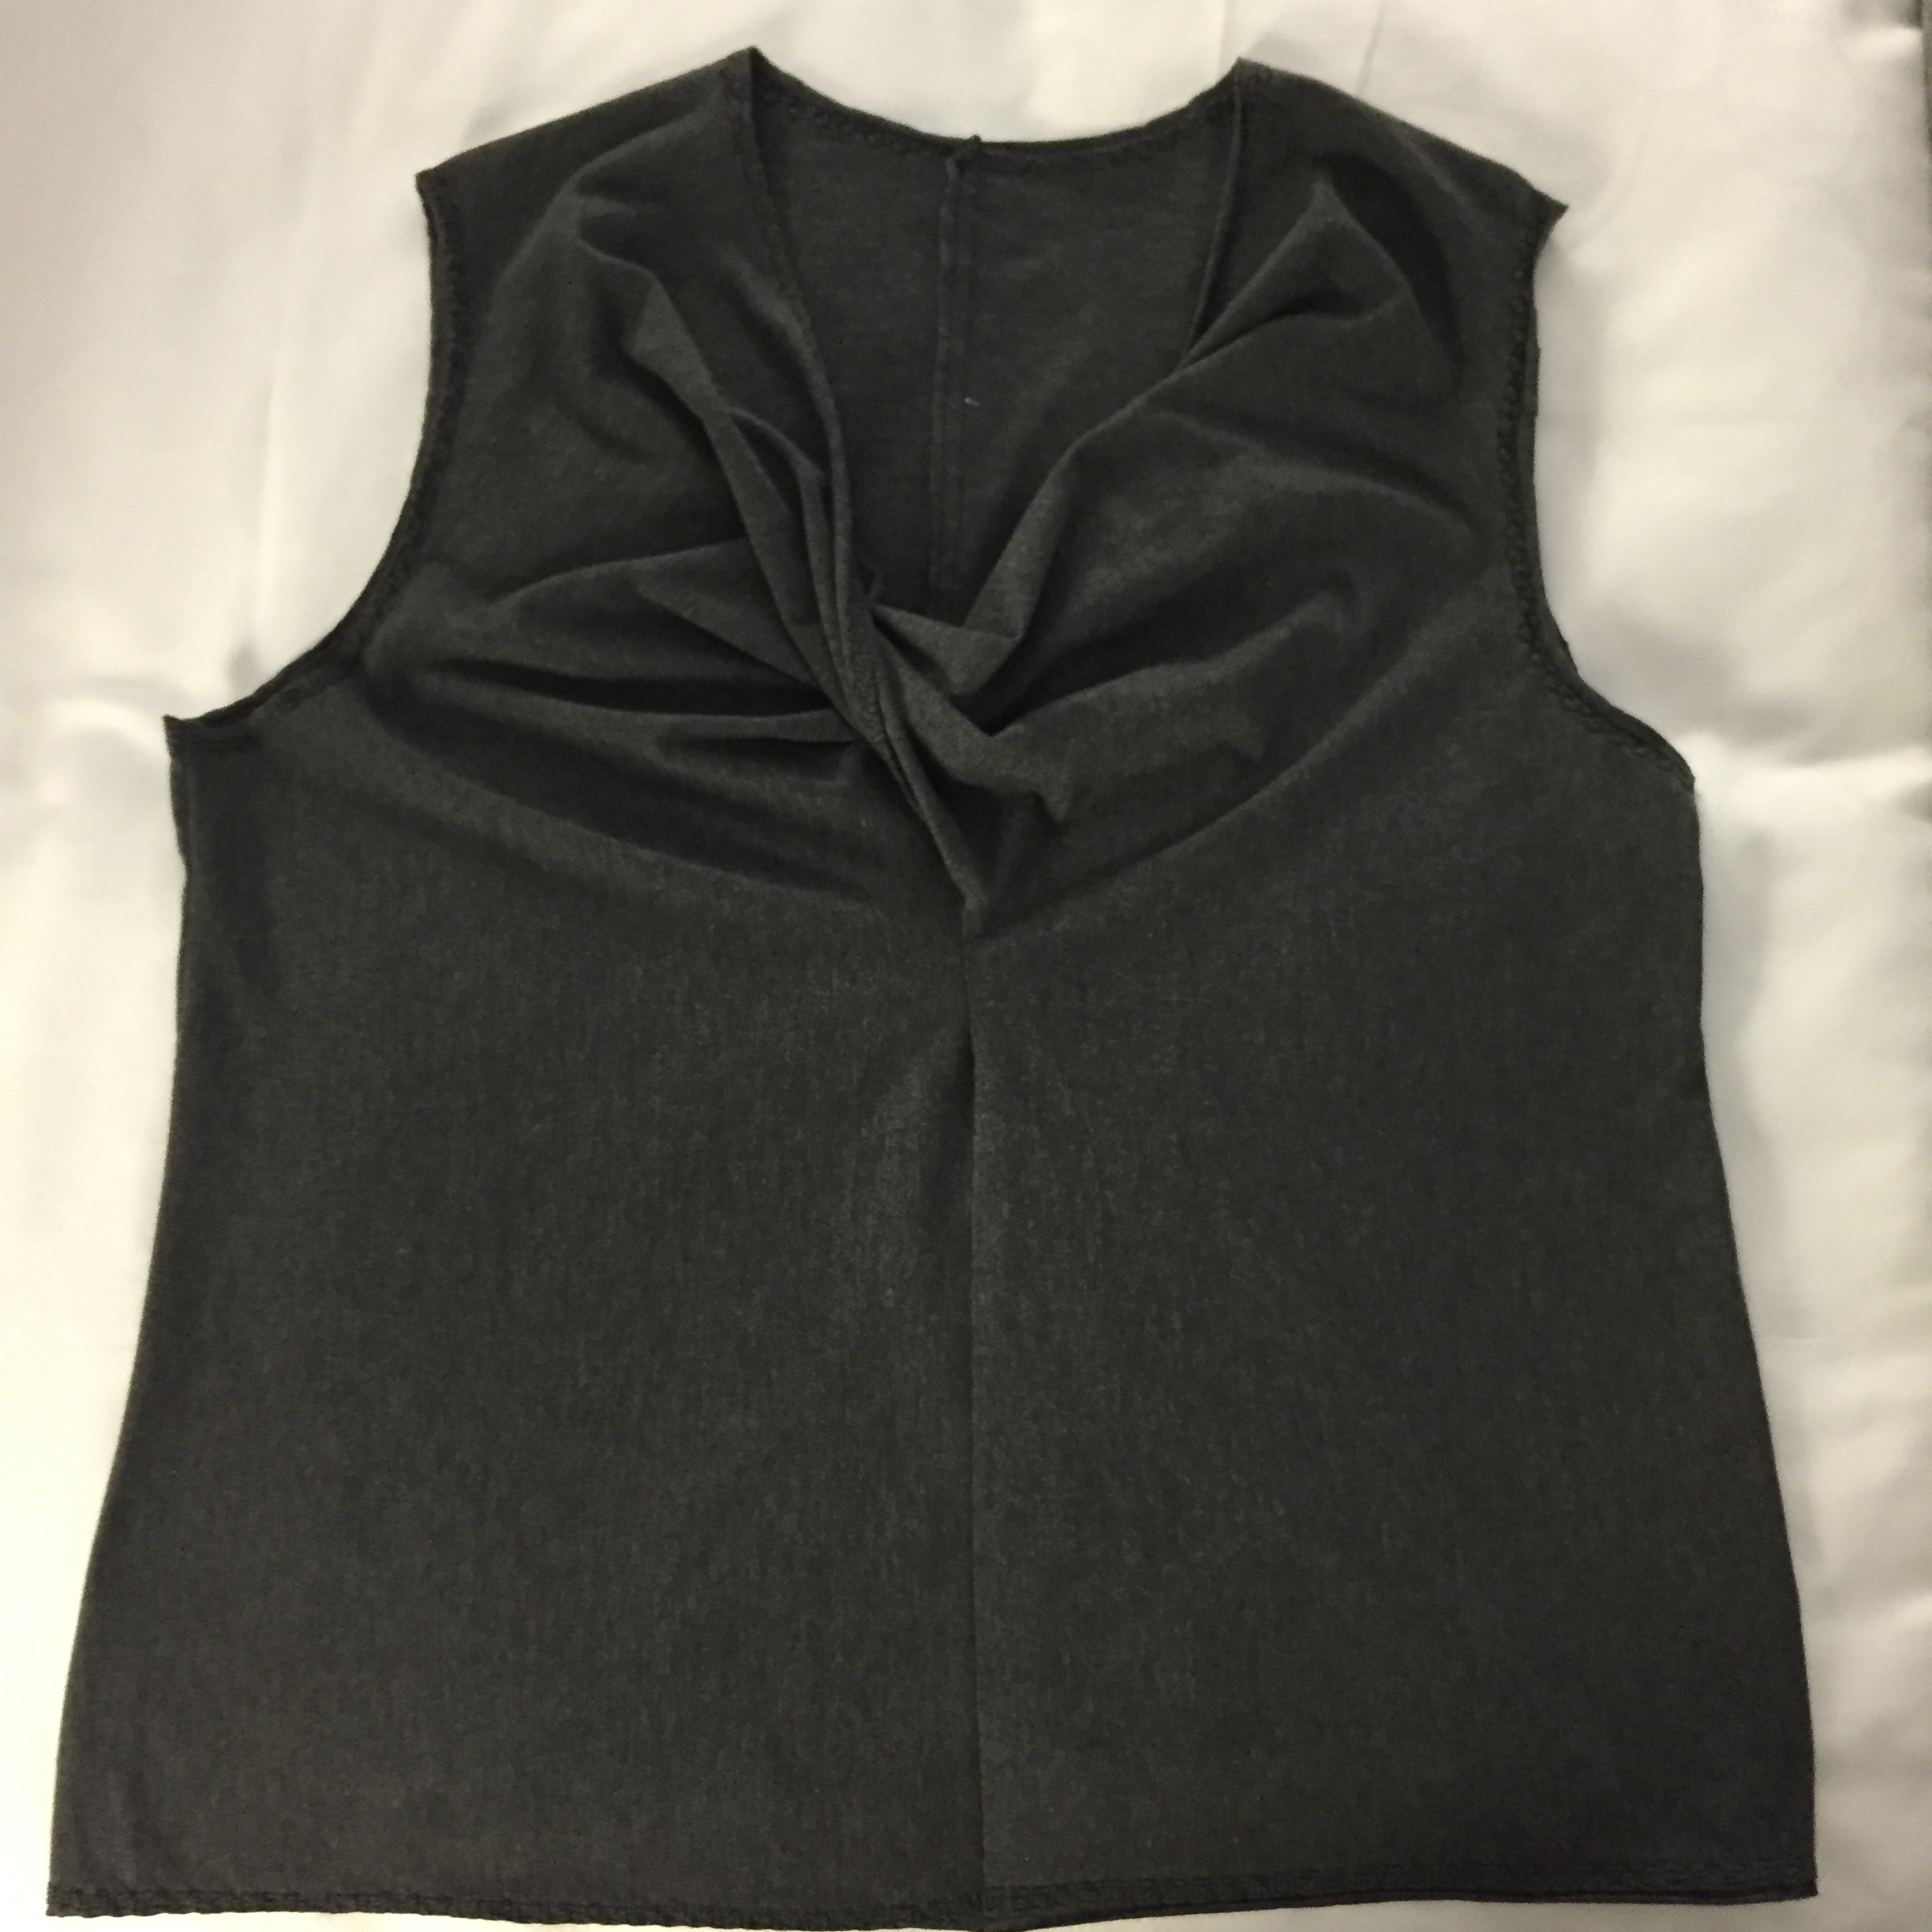
This Vogue Badgley Mischka pattern is modern, but has a 60s element to the neckline. It’s a “crushed boatneck” with a little fold in the shoulder seam to give it some drape.

IMG_3218IMG_3219

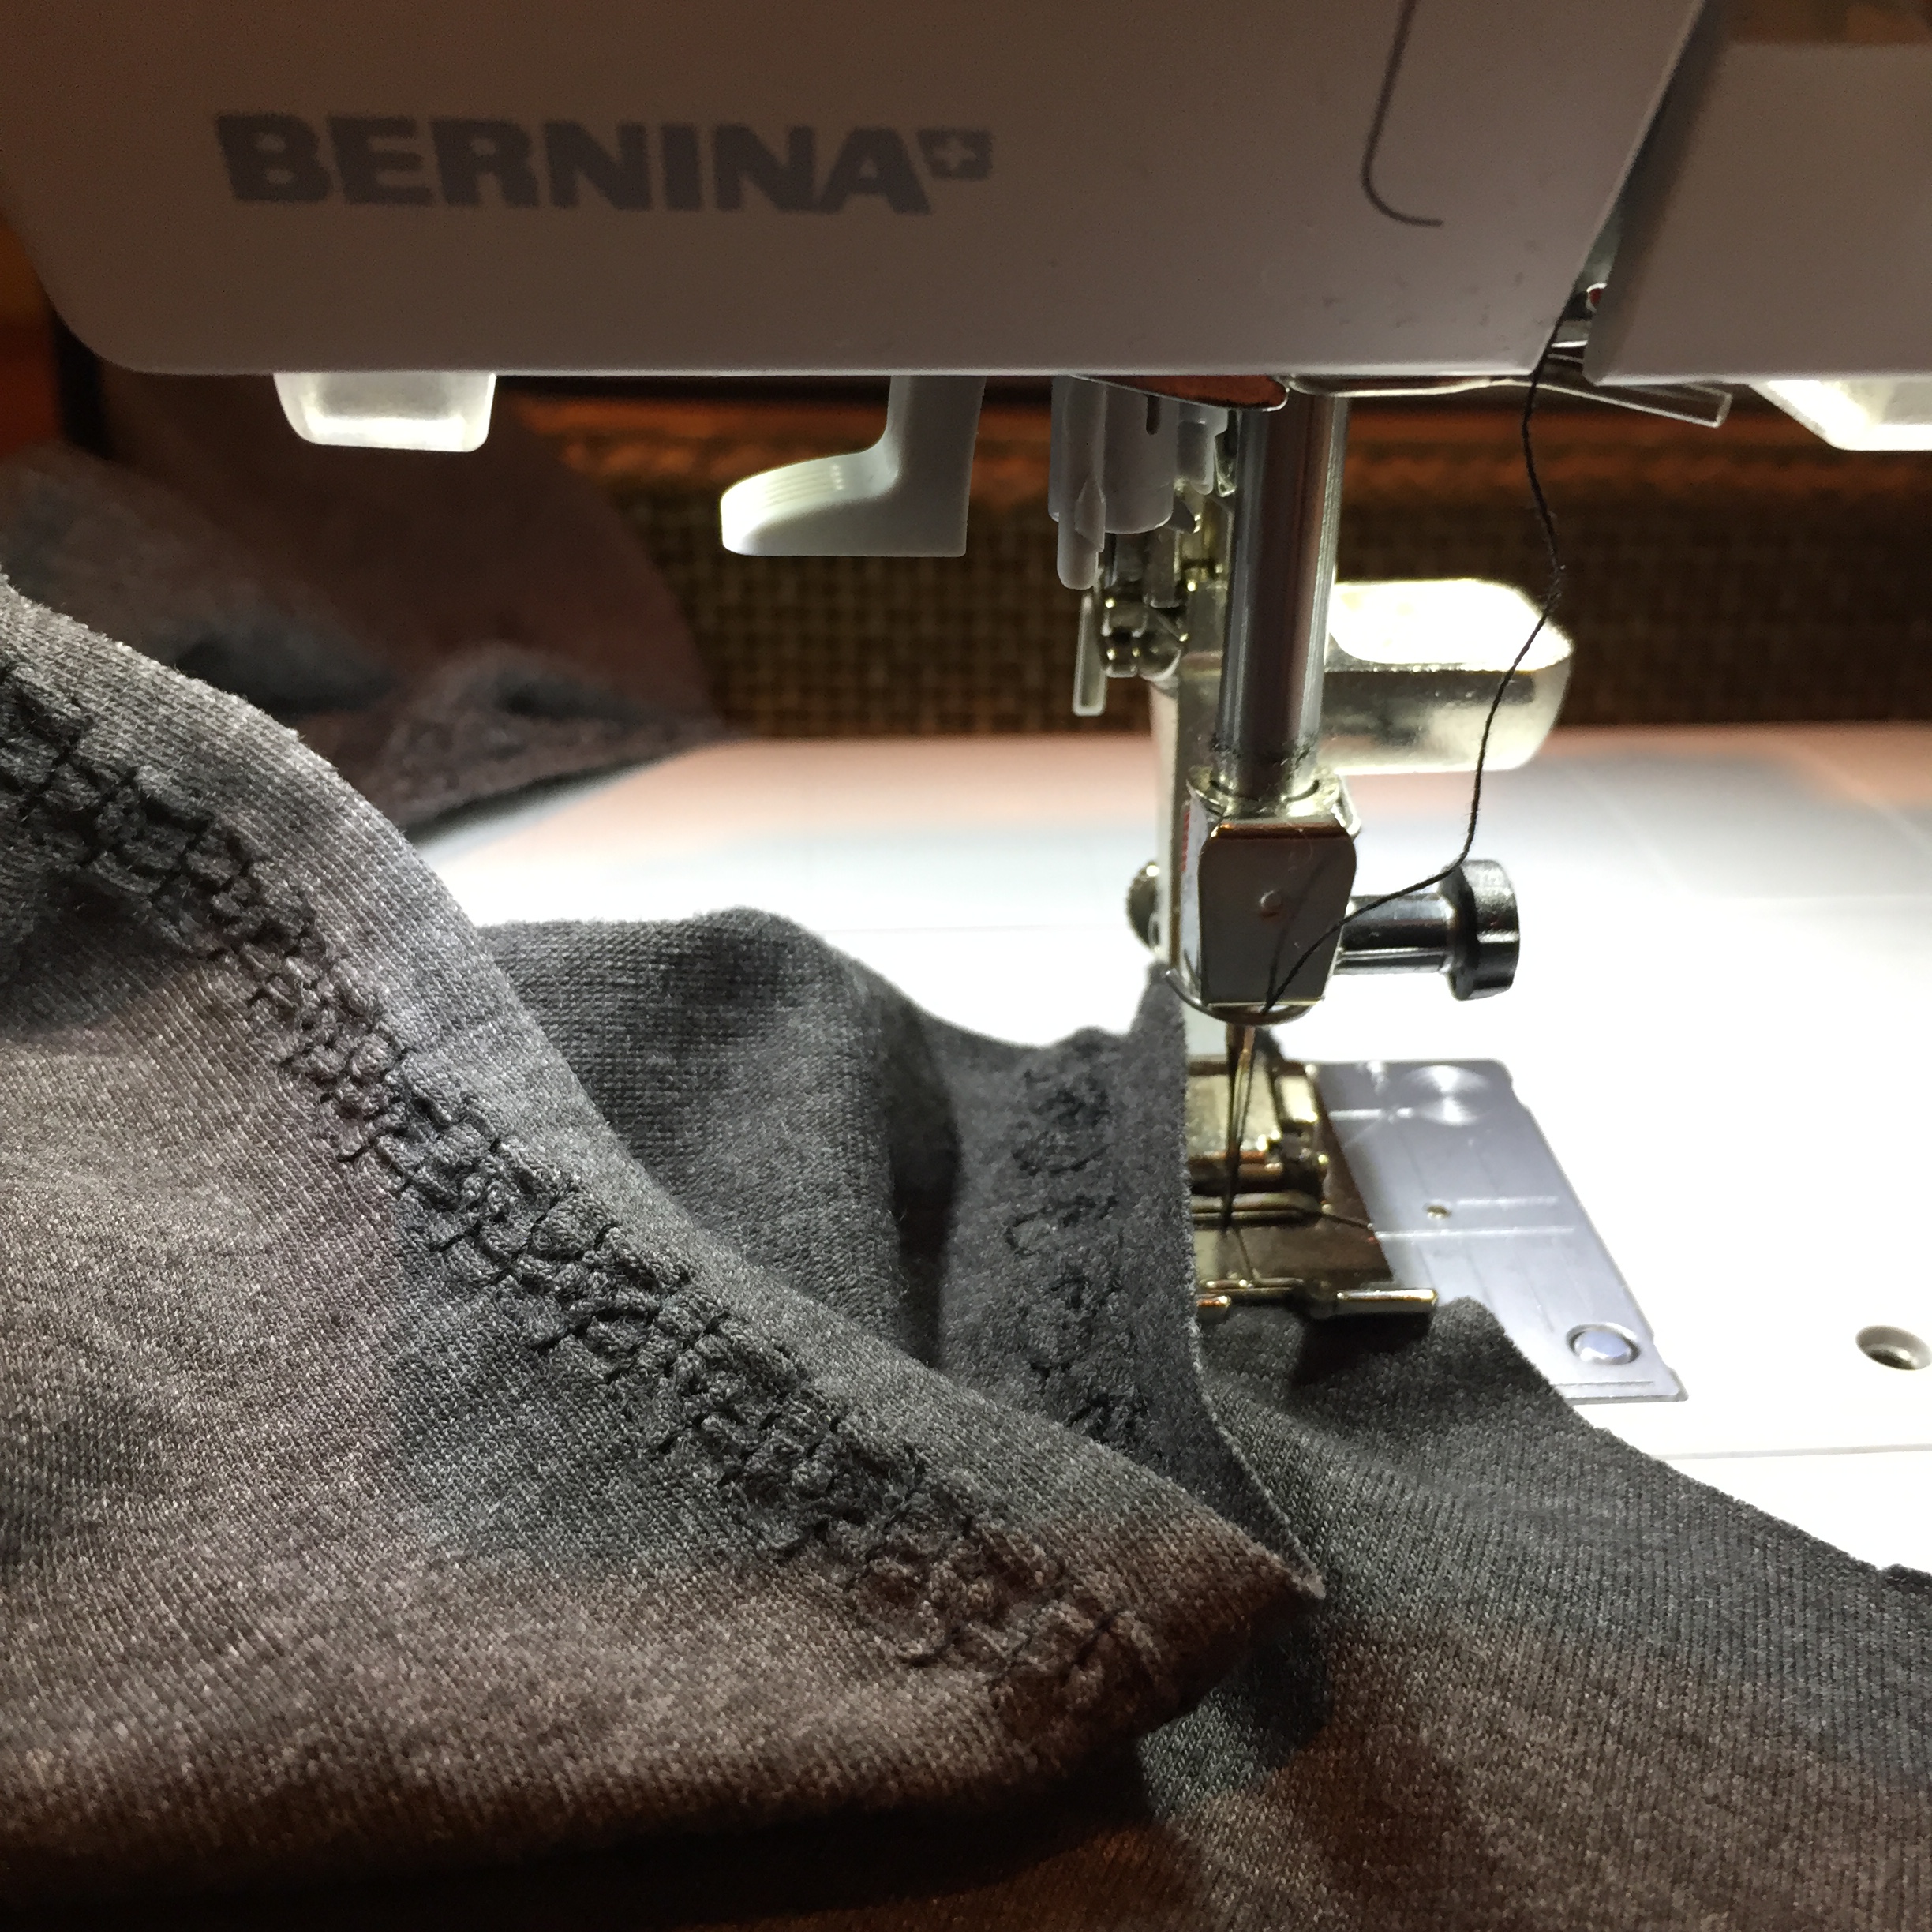
I like this pattern as a dress, and the bodice would be easy to hack into a top. I made a top with a neckline like this several years ago, and you can read all about it here: Crushed Boatneck Frankenpattern

image

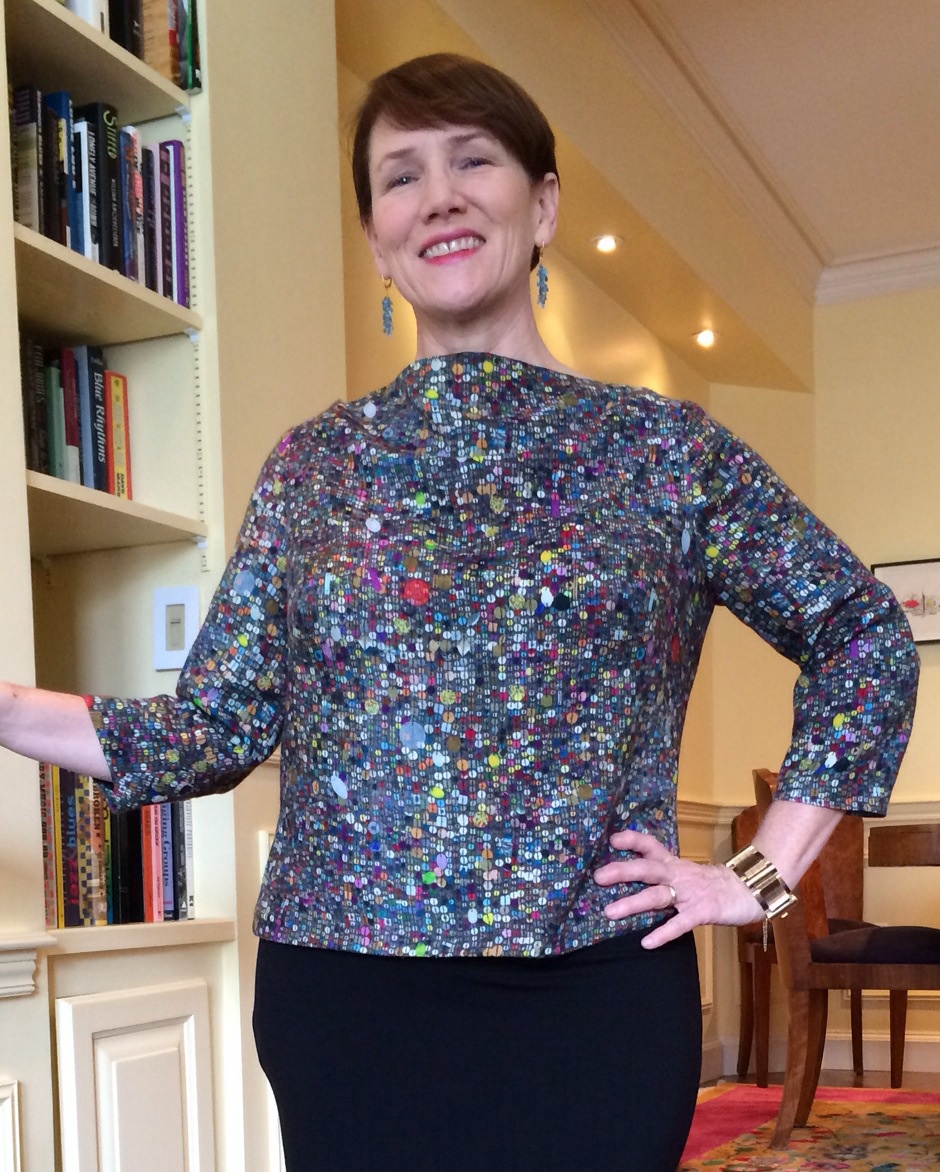
I’ve made three versions of that top, and have worn them to death.

I like this new “Retro” pattern from Butterick, as well, with a boatneck, cut-in sleeves, binding on the neck and sleeve edges, and a bias cummerbund to hide a multitude of desserts. It looks like it’s flattering and easy to wear.

Butterick 6242

And how about these cute sailor pants from Sandra Betzina? I wore the real thing from the Army/Navy store in the 70s, but now, I’d go for something like this, made from a stretch woven. We all need a little lycra in our lives, don’t we?

IMG_3220

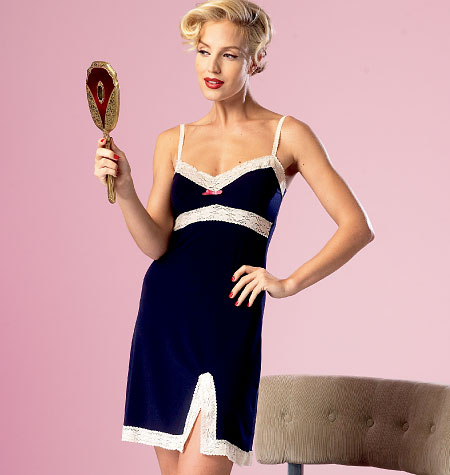
Earlier in the year, Simplicity released this playsuit pattern that I ended up buying. Even though the bra top and skirt are not for me at this age, I really like the way the sleeves are cut into the blouse. I’m not much of a blouse-wearer, but this one looks stylish and easy to wear.

IMG_3225

(I still haven’t made it though…)

And how adorable is this pattern from Simplicity?

IMG_3224

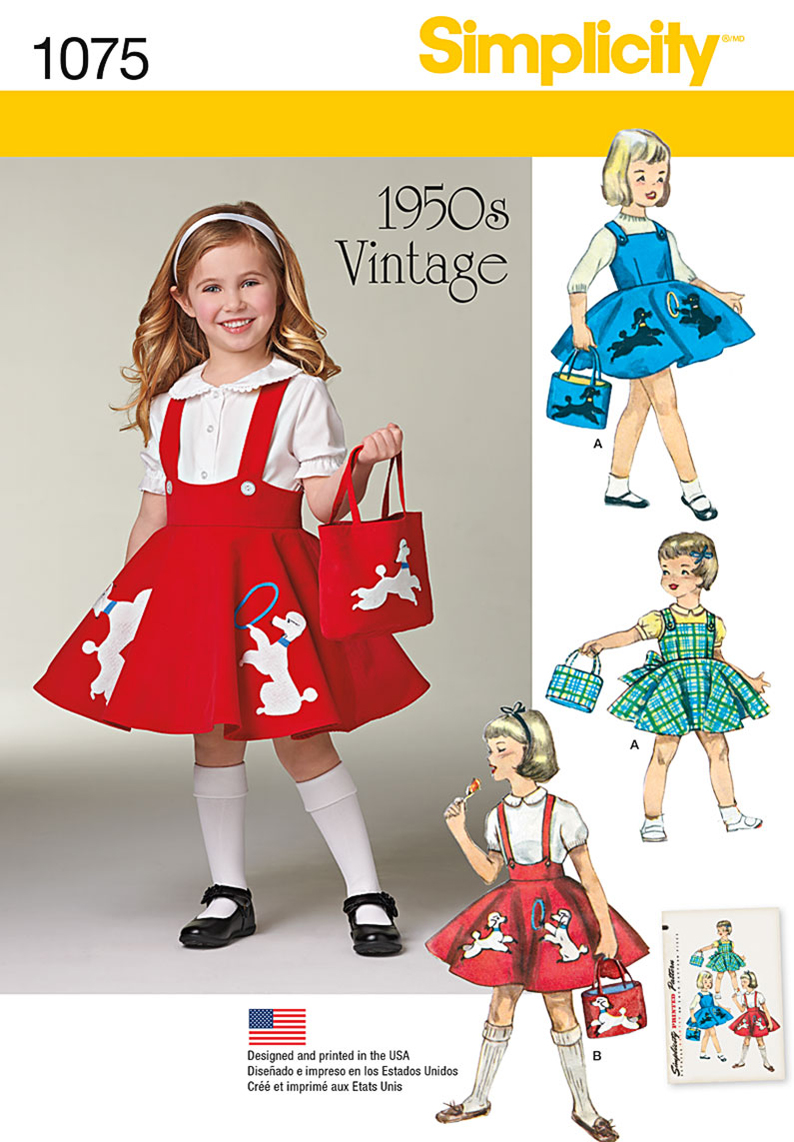
Even though my granddaughters would not wear this unless it was pink, sparkly and had a giant picture of Elsa from “Frozen” on it, it’s fun to think about them in it.

Come to think of it, I have seen a version of this design made up…

EPSON MFP image

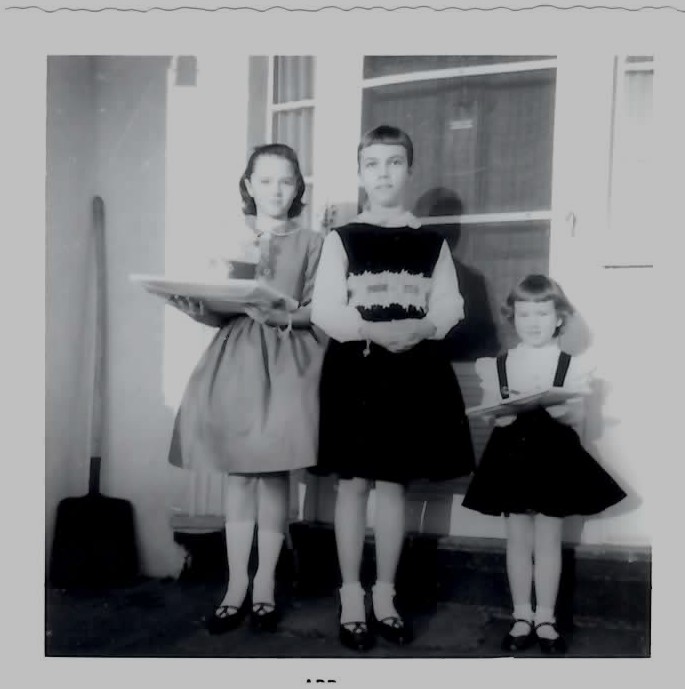
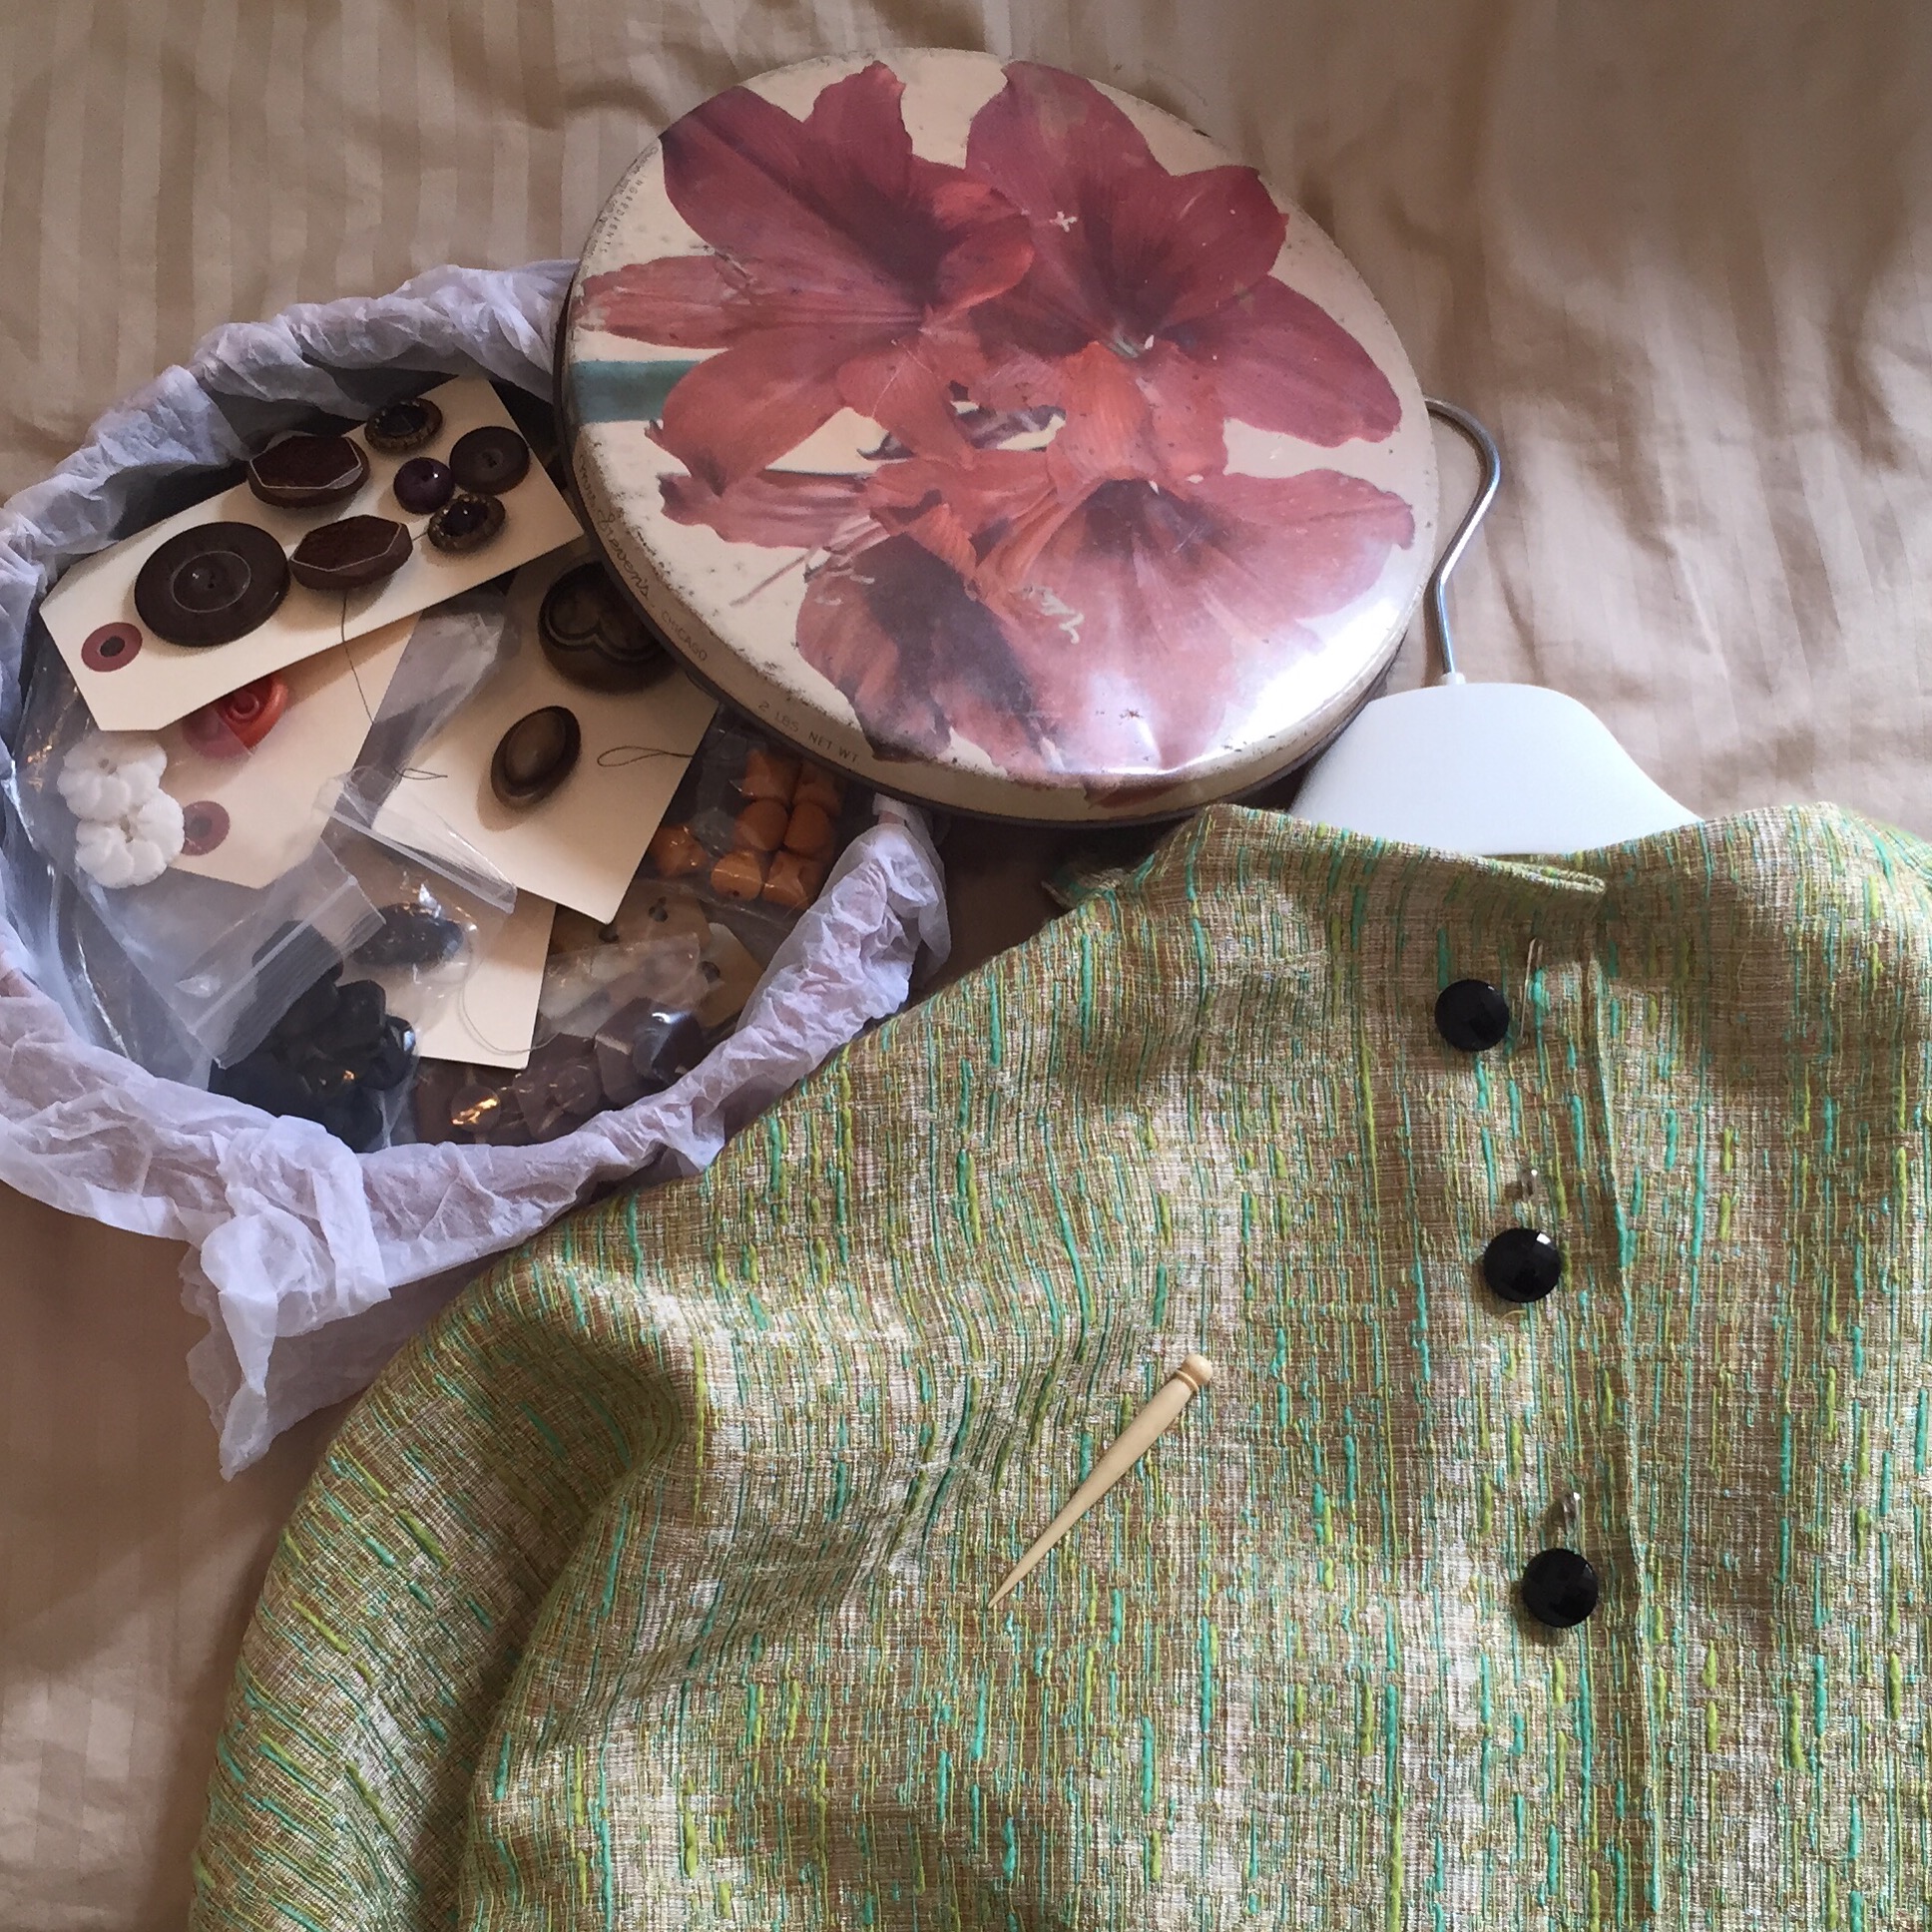
Yep, the little girl on the right is me! My sister Janet is on the left, and my sister Diane is in the middle. Diane, a choreographer and dance instructor, is also a world-class knitter. (I remember she taught me the “popcorn stitch” as a kid.) She’s the one that whips up fun, gourmet party food in about a half an hour and throws warm, relaxed family gatherings. A few months ago, she sent me our grandmother’s button box, full of vintage buttons!

IMG_3212

The photo of we three sisters is from 1961, at which point, when you wore a dress, it was going to have a “stick-out slip” under it (AKA a crinoline). I remember being in first grade in a dress like this (because you weren’t allowed to wear pants), with an itchy crinoline, sitting on the freezing, gritty linoleum floor for 45 minutes watching a tiny black and white TV, waiting for one of the Apollo rockets to launch. It would always get delayed, and it was so boring! And cold! And dirty!

I was in northern Michigan, which is cold and snowy, so we would either have snowpants under the crinolines when we went outside, or we stuffed the whole thing, slip and skirt, inside the snowpants.

So if you’re wondering why baby boomer-aged women in the U.S. run around in yoga jeans, black sneakers, knit Breton tops, and giant sweaters long enough to sit on, that pretty much sums it up.

I’m glad that the Big 4 pattern companies are offering a variety of vintage styles, and not just the big “I Love Lucy” full skirts that have been popular for awhile. I have to give a shoutout to Vogue-Butterick-McCalls for reaching out to sewing enthusiasts and doing market research about what types of patterns we’re looking for. Their new collections are quite appealing.

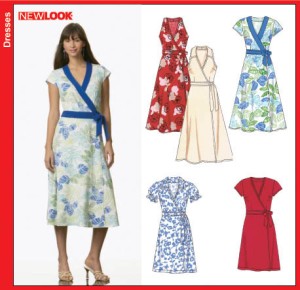
And here’s my all-time favorite of the Big 4 vintage style patterns…

(Are you expecting this?)

IMG_3222

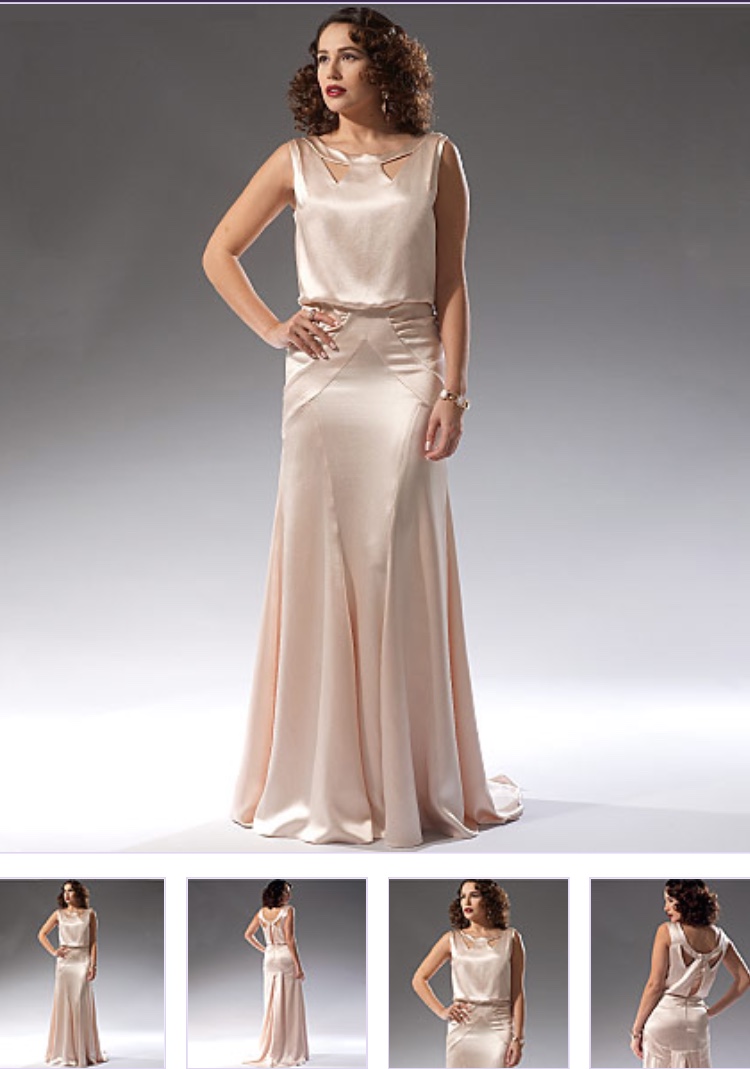
McCalls 7154 has been the talk of the town on vintage blogs and boards, and it is gorgeous. I can’t pull it off at this age, but Lisa of Paprika Patterns  is giving it a go now. We’ll see how it turns out!

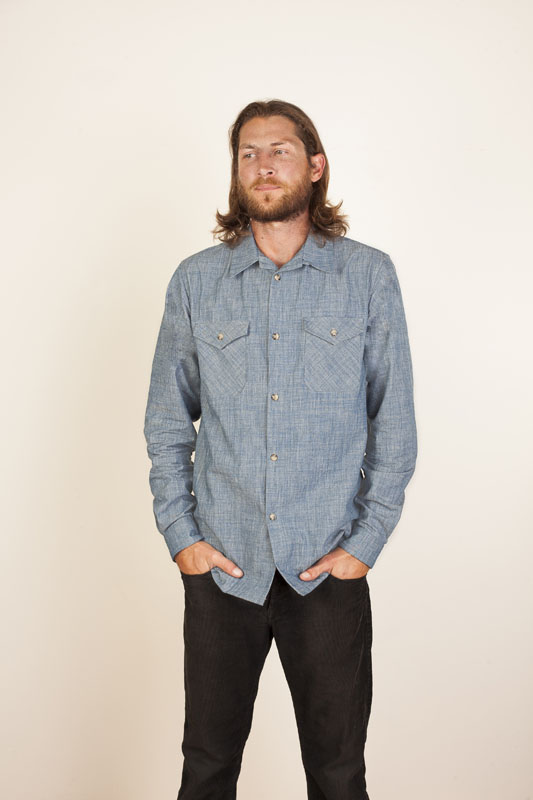
No, my favorite of the Big 4 vintage-style patterns is this:

IMG_3221

Isn’t McCalls 7206 the most fabulous young guy hipster/old guy hipster pattern!?! You can make it solid, in two colors, or in three colors. It could be made into a bowling shirt, a Hawaiian shirt, or you could embroider it for a Cuban guayabera… And those seams are like princess seams. Someone needs to hack this for a girl!

The indy patternmakers have been busy as well.

Decades of Style has a new line of easy vintage patterns. I know some of you readers are just learning to sew or returning to sewing after a long time, and these look like fun projects.

Here’s the “Given A Chance” Dress pattern:

IMG_3215

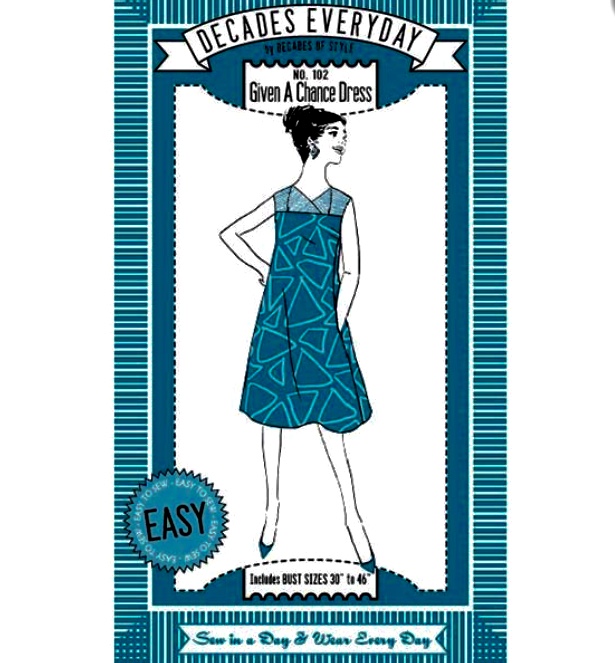
It really has that “let’s have highballs on the patio” look to it, doesn’t it?

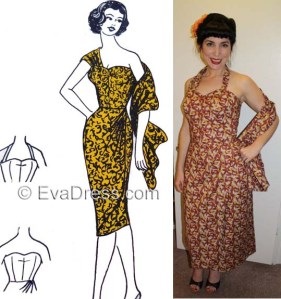
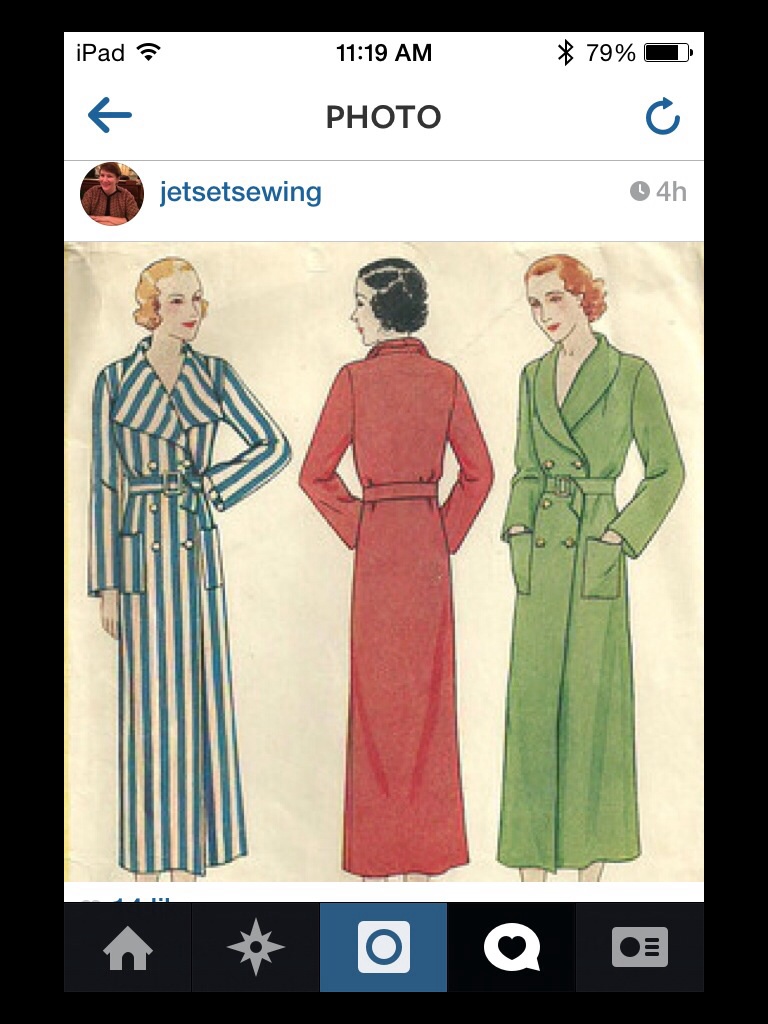
Eva Dress is another reliable pattern re-release company, and they’ve just put out this pattern for 1935 Beach Pajamas…something I wish I could wear to the beach now:

IMG_3227

I like the retro patterns from both Decades of Style and Eva Dress, because they spend time testing their patterns and rewriting the instructions to make them clear for modern sewing enthusiasts. Having worked with original vintage patterns myself, it can be like reading hieroglyphics!

I’d also like to mention that the blogger Shelley, of New Vintage Lady, offers some extremely cool plus-size vintage pattern repros on Etsy.

IMG_3213il_570xN.268777786

She’s an animator, and her indy comic called “Vintageville,” sold through her Etsy shop, is so unique and worth a look.

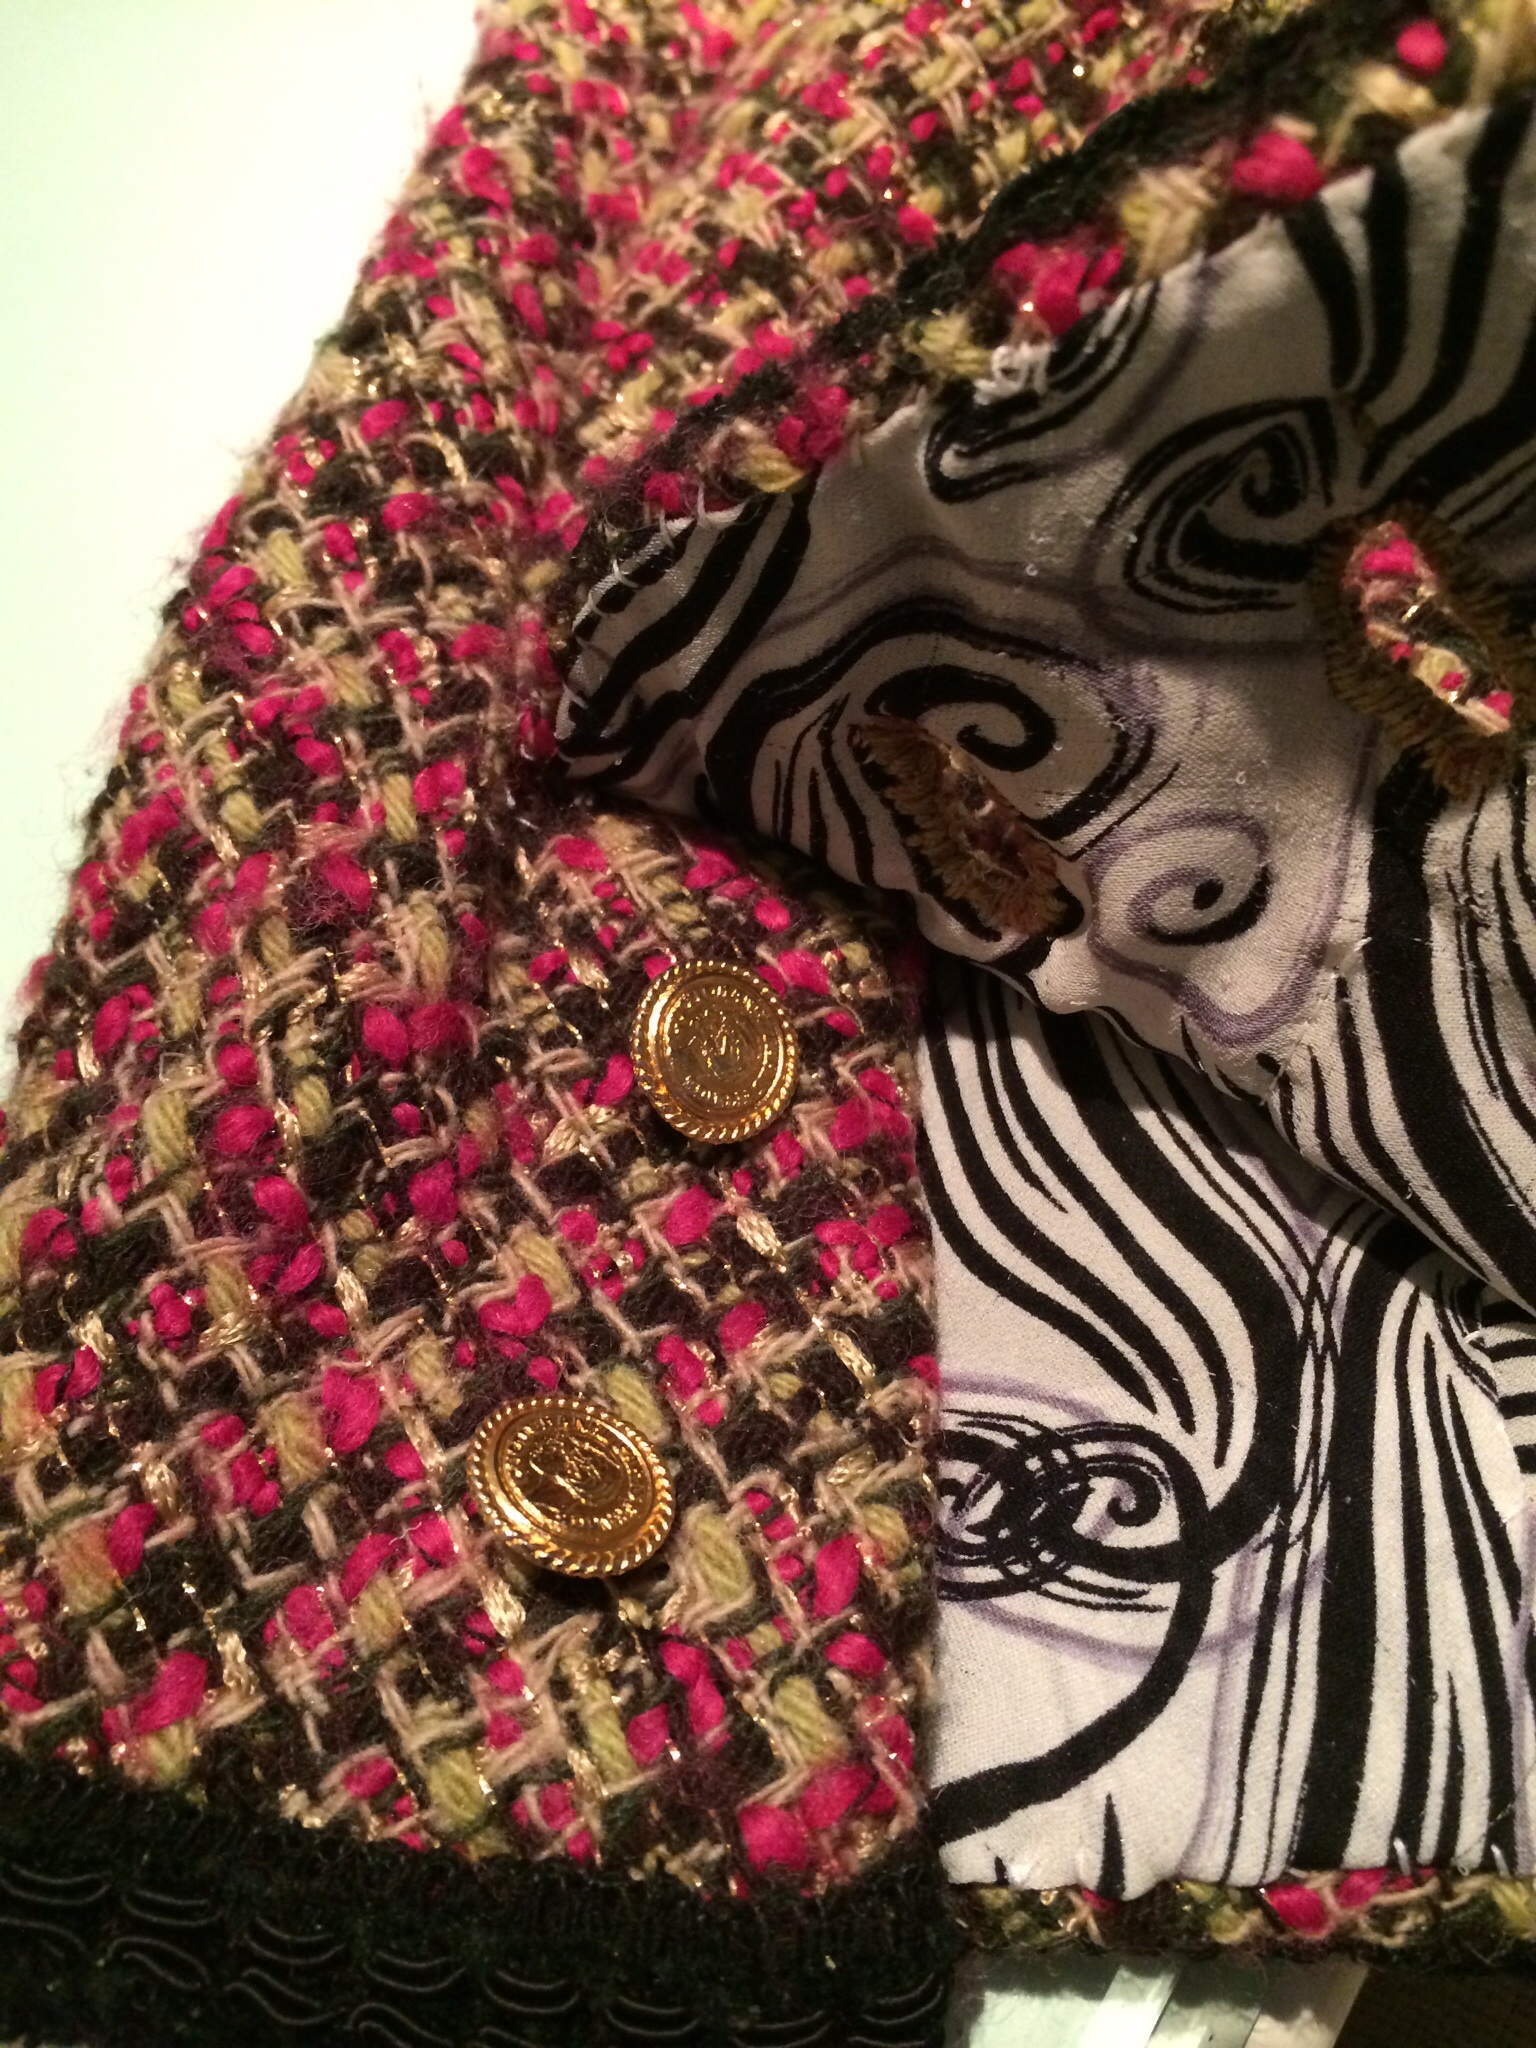
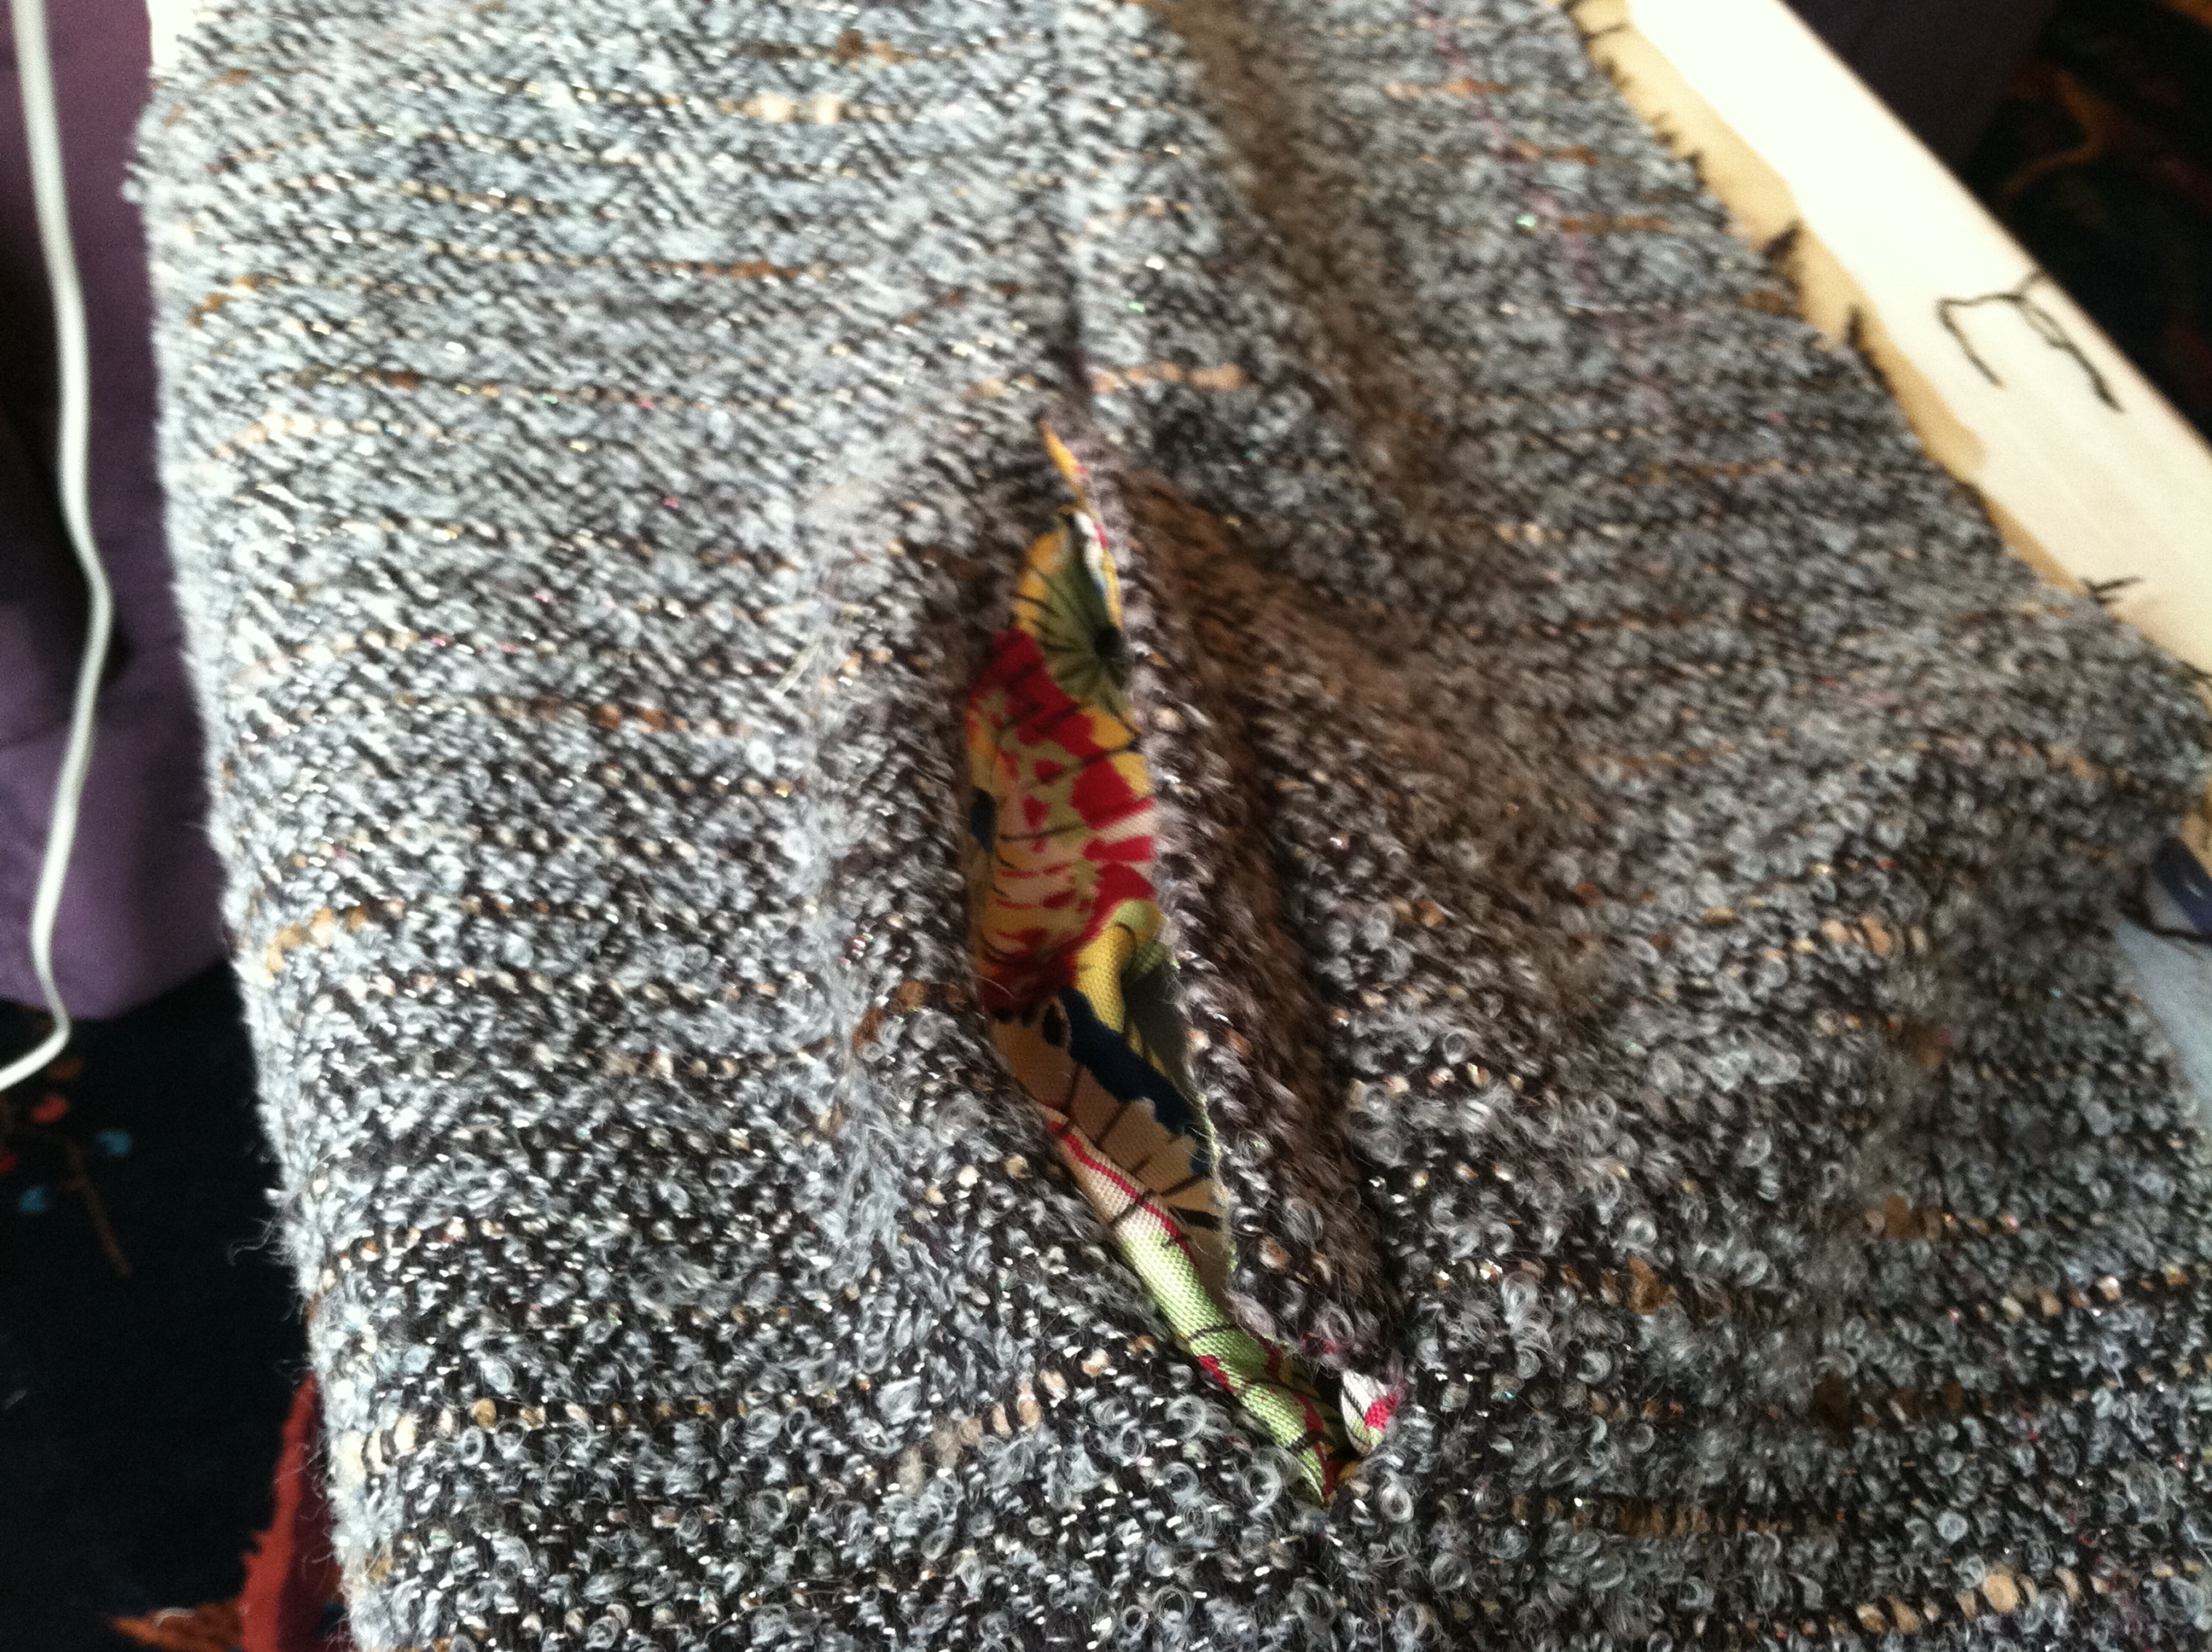
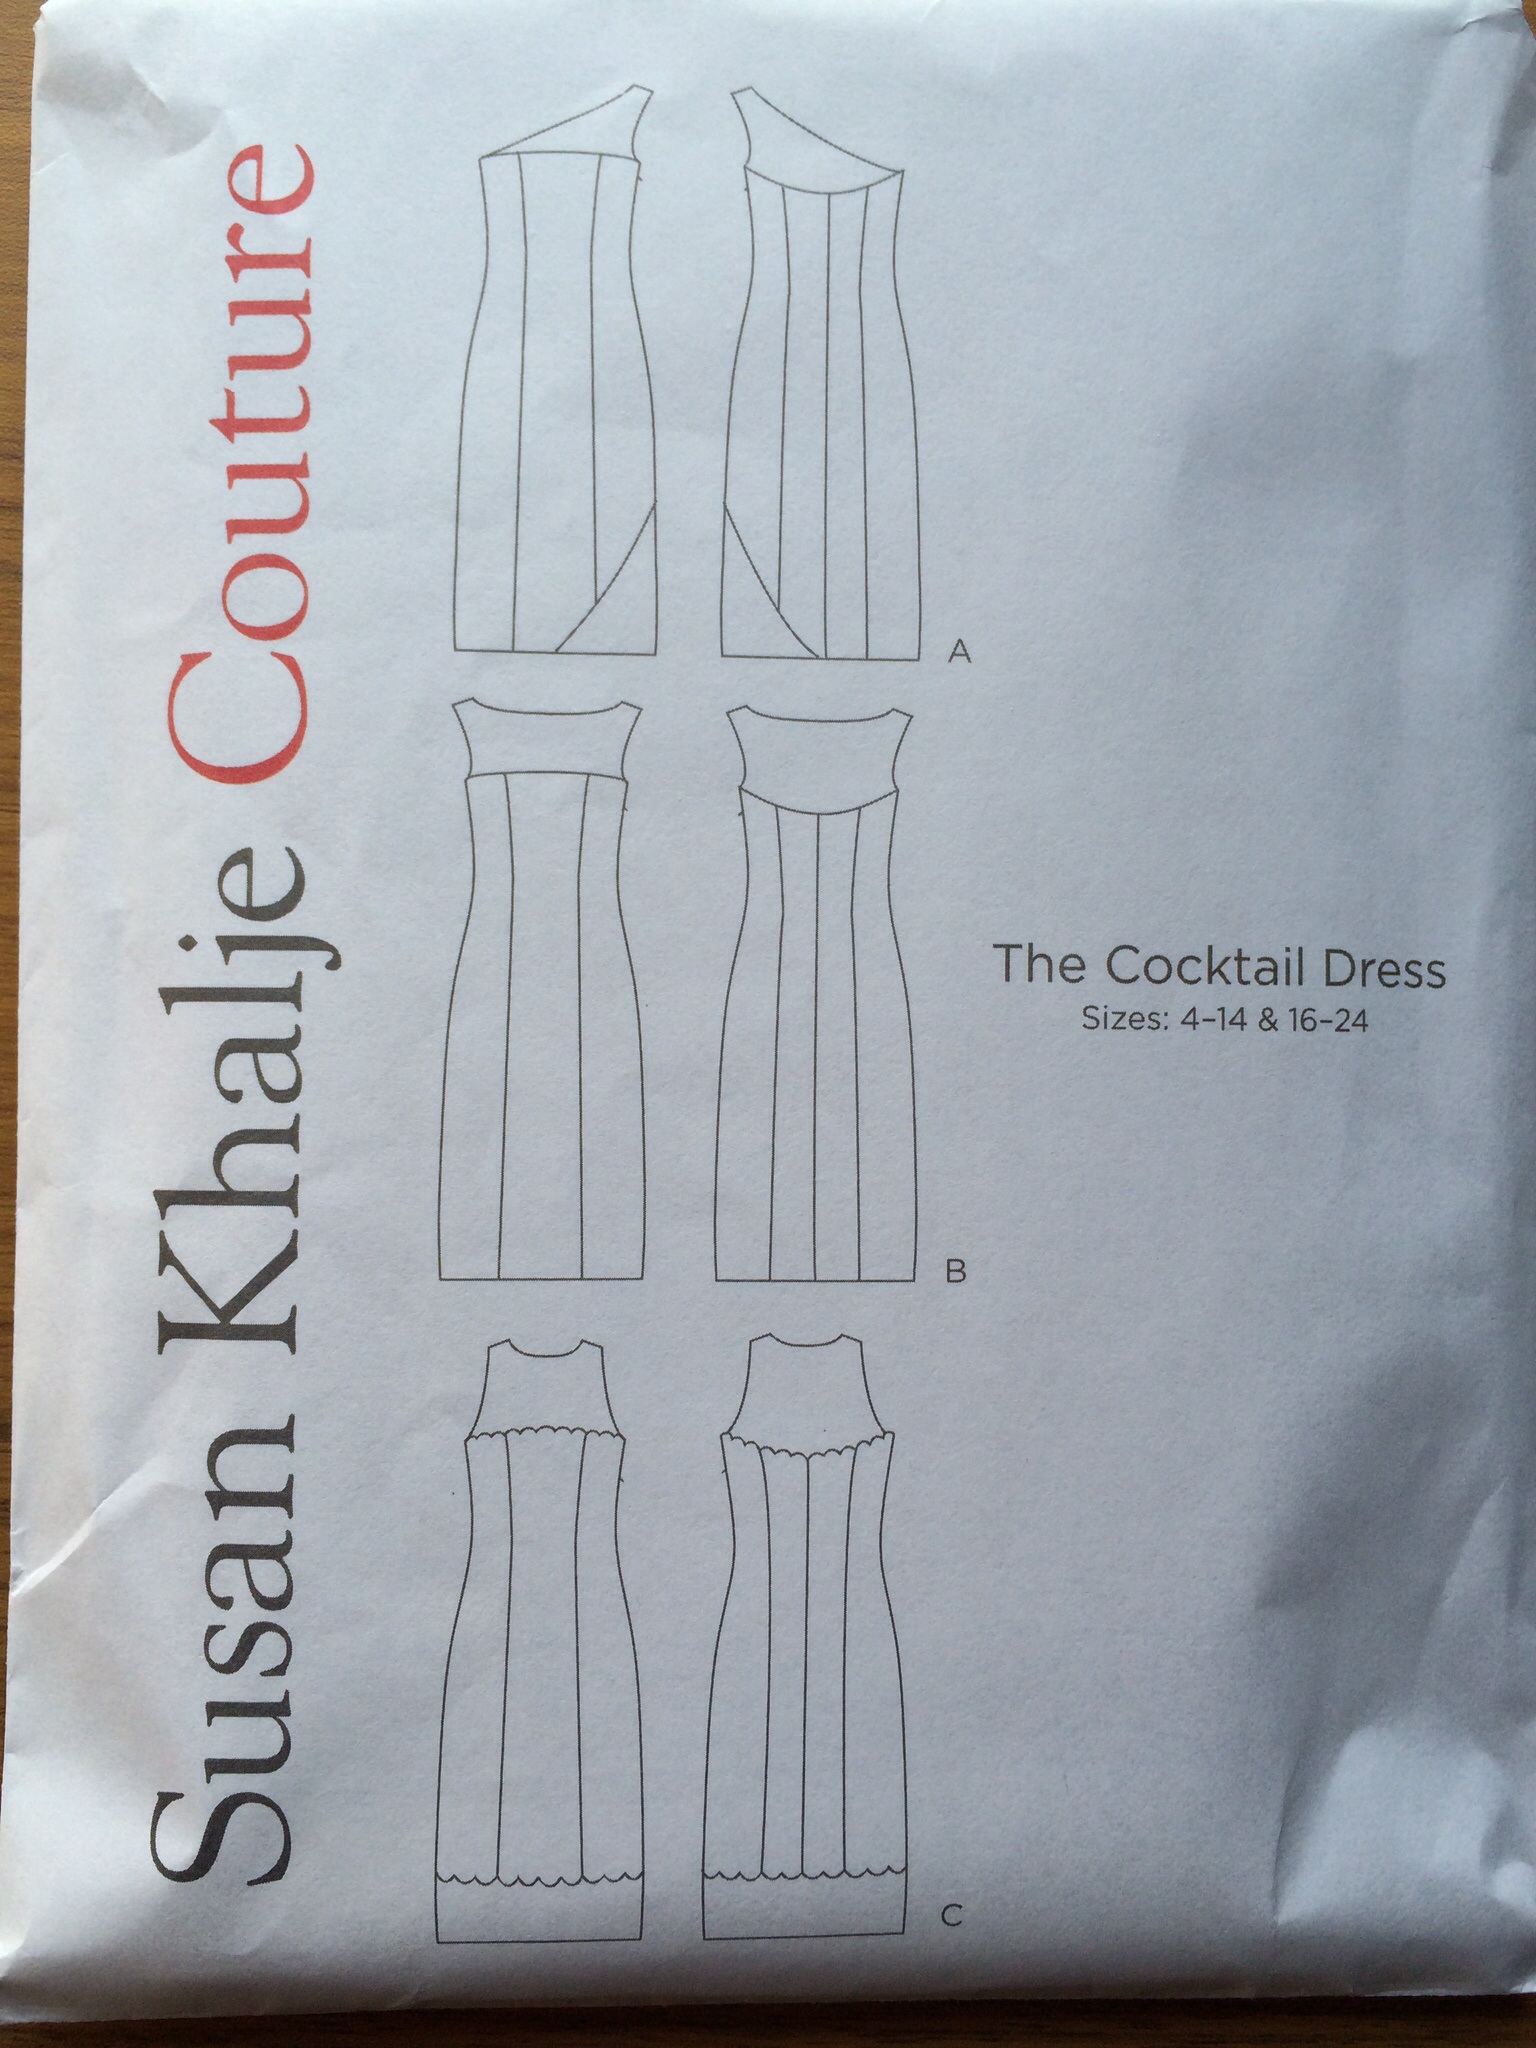
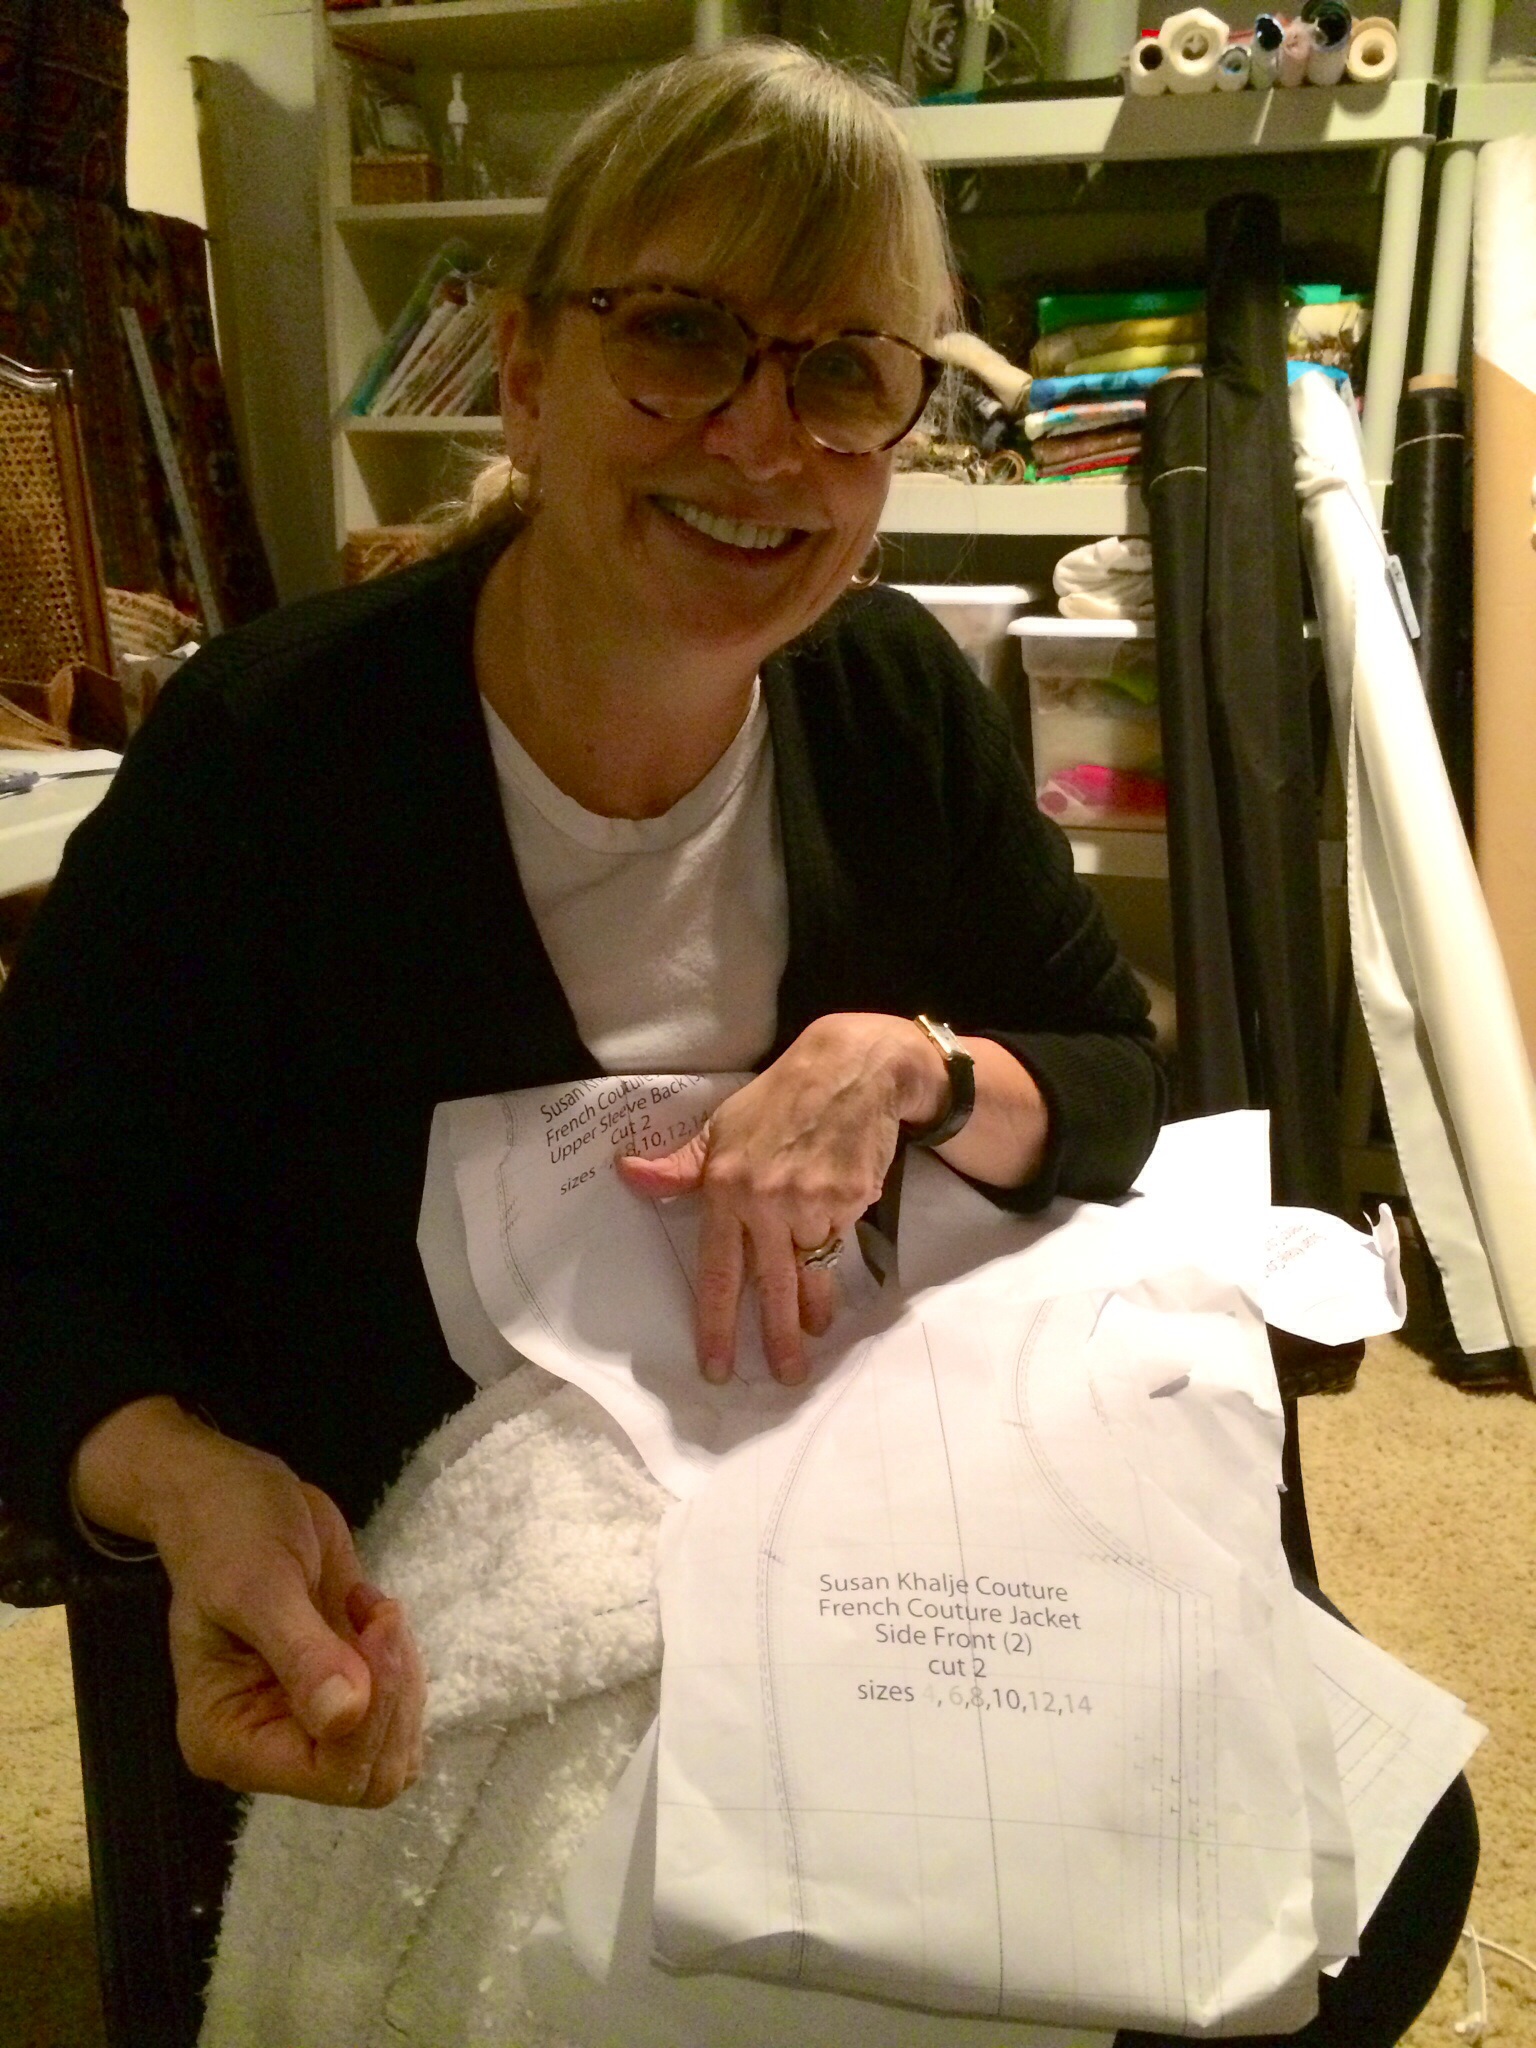
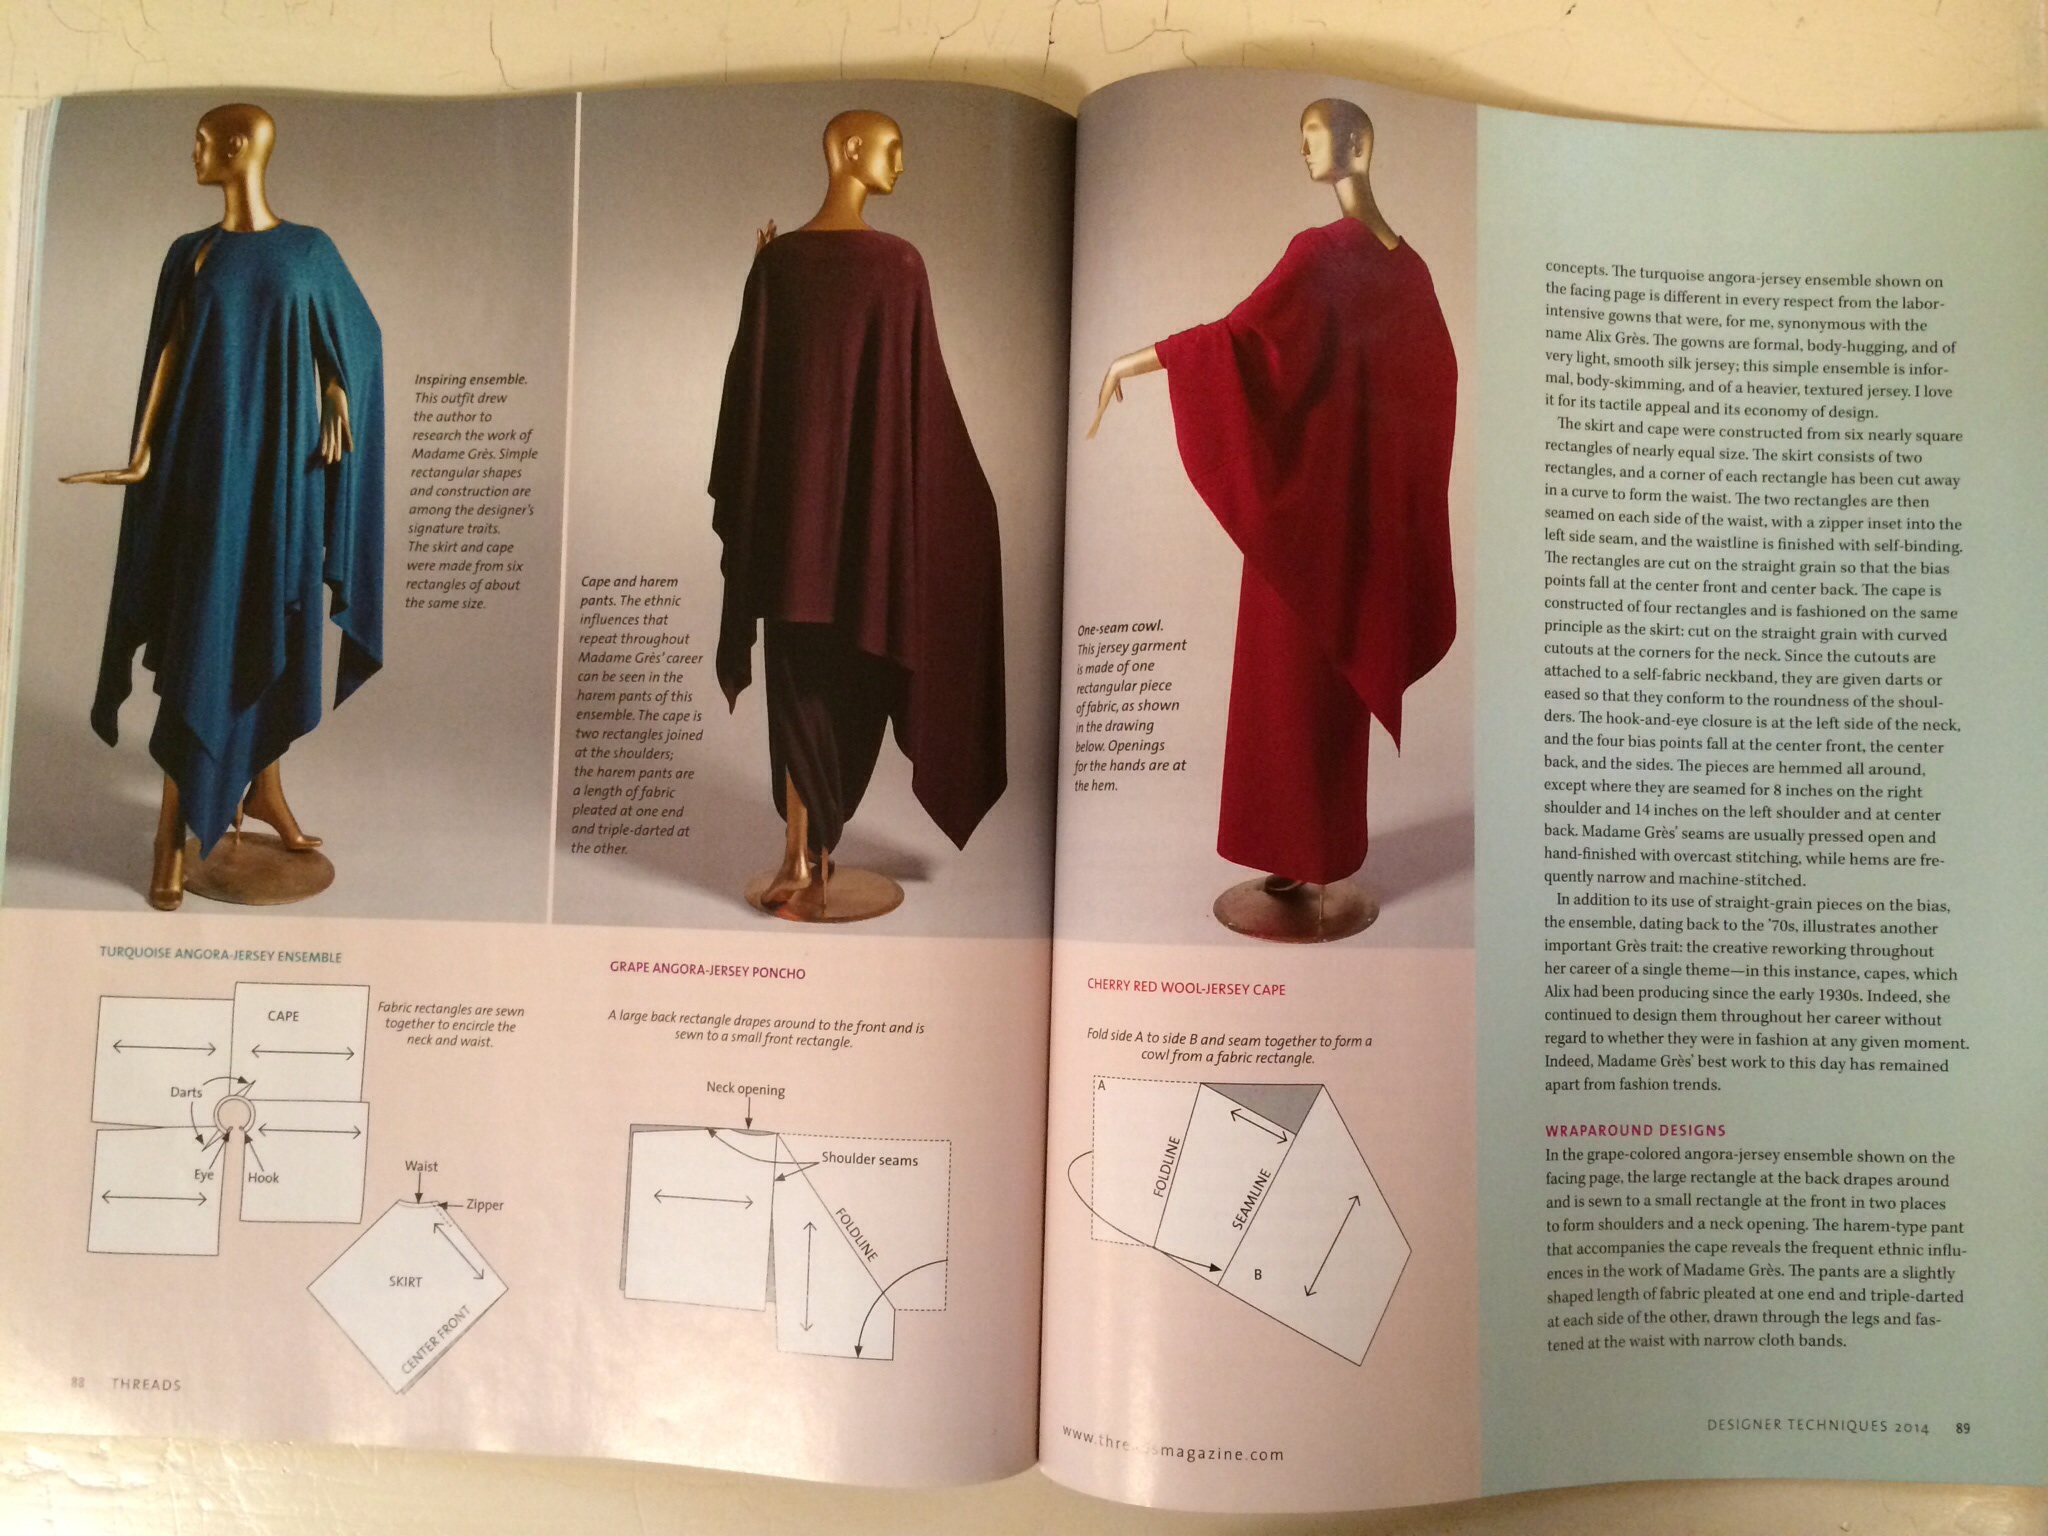
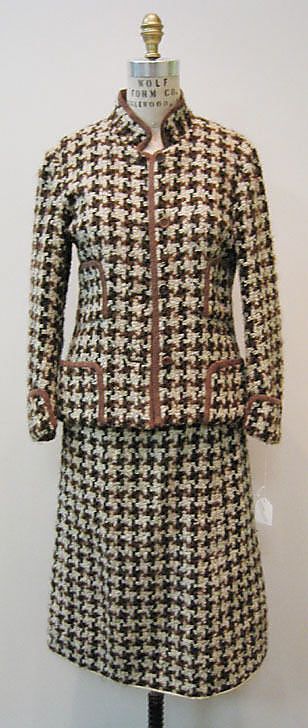
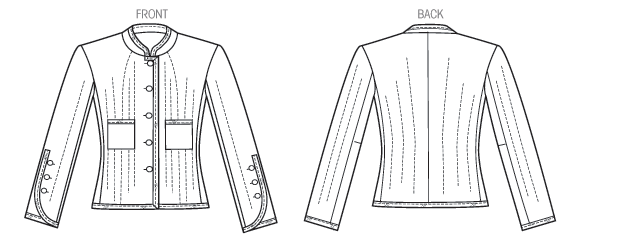
If you’re in the mood to make a Chanel jacket (or French jacket or cardigan jacket), Susan Khalje’s new jacket pattern is available on her website, with or without her Couture French Jacket course. The pattern makes the two jackets pictured here:

FCJ_2

70 years later, they’re still in style.

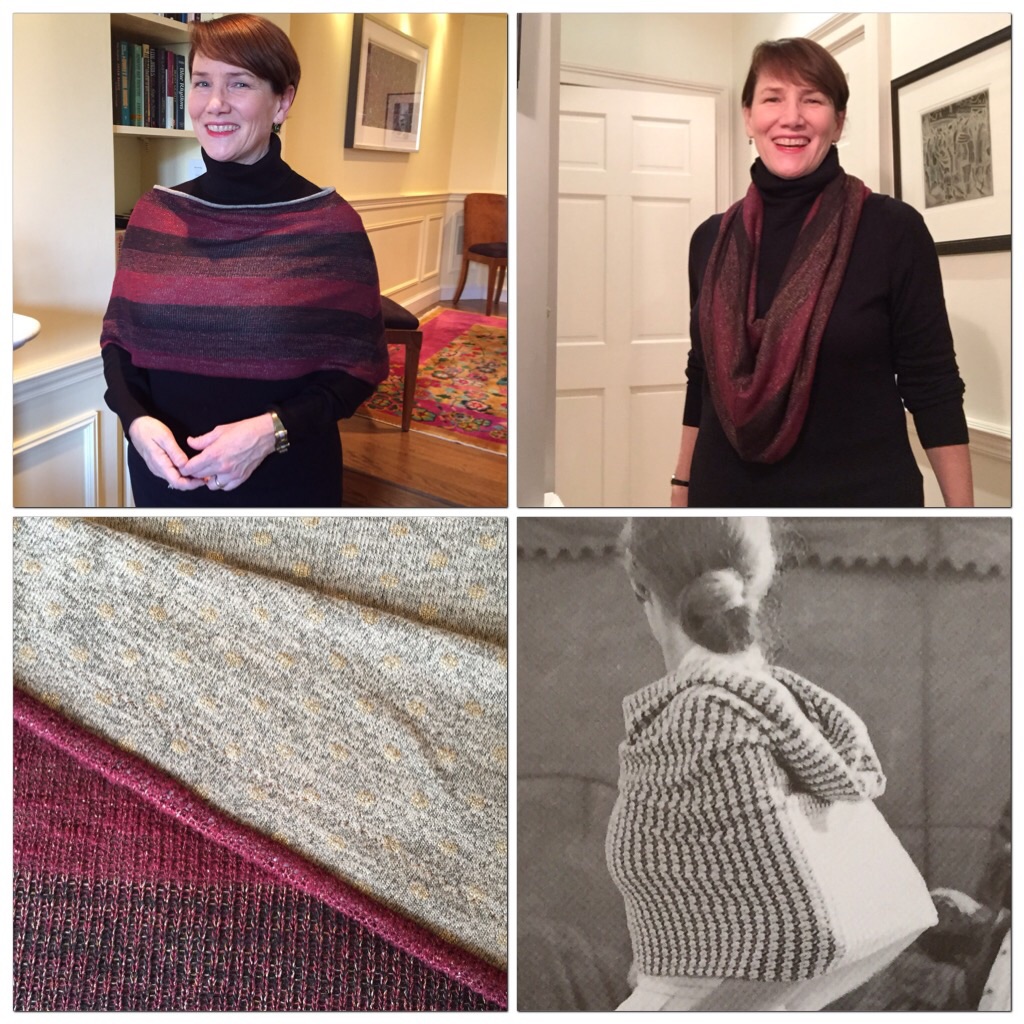
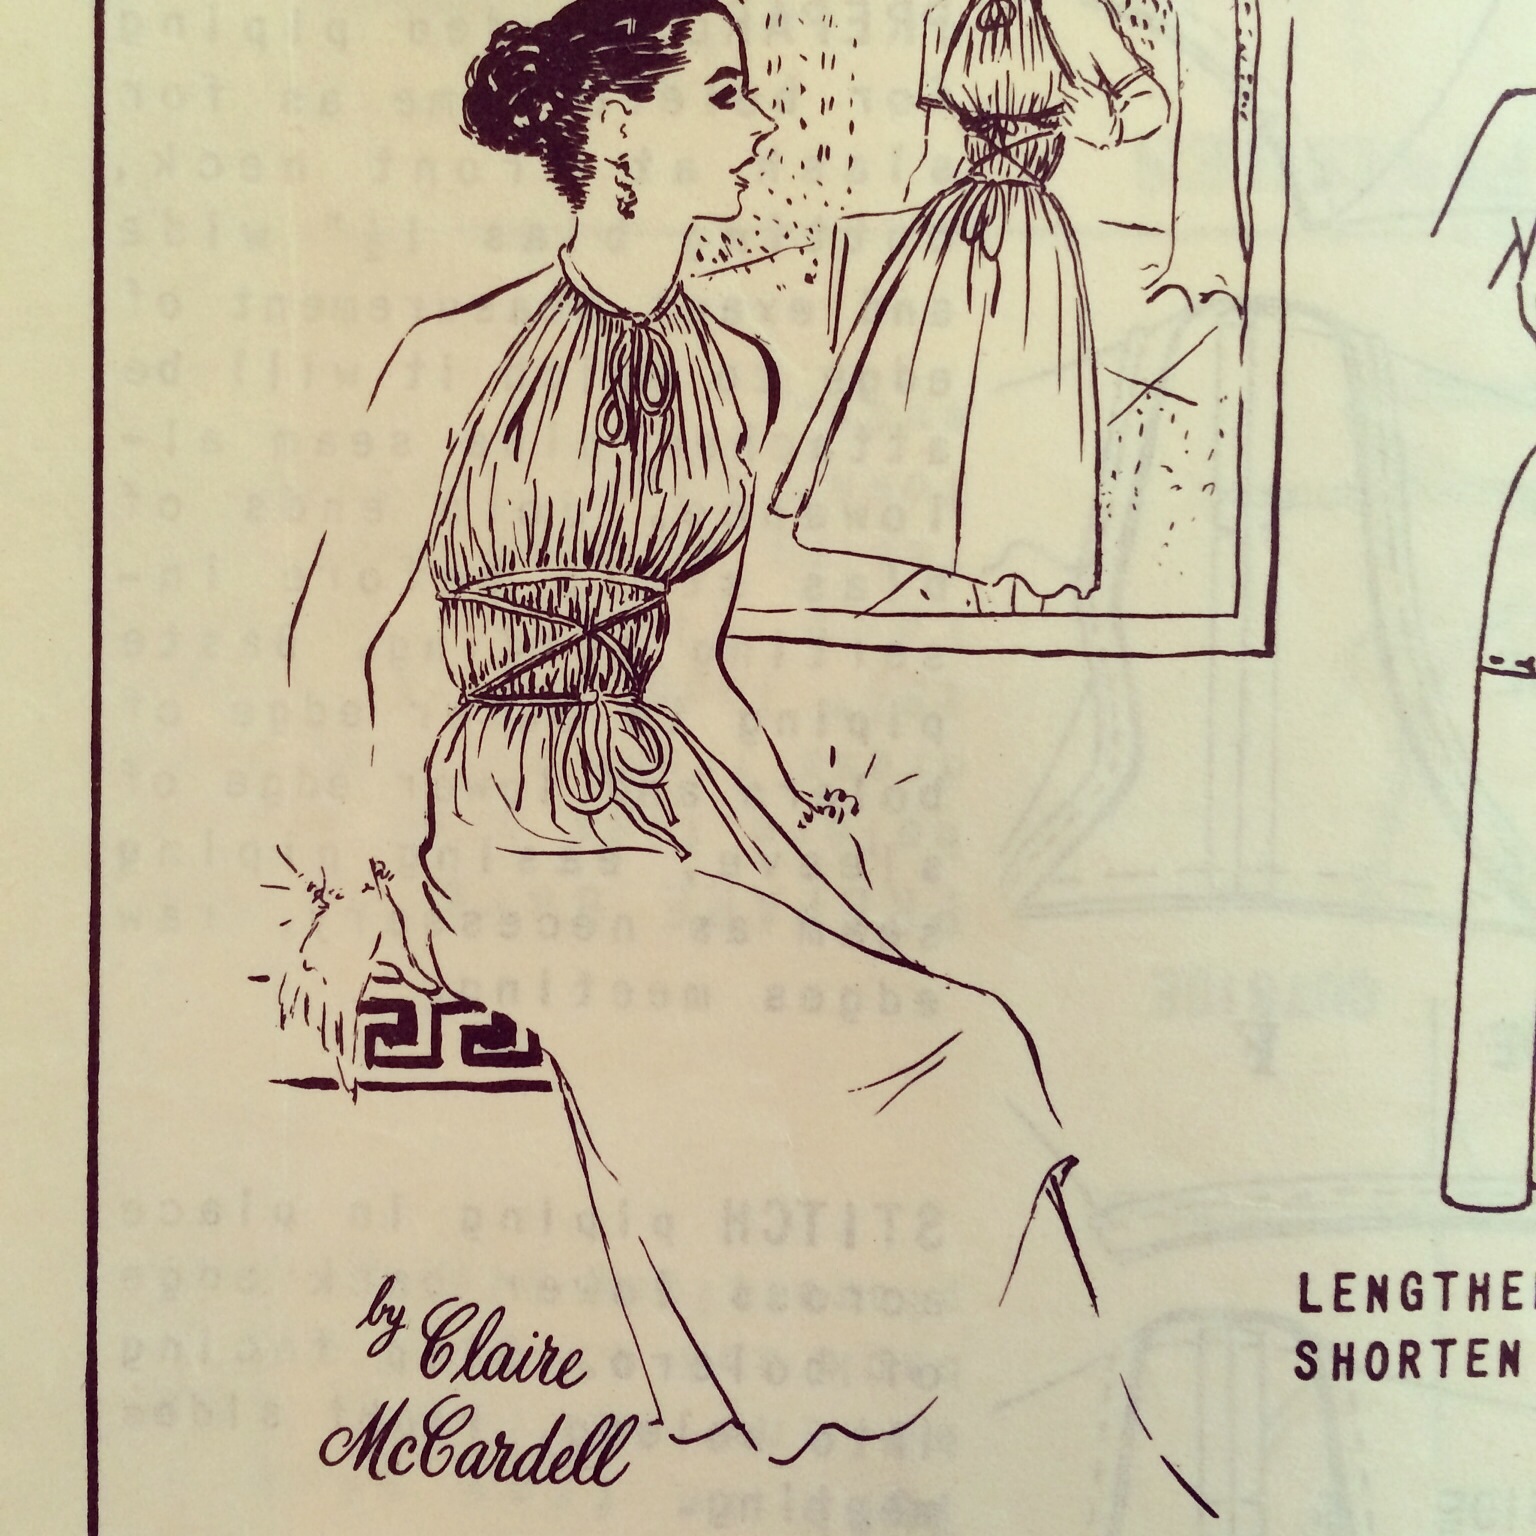
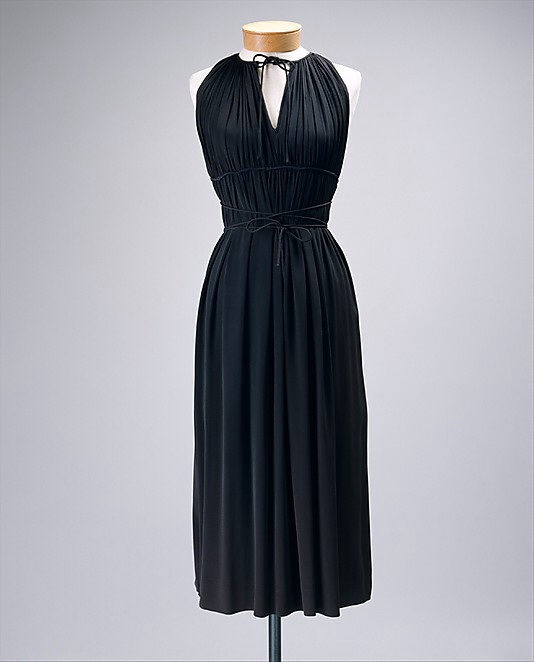
And just a reminder that my two free vintage-style patterns, for the 50s Buttonhole Scarf and the Claire McCardell-Inspired Wrap, are still available on WeAllSew.com. Just download and go!

imageimage

As for being the first officially-sanctioned Intergalactic Sewing Blog, well, it’s true!

I know that you (and perhaps Karl) may be skeptical, but I have proof.

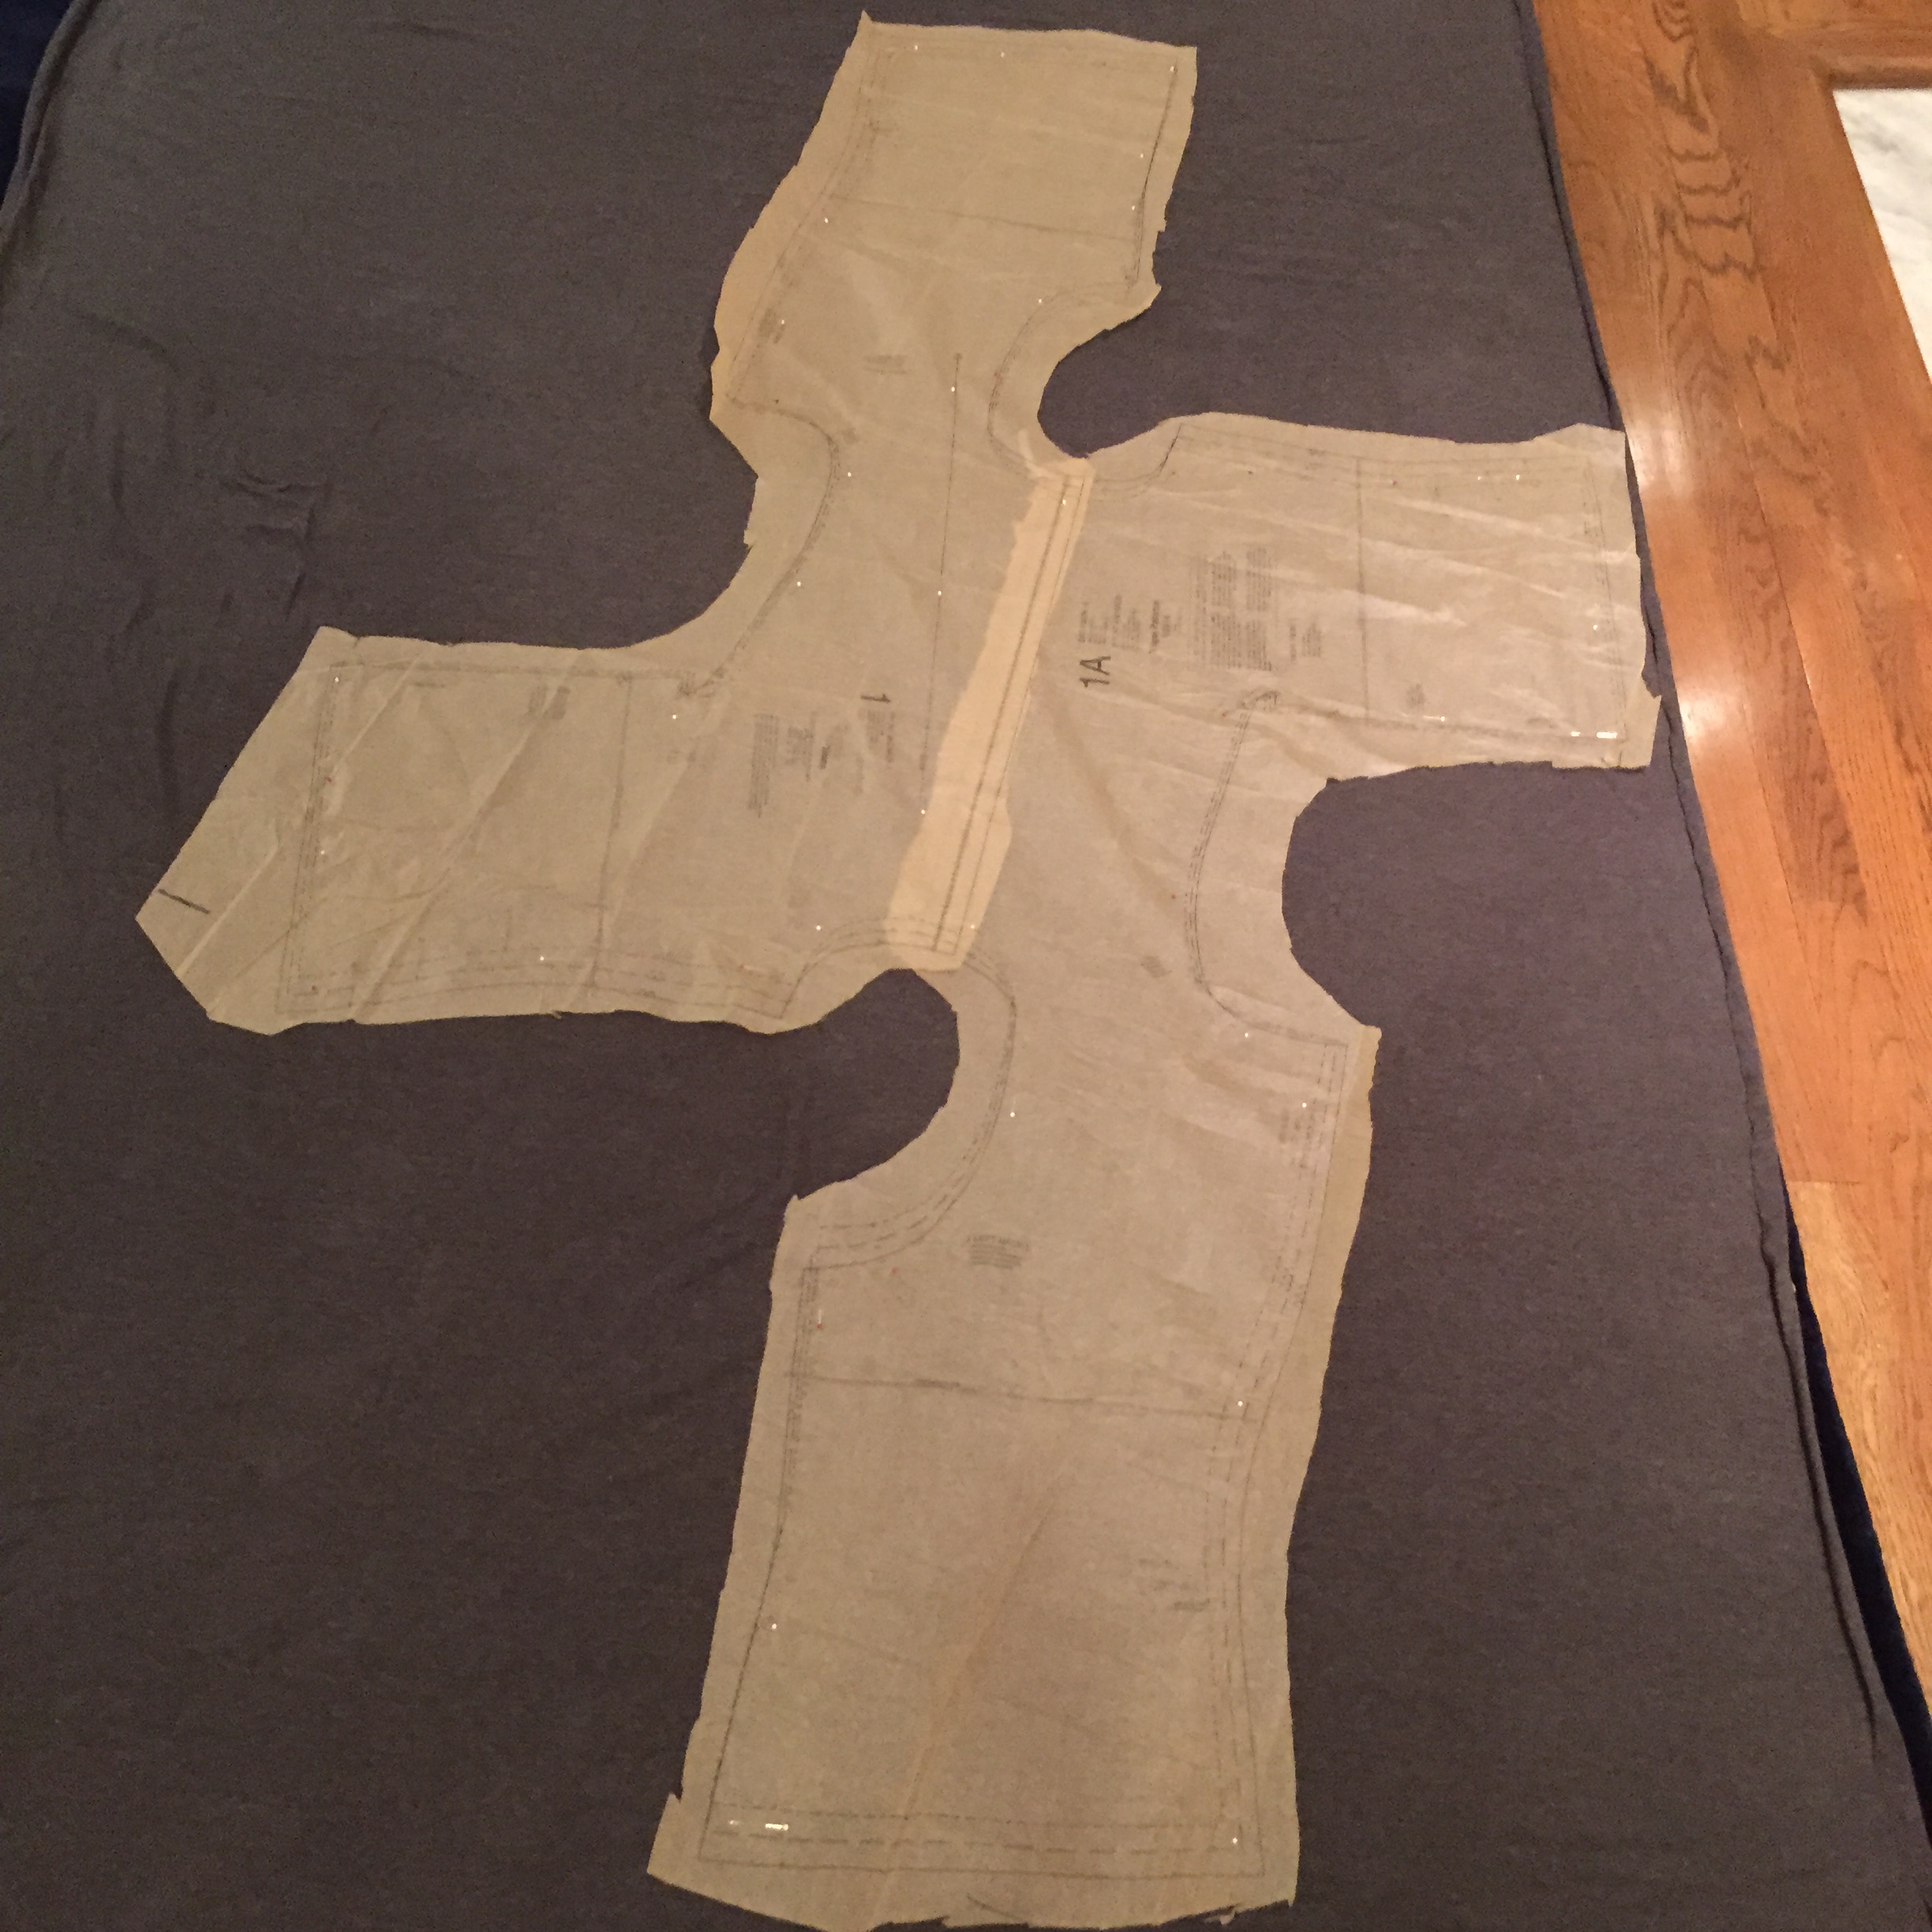
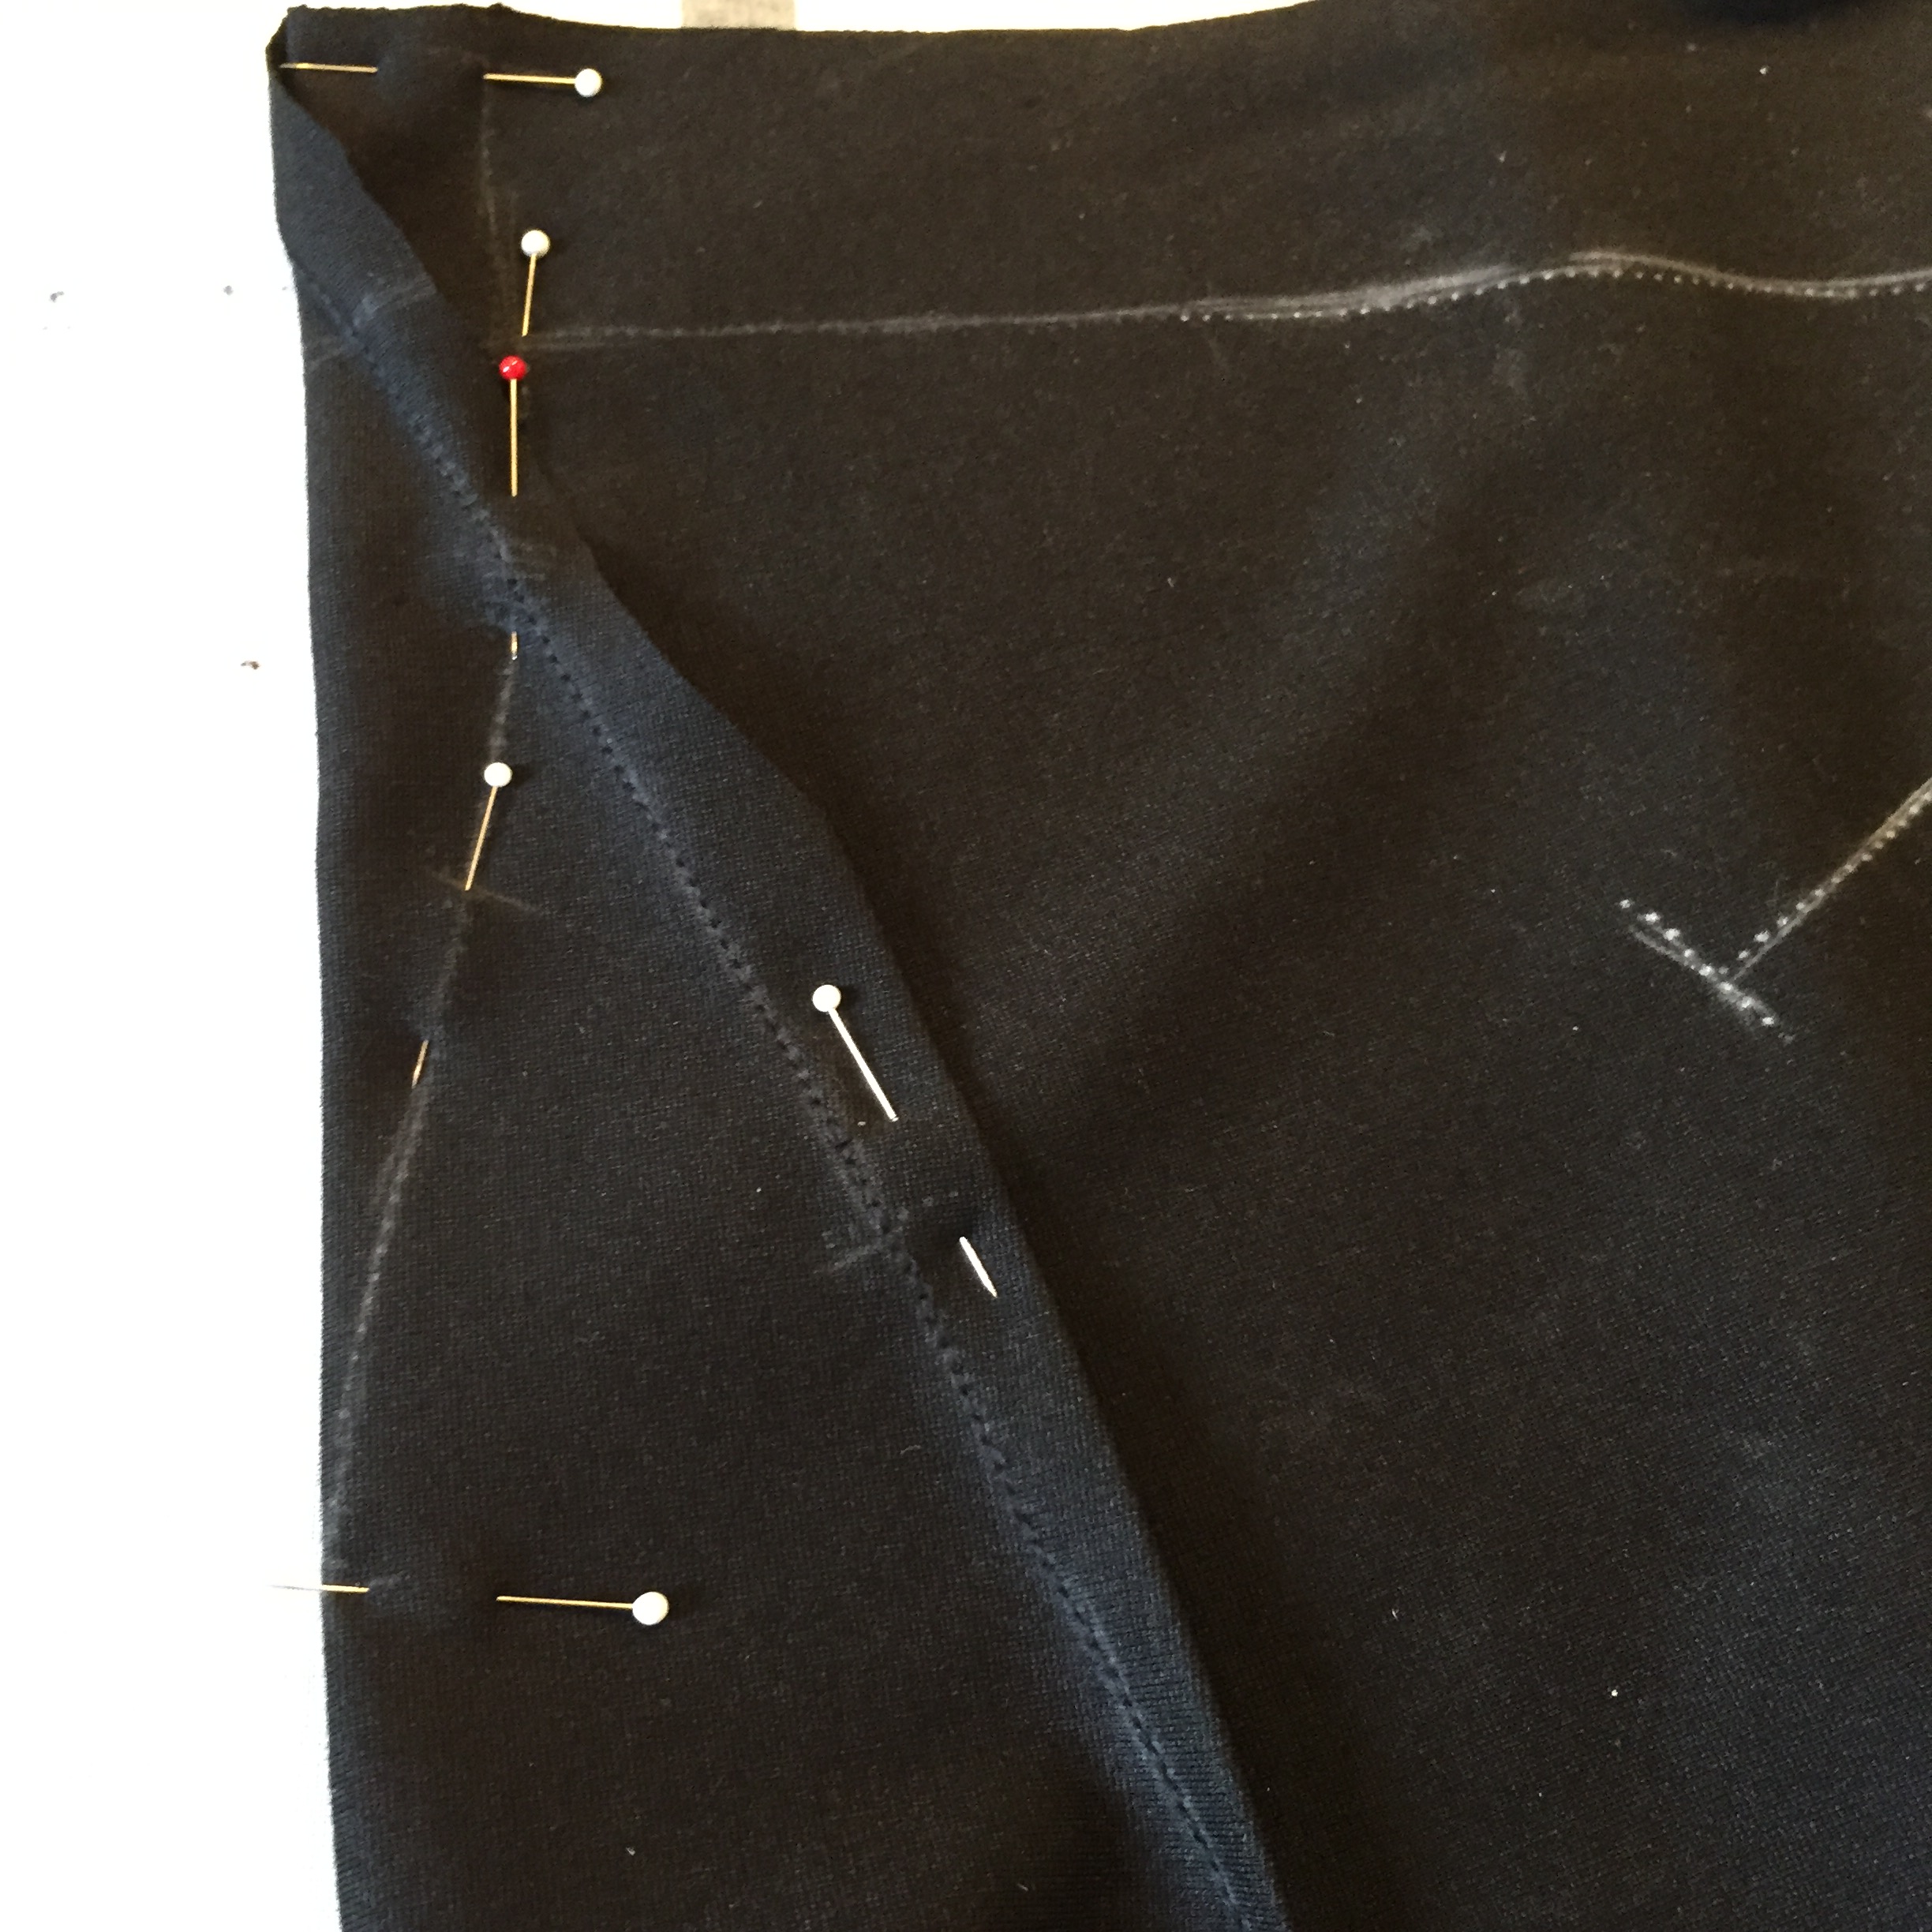
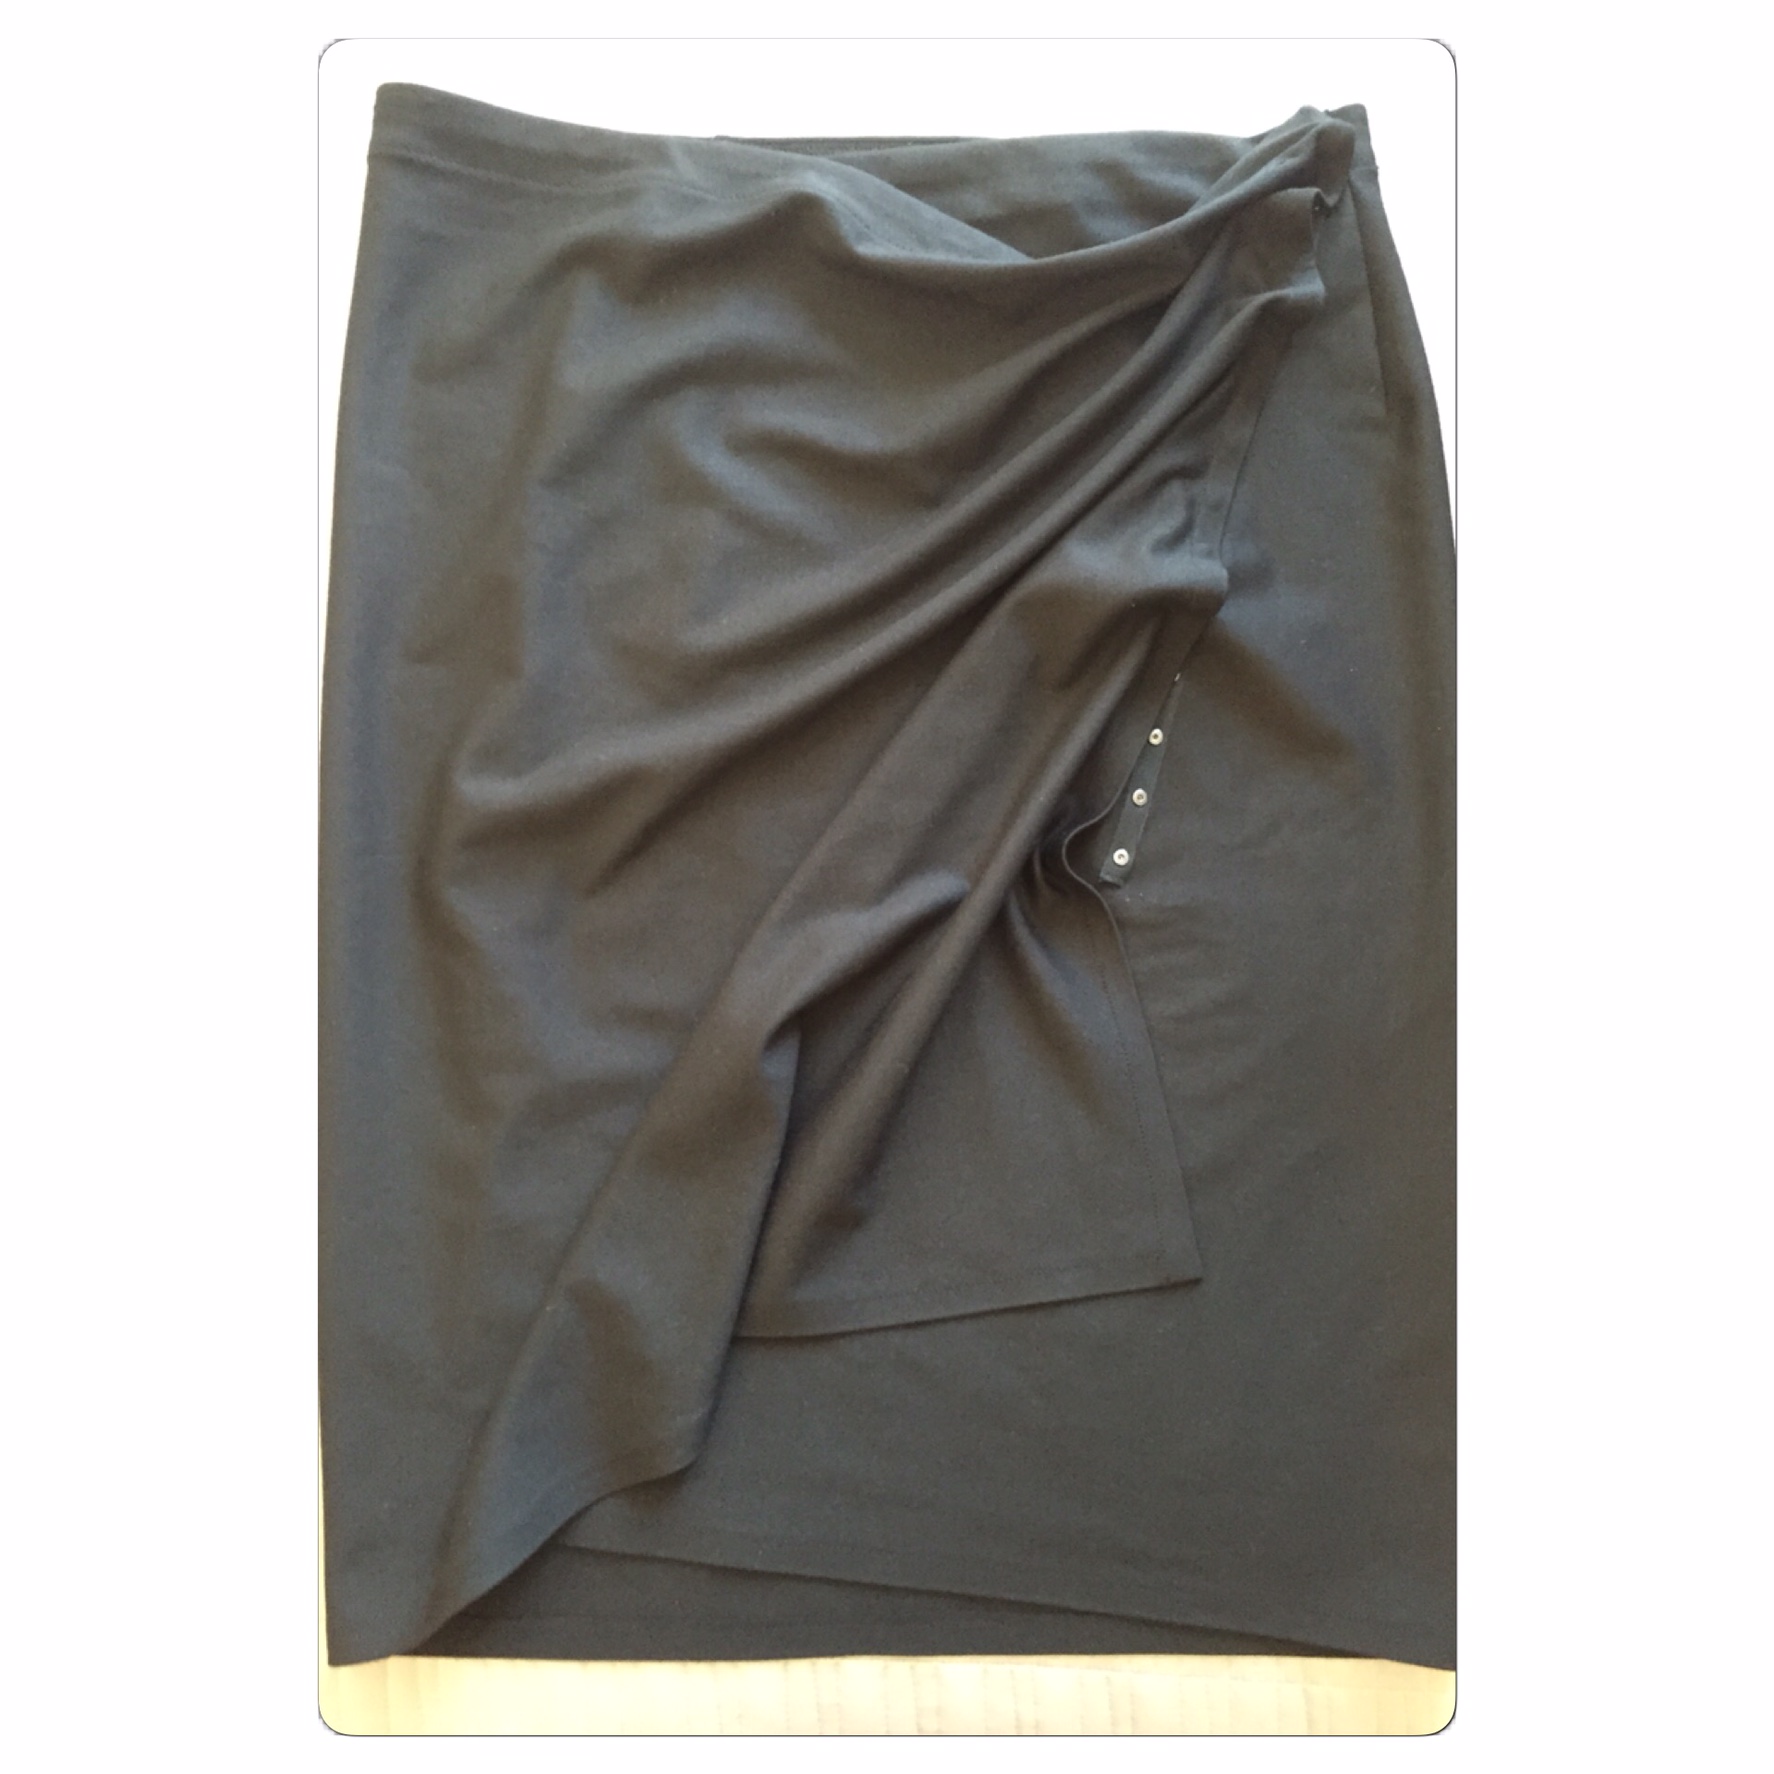
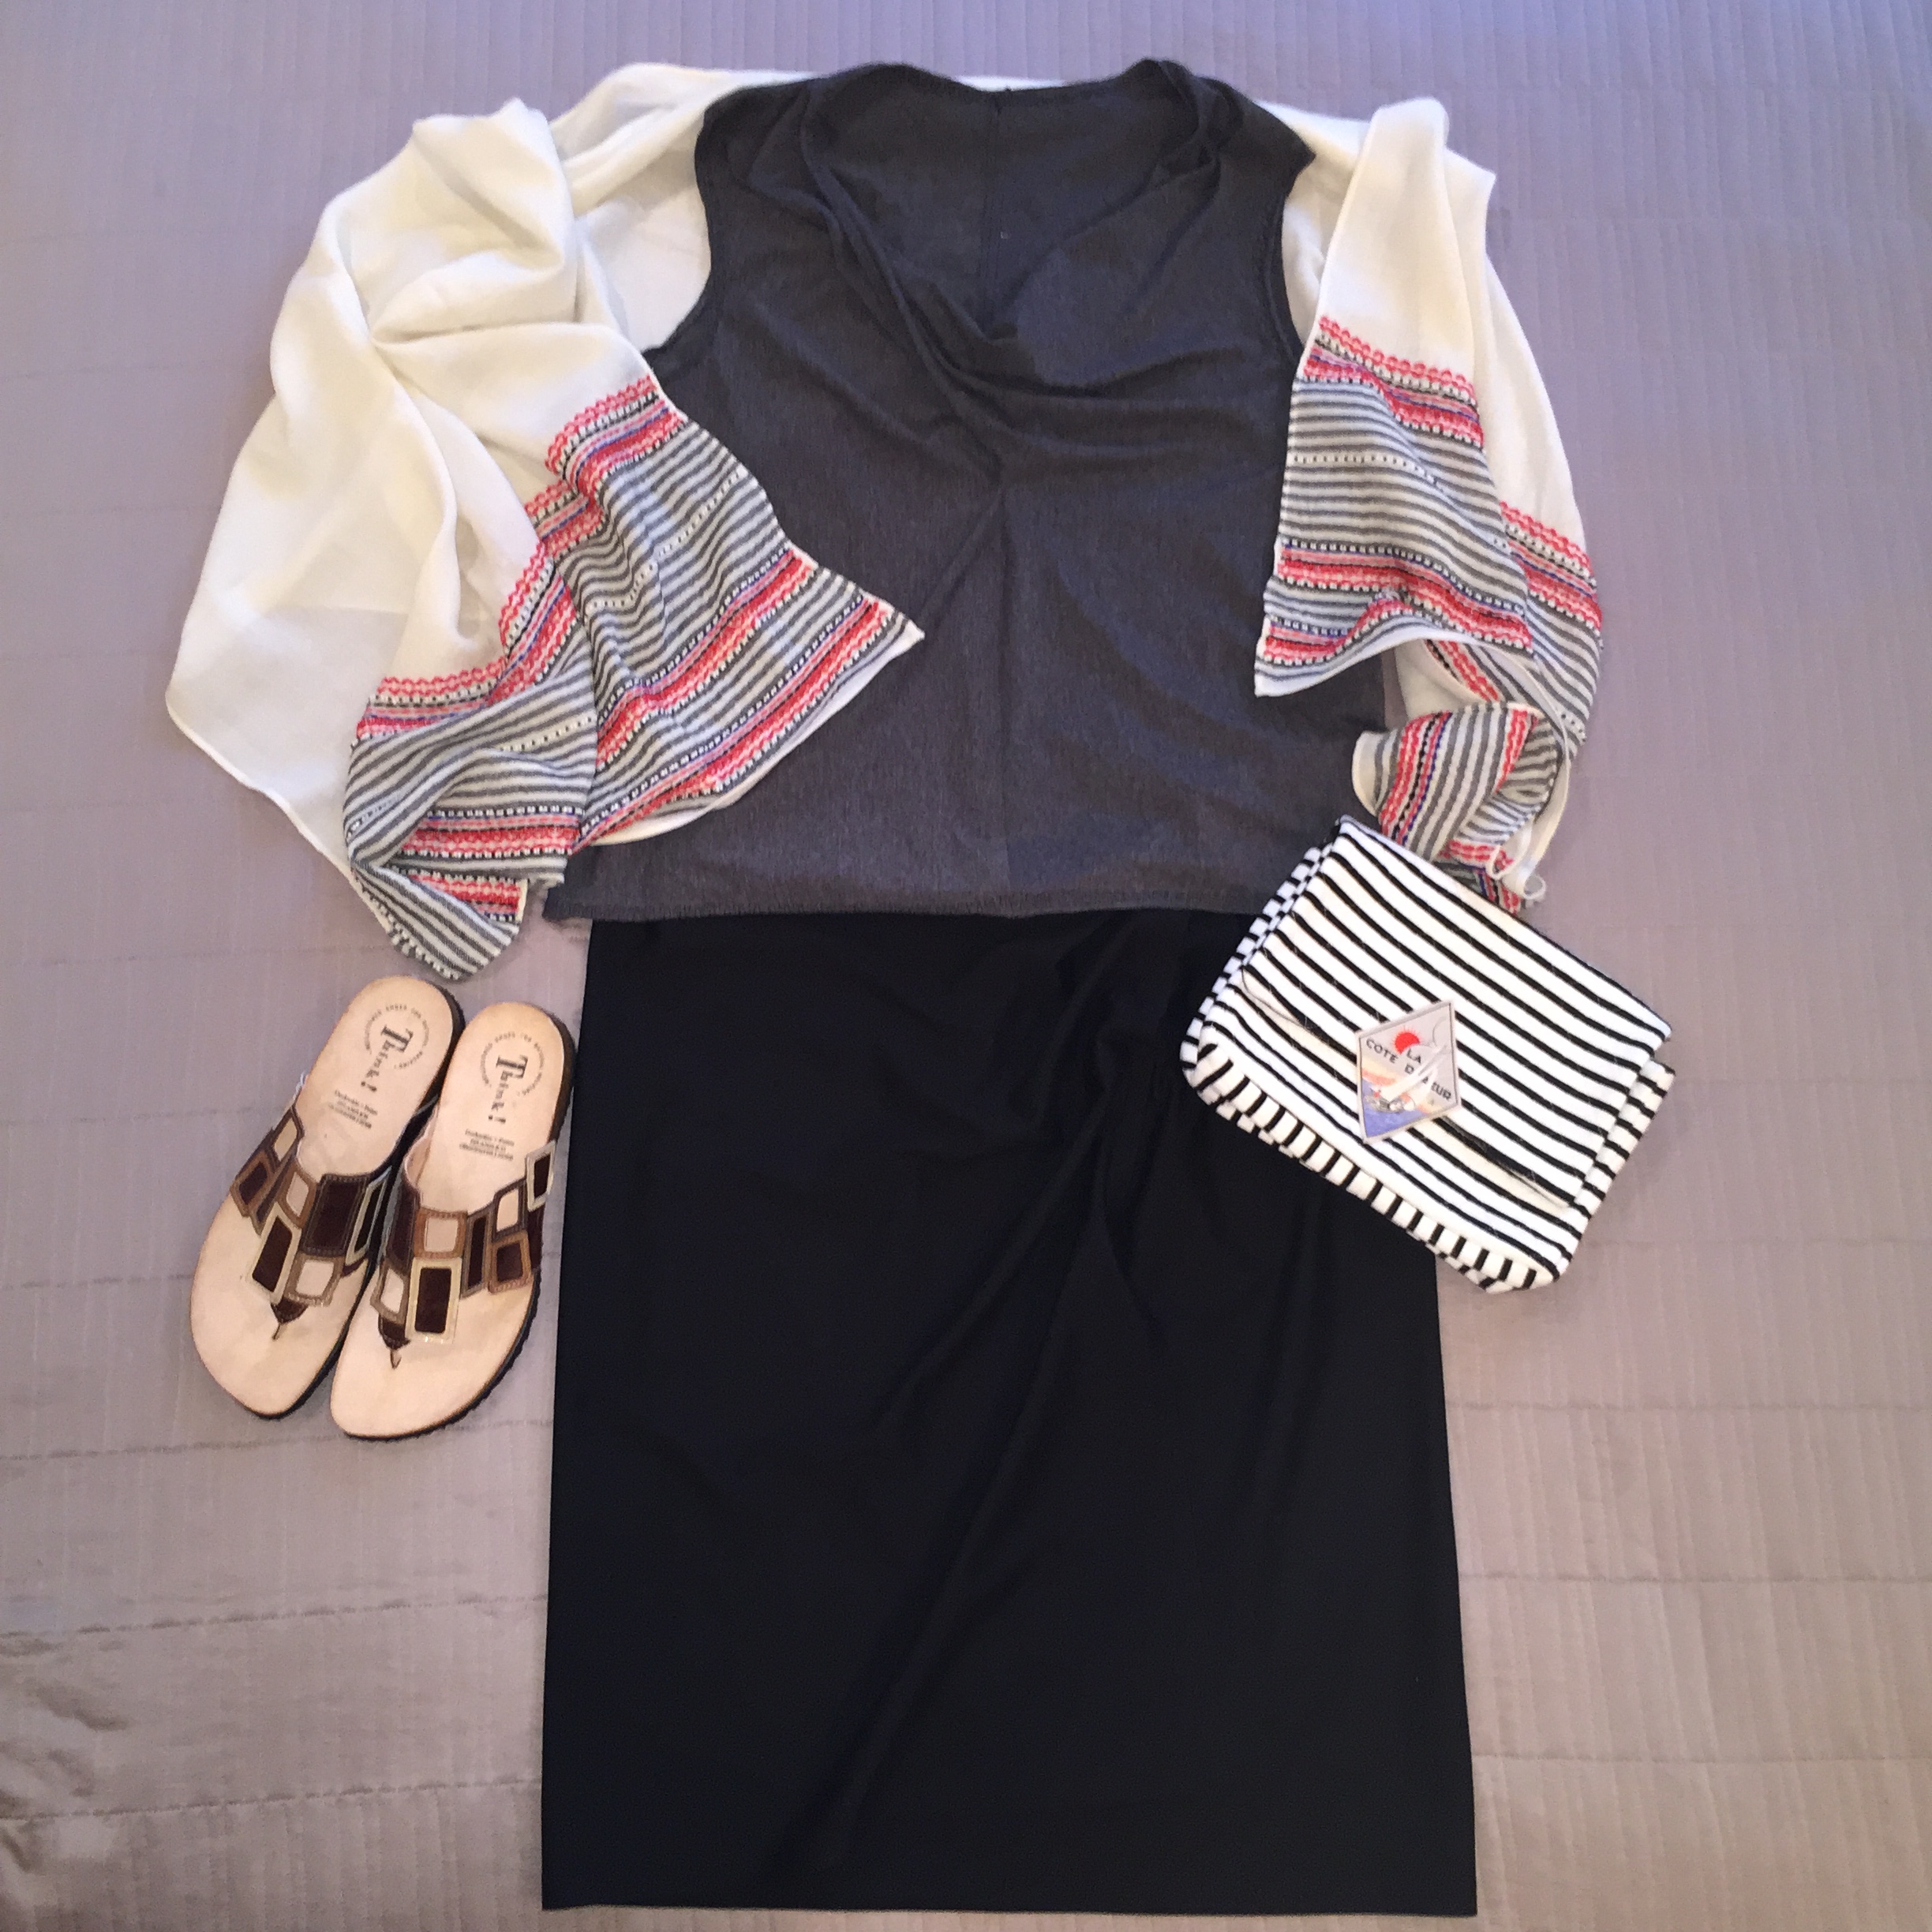
My last post was about finishing a Claire McCardell UFO (AKA an “Unfinished Object”) from my stash pile, just in time for International UFO Day, which of course we all celebrate by wearing hats with antennae and exchanging gifts of small porous rocks.

A couple of days later, I was looking at my Twitter feed and saw this:

IMG_3079

My post had been picked up by an international UFO sighting website (which is mostly in Japanese), and clearly broadcast throughout the Universe and beyond! Who cares about some NASA pictures from Pluto! Pluto’s not even a planet anymore. This is the real deal.

So even though some of you may think that your blog posts have communed with the heavens, I’m the first one to have proof.

Be that as it may, you won’t be seeing me in any of those manned flights to Mars that are coming up. How would I take all of my sewing stuff?

Hope your sewing’s entering a new dimension!

Susan Khalje on Making a French Jacket, Issey Miyake, and Kiss Me Karl

23

FCJ_2

Hi everyone! Just a heads up that part two of my interview with Susan Khalje, where she spills the secrets of “The Little French Jacket” (AKA making a Chanel Jacket, cardigan jacket etc.) has been posted on WeAllSew.com, and you can find it by clicking here. When I spoke to her, she gave me the history of this enduring design, and explained how the famous three-part sleeve is fantastic for fitting.

Aren’t those jackets she made beautiful? Her online “French Jacket” course has just launched, and I’m eager to take a look at it! You can find the info on SusanKhalje.com.

As for my sewing, hm, the end of my son’s school year kind of did that in. But now that I’m back in my island summer sewing shed, I’m going to get right on it. Just as soon as…

IMG_2783

Somebody, GET THAT MAN OUT OF HERE! (Just because I can run a high-tech machine doesn’t mean I know how to fix the printer for you, hon…)

During the winter, I had fun making up some classic Issey Miyake Vogue patterns. The construction was so fascinating! Even though, technically, patterns from the early 2000s aren’t “vintage,” these designs definitely fit under the “modernist” umbrella, which starts with Vionnet and continues through Claire McCardell and Halston.

When I looked up info on Issey Miyake’s theories of design, which include using technically advanced fabrics and manufacturing techniques, I found that trying to pin down his Japanese philosophy and express it in English was beyond my cross-cultural capabilities. So here’s the bio from his official website: Issey Miyake Bio

I decided to make up two of his patterns as part of the PatternReview.com Travel Wardrobe contest, which was loads of fun. I was short on time, so I wanted to make things that required only one or two pattern pieces.

My first make was from this pattern, Vogue 2814:

IMG_0663.JPG (3)

The sleeveless top on the right was intriguing, because the pattern was cut as all one piece!

IMG_1448

That’s it, you’re looking at it. I cut it out from some light cotton/lycra jersey in my stash, and proceeded to scratch my head over the instructions. (I don’t envy the people who had to write up the guide sheet at Vogue.)

IMG_1457

In lieu of top-stitching the edges (but leaving them raw, as called for in the pattern), I used a kind of 50s-looking Greek Key decorative stitch to finish the edges with a little stretch.

IMG_1458.JPG (2)IMG_1451

After a number of twists and turns, and more head-scratching, I ended up marking the center front, left and right sides etc. with chalk so I could figure it all out.

IMG_1449

Lo and behold, the pinwheel became a nice summer top with a twist!

IMG_1484.JPG (2)IMG_0688.JPG (2)

It only took a few hours start to finish, which has got to be a new record for me. Here’s the play-by-play on Pattern Review.

Then I decided to go for a Miyake skirt, from Vogue 2437. (Alas, I don’t have a photo of the pattern at present, but if you go to my review on Pattern Review Vogue 2437, it should turn up.)

This skirt is also cut from one pattern piece, and here I’m using Eileen Fisher rayon ponte, which has a nice drape.

IMG_1586

Just a big rectangle-ish piece, right? Not so fast. There are so many weird darts and closures that I used white tracing paper and a tracing wheel to mark them, followed by chalk.

IMG_1587.JPG (2)IMG_1590

See what I mean? Yes, those are overlapping darts.

The only closures on this skirt are two rows of snap tape. The idea is that you can snap it how you want to give it variations in the drape. I had some brass snap tape from Paris that did the trick.

IMG_1593.JPG (2)

Upon giving the skirt a test drive, though, I discovered that the snap tape did not have enough hold for my middle-aged behind, so I added a giant snap at the top.

Voila!

IMG_0690

It’s a hard to photograph, but it’s a really fun design. I used Steam-a-Seam Lite 2 to secure the edges and snap tape before top-stitching, which helped a lot.

Here’s one way that I “styled” the two pieces for the contest.

IMG_1730

(You may recall that I made that quilted Chanel bag “homage” last year, and the info on that is in this post.)

I really recommend the Miyake patterns from this era!

In other news, last June I announced that BERNINA of America was loaning me a B560 for a year, and, of course, my on-going love affair with my “Swiss Intern Karl” has been fodder for the tabloids ever since. I’m happy to let you know the good news that Karl has signed on for another couple of semesters here at JetSetSewing.com! Which is great because I don’t know what I would do without his fabulous feed and New Wave yodeling. My thanks again to Bernina of America for their generosity. Details can be found by clicking the “Bernina Collaboration” tab above.

Do you think Karl is sticking around because he’s jealous of this new member of the Jet Set Sewing team?

IMG_2709IMG_2664

Well hello, sweet little Carline! Fresh off the Ebay assembly line. She’s gotta be 50-something, and yet this little Minimatic can still satin-stitch like a champ. (I did my research before I bid, because the cam gears on these girls can crack after all of this time. This one had an overhaul by a collector.)  25 pounds of fun in her own little suitcase!

Hope your sewing’s going well!

An Epic Road Trip and Meeting Susan Khalje!

22

Okay, despite the title, there was only one thing truly epic about my road trip to Maryland, and that was meeting haute couture sewing expert and master teacher Susan Khalje!

When I contacted Susan, she graciously invited me to visit her studio, north of Baltimore, where her popular haute couture sewing classes are held. I wanted to hear about her recently-launched online video series, which includes “The Cocktail Dress” course (now available), and a number of other courses in the pipeline. (Find details here on SusanKhalje.com)

Susan has given me access to the Cocktail Dress course for review, and I’m very eager to have a look. Here’s the pretty pattern that goes with the course (which comes in a range of sizes, up to a 50″ bust):

image

Susan even gave me a sneak peek at the French jacket pattern she’s currently tweaking, which will be released in conjunction with her highly-anticipated “French Couture Jacket” online course:

image

Between you and me, I think it will be the go-to pattern for a lot of sewing enthusiasts, so if making a Chanel-style jacket is on your bucket list, you may want to hold off until that course launches in the fall.

Susan and I talked about the sleeve alone for about 20 minutes, during which I learned its little secret… (Shhh…I’ve taken a vow of silence on that subject until the course is launched.)

Susan very nicely allowed me to interview her for a whopping two hours, giving me enough material for about 10 articles. So in the coming weeks I’ll be going over my notes and writing an article to be featured on Bernina USA’s website WeAllSew.com. (For details about the collaboration between Bernina USA and JetSetSewing.com, please click the “Bernina Collaboration” tab at the top of this post.)

I’ll let you know when that post goes up. Many thanks to Susan Khalje for taking the time to meet up with me!

While I was on the road, I decided to join Instagram, and discovered that most of you sewing peeps were already having a party there without me! So I’ve started daily posts featuring my favorite vintage patterns, using the hashtag #patterndujour.

image

You can find me on Instagram under the name “jetsetsewing.” Let me know if you’re a reader, and I’ll be happy to follow you!

Though I was torn away from my dear Bernina 560, “Karl,” for a week, sewing was still on my mind, so I visited G Street fabrics in Rockville, Maryland, which is right outside of Washington, DC.

image

I’ll admit that I’m a little spoiled having shopped for fabrics in L.A. and Paris this year, but I did find a few fun things among the fabrics rolls.

imageimage

I really liked this selection of vintage-style oilcloth yardage, but just couldn’t get in the mood to make a tablecloth.

image

They do have a nice selection of fabrics for both basic garment sewing and high-end dress-making, as well as some quality suit fabrics and designer fabrics, like this brocade from Anna Sui.

image

While I was there, I picked up supplies for my next project, which is to make a Claire McCardell dress and bolero jacket from this 50s Spadea pattern.

image

This style of Grecian-inspired design, with long adjustable strings cinching the waist, is a recurring theme in McCardell’s collections, and in fact there’s a black rayon version in the Metropolitan Museum’s Costume Institute collection.

image

(Claire McCardell Dress in the Metropolitan Museum Costume Institute’s Collection)

Though this style may look familiar now, the dart-free, adjustable-waist concept pioneered by McCardell was radical in its time.

I’ve written in the past about how the Spadea pattern company took existing garments that were being sold in stores, deconstructed them, and drafted patterns from the pieces. So by using this pattern, I should be able to create a clone of the dress in the Met. Here’s a brief history of the Spadea company, written by Lizzie of The Vintage Traveler blog: (Article about Spadea Patterns)

The pattern has a matching bolero, and in researching McCardell, I found this description of the outfit in an ad: “Evening Elegance: black crinkle-crepe sheath, red and black reversible jacket, $55.” Sounds great, huh? I’ve also seen modified versions of this dress in wool jersey, another McCardell signature.

So if all goes well, I’ll be putting together this dress from black merino jersey bought during my mad dash through The Fabric Store in L.A., (L.A. Fabric Stores), and lining the bolero with the red wool jersey I just bought at G Street Fabrics.

And the dress will be worn by…my sister?!?! No fair!

Well, here’s what we’re cooking up.

I’ve mentioned before that my sister, Janet Eilber, is the artistic director of the Martha Graham Center of Contemporary Dance, AKA The Martha Graham Dance Company. You can peruse Janet’s impressive bio here.

Like McCardell, Martha Graham knew her way around a length of jersey, and one of her most famous dances, Lamentation, is danced entirely inside a jersey tube. Graham used the fabric to give the feeling of “stretching in your own skin” from grief. Janet also told me that Martha designed many of her own costumes, via draping.

I’ve always thought that Claire McCardell’s designs, which use a recurring set of pared-down “American Look” elements, have a lot in common with Martha Graham’s spare choreography, which uses a recurring language of movement to reveal the emotional core of the dances.

So, when my sis told me that she would be speaking at the upcoming DANCE & FASHION (!!) exhibit held by the Museum at the Fashion Institute of Technology in New York, and that she needed a dress to wear, I said “have I got a designer for you!”

Here’s a link that describes the exhibit in depth: (Dance & Fashion MFIT exhibit details) The exhibit will feature actual dance costumes as well as dance-inspired designer gowns and streetwear. It sounds fantastic, so I’ll definitely be there!

The exhibit opens at The Museum at FIT on Monday, September 12th, 2014, and runs through January 3rd, 2015. On Tuesday, October 28th, dancers from the Martha Graham Company will be performing Graham’s works “Lamentation” and “Spectre-1914,” to be followed by a panel discussion including Janet, designer Doo-Ri Chung, and Melissa Marra of MFIT.

So we’re going to find out if this ingeniously simple design can be easily adjusted to fit a variety of figures, which was McCardell’s intention. I’ll be making up the dress here, then sending it to my string-bean sister to see if we can fit it via photos and sister mental telepathy. (Or possibly via Skype, as my blogging pal CarmencitaB does with some of her clients in France.)

If the whole thing’s a bust, I have some original McCardell dresses in my collection that I just might be willing to loan to my sister. Considering how many times I raided her closet as a teen, it seems only fair.

Speaking of L.A., the West Coast branch of Mood Fabrics has just reopened, after sustaining earthquake damage in the spring. I’m glad they had the opportunity to work on their roof, as the day I was there (during an early March deluge) there were garbage cans everywhere to catch the raindrops dribbling in from the old skylights.

Phew, that’s it for me! How’s your sewing going?

$9 Couture Course

14

As I was listlessly shlumping through the grocery store yesterday, (because I’m a sewing enthusiast, not a cooking enthusiast) I spotted a new edition of the “Best of Threads Magazine: Designer Techniques” series tucked among the quiltin’ and craftin’ magazines.

image

As I leafed through it, my eyes bugged out, because it’s FULL of great articles by, first of all, the two Godmothers of Haute Couture I wrote about recently, Susan Khalje and Claire Shaeffer, as well as  numerous other articles about vintage designers and their techniques, all from the Threads Magazine archives.

For example, there’s an article by Susan Khalje giving the play-by-play of her method of constructing Chanel-style jackets, which I used in my research to construct my jackets:

image

The magazine also includes articles by Susan about making muslins and creating her version of the couture little black dress. (Note: if you’re thinking of making a Chanel-style jacket using Susan’s method, I would hold out until later in the year when she releases her video series.)

There’s a large section about various vintage designers and their techniques, including articles about Scaasi, Galanos, and Valentina, all written by couture expert Claire Shaeffer.

image

My favorites were two articles about how Madeleine Vionnet and Madame Gres manipulated fabric to create their geometric designs, which included drawings of how Madame Gres’ jersey wraps were constructed:

image

Let me tell you, I wanted to skip making dinner and run into my studio to muslin the red wrap made with one seam on the right.

Throughout the magazine there are pages of clearly-illustrated sewing tips demonstrating vintage and haute couture construction and finishing methods. So worth the $9 price tag! And it made my trip to the grocery store bearable!

The magazine can be ordered from the Threads website, in either hard copy or PDF download form here: (Best of Threads Designer Techniques: Make It Couture). Check it out!

Before I left Boston, I did a little window shopping on Newbury Street as I was on my to Starbucks to get pastries for breakfast (avoiding the grocery store again). Valentino had just been renovated, and there were a number of interesting fabrics and details in the window:

imageimage

image

Love that embroidered fabric. And check this out:

image

A little black dress trimmed at the neckline and cuffs with multicolored feathers!

In the window of the Italian luxury store Loro Piana, they were showing a short fur Chanel-style jacket, which I guess is what you wear when it gets chilly on the yacht:

image

In the 70s we used to call that style a “chubby.”

The outpost of the upscale Swiss brand Akris, known for it’s simple designs made from luxury fabrics, had this pretty black knit dress and some of their classic bags in the window:

image

Chanel was getting festive with a pink boucle 2.55 bag crafted out of tweed (how long is that going to last?):

image

as well as, shall we call it a “bedazzled” 2.55 bag covered in crystals, along with a plastic cuff bracelet with the “Double C” logo in faux pearls:

image

Give me a break, Karl.

Also on this high-end street is a new branch of the a vintage-repro company called “Bettie Paige,” named after the 50s cult pin-up. It seems like a strange place for this store, but they do have some cute designs:

imageimage

Perfect if you need costumes in a hurry for a revival of the musical “State Fair.”

But soon it was time to pack up the car and head for the Martha’s Vineyard ferry. When I got to the island, I saw that the roses were blooming:

image

The barn swallows have two nests under the eaves this year:

image

The peach tree we thought had bitten the dust was miraculously budding fruit:

image

And my summer sewing space was there, patiently waiting for me to unpack:

image

More “Faking Vintage Looks with Modern Patterns”

16

To continue my series on “Faking Vintage Looks with Modern Patterns” (Vintage Schmintage), here’s a look at recent pattern releases that could be used to create vintage-style garments without the hassle of working with a vintage pattern. I’ve chosen these from the summer catalogs of the major commercial pattern companies.

You can find all of these patterns, and more, on my pinterest page Vintage Pattern Re-releases.

Claire Shaeffer’s new Chanel-style cardigan jacket pattern for Vogue has a nice cut with narrow sleeves that could easily work for a 1950s-60s look.

Shaeffer Chanel Jacket Pattern (Claire Shaeffer jacket pattern)

The mandarin-style collar is similar to the collar on this 60s Chanel pattern in my collection:

Chanel pattern

and you can see a number of similar jackets from this era in the online collection of the Metropolitan Museum’s costume institute.

1958 Chanel Suit 1958 Chanel Suit

Here are the technical drawings of the pattern:

Shaeffer Technical Drawings

though what they don’t show clearly is that front of the jacket has a center-front panel that curves into the neckline, which may make matching plaids difficult. (If this is your first time at the Chanel jacket rodeo, take my advice and don’t pick a plaid. This post explains why: Chanel Jacket #2: Blood, Sweat and Tears.)

The instructions in the Shaeffer pattern are quite comprehesive, outlining her well-researched and very precise haute couture method. For more information, Claire Shaeffer’s book  The Couture Cardigan Jacket comes with a DVD explaining her style of construction step by step. Just a heads up that her method is extremely labor-intensive with lots of hand-basting and hand-stitching, and this pattern is no exception. Typically it takes more than 70 hours to make a Chanel-style quilted jacket, and in truth 100+ hours is more realistic.

Gretchen Hirsch of “Gertie’s New Blog for Better Sewing” has come up with a new lingerie pattern for Butterick, which is vintage in feel, though it’s drafted for knits, rather than the traditional bias-cut wovens that were used in these kinds of slips from the 20s through the 60s.

Gertie PatternGertie Lingerie

(Butterick Lingerie Pattern)

I don’t necessarily think this is a bad thing, as knits are easier to manage than slippery charmeuse-type fabrics cut on the bias.

Something else that’s nice about the pattern is that it comes with separate bodice bust pieces sized in A through D cups, making it much easier to fit. Gretchen is currently doing a sew-along of this pattern, and in this post she demonstrates how to modify the pattern for an even larger bust: (Sew-along). Since many original vintage patterns are sized for the tiny people who lived several generations ago, having this kind of fit flexibility is one of the benefits of using a modern pattern to make vintage looks.

When you’re done, you’ll either have a sexy “Cat on a Hot Tin Roof” full slip:

Liz Taylor (there she is again…)

or a more 70s undies and cammie set.

charlies-angels-header

Sort of like that, anyway. The pattern looks cute.

As for true vintage reproductions, I think the companies under the Simplicity umbrella in the U.S. (Simplicity, Burda Style, and New Look) have done the best job lately of re-releasing patterns reflecting the wide range of vintage sewing styles I’m seeing in sewing blogs. Much of current vintage sewing can be lumped into the following groups:

* Medieval through Downton Abbey: costumers who are pretty much in their own high-level sewing time zone;

* Flapper through Film Noir: People who re-create 20s, 30s, and 40s daytime and cabaret-type looks, including the WWII reenactors (many of them women). You can frequently find this style on blogs like We Sew Retro and Lucky Lucille, who’s running a 40s Sew For Victory Sew-along this month.

* 50s/60s Rockabilly meets “I Love Lucy”-style vintage, with crinolines, beehive hairdos and atomic attitude thrown in (Check out Sew Retro Rose); you’ll also see sleek “wiggle” dresses in the style of Joan from “Mad Men.”

* 50s/60s Sweet or Mod Twiggy-style dresses, often with Peter Pan collars and a thick frosting of “Twee.” Several indy companies make patterns for this group, including Colette Patterns.

*A new group of 70s-style boho psychedelic looks, thanks to Mad Men’s latest season;

* Steampunk and Cosplay, which you’re just going to have to google (as I’ve already gotten in enough trouble with my new Steampunk pals thanks to this post (Steampunk Chanel?);

*And finally, a group of sewing and vintage style mavens who are zealously researching and/or sewing particular garments that stand out in fashion history, including The Vintage Traveler, CarmencitaB, American Age Fashion, and patternmaker Studio Faro. And to that group I would add haute couture sewing enthusiasts, such as Cloning Couture, because there’s a lot of crossover between vintage and haute couture.

Now that I’ve completely stereotyped my fellow vintage sewing enthusiasts, I know you’re ALL going to be mad at me!

While you get over it, check out the “Mad Men Challenge” on Julia Bobbin’s blog to see some great takes on style from the 50s through the early 70s: Julia Bobbin’s “Mad Men Challenge”. Excellent job, everyone!

Here are some vintage-style patterns recently released by Simplicity and Burda Style:

Simplicity boatneckBardot in Breton  Simplicity Boatneck Pattern

This basic version of the 60s boatneck top has French darts (starting low on the bodice near the waist then going up toward the bust point) and dropped shoulders, which is very wearable and “Bardot” in my book. I used French darts when I made this similar crushed boatneck top and I liked how they curved the bodice in from the bust to the waist. Though cut for a woven, I think the pattern would work with a stable knit as well. It’s fun to see the “Jiffy” patterns again, and they’re easy to make. (To see more patterns in this style, check out my pinterest page: The Breton Shirt)

Bombshell suit Monroe in BikiniBombshell suit

I don’t know about the wrap, but the retro suit is cute, particularly the Marilyn Monroe bikini.

Halter tops 2Kristy-McNichol-kristy-mcnichol-10827210-376-500

I’ll admit I’m guilty of having worn 70s Halter Tops like these back in the day, but I don’t know, too Kristy McNichol?

Burda halter Burda palazzo pantsValley-of-the-dolls(Burda Halter pattern) (Burda Palazzo Pants)

I think I could actually pull off this “Valley of the Dolls” style. (Not the hair, though.)

Burda coat patternBrando in bomber jacketBurda coat pattern

For the men, I like this classic coat and bomber jacket. You could be a contender.

Burda bohoBurda Hippy Skirt(Megan Mad MenBurda hippy-wear)(Burda Style Boho Skirt)

And having grown up in the 60s and 70s, I can’t go back to the Age of Aquarius, but for someone younger, these patterns will give you that Mad Men “Megan” look.

Here’s another place I’m not going again:

Burda wedding dress (Burda 50s Wedding Dress)

Burda 60s wedding dress (Burda 60s Wedding Dress)

The 60s pattern would make a nice cocktail dress, though, and I like the horizontal pintucks on the 50s gown bodice.

Simplicity has also released some cute retro clothes for baby:

Simplicity babyBooties (Layette and baby booties)

And Barbie…

Barbie (Barbie clothes pattern)

The green coat with scarf collar is pretty great, and you could also make Barbie a Chanel jacket!

All of these major companies have issued so many wonderful patterns over the past 100 years. I would love to see more re-releases of classics like these:

Diane Von Furstenberg’s original wrap dress patterns for Vogue:

DVF Wrap Patternvogue15491976Christian Bale;Amy Adams (Amy Adams wearing one in “American Hustle”)

Butterick’s late 60s- early 70s “Young Designer” patterns by Betsey Johnson, Kenzo, Mary Quant, John Kloss, and Willi Smith.

Betsey Johnson Bateau-neck patternKenzo PatternMary Quant patternJohn Kloss PatternWilli Smith

I remember making that Kenzo double-wrap skirt as a teen; it’s very clever design.


Vogue Paris Original patterns from the 50s and 60s, like these by Schiaparelli and Yves St. Laurent:

imageMondrian dress pattern

50s McCalls “Black Line” patterns by Claire McCardell, Givenchy, and Pauline Trigere…

imageMcCalls GivenchyMcCalls Trigere

How about it, readers, are there any vintage pattern you’d like to see re-released?


Finding a “Fitting Shell” to fit those !$%#! vintage patterns

33

In the past couple of years, I’ve become the proud owner of some pretty fab vintage designer patterns that I’m dying to make up. Here are a few examples:

A 1930’s Schiaparelli bias-cut dress pattern with label:

image

A 1962 Officially licensed Chanel Jacket pattern:

Chanel pattern

I did make that one up, and here’s the finished product: (And here are my posts about how I made it.)

10597356983_069525009b_z[1]

A number of Ceil Chapman patterns by Spadea:

image

Laura Mae from “Lilacs and Lace” has been blogging about making that “Skylark” style pattern in the middle, and it looks mighty tricky. (Lilacs and Lace blog)

Here’s an example of an original Ceil Chapman “Skylark” dress, with a narrow inner skirt and an over-skirt in the back:

Ceil Chapman Skylark dress

No wonder Chapman was a favorite designer for stars like Marilyn Monroe and Elizabeth Taylor. The dress played up the bust and made the wearer look like a beautiful bird. As an aside, here’s a link to the Hoagy Carmichael/Johnny Mercer tune that was popular in that era: “Skylark” sung by Ella Fitzgerald

And here’s the true Skylark dress pattern by Spadea, drafted from the dress above (I’d really like to find this one):

Ceil Chapman Spadea Skylark pattern

I’ve also been snapping up patterns designed by Claire McCardell, released by Spadea, McCalls, and Folkwear. Now I have more than a dozen.

image

Here’s a rare Charles James skirt pattern:

image

The inner workings of these skirt patterns show his genius for garment shaping through structure. There’s going to be a Charles James retrospective at New York’s Metropolitan Museum of Art starting this May 2014, which I’m now scheming to attend (waving my pattern…). (Charles James exhibit info)

Not to mention several boxes of patterns by Pauline Trigere, YSL, Diane Von Furstenberg, Halston, Kenzo, Tiziani (by Lagerfeld) and a number of more obscure designers from the 50s and 60s such as Claire Potter, Jane Derby, Norman Hartnell (the Queen’s couturier), Tina Leser (the original Boho designer), Joset Walker, Jo Copeland, Vera Maxwell, Biki (friend and designer for Maria Callas), and Toni Owen:

image

Also patterns by Hollywood costumers such as Edith Head, Charles LeMaire, and William Travilla, who designed the iconic pleated dress Marilyn Monroe wore over the grate in “Seven Year Itch.”

image

I’ll be the first to admit that I have a pattern problem, and my husband will be the second to admit it.

Most of these patterns are way too small for me, and cut for the different body shapes that were popular at the time. For example, many of the 50s patterns assume that you’re wearing a girdle (which was basically Spanx crossed with a Michelin tire) and a bullet bra that raised the bust point by several inches. It was all about boobs and hips with a tiny short waist, like Elizabeth Taylor in the era.

Elizabeth Tayler

In contrast, the 70s DVF and Halston patterns basically assume that you might possibly be wearing slinky bikini underwear but probably not a bra (because you burned it at a feminist rally before you went to the disco), and the look was super-skinny with a small chest and hips, long torso and really long legs. Nobody worked out (it was pre-Jane Fonda aerobics) and a lot of women smoked and did coke, so the ideal was skin and bones. Here’s Lauren Hutton in that era:

Lauren Hutton

In the picture, she’s wearing a dress by Halston that’s very similar to this late 70s pattern:

Halston pattern #2

Of course a woman’s body can’t morph into new shapes to fit the fashions of the times, so we mainly just beat ourselves up over it.

I’ve gotten tired of starting from scratch in terms of fitting every time I take on a vintage pattern, particularly because my middle-aged body has fit issues of it’s own. So I’m going to see if making a “fitting shell” will help.

If you’re obsessively combing the internet for sewing fun facts (as I do to procrastinate about pinning and cutting fabric), you will see the terms “block,” “sloper” and even the haute couture “moulage” (Kenneth King’s Moulage book) bandied about to describe a basic pattern that is used by a designer to create new patterns.

I didn’t want to get my terminology wrong, so I consulted Kathleen Fasanella’s excellent blog about professional design and manufacturing, Fashion Incubator. There, I found out that patterns without seam allowances, called  “slopers” or “blocks” in the sewing enthusiast world, are generally not used in the industry, and if you use those terms in a pro environment, you’ll be snickered at. She refers to the thing I want to make as a “fitting shell,” so that’s what I’m going to call it.

Basic fitting shell patterns have been available from pattern companies as far back as the 40s or 50s from what I’ve found online, and you can still buy them today. The idea behind these patterns is that if you make up the Vogue Patterns Fitting Shell and get it fitted closely to your body, then you can compare the fitting shell pattern pieces to any other Vogue pattern and easily adjust the fit.

Vogue patterns fitting shell

I want to make myself a fitting shell so that I have a basic flat pattern pieces, fitted for me, to compare with the pattern pieces of the vintage patterns I own. That way, I can ballpark how much I need to increase the dimensions of the smaller pattern to fit my shoulders, bust, waist and hips.

Sounds great in theory, we’ll see how it goes in practice.

I looked at the modern fitting shells released by the Big 4 pattern companies, but nowadays modern patterns tend to have more ease built in, particularly in the armscye, and I want those high and tight vintage Chanel armholes.

So I decided to buy some fitting shell patterns from the 50s and 60s, to see if they would work better. Here’s one from the late 60s, judging from the hairdo and squared-off pumps:

image


And here’s one that looks like late 50s:

image

This one in particular is for half-sizes, which nowadays I think would be referred to as “Petite Plus.” The “half-size” range is described in Connie Crawford’s current Grading Workbook as cut for a “more mature, short-waisted woman with a shorter, heavier body-type.” I can’t say I was terribly happy with that description, but at least now I know I have a “half-size” body with “full-size” legs.

And I was very excited to find out what “The Bishop Method” (written on the back of the pattern) might be.

image

I eagerly looked throughout the instructions but was bummed to discover that there was no mention of The Bishop Method inside.

After a quick google, I found “Bishop Method” books all over the internet, and discovered that they were Home Ec manuals from the 50s and 60s. People were raving about them on Amazon! So of course I ordered one, because I need more sewing stuff.

image

Holy smoke, The Bishop Method is the best flippin’ bible of vintage sewing techniques for the novice that I’ve ever seen! It takes you from square one (learning about the machine and making an apron)…

image

(that looks like the straight-stitch Singer 15 sewing machine I learned on.)

image

and goes all the way through making a tailored and lined suit with bound buttonholes and a hand-picked, lapped zipper.

imageimage

It’s filled with clear, comprehensive instructions and a whole bunch of pictures. If vintage-style sewing with wovens is your thing, it’s worth getting a copy for your library.

There’s a lot of fitting info in The Bishop Method, and also in modern books like this:

image

(Threads “Fitting for Every Figure” book), which is extremely comprehensive and pretty text-heavy and labor-intensive, if that’s what you’re into, which I’m not.

With all of the schmancy sewing books in circulation right now, I’m kind of embarrassed to admit that my favorite book on basic fitting is this one by Nancy Zieman (of “Sewing with Nancy” fame), as it gets right to the point and illustrates the “pivot and slide” method of pattern fitting, which, though based on solid pattern-grading principles, is easy and fast and doesn’t require you to cut up your pattern.

image

She starts out by explaining the importance of finding a pattern that fits in the shoulders, and gives you the formula you need to figure out the proper size pattern to buy. (This helps if you use vintage patterns because even though the sizing varies, you can choose a pattern by bust measurement.) Then she shows you how to modify that pattern to fit the rest of your body by moving it around and tracing parts of it based on your measurements. There’s also specific fitting info, with illustrations, for dealing with issues such as broad shoulders, sway back, and bust adjustment.

So this is the method I’ve been using to fit paper pattern to muslins, and then I eyeball it from there. Since most commercial patterns are cut for someone with a “B” cup (I’m a “C”) and my waist and hips are a larger size than my shoulders, this method has worked well for me.

I recently read a review of Nancy’s life story, Seams Unlikely, on Gertie’s New Blog For Better Sewing (Review from Gertie’s New Blog…). The book talks about how Nancy embraced sewing in 4-H, and started her business from home back the bad old days when a woman was expected to get her husband to co-sign a business loan for her–even if he wasn’t involved in the business. It’s an inspiring story.  Gretchen, thanks for giving us the heads up on that book.

Back to my fitting shell quest. In the end, I got lazy and decided to spring for a pattern drafted directly from my measurements, by String Codes.  They take the five basic measurements you input and a create custom a fitting shell pattern for you.

Seemed easy enough, but when I placed the order and asked them to modify the bust measurement for a “C” cup, I was told that the patterns are only available as a “B” cup and that I would have to do a full bust adjustment myself. They did email me instructions with photos for an FBA, and it was a bit of a hassle, but not a deal-breaker. I’m going to make a muslin of the final pattern, and we’ll see how it fits. The pattern comes without seam allowances, so the exterior line is the seamline. You can see where I put in the bust adjustment below, following the directions from String Codes:

image


I ordered the “torso” pattern with a sleeve with a dart, since I often make jackets and tops, and also ordered the skirt pattern. I can overlap them if I’m making a dress.

As soon as I have it made up, I’ll do a little “show and tell” to let you know how it worked out.

And I’ll try to remember Nancy Zieman’s advice to avoid over-fitting, because “it can be exasperating and can take the joy out of sewing.” Amen, sister!

How’s your sewing going?

Vintage, Schmintage; faking vintage looks with modern patterns

16

I love vintage sewing. It’s the high-maintenance aspect of using the original patterns that gives me a pain. Fortunately, there are a number of vintage pattern reproductions and homages in current release that can keep you busy without the hassle of working with an old pattern.

Surprisingly, many of my favorite vintage-style patterns are not from the “vintage” or “retro” collections. Those can turn out looking costume-y or kitsch, and I’m just too old to pull it off without looking dotty. And pattern reviewers often find that the fit of these patterns has been modernized and made too roomy.

The patterns I like tend to be from the main collections of Big-4 or small commercial companies, or from indy companies that re-release vintage patterns.

Here’s one example. If I wanted to reproduce a Norman Norell “Mermaid Dress” seen here:

norell-mermaid-sheathNorell Mermaid Dress

I could modify this Vogue Badgley Mischka pattern that’s currently in release.

Mermaid Dress PatternVogue 1374

(First thing I’d do is take up that armscye.) The sequins on the original Norells were each hand-sewn on twice to make them lay flat, so I’m not going to be taking on that project on anytime soon.

With any of these patterns, you need to look beyond the photos and use your imagination to see how they can be modified for a vintage look. For example, View A (right photo) of this typical boho pattern can be easily modified to create this 40s Claire McCardell “Hostess Dress”, made of wool jersey. She basically invented the peasant dress we all wore in the 70s.

New Look 6096McCardell Hostess Dress FIT

New Look 6096McCardell Hostess Dress at FIT

Here are a few pattern suggestions for my favorite bloggers, chosen from patterns that are commercially available now. You can see details on my Pinterest page: Favorite Vintage Re-releases.

Many of these patterns come in a range of sizes, with modern instructions, and can be easier to deal with than actual vintage patterns.

For Carrie from Apricot Adventure blog, who looks like Megan from Mad Men, adjusts the fit on her dresses perfectly, and is a scientist to boot, I’m seeing this Burda repro of a late 60s glam girl dress: Burda Glam Dress. What do you think, Carrie? Maybe for your bachelorette party?

burda pattern

Put some chiffon sleeves on it, and you can do your own version of “Zou Bisou Bisou.”

Megan Zou Bisou Bisou

For Lizzie of The Vintage Traveler, who just did a post on Winter Olympic Uniforms through the years, featuring the Unfortunate Christmas Sweater:

Unfortunate Christmas Sweaterand the Awesome Peacoat: Ralph Lauren Peacoat

how about this fab 30s blanket coat from Wearing History?

Blanket Coat blanket coat pattern

For Red Point Taylor, who stitches up lovely jackets (see her beautiful French Jacket here), a cropped jacket for her next Chanel adventure:

Cropped JacketButterick 5859.

I like the 30s-style high-waist pants and “naughty secretary” blouse in the pattern, too.

And for Carmen, of the Carmencitab blog, who whipped up this fab Yves St. Laurent Mondrian Dress from an original 60s Vogue pattern:

mondrian dress

Maybe a Schiaparelli Wrap from Decades of Style for chilly nights in Paris?

5006-web-picHere’s my review of that pattern: Schiaparelli Wrap Review

Then there’s Peter of Male Pattern Boldness, who’s making us all jealous recounting his experiences studying menswear at FIT. He could really get his Gable on with this 40s pattern from Eva Dress:

Robe

There’s also a shorter “Smoking Jacket” version in the pattern, to wear when he gets those vintage sewing machines of his smokin’. The shorter jacket won’t get in the way of the knee lift.

For Patricia of Notes from High Road blog, who enjoys projects from Japanese pattern books and international magazines, how about a Vietnamese Ao Dai from Folkwear, a company that carries patterns for traditional ethnic garb from around the world, as well as a number of vintage styles.

Vietnamese drawing

For Lynn of American Age Fashion, a blog that chronicles how older women have dressed throughout the years, and who just wrote this hilarious post about what Coco Chanel wore to a Texas Barbeque:

Coco at a Barbeque

(Fur at a barbeque?), I’m thinking that this vintage pattern repro from Decades of Style would have been a better choice for Coco:

Rodeo shirt pattern

After some pulled pork and a few drinks, who knows? Coco might have gotten up and performed Agnes DeMille’s ballet “Rodeo”. Then she would have gone home with this guy:

Negroni Mr. Negroni from Colette Patterns.

And for the rest of you, how about a 40s film noir nighty?

Film Noir Nighty Film Noir Nighty from Eva Dress

60s Laura Petrie Capris?

Laura Petrie PhotoLaura Petrie CaprisVogue 8886

An “American Hustle” 70s wrap dress?

American Hustle WrapWrap dress70s Wrap Dress Pattern

A 40s sarong?

Dorothy_Lam_3Bombshell SarongBombshell Sarong

I know there are many other favorites I’m missing, particularly from indy pattern companies. If you have suggestions, please jump in!

The Making of Chanel Jacket #2: Blood, Sweat and Tears

23

A couple of posts ago, I promised details about how I constructed Chanel jacket #2.

image

Even though I was working on this project a year ago, it’s alllll coming back to me. The ill-fated muslins, the horrendous plaid matching, the pricked fingers and blood on my white lining, the furry fabric that felt like a shedding lapdog as I did hour after hour of hand sewing. No wonder it was sitting in my closet for a year!

Here’s the story: while in the thrall of creating Chanel jacket #1, which I made as a project for Susan Khalje’s “Couture Dress” course on craftsy.com, I started obsessively researching all things related to sewing a Chanel jacket. Looking at the Elliott Berman Textiles website one day, I noticed a listing for actual Chanel tweed fabric for $55 a yard. Not knowing at the time that that was a bargain for this type of fabric, I waited for a sale and got a couple of yards at 20% off.

Soon after, I completed Chanel jacket #1, then won a blue ribbon for it at the Martha’s Vineyard Agricultural Fair, which is a blood-sport crafting competition between rural crafters, hippy artsy folk, and overeducated gentleman/women farmers, with a few summer residents like me jumping in. Filled with hubris, and my $5 Fair winnings, I embarked on Chanel #2.

image

Embracing sewing has helped me get in touch with a scary competitive side of myself I didn’t know I had.

My plan was to use Vogue pattern 7975, (Vogue pattern 7975) which at that time was a favorite of Susan Khalje’s during her Chanel boot camps, though apparently she helps her students change the sleeve pattern into 3-part sleeves (Susan Khalje’s week-long Chanel Jacket class). So I started obsessing about the sleeve and decided to do a “frankenpattern” of that pattern with the sleeve from the Claire Shaeffer’s Vogue 8804 jacket pattern, which had just been released (Claire Shaeffer’s Chanel jacket pattern).

image  As I muslined 7579, which is a fairly conservative pattern with curving princess seams, I kept thinking, “I look lousy in princess seams,” and “this is too dowdy for me.” Undeterred and in denial, I finished the muslin and hated it. If you’re built like me, with boobs, a short waist, and hips, a fitted Chanel-style jacket is not your finest look to begin with, and it can easily turn you into a dumpy “pepper pot” (as the guys from Monty Python used to call themselves when they played middle-aged women in drag).

7975 muslin

I hate the way I look in muslins, but I’m always glad I did them.

In the end I selected a Simplicity pattern (Simplicity 2154) with kimono sleeves and side panels, which I reasoned would be easier for plaid matching and construction. I had convinced myself that I could throw this jacket together. I have no idea why! I have seen photos of Chanel jackets using this cut, so it is an authentic look.

Chanel jacket with kimono sleeves

I muslined the Simplicity pattern and liked it a lot better–it had a much more retro 60s vibe, and it looked better on me. Also, I saw that I could create a vent on the top sleeve seam, which would save me the hassle of creating a three-part sleeve.

After taking about 2″ off the top shoulder/arm seam, raising the side panel to make the underarm higher, and cutting lengthwise rectangles at the cuff of the top sleeve seams to make the vent, the muslin was fitted and good to go.

IMG_0428

I took apart the muslin and trimmed it to the stitching line to make the pattern pieces. I laid out the front pieces on one layer of fabric, side by side, so that the plaids would match up. Ditto for the back. The side pieces I thought would match pretty closely. I cut around the pieces, leaving a large seam allowance. At this point, you’re supposed to thread-trace (hand baste) around the pattern pieces to mark the seamline, but I think I used tracing paper instead. As I noted in the construction of Chanel #4, this is a bad idea because the tracing lines can permanently mark the fabric. But thread tracing is so boring!

image

Then the fun started. The fabric I selected has a subtle, very tricky, plaid repeat that is about 6″ long. So when you think you’ve got it lined up properly, you’re really about 2″ off. By the time I got into the serious matching and construction I got so obsessive that I spent hours trying to ensure that the large black thread was matching the other large black thread, and not the small black thread, which would completely throw off all of the fuchsia and grass green threads. It made me nuts.

For lining, I used a double silk georgette from Emma One Sock (emmaonesock.com), which, though lovely, I realized during construction was not all that sturdy for the amount of hand-work required.  And even though I really liked the style of the kimono sleeves (because the bodice starts on the grain and then the sleeves dip down on the bias), when it came to attaching the bottom of the sleeve/bodice pieces to the two small side panels that go under the arms, it was such a pain. Such a pain! It requires a weird pivot on your machine that I botched and then ended up doing by hand. Set-in sleeves would have been a hundred times easier. But it was worth it, as it gives this jacket a non-traditional look.

For instructions, I used an old article by Susan Khalje from Threads Magazine (Threads Magazine article), outlining the steps she uses to make a traditional Chanel-style jacket, where, prior to construction, the lining pieces are quilted directly onto the exterior “fashion” fabric pieces. The exterior pieces are machined together, and then the interior seams allowances are finished by catch-stitching them down to keep them from rolling up. Finally, the lining seams are hand-sewn closed to cover the fashion-fabric seams.

So I machine-quilted the pieces of lining to the pieces of fashion fabric, using a walking foot. Then I attempted to put the exterior together, with the attached lining pieces flapping around the seams. No fun at all. I had convinced myself that I would close the lining seams by folding them over one another and machine top-stitching the whole thing, but it looked awful. So it was back to hand-stitching. Everything.

Here you can see my haphazard machine quilting, with the hand-stitched line where the lining was connected over the exterior seam. So much flippin’ hand sewing! If you look closely you can see a small dot of blood on the lining from when I pricked my finger. I can’t believe that some people do the quilting by hand, too.

image

I also watched a video from the Chanel atelier showing the construction of a modern “little black jacket” and saw that they were using fusibles to support the neckline, center front and sleeve cuffs. I decided that if it’s okay by Karl, it’s okay by me! (Video of the making of a Chanel “little black jacket”.)

What you’re looking at below, on the left, is the center front of the right bodice, with the edge reinforced by sewing on a piece of selvedge from some silk organza (I learned that trick from Susan Khalje’s Craftsy course) and stabilized with lightweight knit fusible. I did this around the neckline and cuffs as well. You can see that the lining was already quilted on so I have to fold it back to put on the fusible. The lining was constantly getting caught in the stitching during the exterior construction. Yiiii!

image

I turned in the center-front edge, hand catch-stitched it down, then turned under the lining and fell-stitched it down. Here’s the finished center front, after I had put on the chain and hooks and eyes.

image

I basically jerry-rigged some vents on the upper sleeves by cutting a rectangle, about 3″ long and 2″ wide, on the cuff end of the sleeve back piece. I turned the rectangle in by 1″ (self-facing it), catch-stitched it down, and then attached the lining.

image At that point, nearing the freak-out zone, I remembered that I hadn’t done buttonholes in 30 years. We didn’t have a buttonholer when I was a kid, so I just went at them by hand. I like to think of the buttonholes on this jacket as “funky.” Note: you can avoid funky buttonholes and other pitfalls by consulting Claire Shaeffer’s book with DVD: The Couture Cardigan Jacket.

imageYes, that is a picture of Coco Chanel on those buttons. I bought a trashed Chanel blouse on Ebay, cut the buttons off and sewed them on the jacket. Now when I wear this jacket, stupid Coco’s always giving me that look.

I wanted to make the jacket look 60s, so rather than the jewel neck, I made the neckline more bateau. However, I had to close up the ends of the neckline, as the bateau shape made the front hang in a weird way. I still like it, though.

image

I found a roll of those vintage “La Cote d’Azur” clothing labels on etsy. Now they’re my “private label”.

For pockets, I was inspired by this 60s jacket:

Chanel best look

but since I’m short-waisted, I didn’t want to do the upper set of pockets, which I assumed were for Coco’s ciggies anyway. More dastardly plaid-matching ensued while I created and lined two patch pockets and hand-sewed them on. (Basically cut a rectangle of fabric and one of lining, sew three sides right sides together, turn them right-side out, turn under the raw ends and hand-stitch, hand-sew on the trim, stick the pocket on the jacket and hand-stitch it on, repeat.)

Meanwhile, the exterior fabric was getting fuzzier and more played-out looking the more I stitched away, and the silk was getting tiny pulls all around the edge.

But as frustrating as it all was, I could see for myself why Chanel had added various design elements. The trim goes around the neck and center front to reinforce and stabilize that area without heavy tailoring. It keeps the neckline from flopping open, and it keeps the simple design from being too blocky and boring. Though I wasn’t using upper pockets, I could see how they would be useful on a princess-seamed jacket, to cover the place where the plaids don’t match at the bust point. The chain helps to keep the lightweight fabric hanging well so it won’t ride up, and the weight can counter-balance heavy buttons. The brilliant simplicity and wearability of this design has kept these jackets in vogue for more than 60 years.

I finally hand-sewed on the chain (time-consuming because you’ve got to get the needle around and through the metal loops) and hand-sewed on the trim and hooks and eyes. Then I put it in my closet until I recovered from the trauma ten months later.

Chaneljacket

I’m tired of Coco, how about you?

10

Okay, here are a few last details of the construction of Chanel Jacket #4 that I’d like to add before moving onto my next, much more fun topic, a Coco Chanel vs. Madame Vionnet Smackdown! Are you working on a Chanel-style jacket right now? If so, leave me a comment; I’d love to hear about it.

1962 Chanel pattern released by Spadea

1962 Chanel pattern released by Spadea

As I mentioned before, this Spadea Chanel pattern from 1962 was drafted from a retail jacket, the design of which was licensed from Chanel by the US company Suzy Perette. This was a common practice back in the days before off-shore manufacturing. In fact, the pink suit worn by Jacqueline Kennedy on the tragic day of the assassination, though often attributed to Chanel, was actually a copy made in a New York haute couture boutique. Here’s a story about the historic preservation of that suit from the New York Times:

http://www.nytimes.com/2013/11/15/fashion/jacqueline-kennedys-smart-pink-suit-preserved-in-memory-and-kept-out-of-view.html?smid=pl-share

The instructions from the 1962 Spadea Chanel pattern I used were very thorough and old school in terms of construction. Though I had never made welt pockets before, by following the instructions they were a breeze.

Pocket welts

Pocket welts

I created the flaps, attached the pockets, sewed up the side panel seam, and voila, a pretty little pocket made of colorful lining. Though Chanel jackets don’t typically have vertical pockets like this, I have seen examples from this era.

Completed welt pockets

Welt pocket in progress

Let’s talk about the obsession with 3-part sleeves, shall we? The two godmothers of haute couture, Susan Khalje and Claire Shaeffer, both have their disciples make 3-part sleeves for their home-made Chanel jackets, so the sleeve has a graceful bend at the elbow and the vent is high enough on the cuff to show off the trim and buttons.

But the truth is, not all Chanel jackets have had three-part sleeves. In Claire Shaeffer’s new book, for example, she shows several vintage Chanel jackets with two-part sleeves. The Spadea pattern I used cleverly fakes the three-part sleeve with a one-part sleeve by putting some ease in the seam to give it the bend at the elbow. Then the vent is added by cutting a slash in the sleeve and adding a facing that goes around the cuff.

Sleeve facing

Sleeve facing

Whether this is the original Chanel design, or a change made by Suzy Perette for US manufacturing, we’ll never know. But it does work pretty well. It’s still time-consuming, but probably not as much of a hassle as building a three-part sleeve.

My last comment on the sleeve is that I added sleevehead under the sleeve cap and then steamed it on a sleeveboard like this, to give the sleeve cap a nice, round shape.

Shaping sleeve cap

Shaping sleeve cap

After lining the jacket, I added the trim, chain (cleverly woven into a 5/8″ tape–much easier to sew on), buttons, and button loops, then collapsed.

Finished cuff and chain

Finished cuff and chain

My blog has been visited by people from around the world and I appreciate you all. Even the spammer guy from Korea! What projects are you working on? Please leave me a comment and let me know.

Working with a vintage unprinted pattern, if you’re lazy.

0
1962 Spadea/Chanel unprinted pattern

1962 Spadea/Chanel unprinted pattern

If you sew from vintage patterns, you may have been nonplussed to open that package and see absolutely nothing printed on the pieces, like in the photo above. Printed patterns only came into vogue in the 50s, and before that people needed to follow the notches and dots cut into the pattern to find their way. The Spadea company continued to hand-cut their unprinted patterns well into the 60s.

Above is a piece of the Spadea/Chanel jacket pattern I wrote about in a previous post. The instructions included with the pattern explain what the markings mean.  Each pattern piece has a letter made of small dots punched in it, to identify the back, front, sleeve etc. The notches are small “v” shapes on the side, three large dots indicate the fold, two large dots indicate the grainline, and medium and small dots are used in the instruction to indicate buttons, buttonholes, ease lines etc.

Marking pattern on to "Kwik Trace" muslin

Marking pattern on to “Kwik Trace” muslin

The first thing I do when I open an unprinted vintage pattern is write the pattern number, name and original bust size measurement on each piece so they don’t get mixed up with other patterns. Since I was using a rare vintage pattern, I traced it onto tracing paper and put the original away. Then I compared the pattern piece with a pattern from a previous jacket I made to make some fit adjustments. You can do this with a pattern block or sloper if you have one. (Those are basic fitting patterns some people make for themselves to fit patterns more quickly. So far I’ve been too lazy to make one.)

I then used a large piece of tracing paper (from the http://www.richardthethread.com/  website in LA) and a tracing wheel to copy the pattern onto my “muslin” version of the jacket. (Though in this case I’m using Kwik Trace tracing fabric rather than actual muslin, again being lazy.) The downside of Kwik Trace is that it’s unwoven and doesn’t have a grain, so I wouldn’t recommend it for projects where you need to know how the fabric will behave, such as a bias cut dress.

Completed "muslin" of jacket

Completed “muslin” of jacket

I cut out the pieces and constructed the muslin loosely using the method outlined in Susan Khalje’s “Couture Dress” course on Craftsy. (Okay, I skipped a few steps, but you get the idea.) I’ve recommended that course in previous posts, and it really helps with vintage projects like this. http://www.craftsy.com/class/The-Couture-Dress/53?_ct=sbqii-sqjuweho-qbb&_ctp=53,1

Once I tweaked the fit, I marked any changes on the Kwik Trace with a sharpie and took the “muslin” apart. Those pieces now became my pattern. At this point I wrote the pattern number and name on each piece and indicated that it had been fitted for me, in case I wanted to reuse it.

Cutting the fabric with large seam allowances

Cutting the fabric with large seam allowances

I pinned the pattern pieces on my fabric and then cut loosely around them to leave plenty of seam allowance. Boucle like this unravels in a huge hurry, and by the time you’re ready to finish the seams, you may have already lost more than 1/2 an inch.

Thread tracing the seam line

Thread tracing the seam line

At this point, if you follow Susan’s Khalje’s instructions in the Couture Dress course, you are supposed to “thread trace” (loosely baste with contrasting silk thread) around all of the seam lines to mark the seams on the front and back. This is a great idea! But I can’t face it at this point in the construction! (Because I’m lazy.) So, despite the fact that Susan warns against this, I marked both sides of my fabric with tracing paper, which I then could not get out of the fabric. Fortunately my fit was pretty good, so I just stitched inside the line and the marks ended up inside the seam allowance. I did thread trace the armscye and sleevecap as it makes it a million times easier to line up.

How about you? Have you ever worked with an unprinted pattern? How did it go? Leave me a comment, and a link if you have one. I’d love to see your projects.

Till next time… (I used to work in TV so I feel like I need a sign-off line) “May your bobbins be full and your tension even?”