Finding a “Fitting Shell” to fit those !$%#! vintage patterns

33

In the past couple of years, I’ve become the proud owner of some pretty fab vintage designer patterns that I’m dying to make up. Here are a few examples:

A 1930’s Schiaparelli bias-cut dress pattern with label:

image

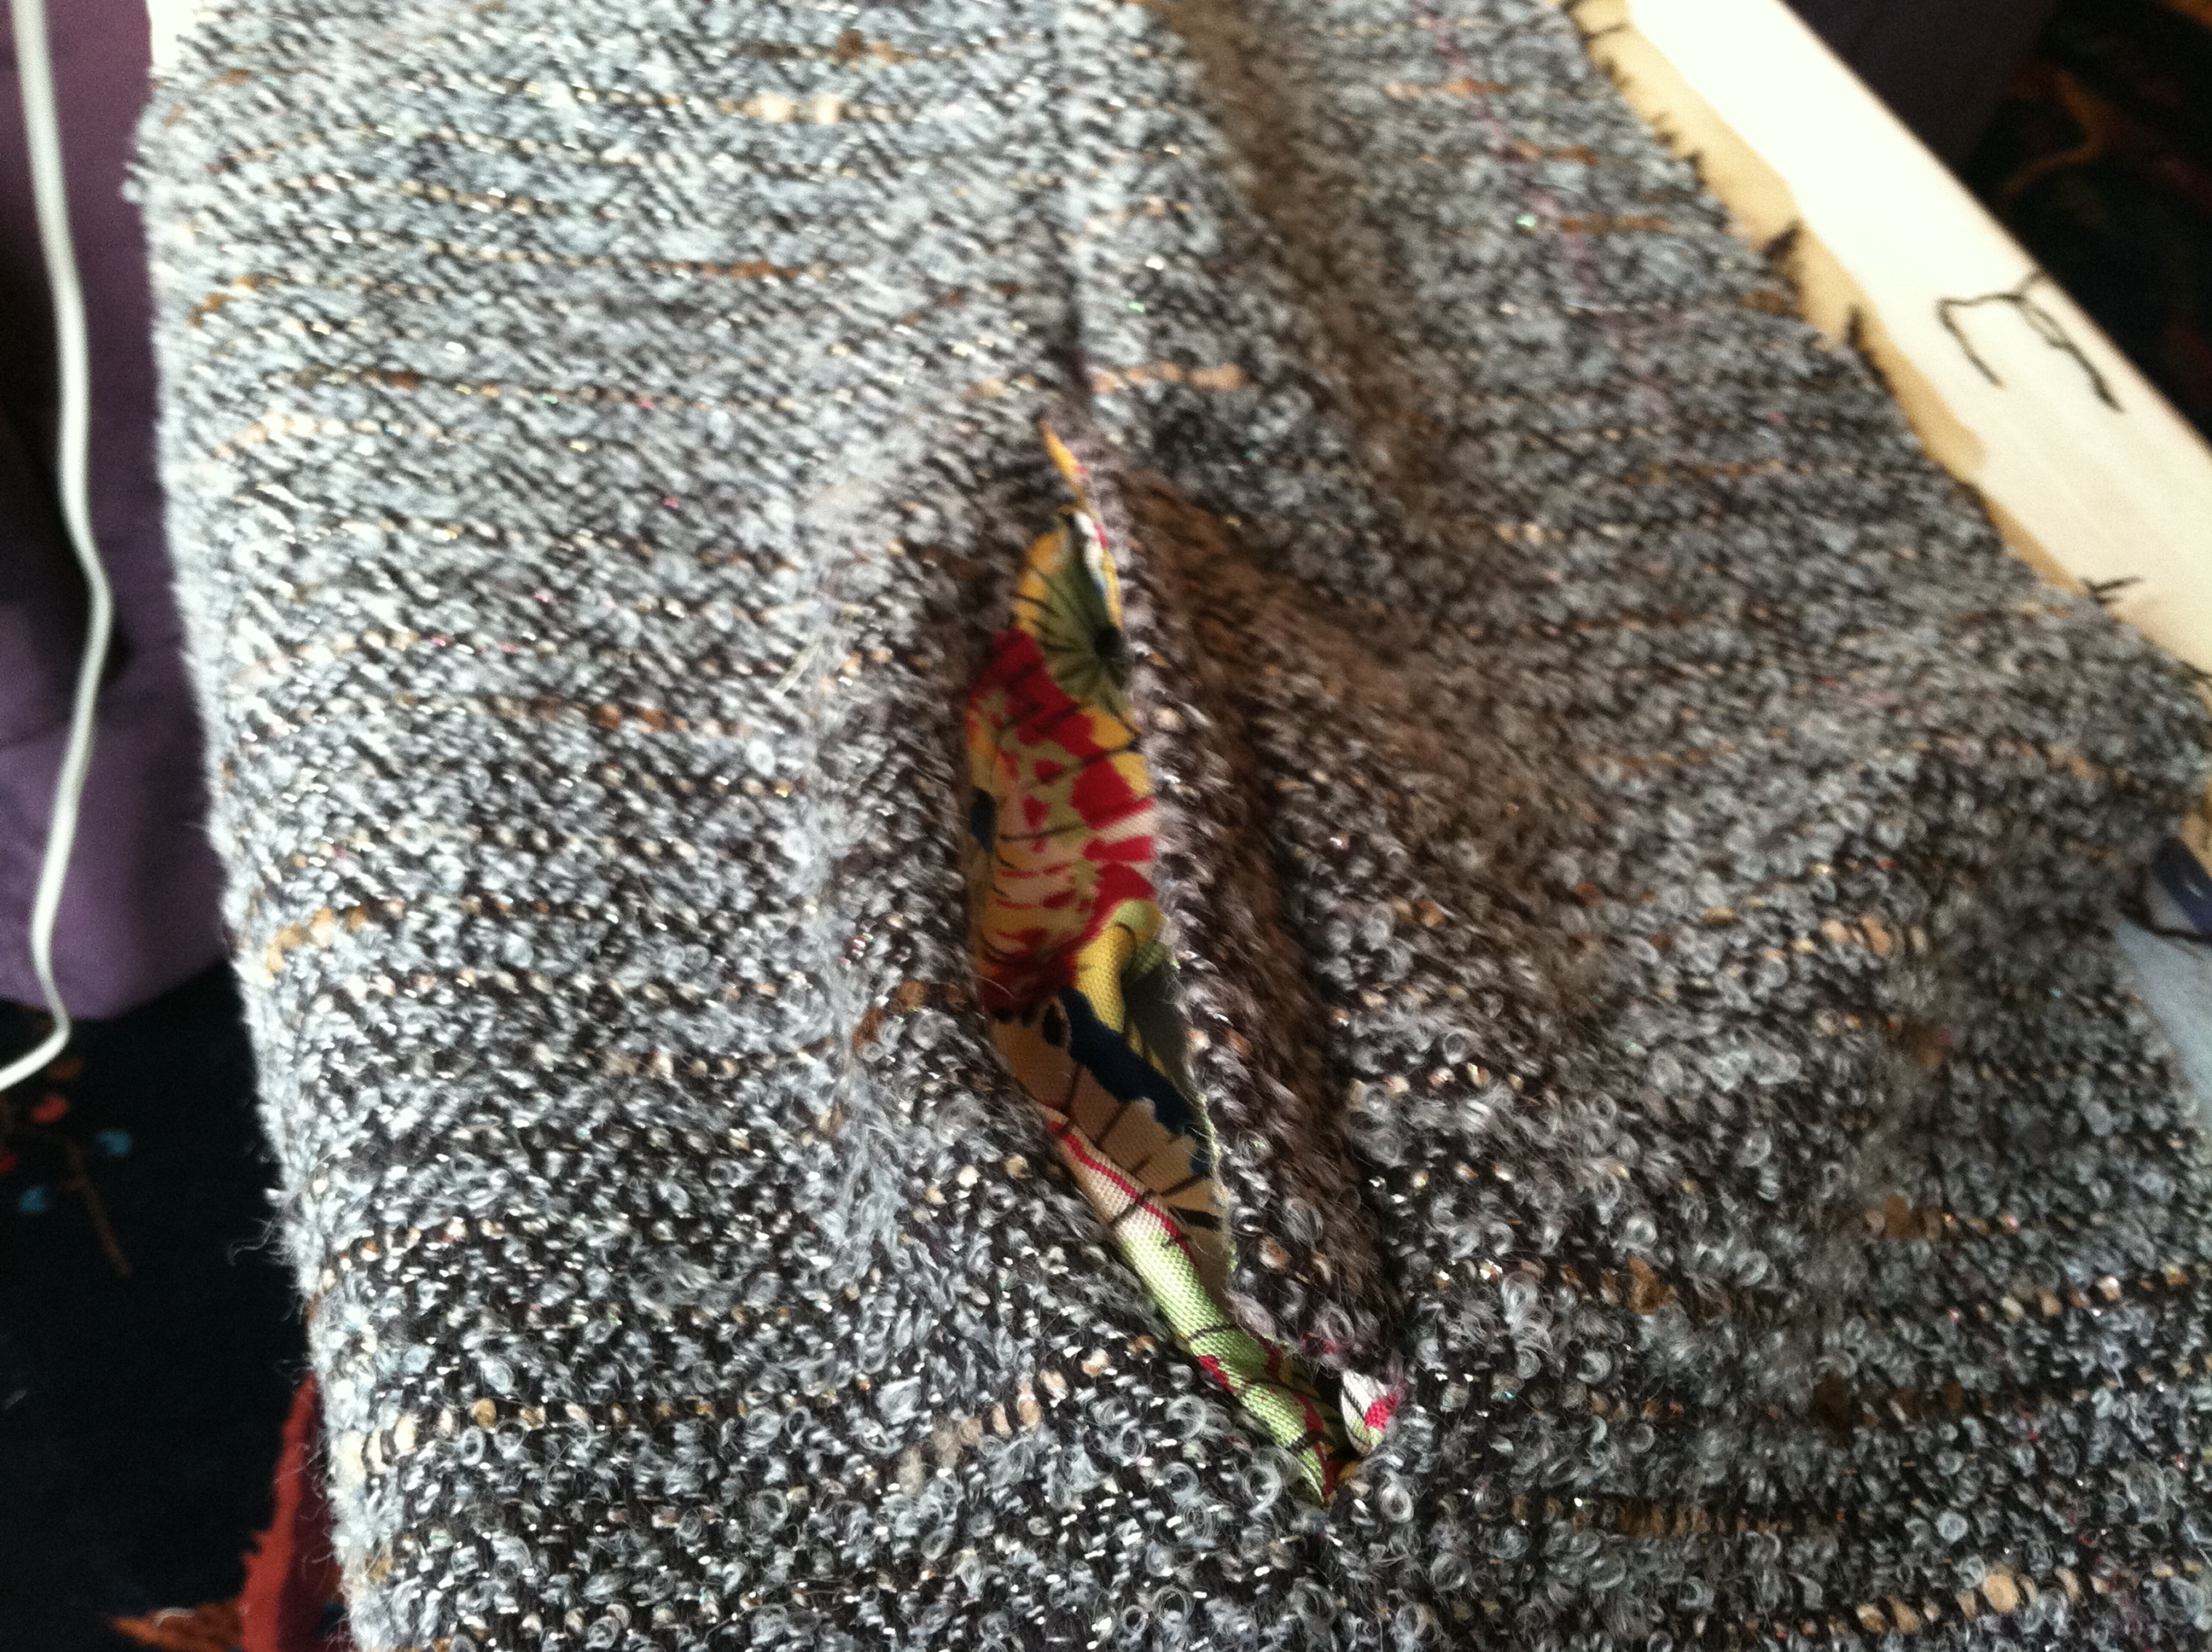
A 1962 Officially licensed Chanel Jacket pattern:

Chanel pattern

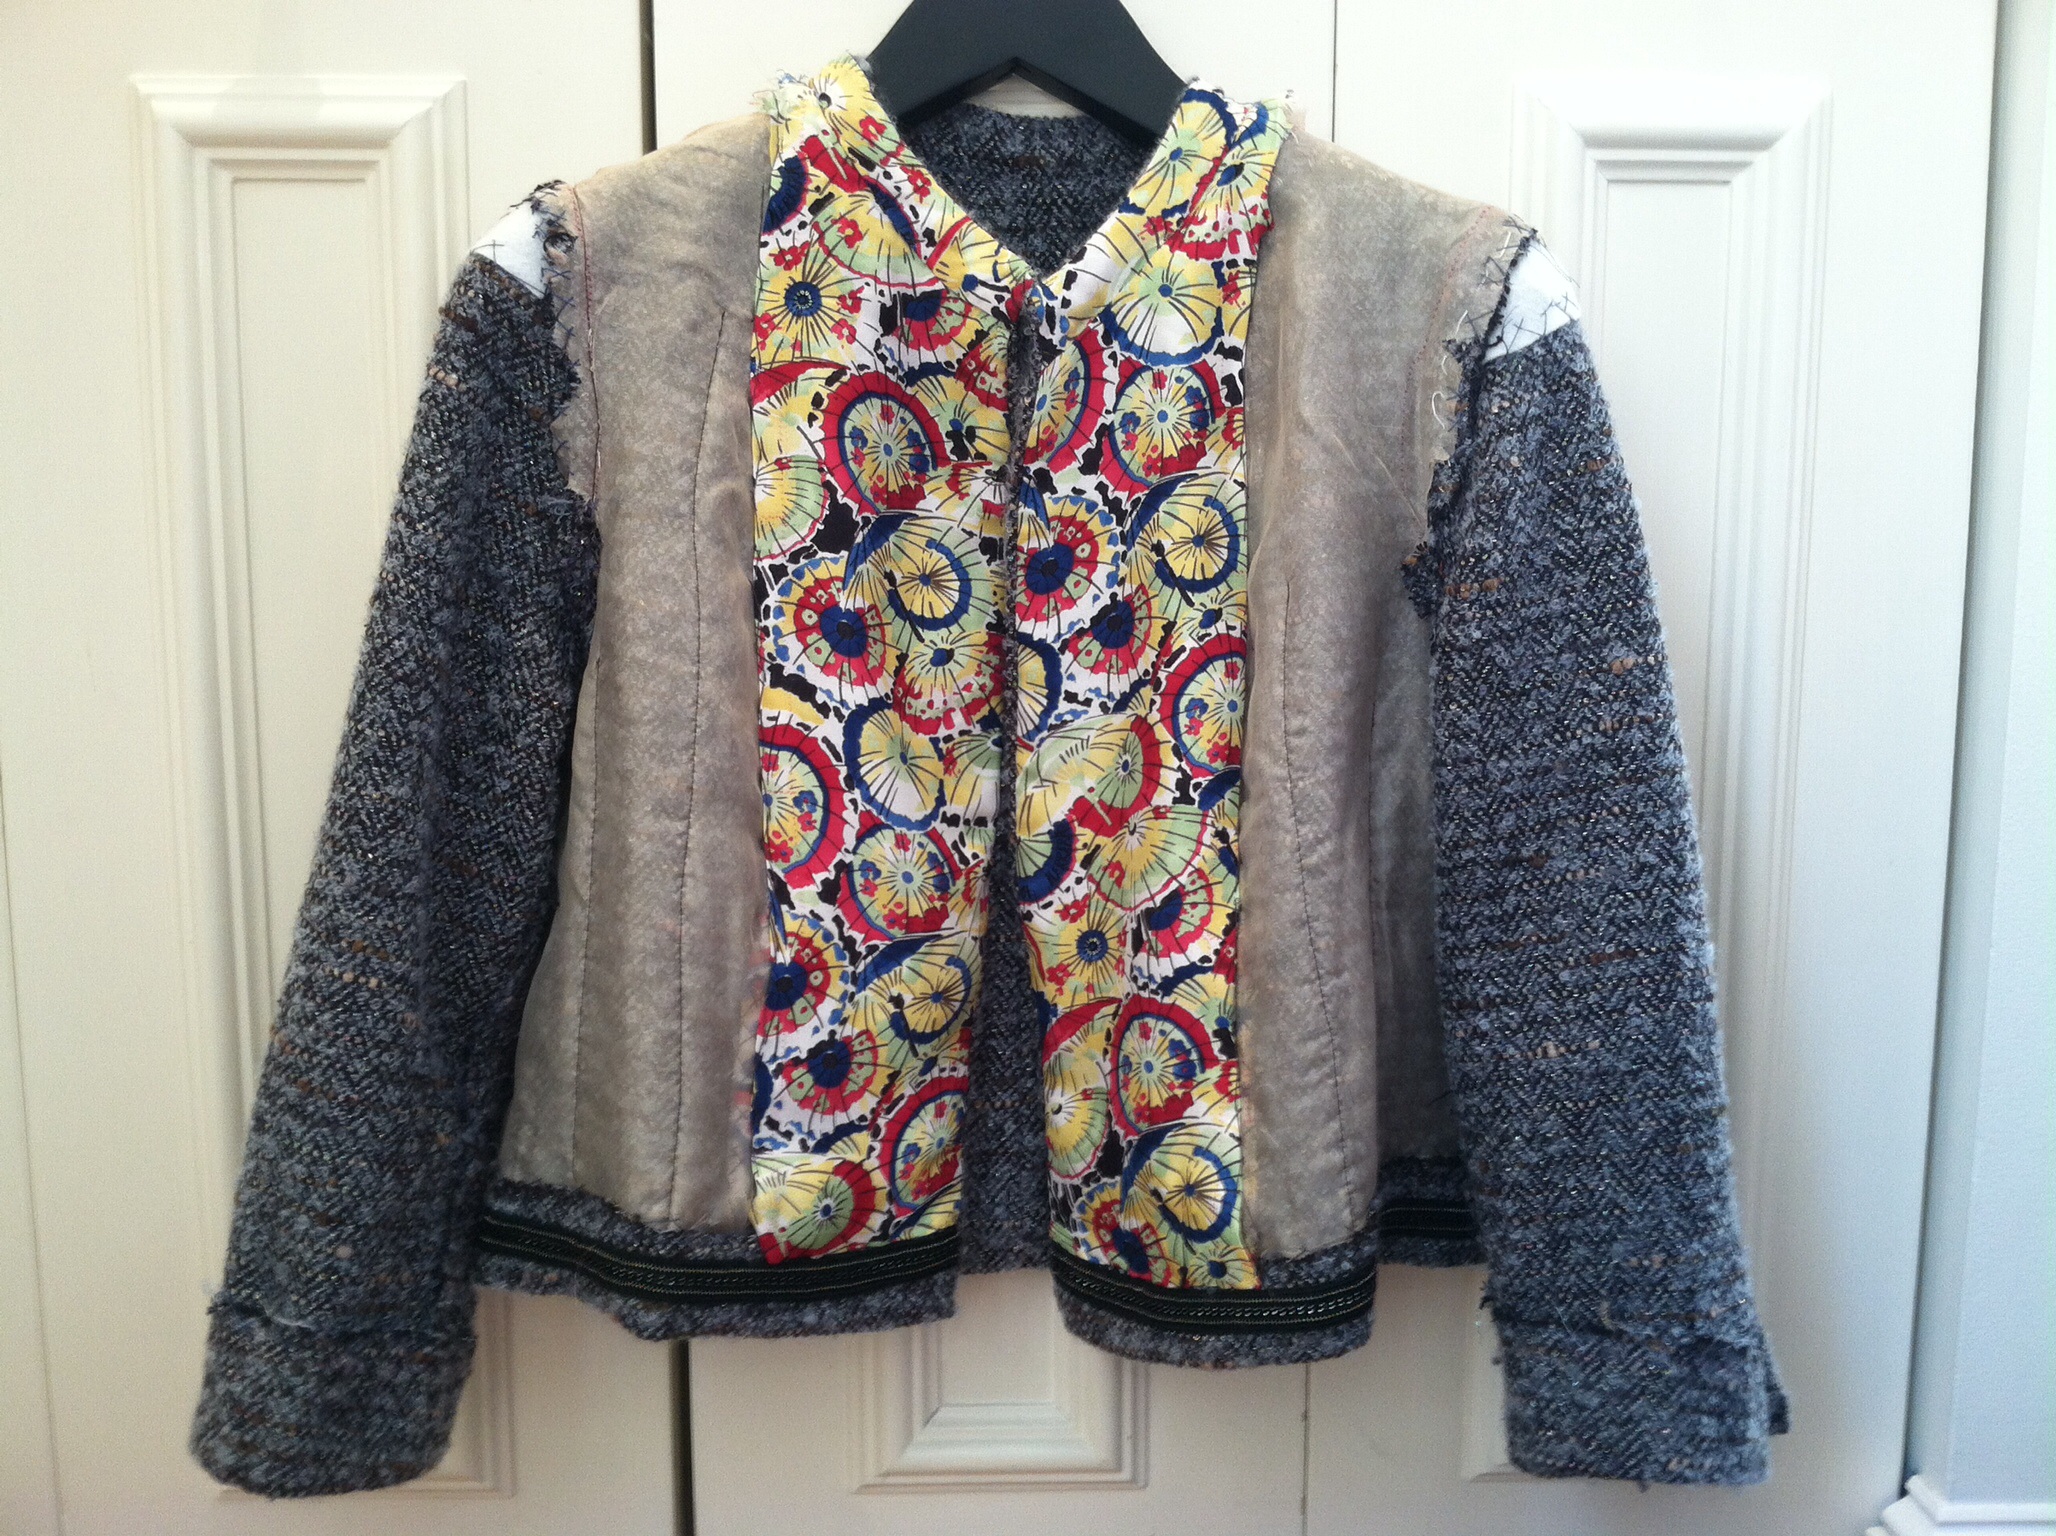
I did make that one up, and here’s the finished product: (And here are my posts about how I made it.)

10597356983_069525009b_z[1]

A number of Ceil Chapman patterns by Spadea:

image

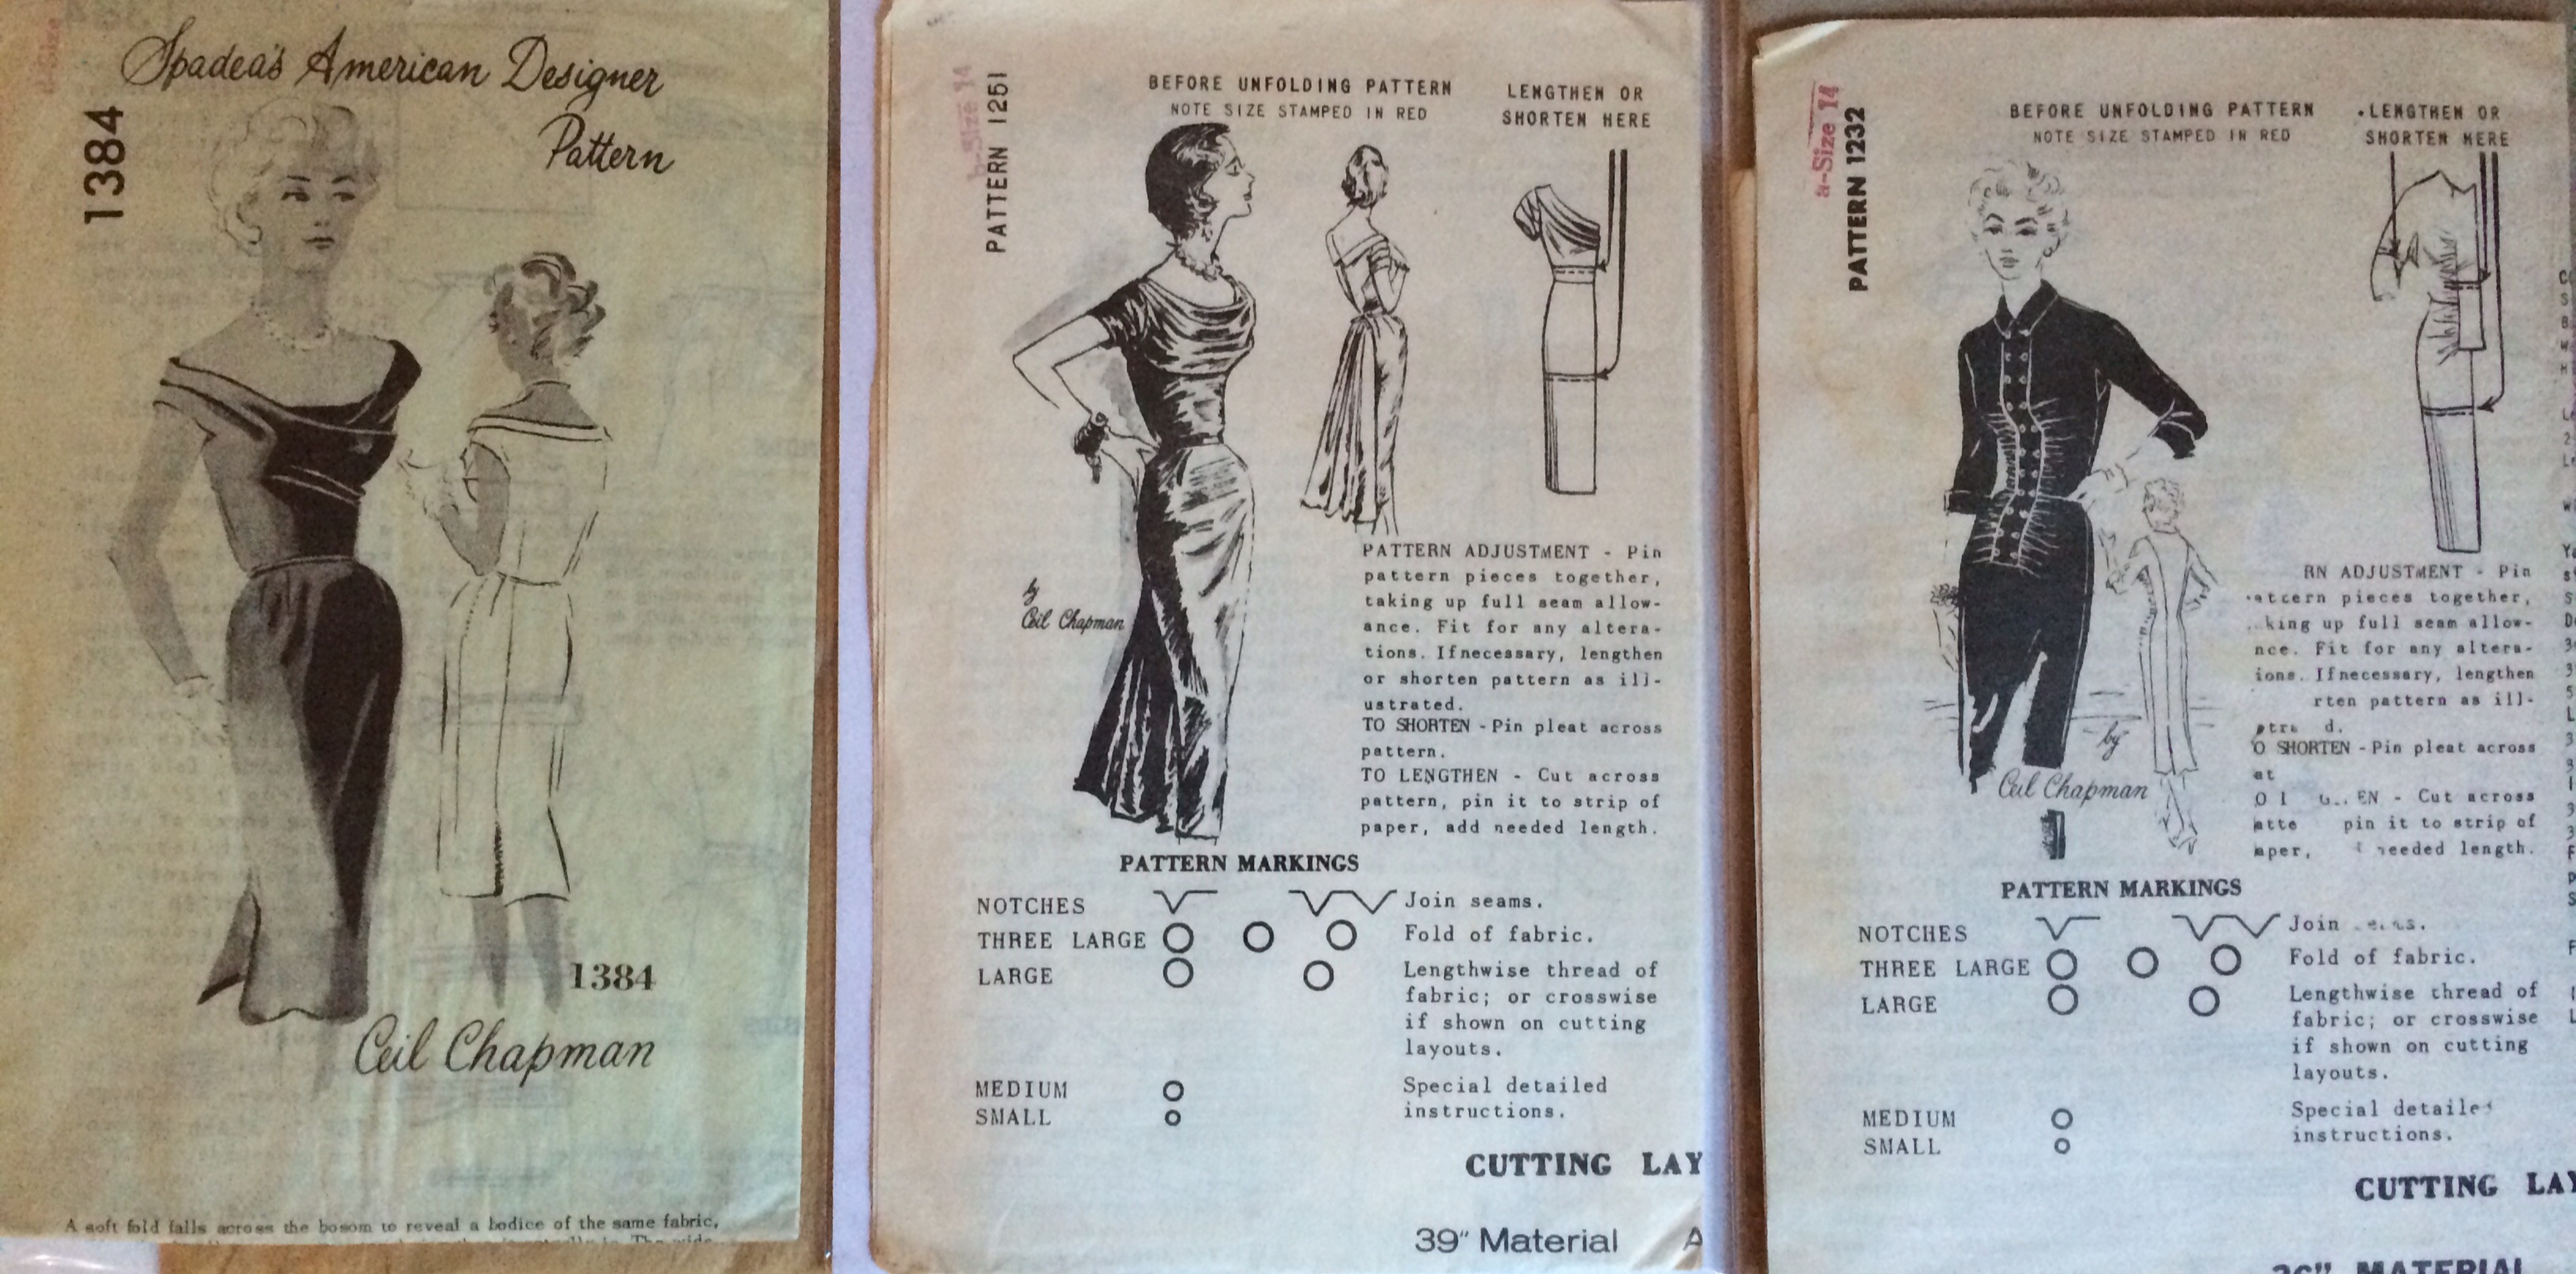
Laura Mae from “Lilacs and Lace” has been blogging about making that “Skylark” style pattern in the middle, and it looks mighty tricky. (Lilacs and Lace blog)

Here’s an example of an original Ceil Chapman “Skylark” dress, with a narrow inner skirt and an over-skirt in the back:

Ceil Chapman Skylark dress

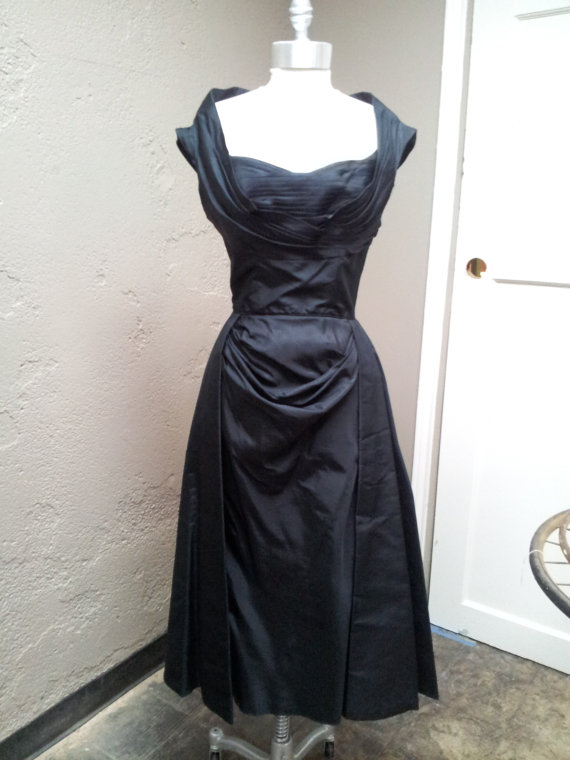
No wonder Chapman was a favorite designer for stars like Marilyn Monroe and Elizabeth Taylor. The dress played up the bust and made the wearer look like a beautiful bird. As an aside, here’s a link to the Hoagy Carmichael/Johnny Mercer tune that was popular in that era: “Skylark” sung by Ella Fitzgerald

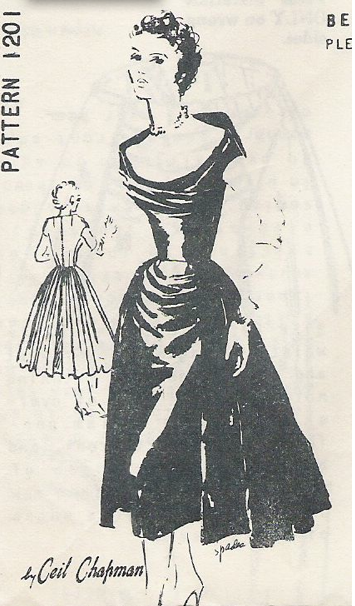
And here’s the true Skylark dress pattern by Spadea, drafted from the dress above (I’d really like to find this one):

Ceil Chapman Spadea Skylark pattern

I’ve also been snapping up patterns designed by Claire McCardell, released by Spadea, McCalls, and Folkwear. Now I have more than a dozen.

image

Here’s a rare Charles James skirt pattern:

image

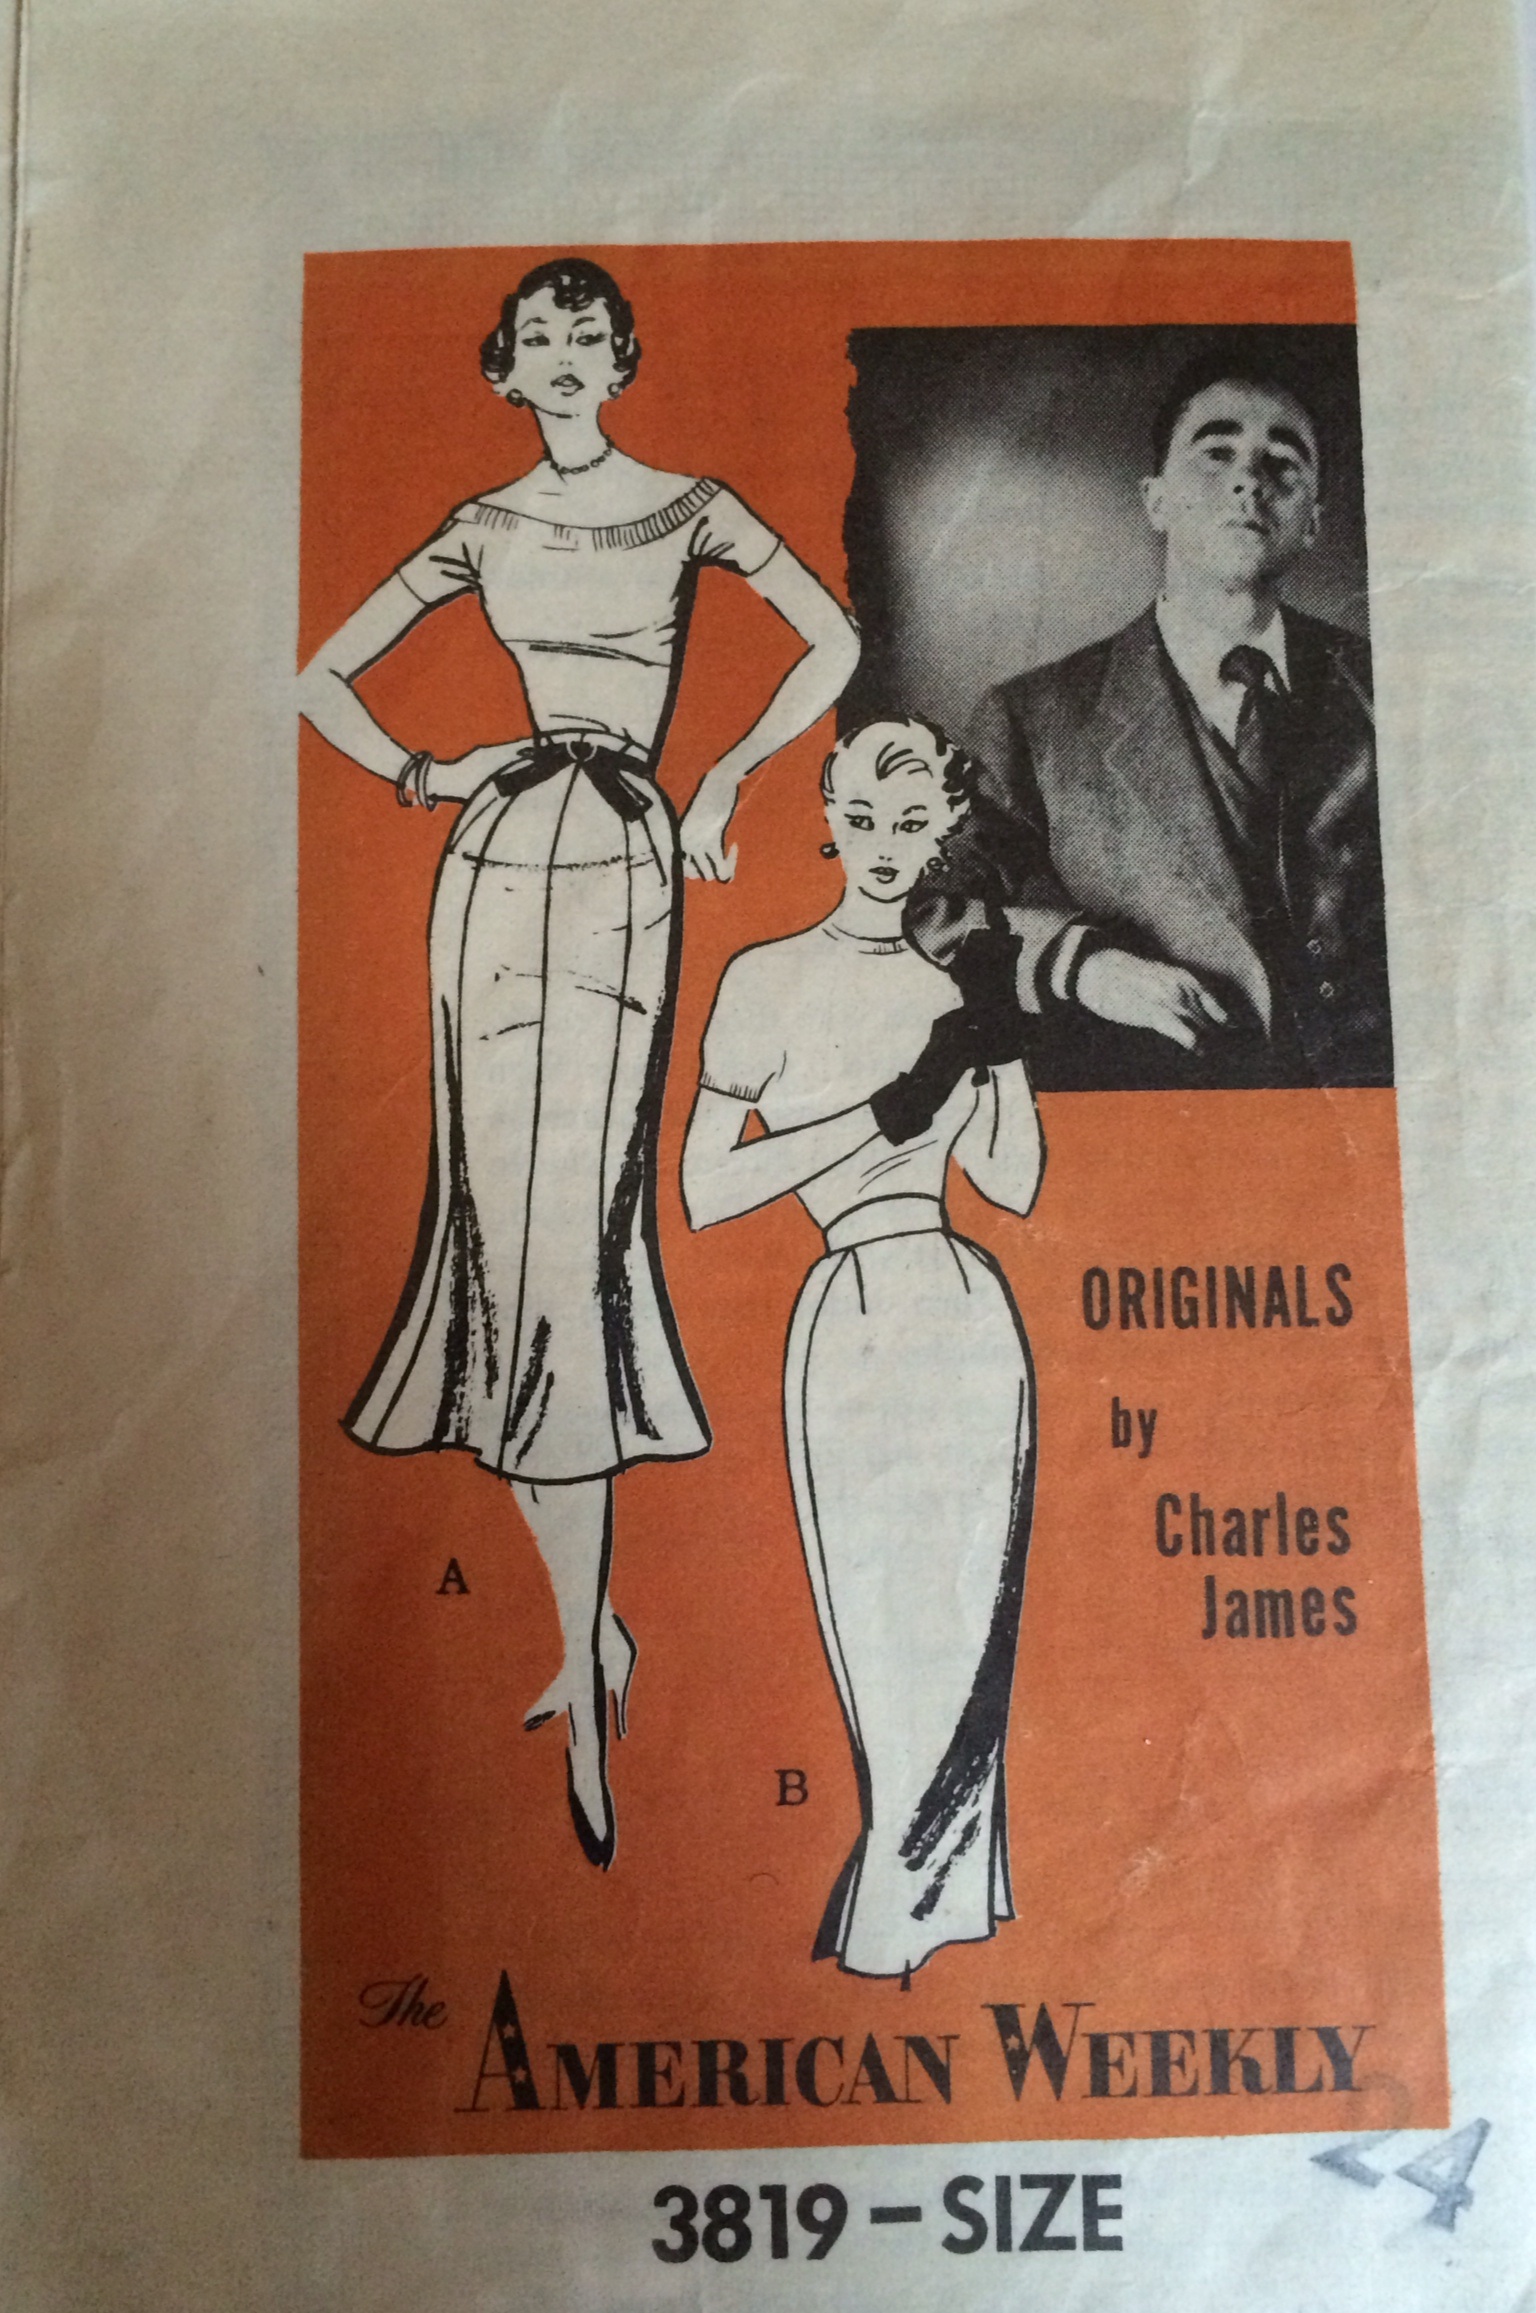
The inner workings of these skirt patterns show his genius for garment shaping through structure. There’s going to be a Charles James retrospective at New York’s Metropolitan Museum of Art starting this May 2014, which I’m now scheming to attend (waving my pattern…). (Charles James exhibit info)

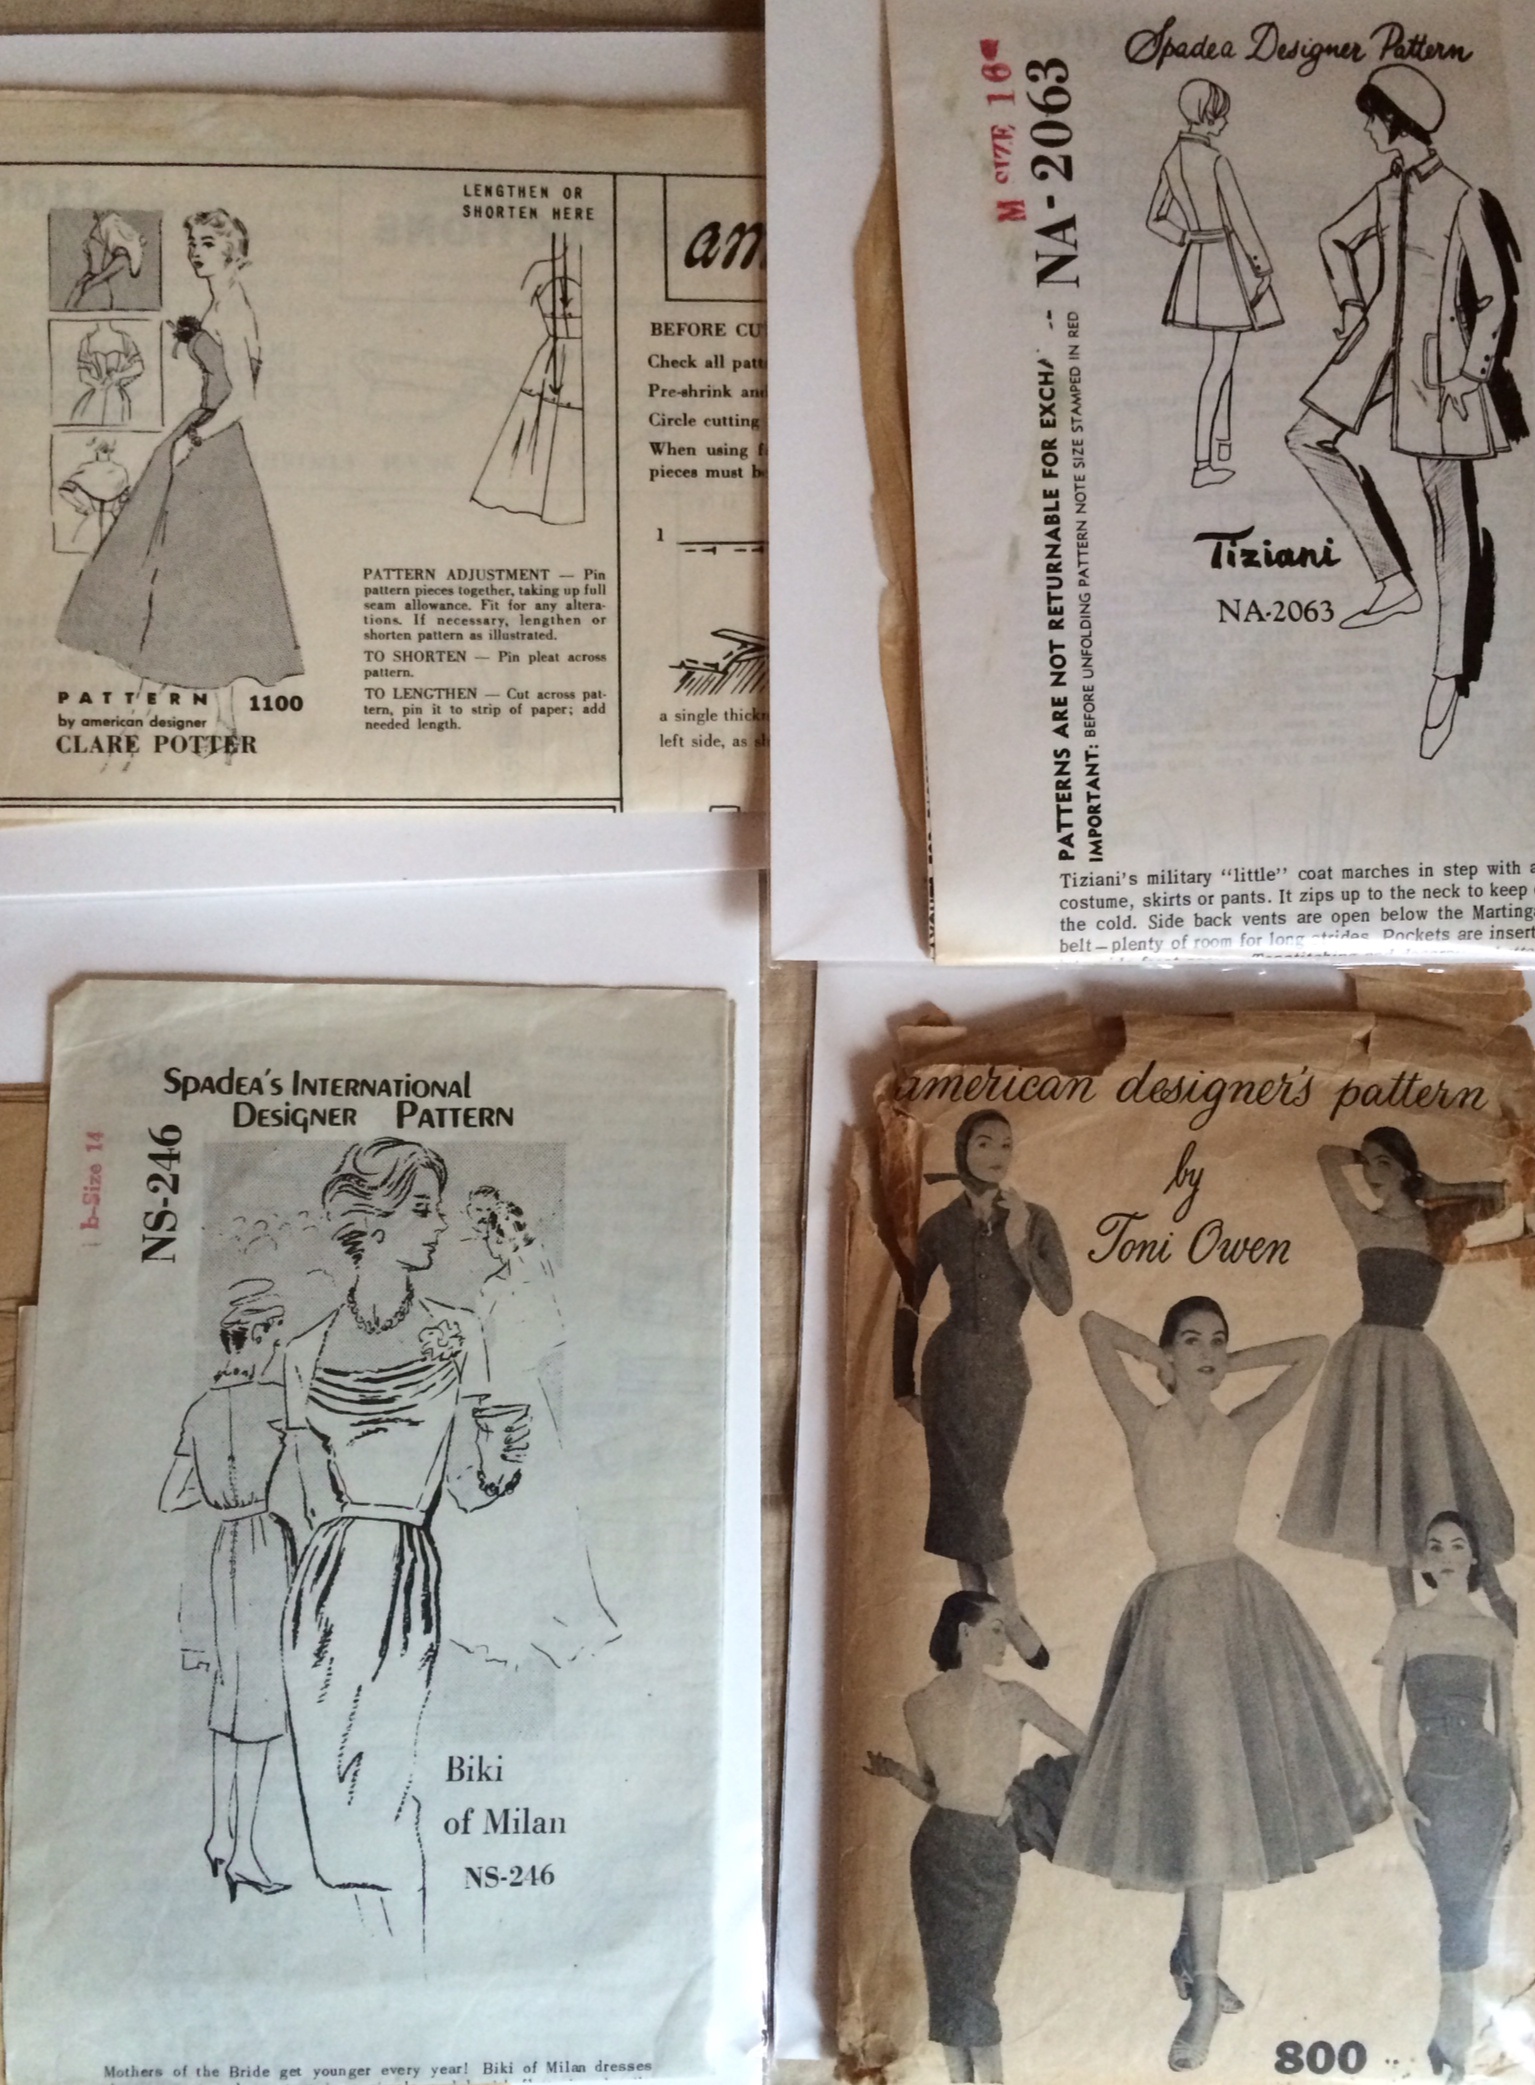
Not to mention several boxes of patterns by Pauline Trigere, YSL, Diane Von Furstenberg, Halston, Kenzo, Tiziani (by Lagerfeld) and a number of more obscure designers from the 50s and 60s such as Claire Potter, Jane Derby, Norman Hartnell (the Queen’s couturier), Tina Leser (the original Boho designer), Joset Walker, Jo Copeland, Vera Maxwell, Biki (friend and designer for Maria Callas), and Toni Owen:

image

Also patterns by Hollywood costumers such as Edith Head, Charles LeMaire, and William Travilla, who designed the iconic pleated dress Marilyn Monroe wore over the grate in “Seven Year Itch.”

image

I’ll be the first to admit that I have a pattern problem, and my husband will be the second to admit it.

Most of these patterns are way too small for me, and cut for the different body shapes that were popular at the time. For example, many of the 50s patterns assume that you’re wearing a girdle (which was basically Spanx crossed with a Michelin tire) and a bullet bra that raised the bust point by several inches. It was all about boobs and hips with a tiny short waist, like Elizabeth Taylor in the era.

Elizabeth Tayler

In contrast, the 70s DVF and Halston patterns basically assume that you might possibly be wearing slinky bikini underwear but probably not a bra (because you burned it at a feminist rally before you went to the disco), and the look was super-skinny with a small chest and hips, long torso and really long legs. Nobody worked out (it was pre-Jane Fonda aerobics) and a lot of women smoked and did coke, so the ideal was skin and bones. Here’s Lauren Hutton in that era:

Lauren Hutton

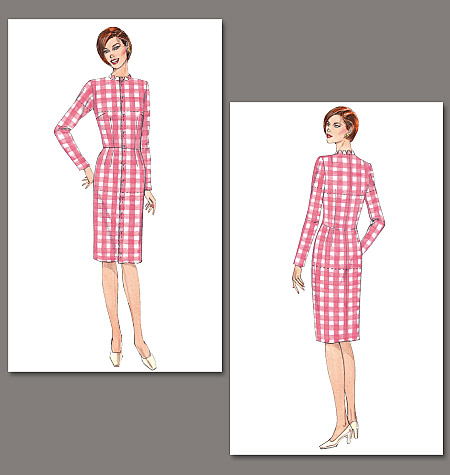
In the picture, she’s wearing a dress by Halston that’s very similar to this late 70s pattern:

Halston pattern #2

Of course a woman’s body can’t morph into new shapes to fit the fashions of the times, so we mainly just beat ourselves up over it.

I’ve gotten tired of starting from scratch in terms of fitting every time I take on a vintage pattern, particularly because my middle-aged body has fit issues of it’s own. So I’m going to see if making a “fitting shell” will help.

If you’re obsessively combing the internet for sewing fun facts (as I do to procrastinate about pinning and cutting fabric), you will see the terms “block,” “sloper” and even the haute couture “moulage” (Kenneth King’s Moulage book) bandied about to describe a basic pattern that is used by a designer to create new patterns.

I didn’t want to get my terminology wrong, so I consulted Kathleen Fasanella’s excellent blog about professional design and manufacturing, Fashion Incubator. There, I found out that patterns without seam allowances, called  “slopers” or “blocks” in the sewing enthusiast world, are generally not used in the industry, and if you use those terms in a pro environment, you’ll be snickered at. She refers to the thing I want to make as a “fitting shell,” so that’s what I’m going to call it.

Basic fitting shell patterns have been available from pattern companies as far back as the 40s or 50s from what I’ve found online, and you can still buy them today. The idea behind these patterns is that if you make up the Vogue Patterns Fitting Shell and get it fitted closely to your body, then you can compare the fitting shell pattern pieces to any other Vogue pattern and easily adjust the fit.

Vogue patterns fitting shell

I want to make myself a fitting shell so that I have a basic flat pattern pieces, fitted for me, to compare with the pattern pieces of the vintage patterns I own. That way, I can ballpark how much I need to increase the dimensions of the smaller pattern to fit my shoulders, bust, waist and hips.

Sounds great in theory, we’ll see how it goes in practice.

I looked at the modern fitting shells released by the Big 4 pattern companies, but nowadays modern patterns tend to have more ease built in, particularly in the armscye, and I want those high and tight vintage Chanel armholes.

So I decided to buy some fitting shell patterns from the 50s and 60s, to see if they would work better. Here’s one from the late 60s, judging from the hairdo and squared-off pumps:

image


And here’s one that looks like late 50s:

image

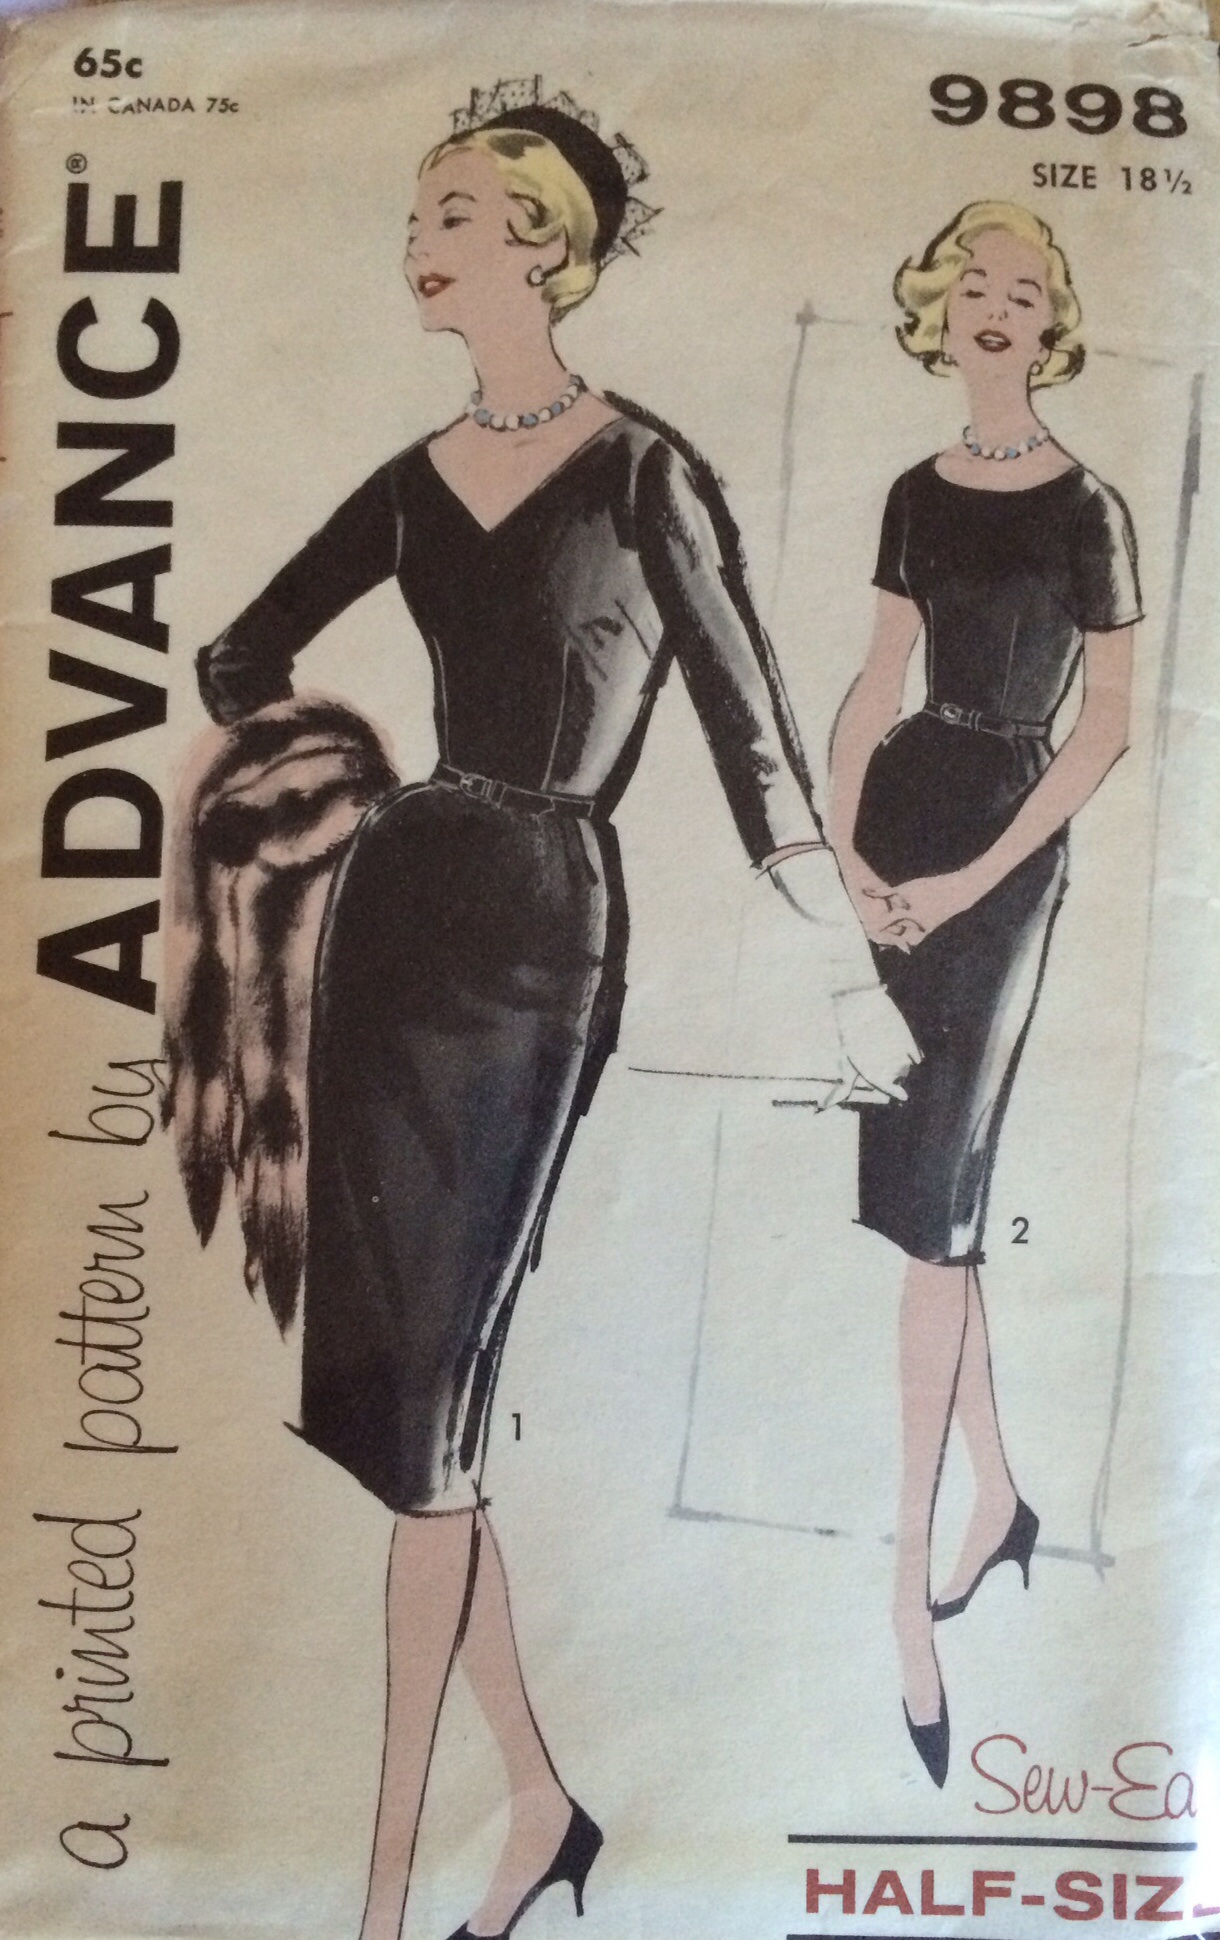
This one in particular is for half-sizes, which nowadays I think would be referred to as “Petite Plus.” The “half-size” range is described in Connie Crawford’s current Grading Workbook as cut for a “more mature, short-waisted woman with a shorter, heavier body-type.” I can’t say I was terribly happy with that description, but at least now I know I have a “half-size” body with “full-size” legs.

And I was very excited to find out what “The Bishop Method” (written on the back of the pattern) might be.

image

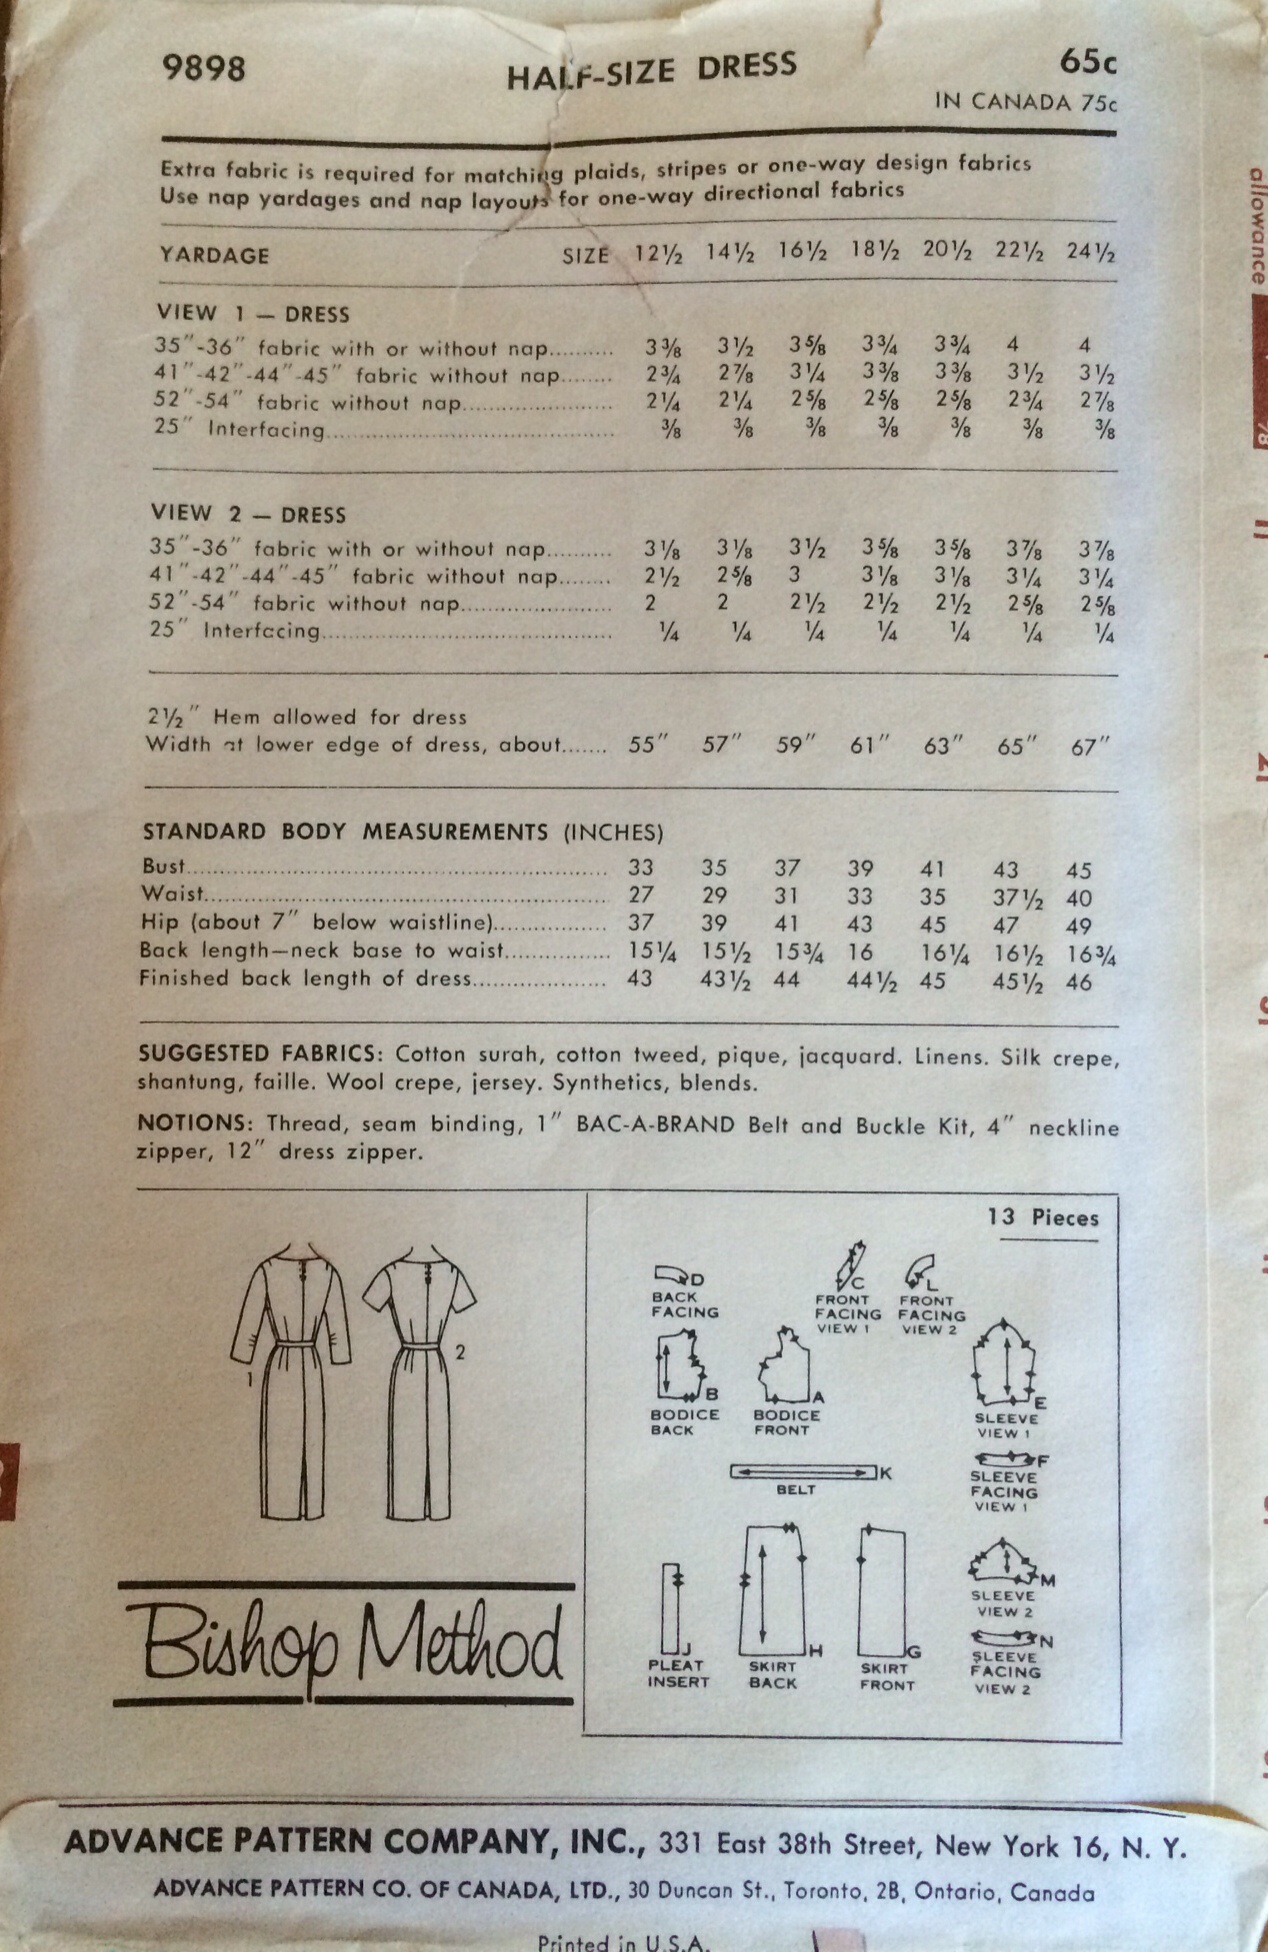
I eagerly looked throughout the instructions but was bummed to discover that there was no mention of The Bishop Method inside.

After a quick google, I found “Bishop Method” books all over the internet, and discovered that they were Home Ec manuals from the 50s and 60s. People were raving about them on Amazon! So of course I ordered one, because I need more sewing stuff.

image

Holy smoke, The Bishop Method is the best flippin’ bible of vintage sewing techniques for the novice that I’ve ever seen! It takes you from square one (learning about the machine and making an apron)…

image

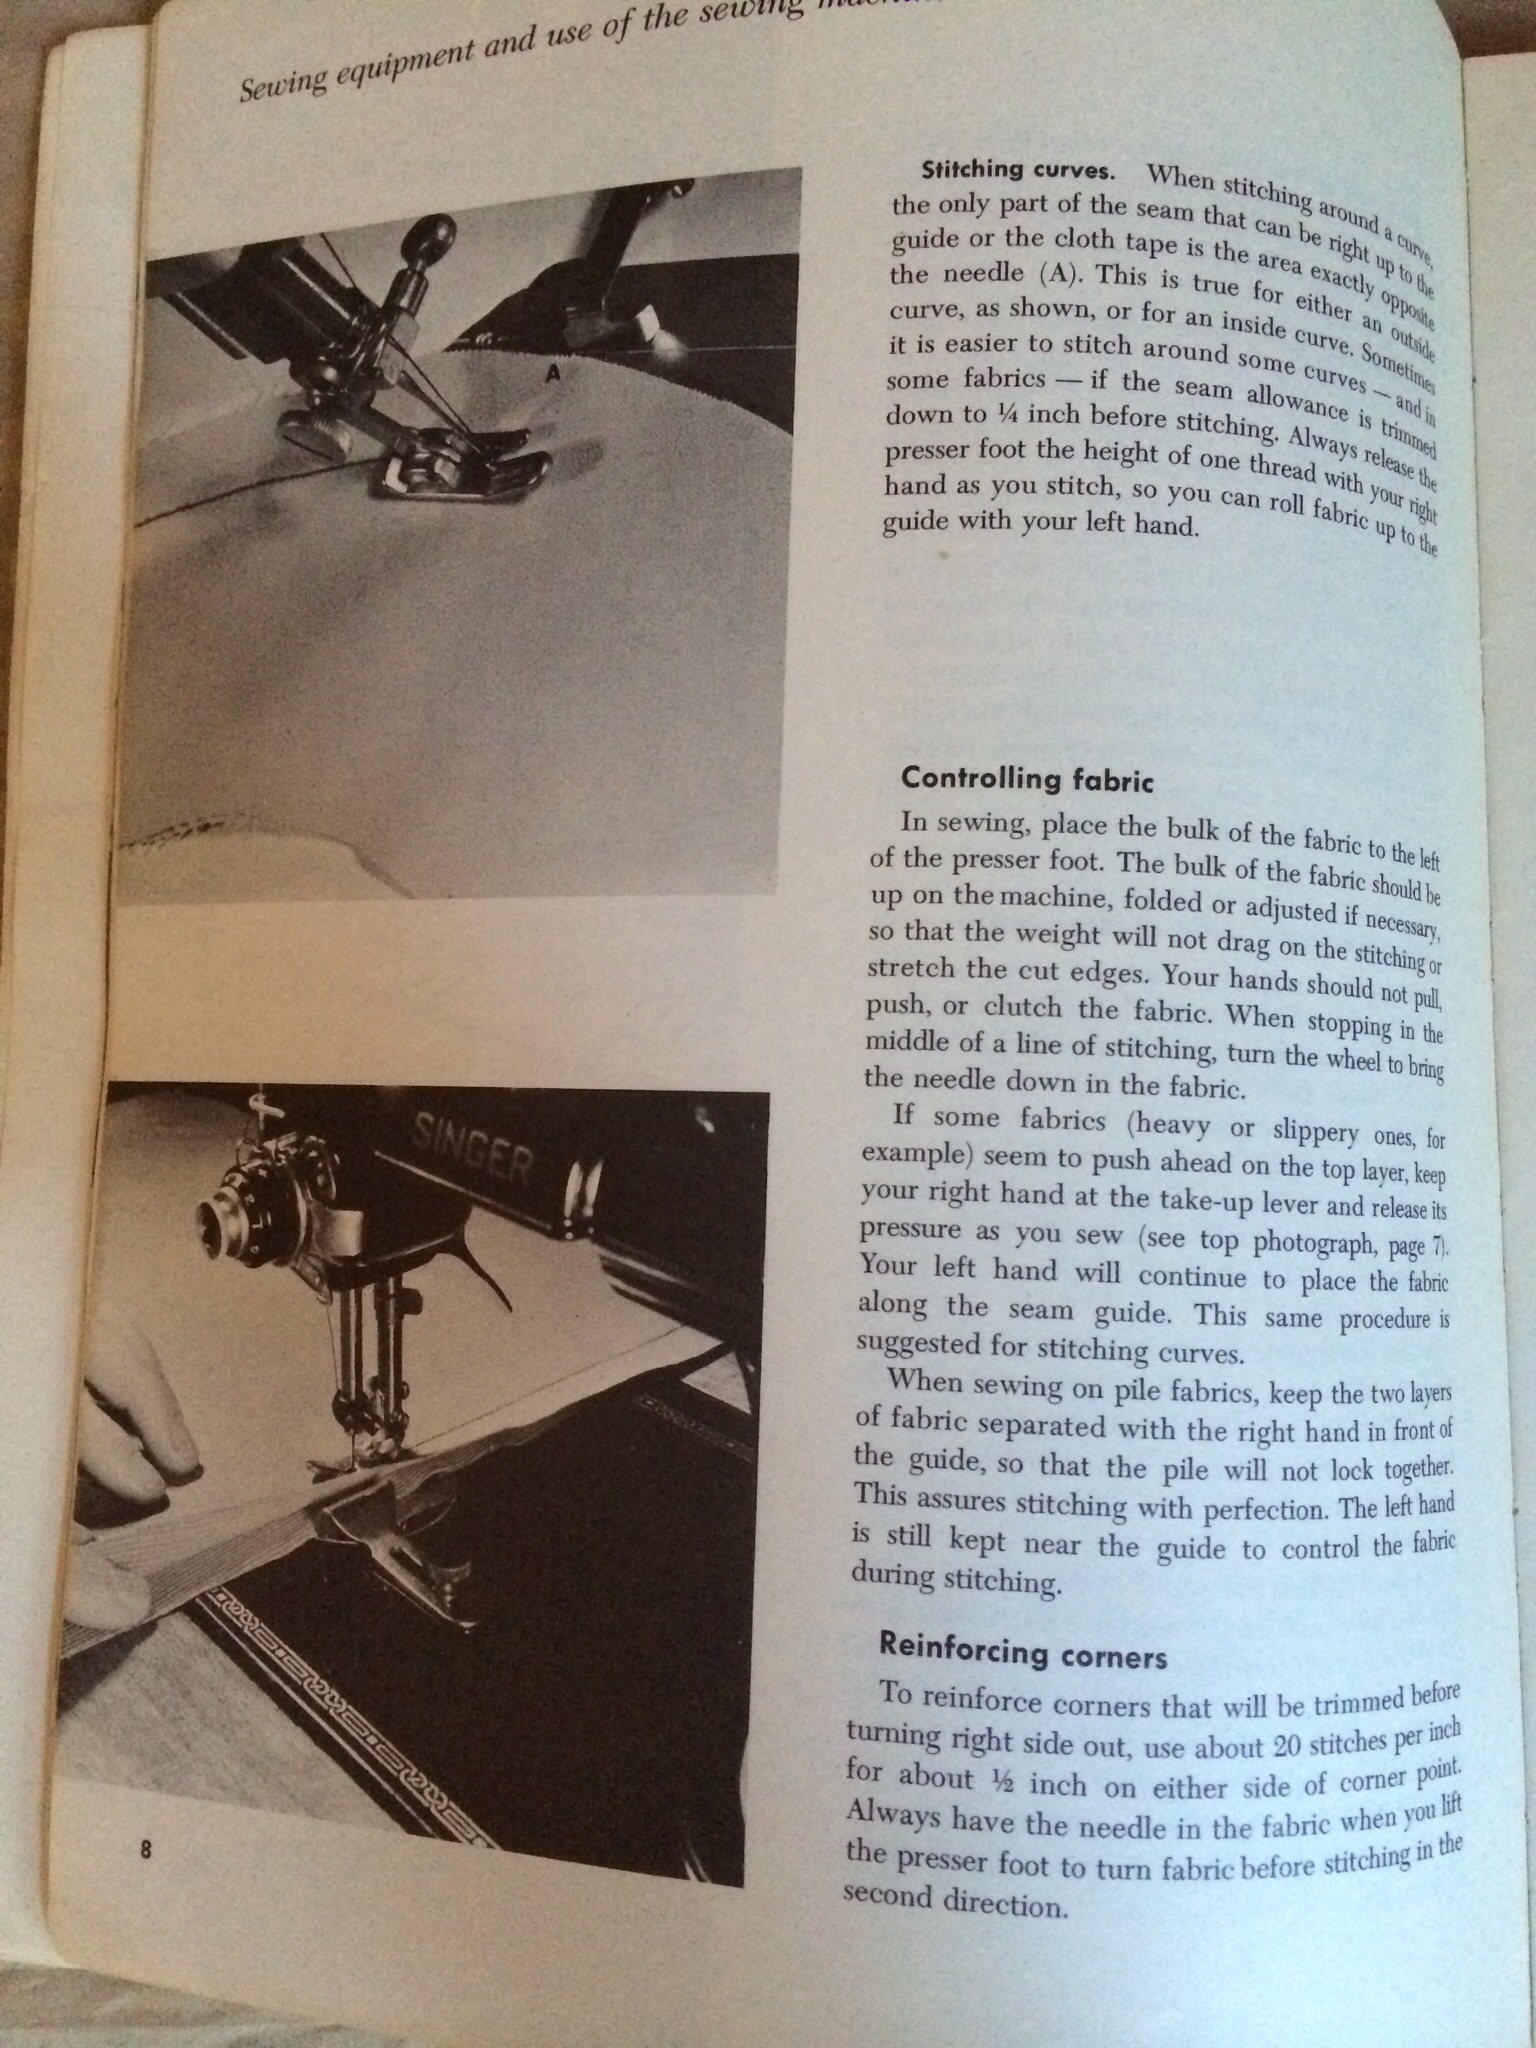
(that looks like the straight-stitch Singer 15 sewing machine I learned on.)

image

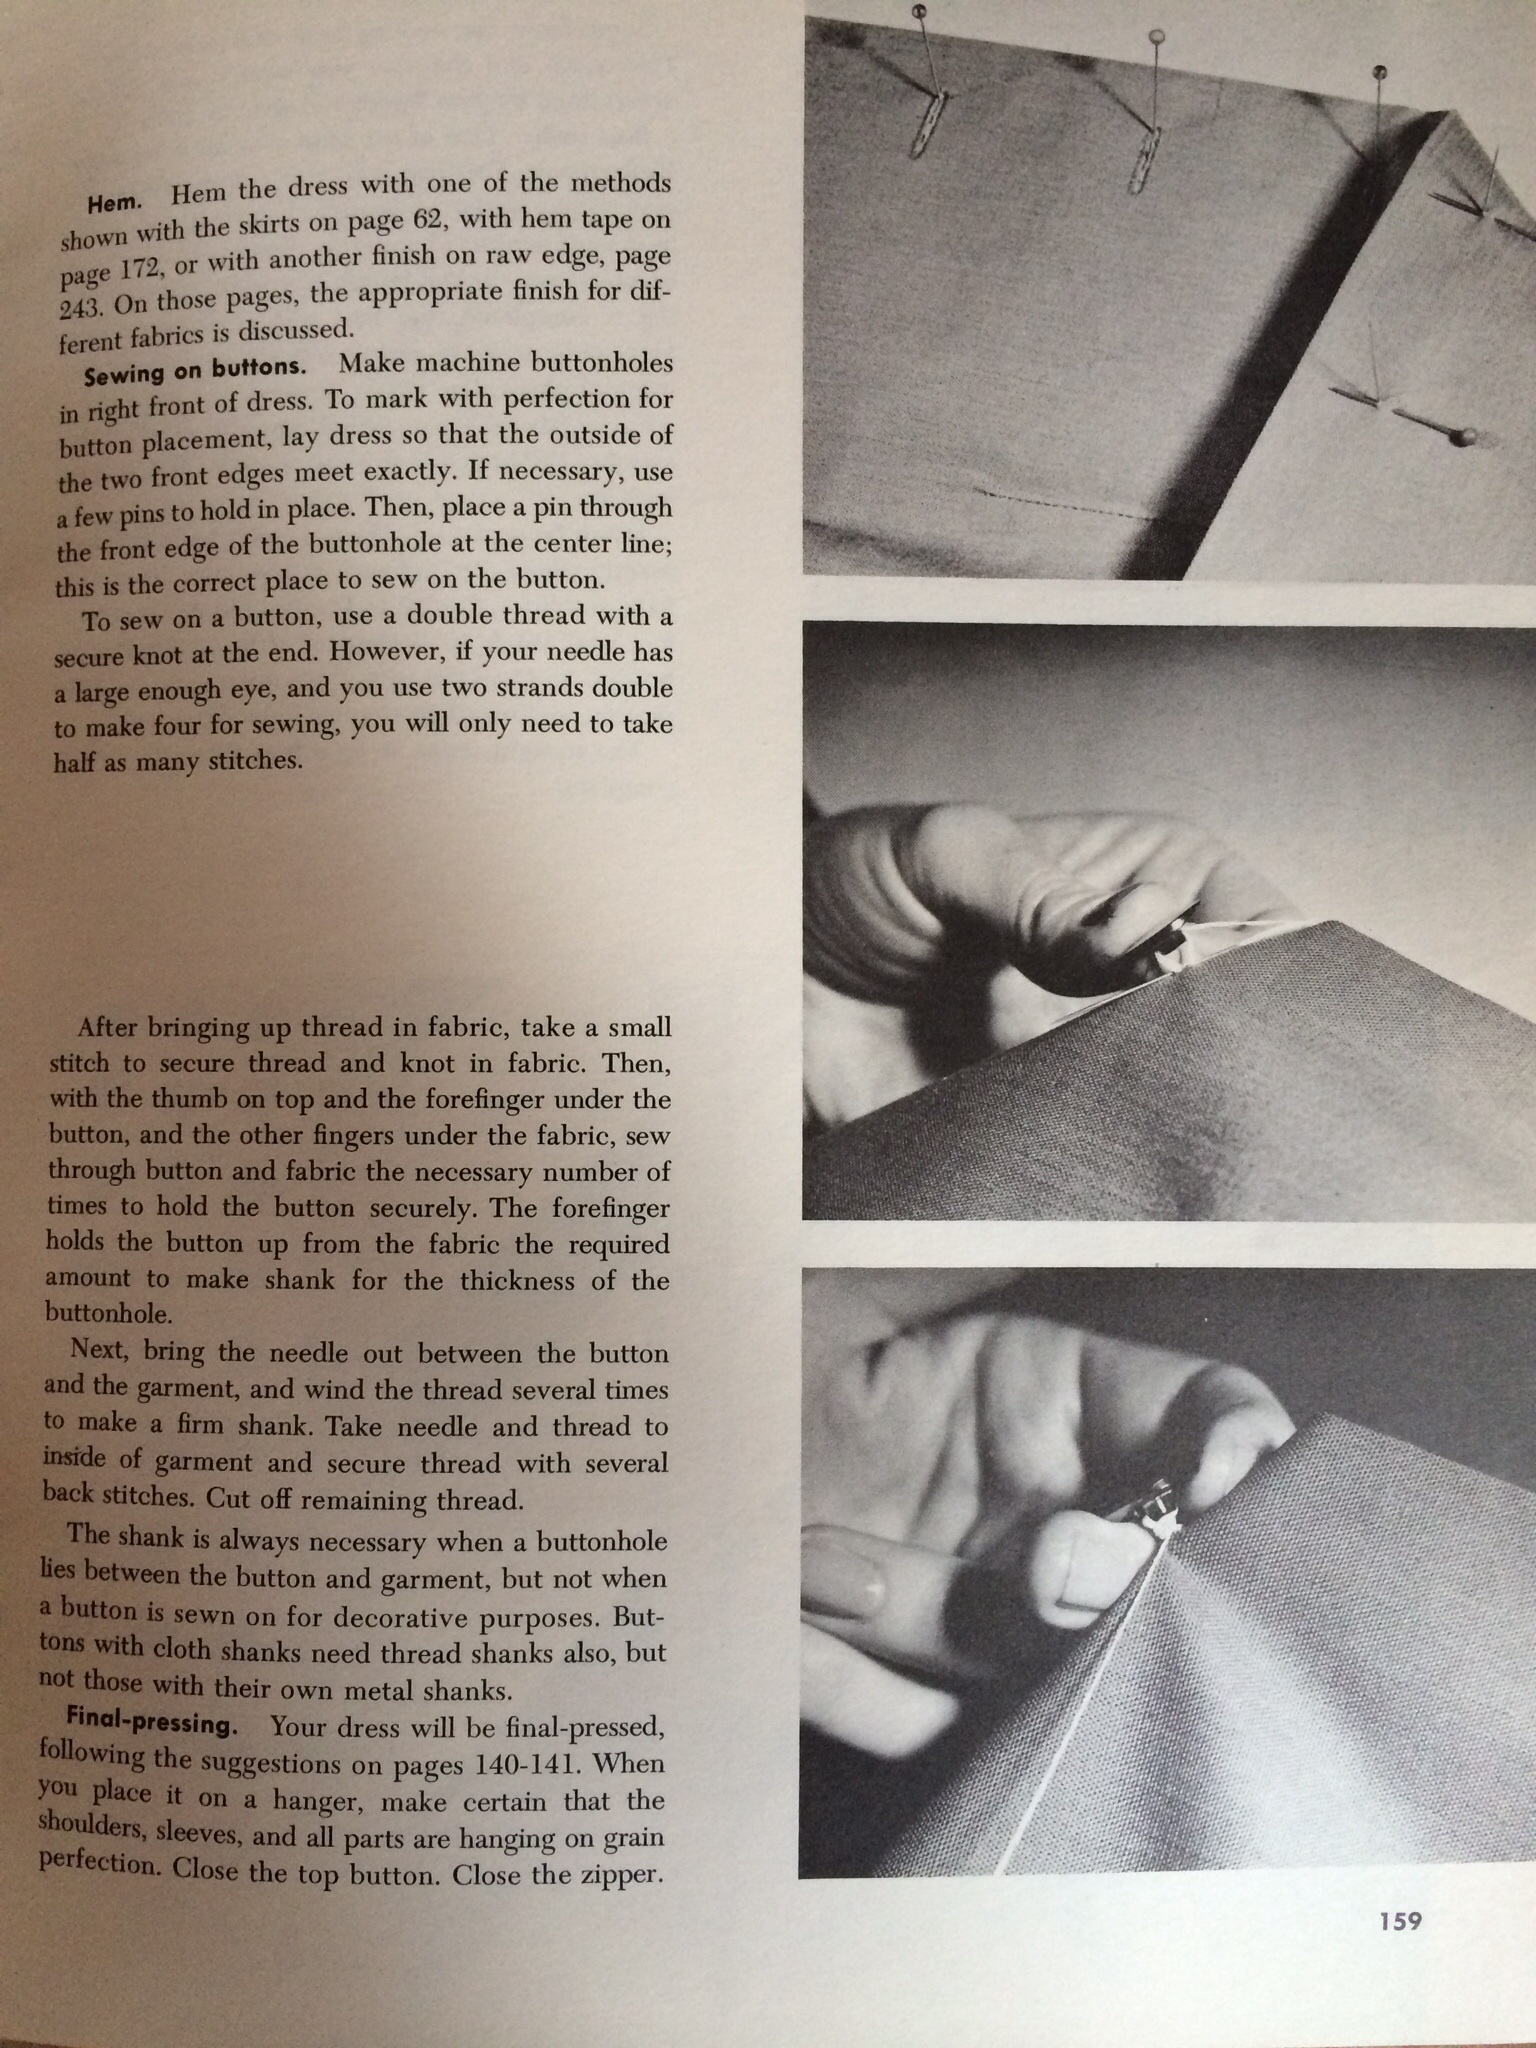
and goes all the way through making a tailored and lined suit with bound buttonholes and a hand-picked, lapped zipper.

imageimage

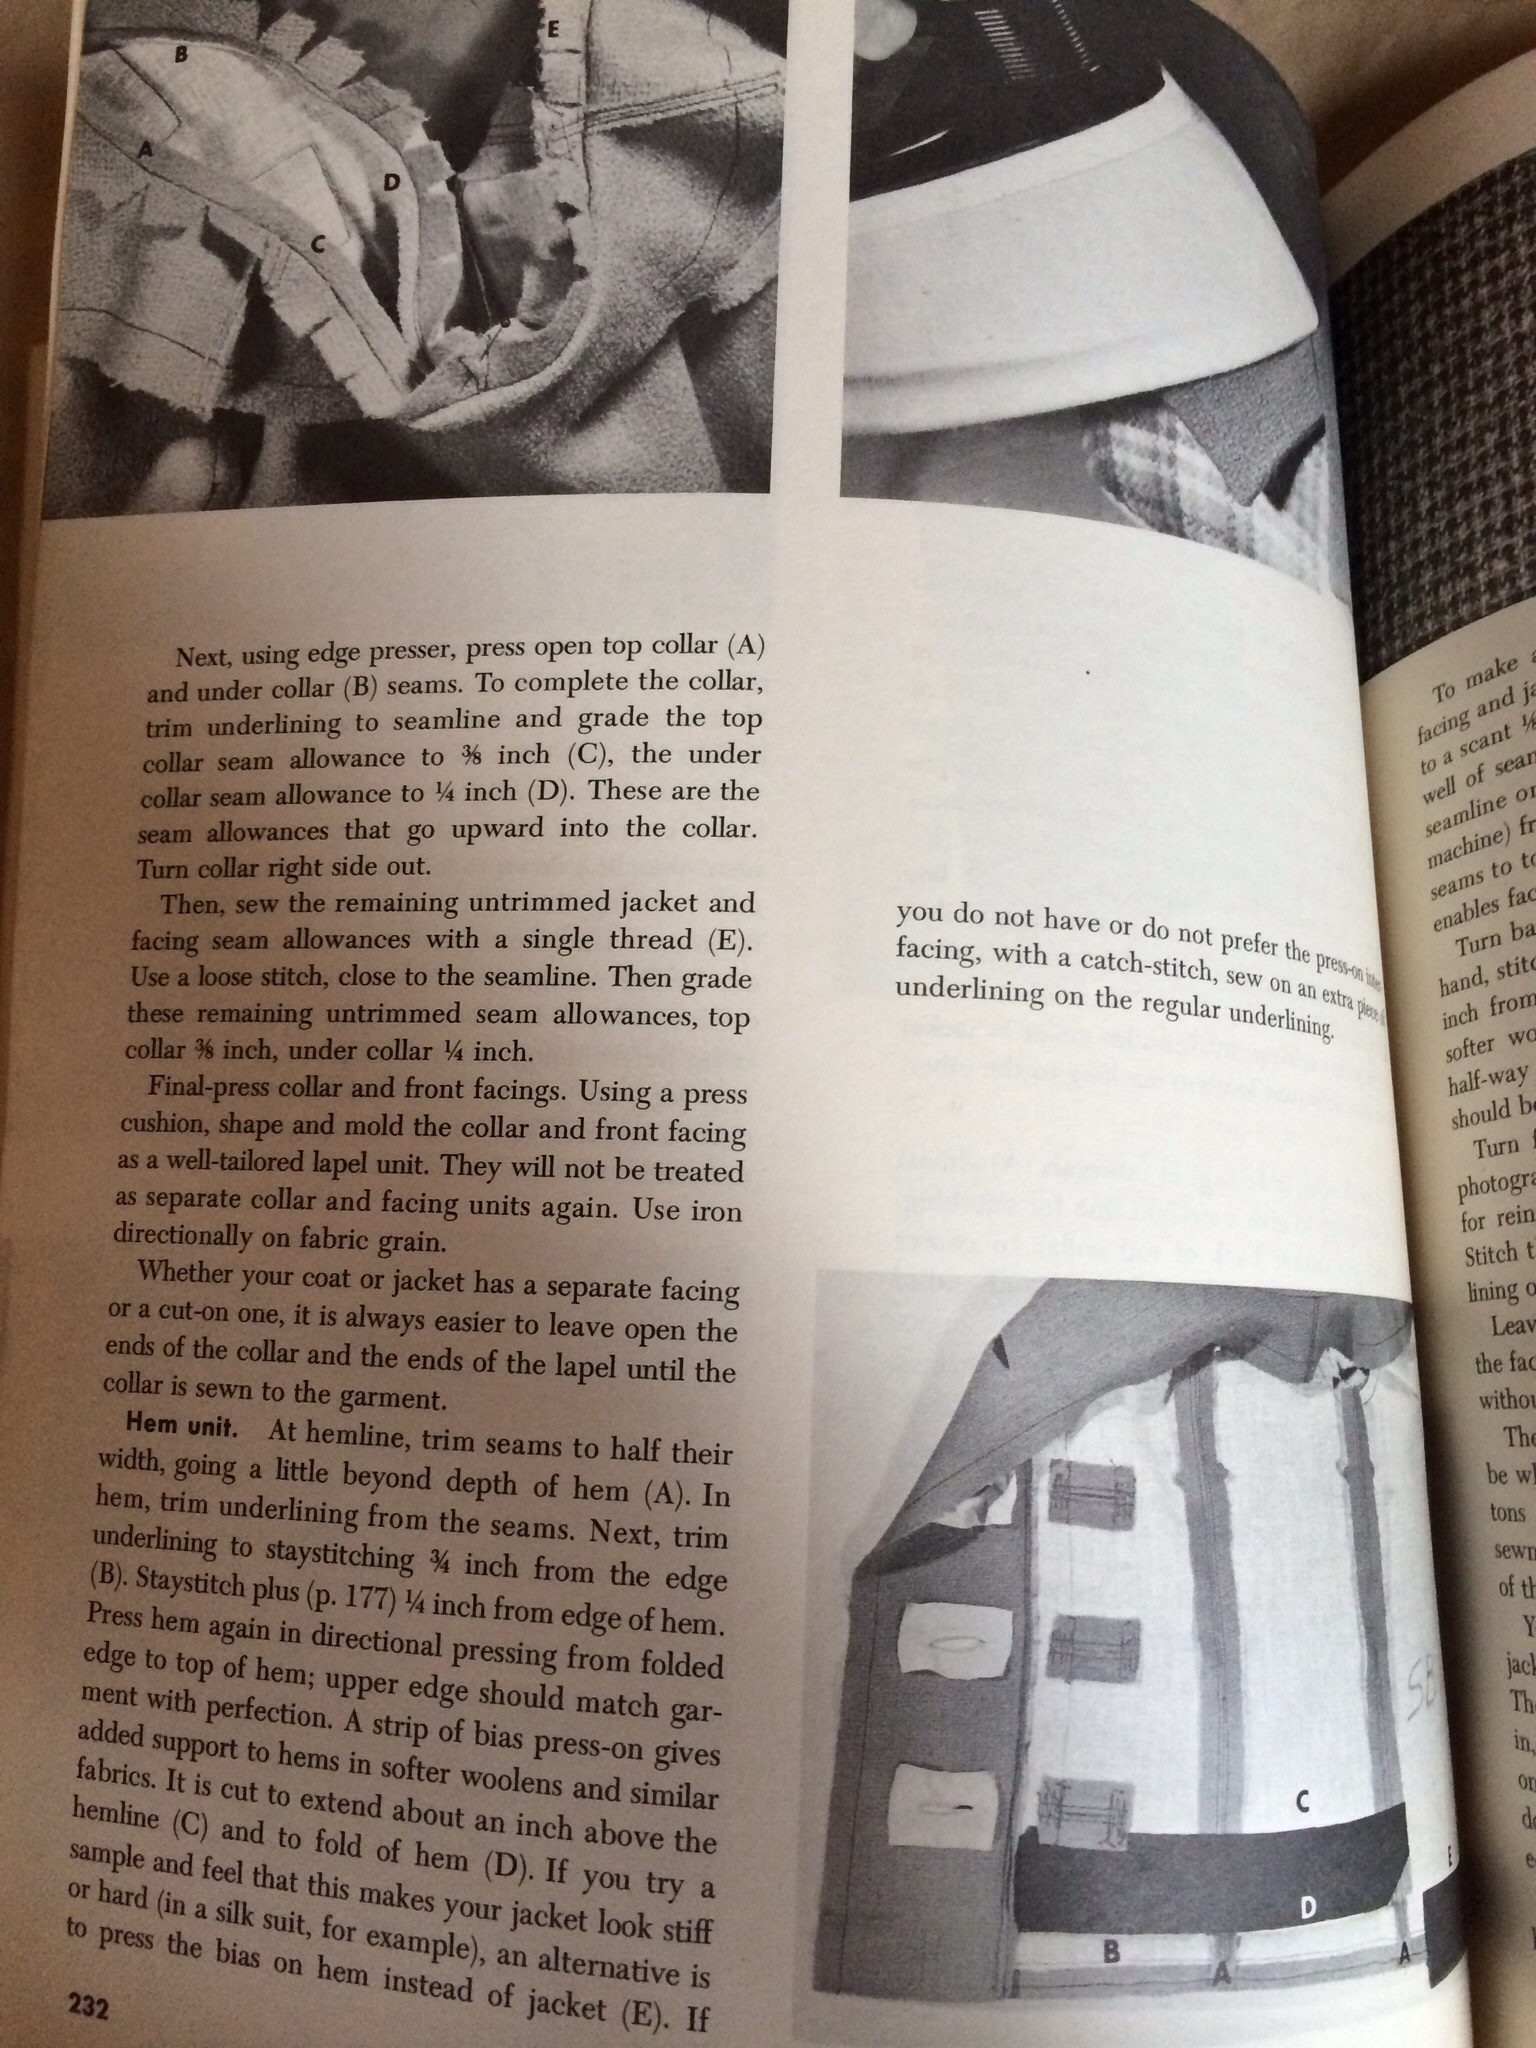
It’s filled with clear, comprehensive instructions and a whole bunch of pictures. If vintage-style sewing with wovens is your thing, it’s worth getting a copy for your library.

There’s a lot of fitting info in The Bishop Method, and also in modern books like this:

image

(Threads “Fitting for Every Figure” book), which is extremely comprehensive and pretty text-heavy and labor-intensive, if that’s what you’re into, which I’m not.

With all of the schmancy sewing books in circulation right now, I’m kind of embarrassed to admit that my favorite book on basic fitting is this one by Nancy Zieman (of “Sewing with Nancy” fame), as it gets right to the point and illustrates the “pivot and slide” method of pattern fitting, which, though based on solid pattern-grading principles, is easy and fast and doesn’t require you to cut up your pattern.

image

She starts out by explaining the importance of finding a pattern that fits in the shoulders, and gives you the formula you need to figure out the proper size pattern to buy. (This helps if you use vintage patterns because even though the sizing varies, you can choose a pattern by bust measurement.) Then she shows you how to modify that pattern to fit the rest of your body by moving it around and tracing parts of it based on your measurements. There’s also specific fitting info, with illustrations, for dealing with issues such as broad shoulders, sway back, and bust adjustment.

So this is the method I’ve been using to fit paper pattern to muslins, and then I eyeball it from there. Since most commercial patterns are cut for someone with a “B” cup (I’m a “C”) and my waist and hips are a larger size than my shoulders, this method has worked well for me.

I recently read a review of Nancy’s life story, Seams Unlikely, on Gertie’s New Blog For Better Sewing (Review from Gertie’s New Blog…). The book talks about how Nancy embraced sewing in 4-H, and started her business from home back the bad old days when a woman was expected to get her husband to co-sign a business loan for her–even if he wasn’t involved in the business. It’s an inspiring story.  Gretchen, thanks for giving us the heads up on that book.

Back to my fitting shell quest. In the end, I got lazy and decided to spring for a pattern drafted directly from my measurements, by String Codes.  They take the five basic measurements you input and a create custom a fitting shell pattern for you.

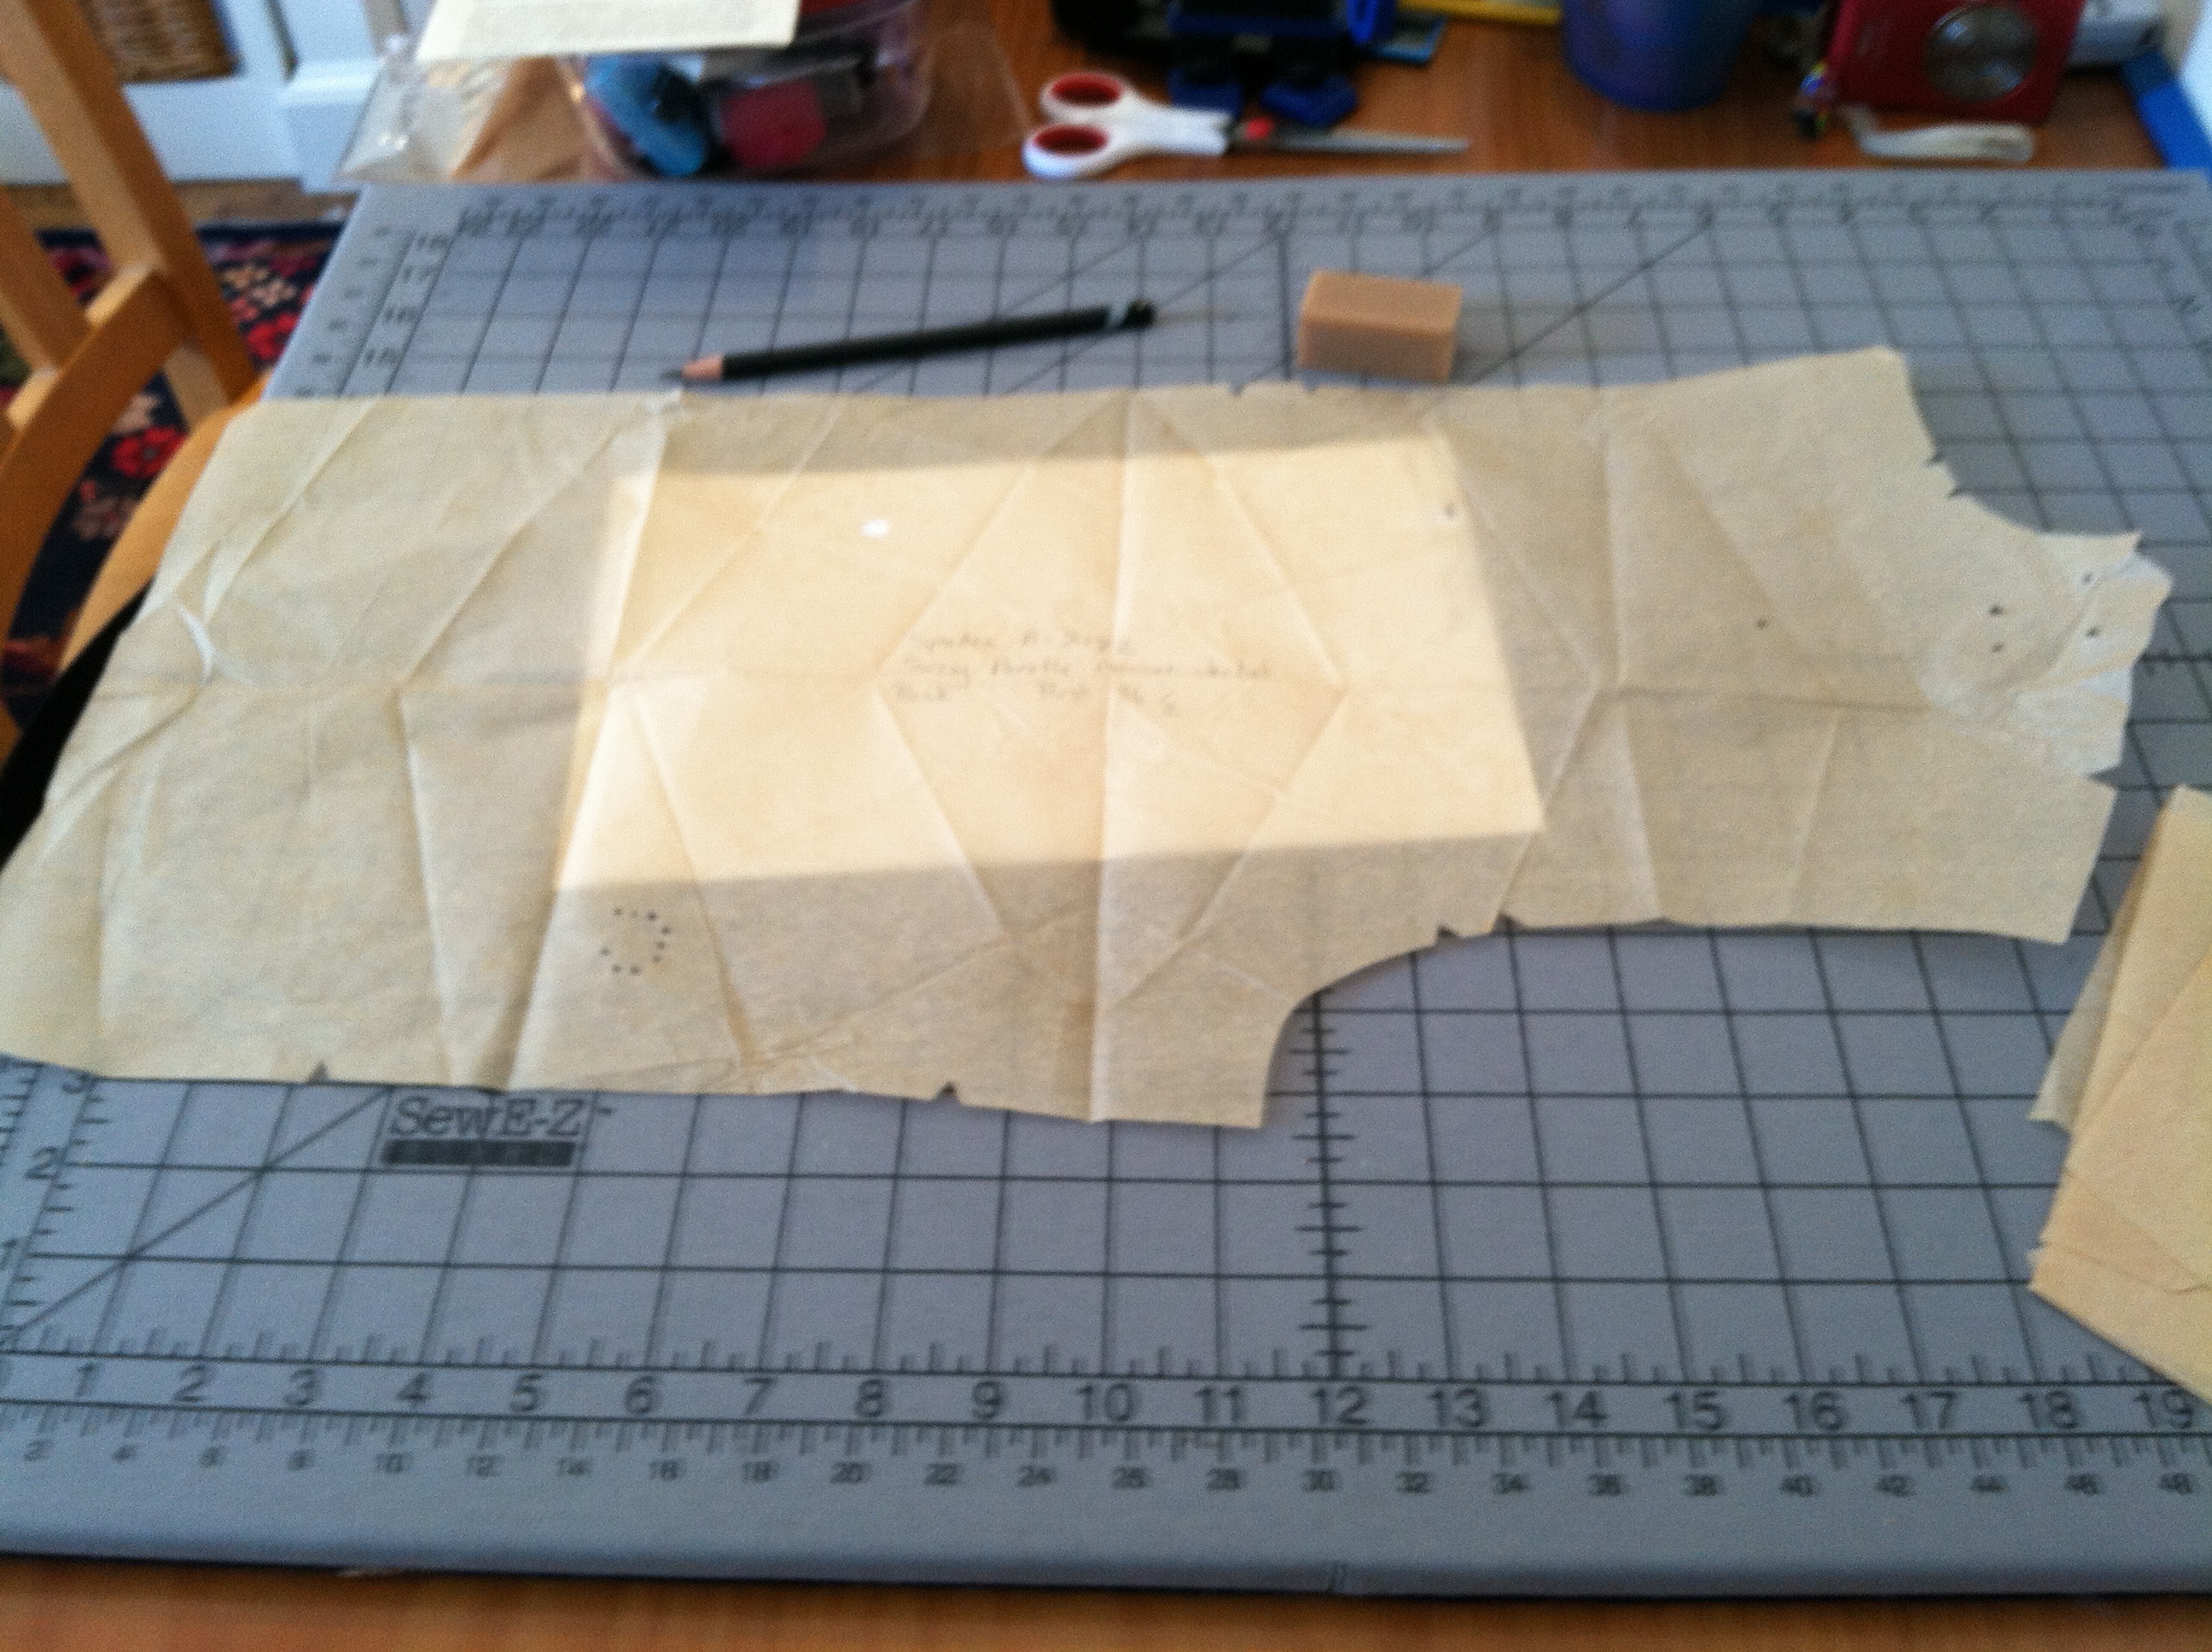
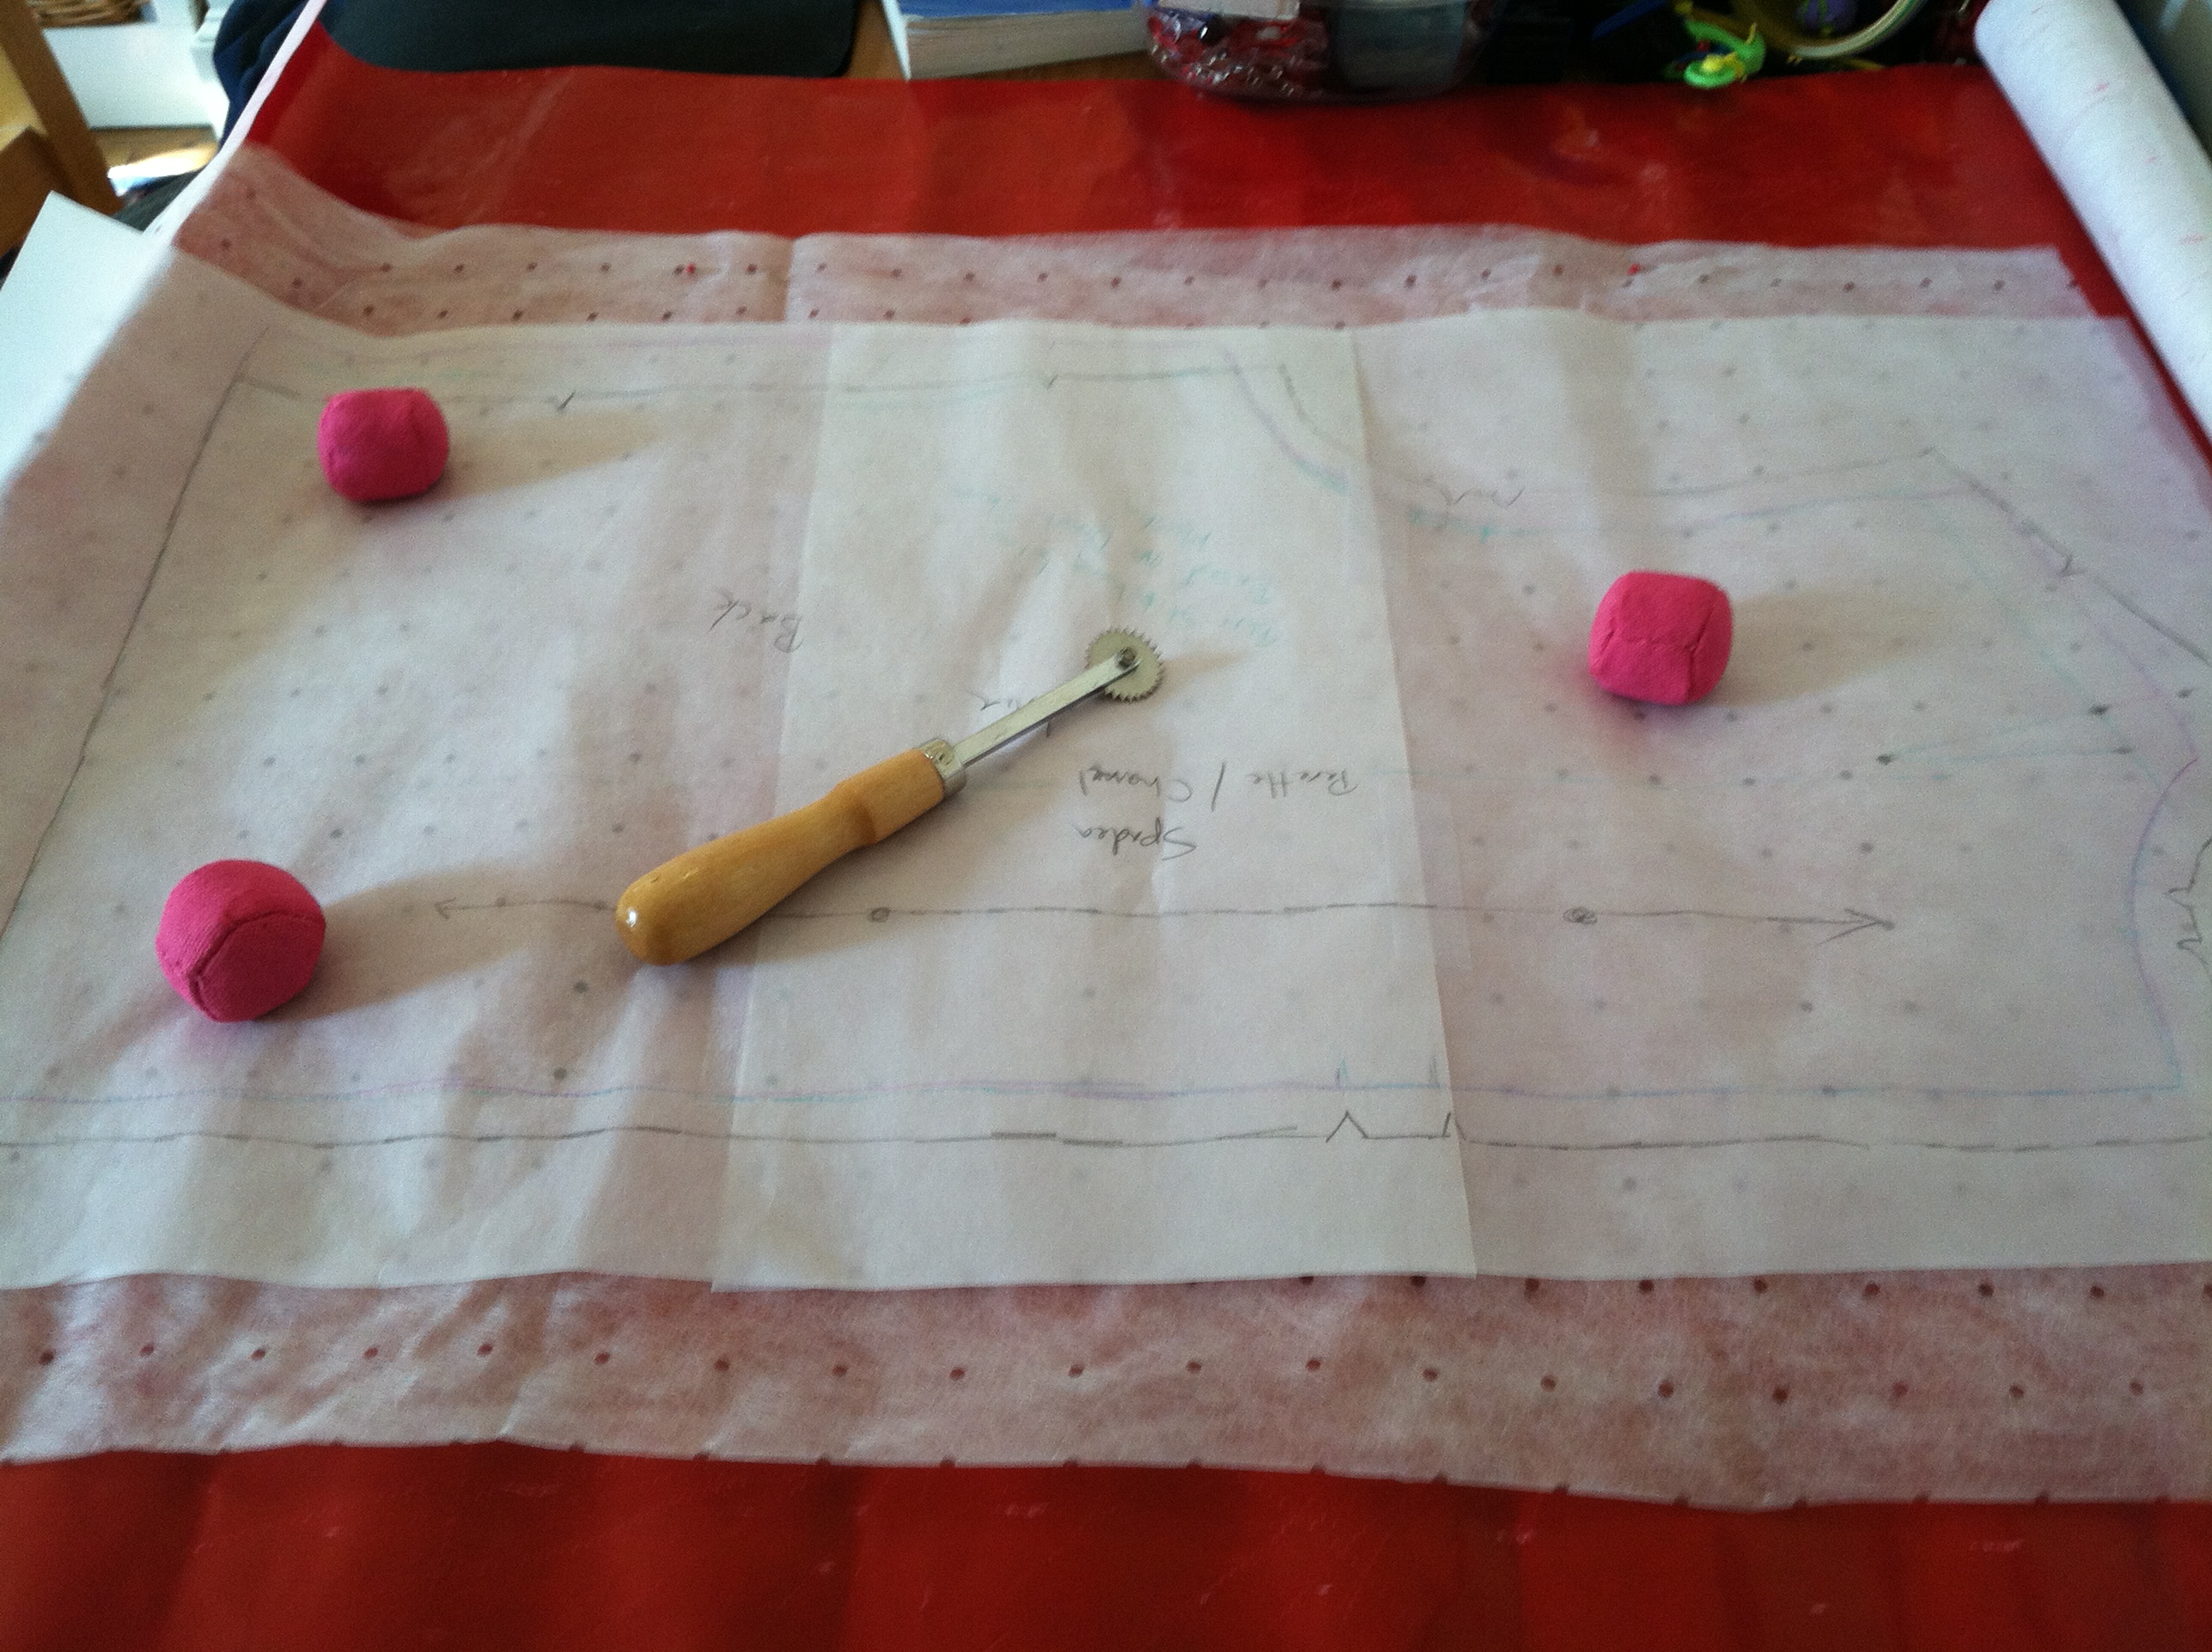
Seemed easy enough, but when I placed the order and asked them to modify the bust measurement for a “C” cup, I was told that the patterns are only available as a “B” cup and that I would have to do a full bust adjustment myself. They did email me instructions with photos for an FBA, and it was a bit of a hassle, but not a deal-breaker. I’m going to make a muslin of the final pattern, and we’ll see how it fits. The pattern comes without seam allowances, so the exterior line is the seamline. You can see where I put in the bust adjustment below, following the directions from String Codes:

image


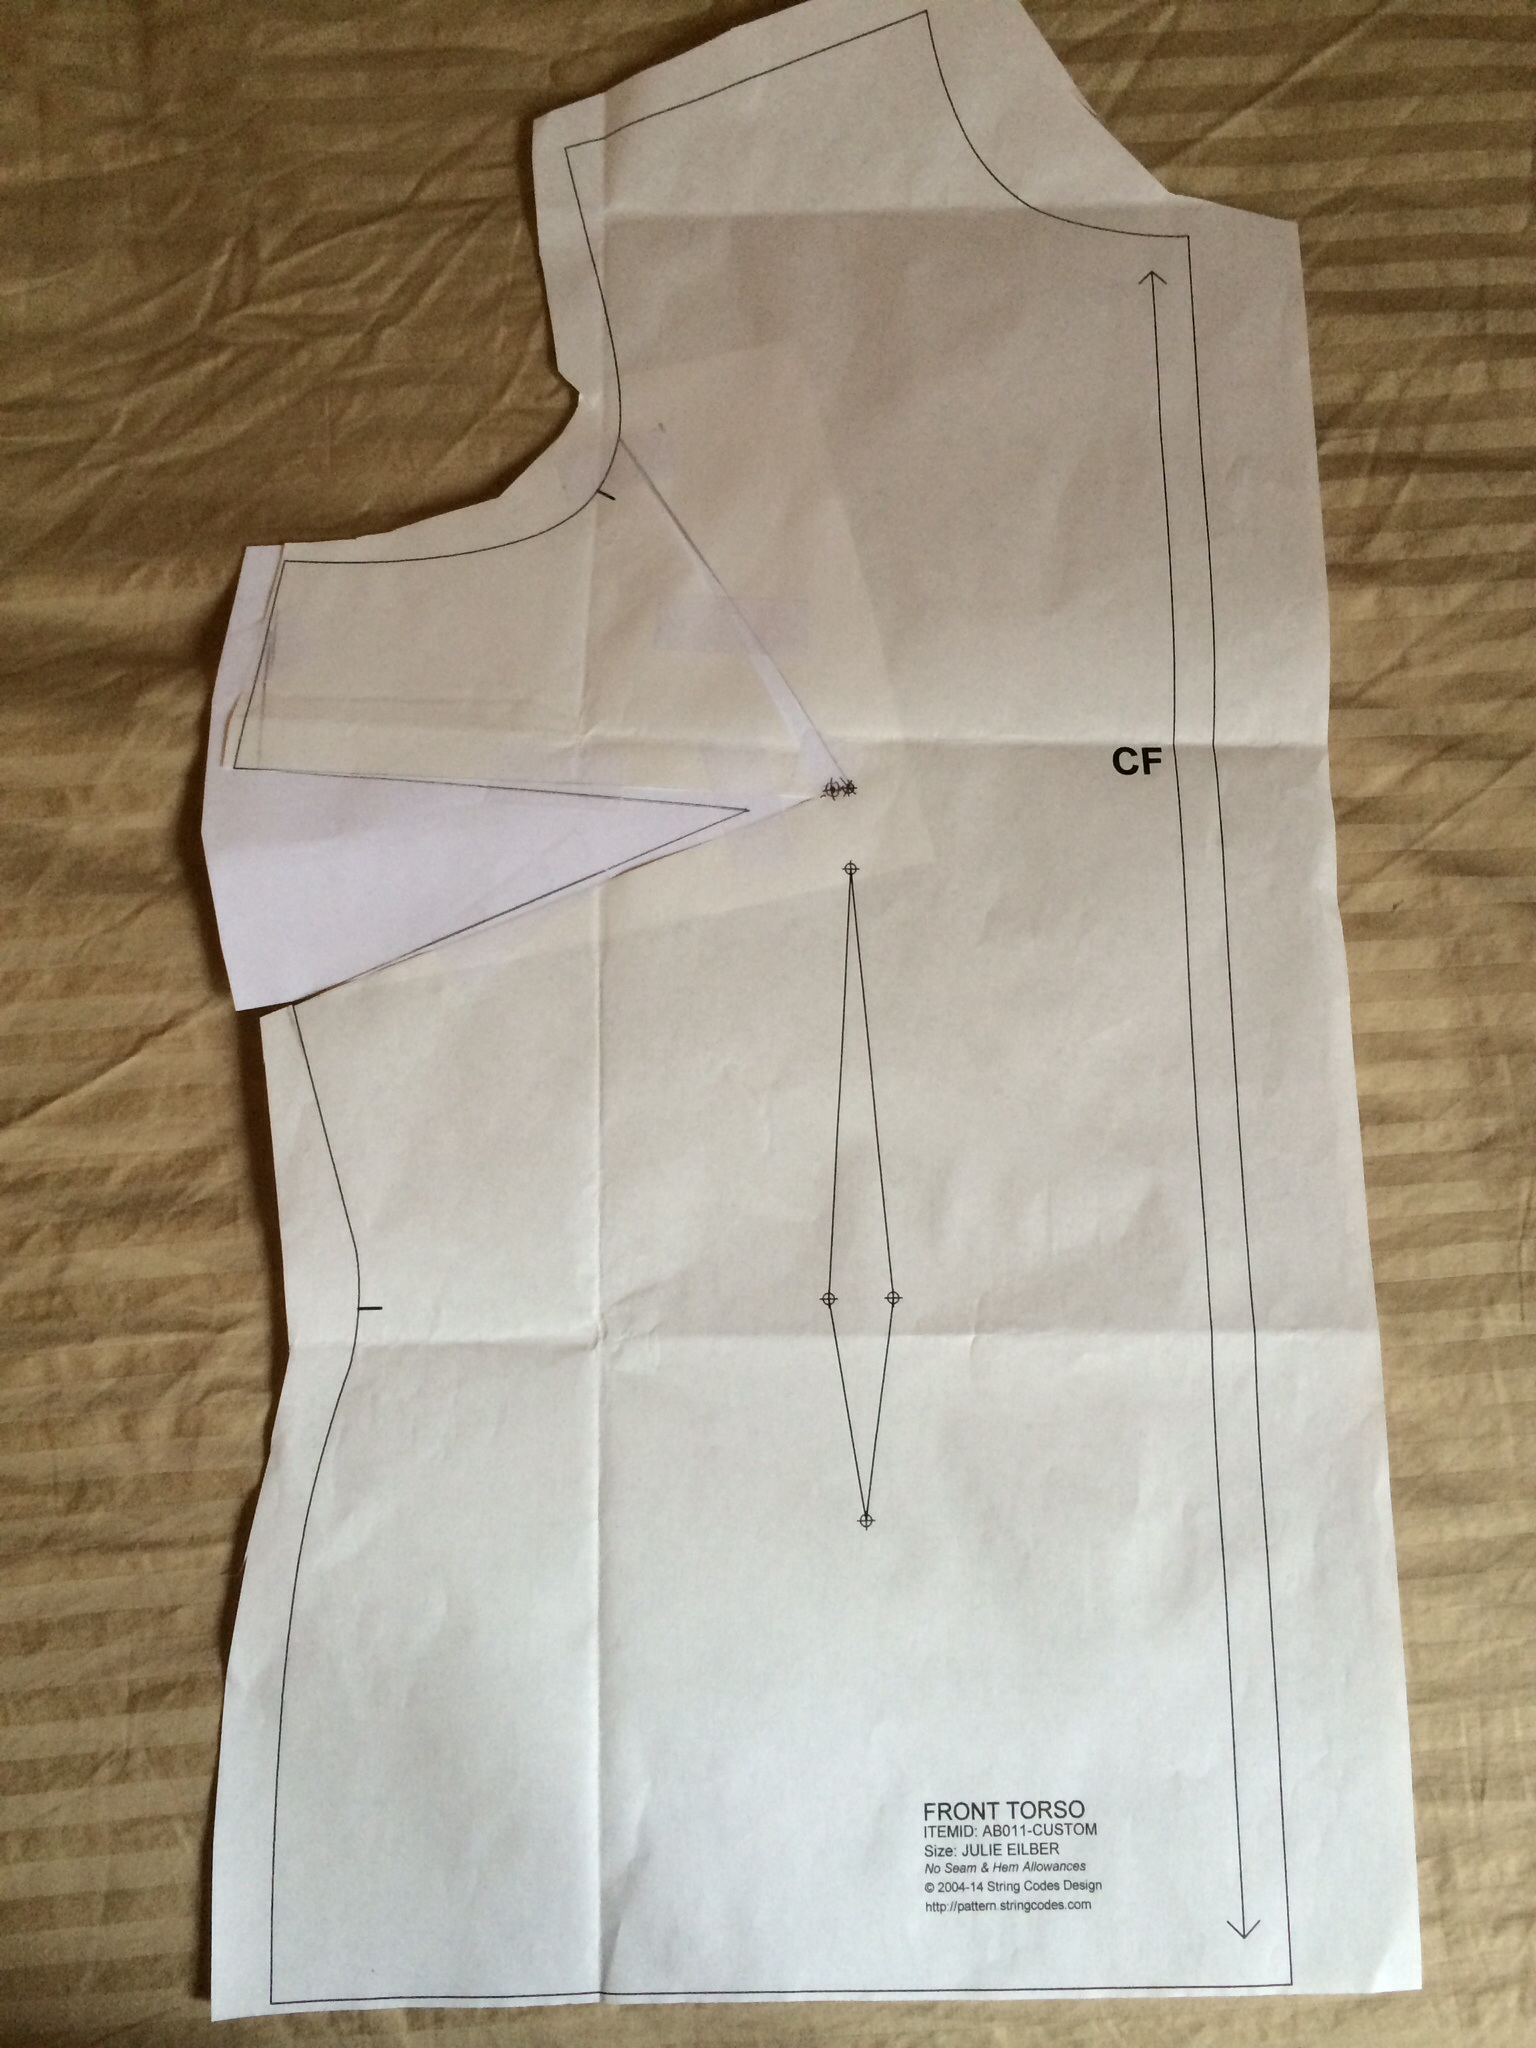
I ordered the “torso” pattern with a sleeve with a dart, since I often make jackets and tops, and also ordered the skirt pattern. I can overlap them if I’m making a dress.

As soon as I have it made up, I’ll do a little “show and tell” to let you know how it worked out.

And I’ll try to remember Nancy Zieman’s advice to avoid over-fitting, because “it can be exasperating and can take the joy out of sewing.” Amen, sister!

How’s your sewing going?

I’m tired of Coco, how about you?

10

Okay, here are a few last details of the construction of Chanel Jacket #4 that I’d like to add before moving onto my next, much more fun topic, a Coco Chanel vs. Madame Vionnet Smackdown! Are you working on a Chanel-style jacket right now? If so, leave me a comment; I’d love to hear about it.

1962 Chanel pattern released by Spadea

1962 Chanel pattern released by Spadea

As I mentioned before, this Spadea Chanel pattern from 1962 was drafted from a retail jacket, the design of which was licensed from Chanel by the US company Suzy Perette. This was a common practice back in the days before off-shore manufacturing. In fact, the pink suit worn by Jacqueline Kennedy on the tragic day of the assassination, though often attributed to Chanel, was actually a copy made in a New York haute couture boutique. Here’s a story about the historic preservation of that suit from the New York Times:

http://www.nytimes.com/2013/11/15/fashion/jacqueline-kennedys-smart-pink-suit-preserved-in-memory-and-kept-out-of-view.html?smid=pl-share

The instructions from the 1962 Spadea Chanel pattern I used were very thorough and old school in terms of construction. Though I had never made welt pockets before, by following the instructions they were a breeze.

Pocket welts

Pocket welts

I created the flaps, attached the pockets, sewed up the side panel seam, and voila, a pretty little pocket made of colorful lining. Though Chanel jackets don’t typically have vertical pockets like this, I have seen examples from this era.

Completed welt pockets

Welt pocket in progress

Let’s talk about the obsession with 3-part sleeves, shall we? The two godmothers of haute couture, Susan Khalje and Claire Shaeffer, both have their disciples make 3-part sleeves for their home-made Chanel jackets, so the sleeve has a graceful bend at the elbow and the vent is high enough on the cuff to show off the trim and buttons.

But the truth is, not all Chanel jackets have had three-part sleeves. In Claire Shaeffer’s new book, for example, she shows several vintage Chanel jackets with two-part sleeves. The Spadea pattern I used cleverly fakes the three-part sleeve with a one-part sleeve by putting some ease in the seam to give it the bend at the elbow. Then the vent is added by cutting a slash in the sleeve and adding a facing that goes around the cuff.

Sleeve facing

Sleeve facing

Whether this is the original Chanel design, or a change made by Suzy Perette for US manufacturing, we’ll never know. But it does work pretty well. It’s still time-consuming, but probably not as much of a hassle as building a three-part sleeve.

My last comment on the sleeve is that I added sleevehead under the sleeve cap and then steamed it on a sleeveboard like this, to give the sleeve cap a nice, round shape.

Shaping sleeve cap

Shaping sleeve cap

After lining the jacket, I added the trim, chain (cleverly woven into a 5/8″ tape–much easier to sew on), buttons, and button loops, then collapsed.

Finished cuff and chain

Finished cuff and chain

My blog has been visited by people from around the world and I appreciate you all. Even the spammer guy from Korea! What projects are you working on? Please leave me a comment and let me know.

Working with a vintage unprinted pattern, if you’re lazy.

0
1962 Spadea/Chanel unprinted pattern

1962 Spadea/Chanel unprinted pattern

If you sew from vintage patterns, you may have been nonplussed to open that package and see absolutely nothing printed on the pieces, like in the photo above. Printed patterns only came into vogue in the 50s, and before that people needed to follow the notches and dots cut into the pattern to find their way. The Spadea company continued to hand-cut their unprinted patterns well into the 60s.

Above is a piece of the Spadea/Chanel jacket pattern I wrote about in a previous post. The instructions included with the pattern explain what the markings mean.  Each pattern piece has a letter made of small dots punched in it, to identify the back, front, sleeve etc. The notches are small “v” shapes on the side, three large dots indicate the fold, two large dots indicate the grainline, and medium and small dots are used in the instruction to indicate buttons, buttonholes, ease lines etc.

Marking pattern on to "Kwik Trace" muslin

Marking pattern on to “Kwik Trace” muslin

The first thing I do when I open an unprinted vintage pattern is write the pattern number, name and original bust size measurement on each piece so they don’t get mixed up with other patterns. Since I was using a rare vintage pattern, I traced it onto tracing paper and put the original away. Then I compared the pattern piece with a pattern from a previous jacket I made to make some fit adjustments. You can do this with a pattern block or sloper if you have one. (Those are basic fitting patterns some people make for themselves to fit patterns more quickly. So far I’ve been too lazy to make one.)

I then used a large piece of tracing paper (from the http://www.richardthethread.com/  website in LA) and a tracing wheel to copy the pattern onto my “muslin” version of the jacket. (Though in this case I’m using Kwik Trace tracing fabric rather than actual muslin, again being lazy.) The downside of Kwik Trace is that it’s unwoven and doesn’t have a grain, so I wouldn’t recommend it for projects where you need to know how the fabric will behave, such as a bias cut dress.

Completed "muslin" of jacket

Completed “muslin” of jacket

I cut out the pieces and constructed the muslin loosely using the method outlined in Susan Khalje’s “Couture Dress” course on Craftsy. (Okay, I skipped a few steps, but you get the idea.) I’ve recommended that course in previous posts, and it really helps with vintage projects like this. http://www.craftsy.com/class/The-Couture-Dress/53?_ct=sbqii-sqjuweho-qbb&_ctp=53,1

Once I tweaked the fit, I marked any changes on the Kwik Trace with a sharpie and took the “muslin” apart. Those pieces now became my pattern. At this point I wrote the pattern number and name on each piece and indicated that it had been fitted for me, in case I wanted to reuse it.

Cutting the fabric with large seam allowances

Cutting the fabric with large seam allowances

I pinned the pattern pieces on my fabric and then cut loosely around them to leave plenty of seam allowance. Boucle like this unravels in a huge hurry, and by the time you’re ready to finish the seams, you may have already lost more than 1/2 an inch.

Thread tracing the seam line

Thread tracing the seam line

At this point, if you follow Susan’s Khalje’s instructions in the Couture Dress course, you are supposed to “thread trace” (loosely baste with contrasting silk thread) around all of the seam lines to mark the seams on the front and back. This is a great idea! But I can’t face it at this point in the construction! (Because I’m lazy.) So, despite the fact that Susan warns against this, I marked both sides of my fabric with tracing paper, which I then could not get out of the fabric. Fortunately my fit was pretty good, so I just stitched inside the line and the marks ended up inside the seam allowance. I did thread trace the armscye and sleevecap as it makes it a million times easier to line up.

How about you? Have you ever worked with an unprinted pattern? How did it go? Leave me a comment, and a link if you have one. I’d love to see your projects.

Till next time… (I used to work in TV so I feel like I need a sign-off line) “May your bobbins be full and your tension even?”

Why Chanel lining is like lingerie…

2
Chanel/Spadea jacket lining

Chanel/Spadea jacket lining

A quick look at the interior of the finished jacket. The lining is a silk crepe de chine by Carolina Herrera, found on emmaonesock.com, a website that offers, among other things, leftover yardage from high-end designers. After I finished the interior steps outlined in the previous post, I constructed the lining and fell-stitched it to the front facing, neckline, center front and hems, enclosing all of the busy work inside.

I always like the “surprise” of the bright linings stitched into these vintage Chanel jackets, which remind me of how chic, put-together French women have their look thought out down to their meticulously chosen, gorgeous (and mostly hand-wash only) lingerie.

I personally witnessed the French ritual of selecting lingerie one Saturday afternoon in the tiny, tony Eres shop on Paris’ rue de Cherche Midi. While I was attempting to squeeze my American behind into the largest size of their minimalistic beachwear, the saleswoman, in typical French fashion, would periodically throw the curtain wide open and loudly give her unvarnished opinion of how each style was or wasn’t working on me.

The scene was different in the neighboring dressing rooms, though, which all had men stationed outside. I finally realized that the French women in the changing rooms were all trying on various 200 Euro bras made of about 20 centimeters of tulle, then getting the yay or nay from their lovers outside the curtain, who were standing all of 3 feet away from me while participating in this discreet form of foreplay.

Um, where was I? The chain weight on the hem of the jacket is just the best cheat, which I found at Mood Fabrics’ new locale in L.A. It’s a chain that is cleverly woven into a twill tape.  So rather than the oh-so-laborious hours sewing on of the traditional Chanel chain weight, when you are so over making the jacket, you just machine the twill tape on about 1/2 below the unfinished hemline, then turn up the hem and catch-stitch it in place before fell-stitching on the lining right above the chain. It’s worth putting on the chain to counterbalance the lightness of the jacket, and this method makes it much easier.

All that’s left is a row of hooks and eyes down the front, then the joy of wearing it.

Jacket interior–hidden luxury

4

Image

Here’s a closer look at the interior of the jacket, before it was fully lined with silk crepe de chine. The blue/gray fabric is the exterior “fashion” fabric, and the colorful fabric is the silk lining front facing. The beige fabric is the hidden luxury of this method. Rather than using modern fusible interfacing, the jacket is underlined and quilted with silk organza, a soft, sturdy secret weapon that gives the jacket shape without stiffness. The white crescents on the top of the sleeves are a soft wool “sleevehead” that give the sleevecap that “couture pop” without shoulder pads. (Although in this 60s version, the sleeve fits pretty tightly in the armhole, without the modern “poof” I’m not that into.)

To avoid having any topstitching visible on the exterior, which to me looks mass-market, I catch-stitched all of the hems and seam allowances down by hand. This highly-tedious process is tempting to skip, and yet I believe it’s the most important thing you can do to give it that haute couture je ne sais quoi. It’s hard to describe, but this secure and highly elastic stitch gives the jacket a soft movement, making it look like it’s held together without thread. Yet it controls the interior, so the seams never roll or unravel.

Traditionally, haute couture Chanel jackets have the colorful silk lining quilted directly onto the fashion fabric, without an underlining, but not all of them were made that way over the years. Personally I prefer this method because the organza underlining gives you a stronger jacket that’s still soft and light. And your last step, which is to tightly fell-stitch the colorful lining all around the interior edge of the jacket, completely covers the organza, the quilting, the seam finishes, and a multitude of sins.

Choosing the fabric for the Chanel/Spadea

1
Chanel/Spadea Jacket materials

Chanel/Spadea Jacket materials

I’ll admit that finding the elements for a Chanel-style jacket is the most fun part, because you’re still living in a dream. While still stitching away on my second Chanel jacket during a holiday trip to Paris, I had the bad fortune to visit Janssens et Janssens fabric shop (janssensparis.com). The fact that it is a block down from Louis Vuitton should have tipped me off that the neatly arrayed bolts of fabric shelved floor to ceiling would start at 200 Euros a yard and go up from there. The slogan on their website loosely translates to “In the heart of Faubourg Saint Honore, the boutique for creative and elegant women who understand the price of fashion.” Talk about French understatement.

Nevertheless, the women who worked there were unfailing pleasant and helpful as I woefully eyeballed the bespoke tweeds, beaded confections and artfully printed cashmere challis. Just when I’d convinced myself that I couldn’t justify the yardage price vs. husband will kill me cost ratio, I saw an unmarked table of half-price remnants, which included the blue/gray boucle above. The fabric is a wool herringbone weave, with slubs of beige woven throughout, jazzed up with shiny silver threads. With a meter and a third left, the woman assured me that I had enough for a “jacket” (said with a knowing look). Sold.

There were a number of other people in the shop at that time, one of whom was an elfin French male dressmaker, who proudly told an Asian couple there, in English, that his jacket was “‘omemade”. He said he had once worked for Chanel, and as I was selecting trim for the jacket from the equally pricey yet out of control trim rack, he decided in that very French way to stop me from making any grievous aesthetic errors. The trim I’d picked, with the black gimp edges and beige velvet ribbon, was “too taupe” and just wouldn’t do. The saleswoman, seeing a large sale go out the window, insisted that my choice was a good one. “Ah” he said, in that French tone that means, “I’m going to compromise but still pretend you’re doing it my way,” “Here’s how you do.” He then told me to pull several strands from the fabric, two or three at a time, put them in a darning needle, and weave them in and out of the trim over the velvet ribbon. As a well-behaved non-confrontational American in Paris, I nodded my head and thanked him, thinking, “I’m not doing that.”

As my items were rung up, I heard him gossiping in French with the saleswoman, and was able to catch the following…that made-to-measure haute couture Chanel suits were starting at 40,000 Euros ($55,000 depending on the day) and the one for Madame So-and-So cost 50,000 Euros. Having made several of the jackets now using the haute couture method, I can just about understand how a hand-made suit could be as complex and costly as an Audi. And as an Audi owner, I can attest that the jackets last longer.

When my jacket was constructed, and it came time to trim it, I looked at the trim and realized that indeed it was “too taupe.” So I got out my darning needle and wove in those threads from the fabric. My French friend, you were so right.

Pattern by Chanel

1

Here’s what inspired me to give another tedious, labor intensive Chanel Jacket a go:

1962 Chanel pattern released by Spadea

1962 Chanel pattern released by Spadea (photo (c) Julie Eilber, 2013)

It’s a 1962 Chanel jacket pattern released by the Spadea pattern company. Spadea was a mail-order company that sold sewing patterns, via articles in local newspapers across the country, from 1950 through the 1970s. What made Spadea unique was that the patterns were drafted directly from designer garments currently retailing in U.S. stores. So a housewife in rural Ohio or Salt Lake City could use their patterns to recreate replicas of garments by American Look designers such as Claire McCardell, Ceil Chapman, Tina Leser, Joset Walker, Clare Potter, or international designers such as Biki of Milan, Pierre Cardin, a young Lagerfeld (designing for Tiziani) and the Queen’s couturier, Norman Hartnell. The range of designers fashions represented in the Spadea line is astonishing. In recent years these patterns have become highly collectible in the vintage sewing world, some going for hundreds of dollars.

Look closely, and you’ll see that this particular pattern says “Chanel design reproduced by Suzy Perette.” In those days before off-shore manufacturing, U.S. fashion companies would license designs from French companies and manufacture replicas of the garments in the U.S. for the domestic market. One of those companies was Suzy Perette, who created U.S.-manufactured garments by Euro designers such as Givenchy and Chanel.

This jacket pattern has the hallmarks of Chanel jackets of that era: the high, tight armholes, the bracelet-length sleeves with vents, the center front panels that hang in parallel lines from the neckline, the small Mandarin collar that stands up just so, the slightly boxy, cropped “Jackie” fit.

Even though I was sick to death of making jackets, when I found this pattern online late last summer I just couldn’t resist.


Chanel Jacket #4

2

10597356983_069525009b_z[1]

I’ll start at the end and work backwards. Here’s my 4th, best, and hopefully final Chanel jacket all made in the past 18 months. It was constructed using what appears to be the only officially licensed Chanel jacket pattern to ever be released–a 1962 pattern by the Spadea company. (More on the pattern in the next post).

The whole thing took me at least 100 hours.