American Hustle and Wrap Dress Patterns

20

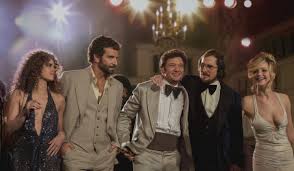
Have you seen the movie American Hustle? Oh honey, in the 70s, I was there. The knit dresses cut down to there. The men with hair everywhere. The whole feeling of “Vietnam’s over, the feminist movement’s started, and we have birth control.  Let’s dress up and have a party!” We would go to the disco and dance for hours. The scene with the two leads in the Studio 54 bathroom stall? Totally could have happened anywhere in the US during that time.

I’m not sure how American Hustle will translate into other eras and cultures, but everything in it resonated with me, particularly the wardrobe.

American Hustle StillAmerican Hustle Wrap

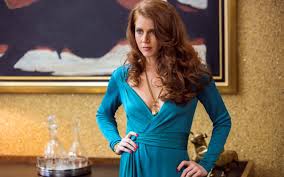
In one scene, Amy Adams tries on an instantly recognizable Diane Von Furstenberg silk jersey wrap dress, which looks like this:

DVF Wrap

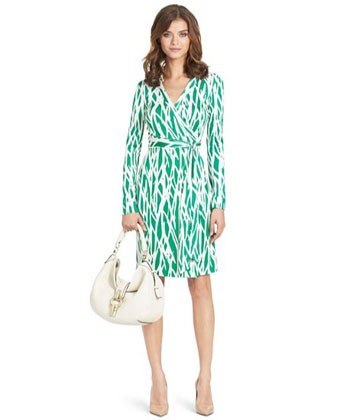
DVF’s wrap dress design is now celebrating it’s 40th anniversary. http://www.harpersbazaar.com/fashion/fashion-designers/dvf-wrap-dress-0214  I was happy to see that the reissue of this dress is made of the original silk jersey, which makes these dresses a cut above the countless polyester knock-offs we’ve seen since.

Seeing that wrap dress reminded me that DVF did a number of patterns for Vogue in that era. So people like me who were living on a shoestring could make their own. That led me to Etsy, where I bought this pattern last night.

DVF Wrap Pattern
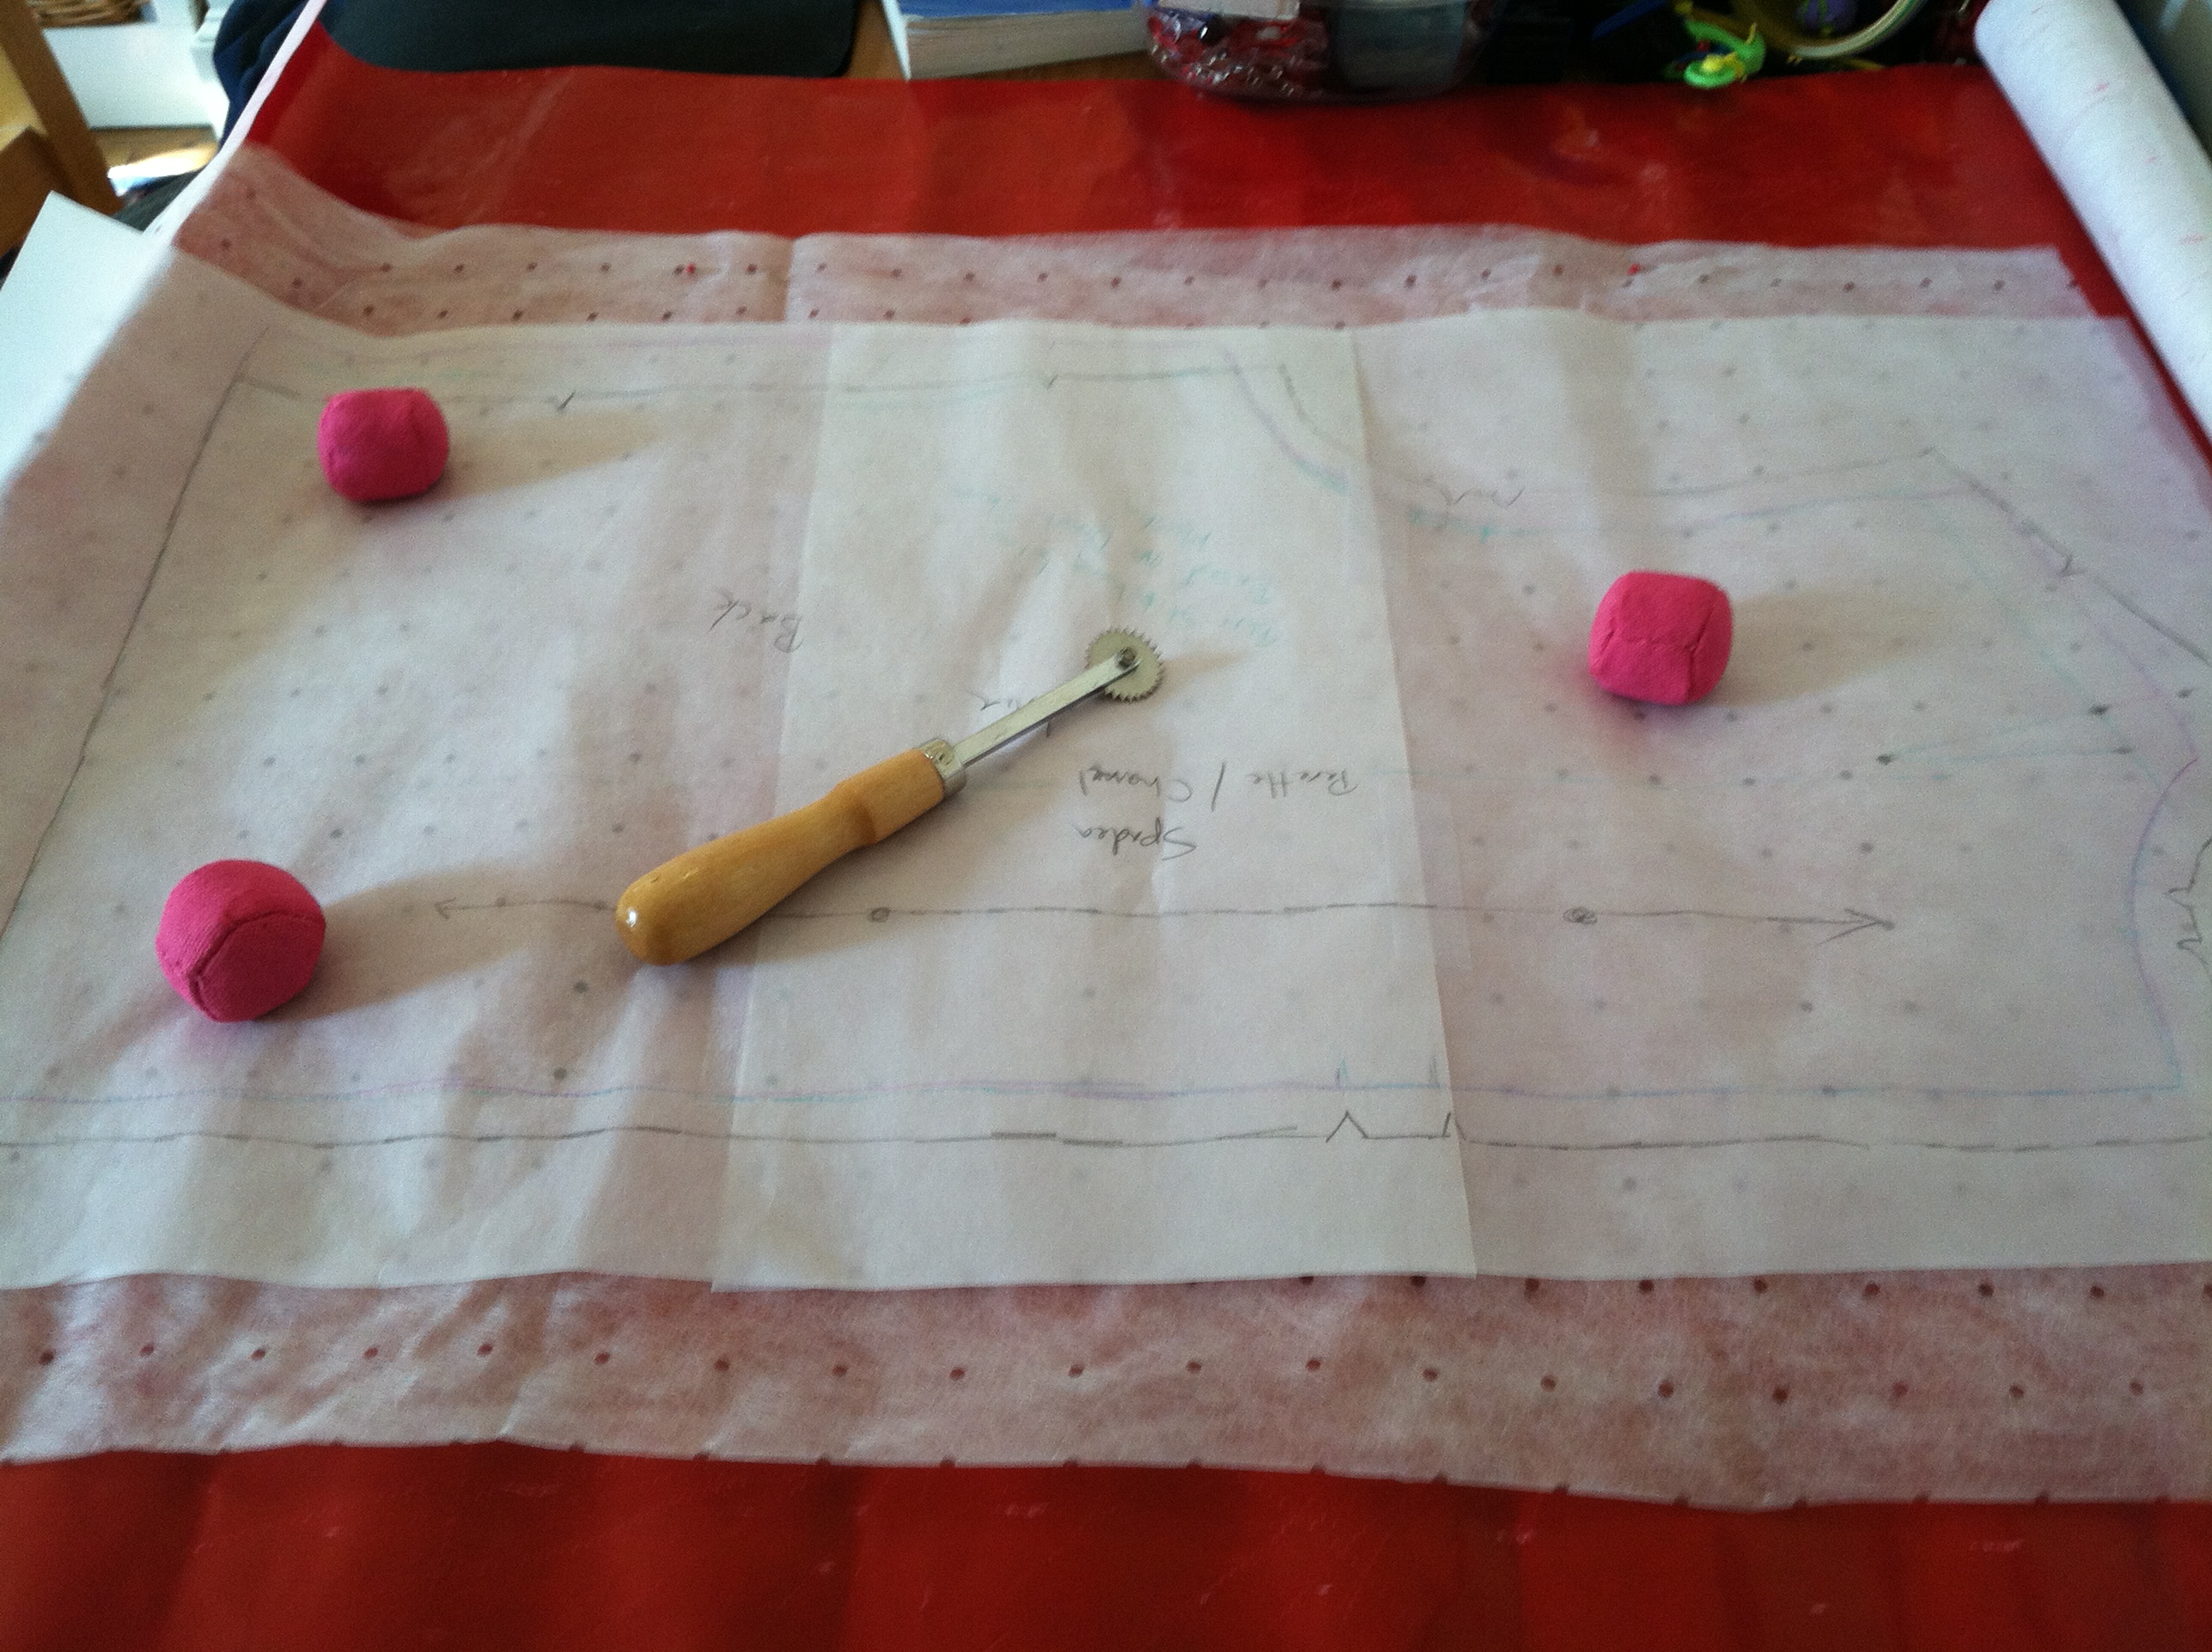
I like how they show the dress as reversible.

A lot of people make fun of 70s, but it was a great time for design and for sewing. In the early 70s, Butterick’s “Young Designer” pattern series allowed teens like me, living in the midwest, to make dresses by new designers like Betsy Johnson, whose clothes we’d only seen in Seventeen magazine.

Betsy Johson pattern

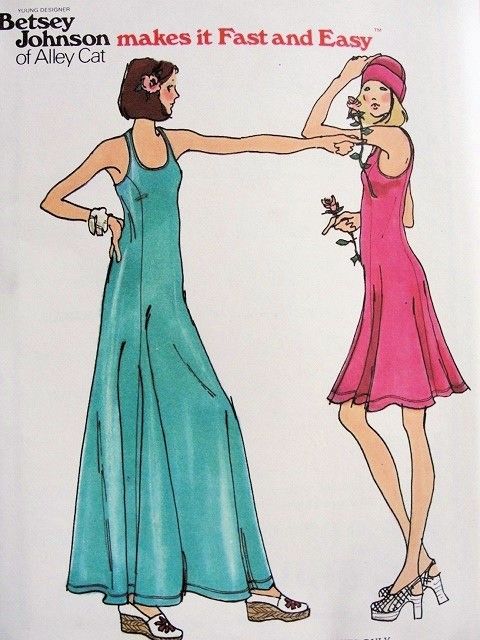
Trust me, no one had done slinky tank dresses like this, and there certainly weren’t patterns for them. I had spent all of my grade-school years in uncomfortable dresses with crinolines and smocking, then freezing cold, constricting mini shift dresses. In junior high, I made this dress out of Quiana polyester with pale roses on it. I LOVED it! The Young Designers line also had patterns by new youthful designers such as Kenzo, Mary Quant, Clovis Ruffin, and Willi Smith. The clothes were fun and comfortable.

By the late 70s, everyone in the country had heard about Studio 54, and what a fabulous, hedonistic place it was. Though in reality, it was probably more like this:

Studio 54

That’s the designer Halston on the left, Bianca Jagger in some odd hoodie next, some other guy, Liza Minelli, and yes, PREPPY Michael Jackson. Were they really having fun? I don’t know. The whole era got to be too much after awhile.

Speaking of Halston, in the late 70s and early 80s, he designed some great patterns for McCalls:

Halston pattern #1Halston pattern #2 
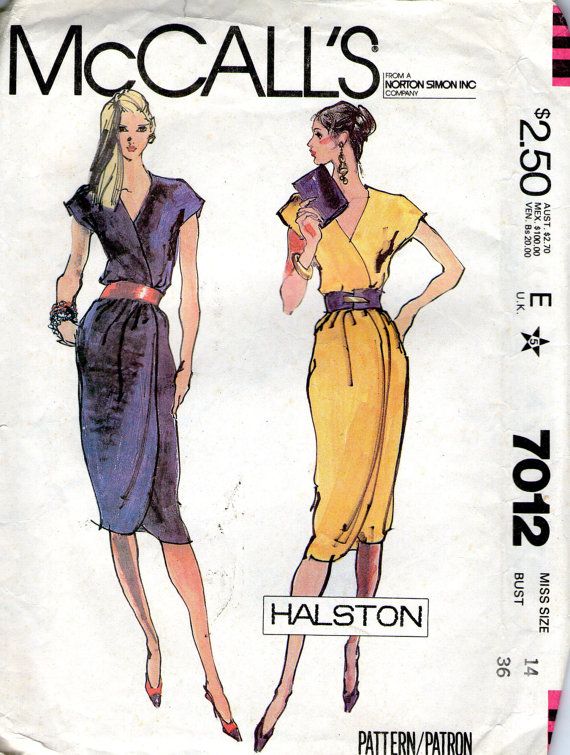
Very Amy Adams in American Hustle.

I remember making this knit top and skirt in the early 80s, when I was first working as a television producer:

Halston pattern #3

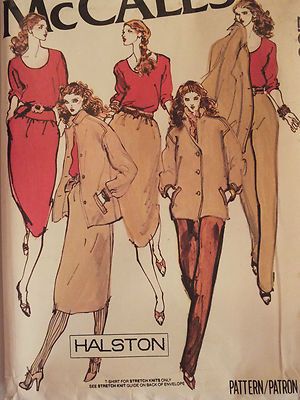
I wore it on a field shoot, one thing led to another, and the guy I was interviewing and I ended up at the Plaza. Those were the days, my friend.

You can see more Halston patterns on my pinterest page: Make Your Own Vintage Halston. The patterns are not too hard to find on Ebay and etsy.com.

Let’s get back to the wrap dress. Diane Von Furstenberg is known for “inventing” it, but it was around for a long time before that:

McCardell Popover

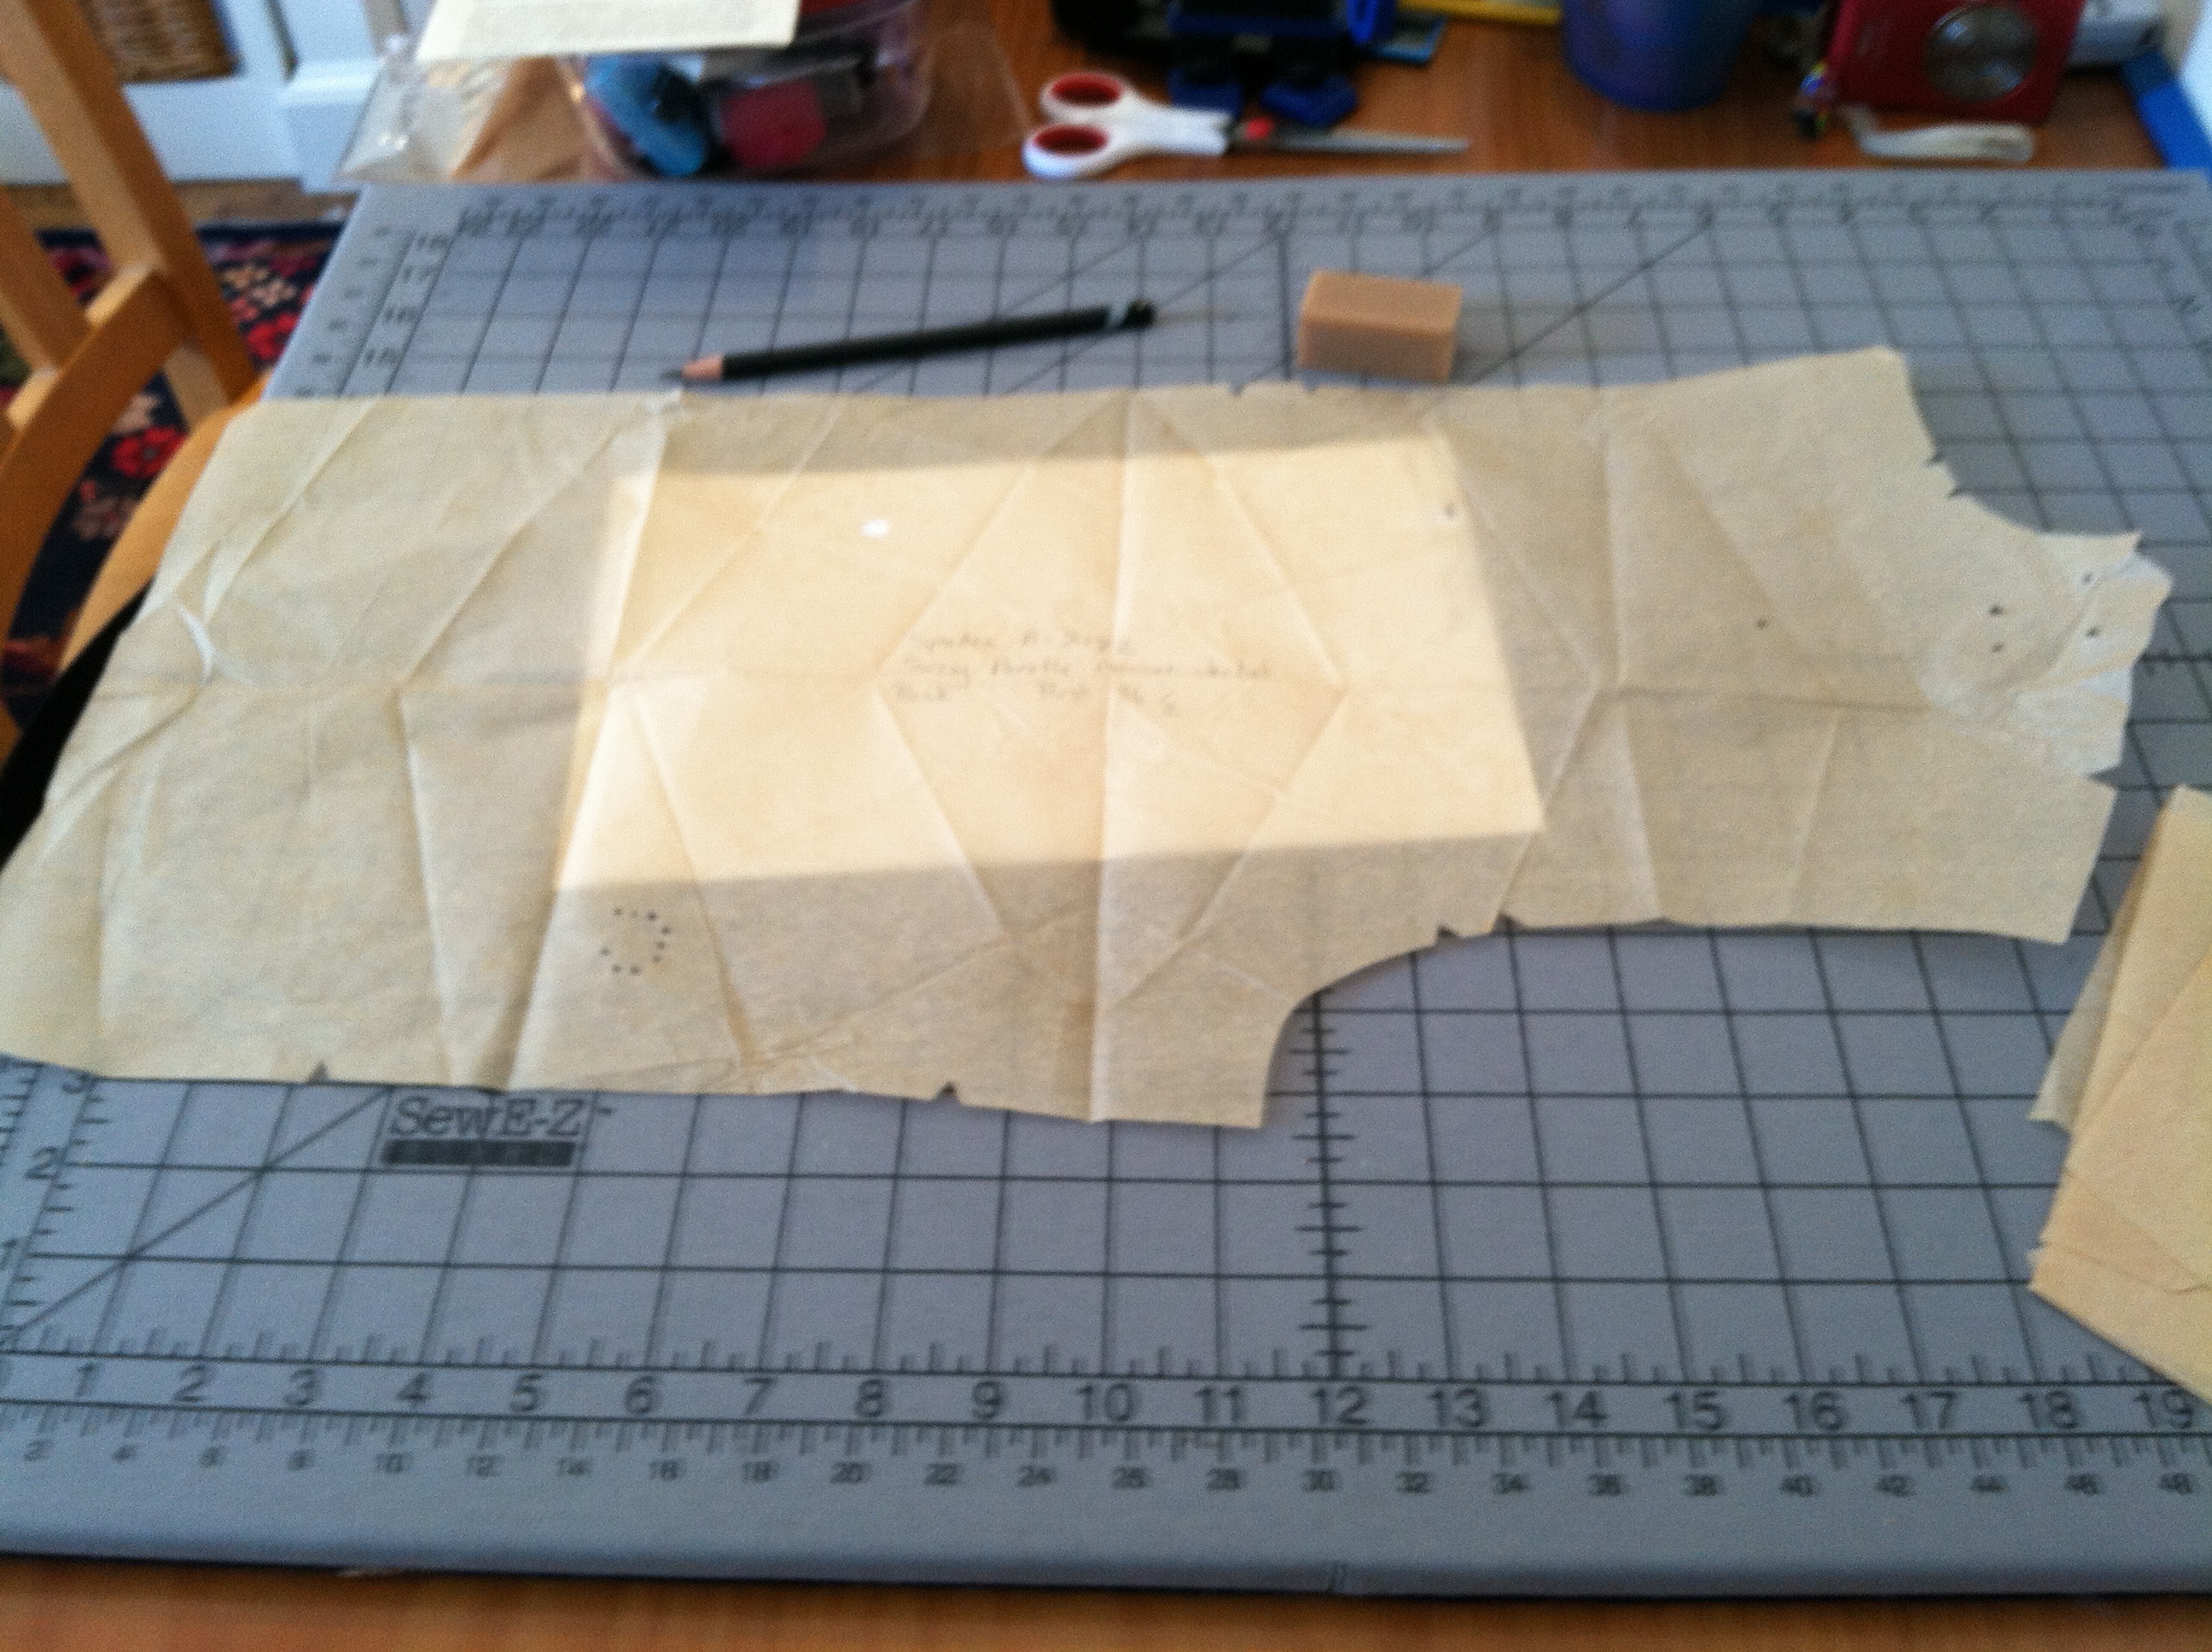
This rare early 50s Claire McCardell pattern, released by Spadea, was drafted from a retail McCardell dress, like this:

McCardell Popover Dress
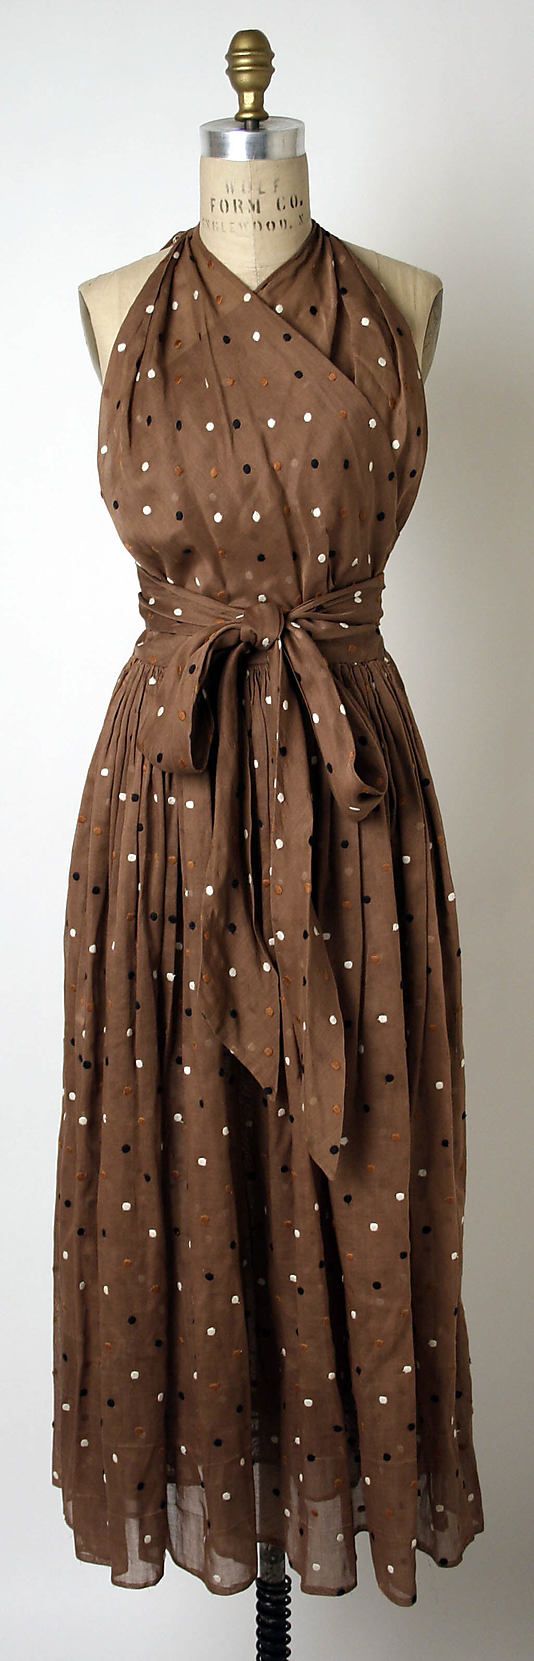
McCardell Popover in the Metropolitan Museum Collection

The bodice is cut on the bias, a technique McCardell learned by deconstructing Vionnet dresses while she was a student in 1920’s Paris. She had wrap dresses in her line from the 40s through her death in the late 50s, though she called them “popover” dresses. More on this design later.

These dresses never really go out of style. Just today, I spotted this new Vogue pattern from Donna Karan:

Donna Karan Wrap Pattern

Bias cut, very nice. Here’s the link: Donna Karan Vogue Wrap Pattern. Many of Donna Karan’s early sewing patterns (including the ones she did for Anne Klein) were influenced by Claire McCardell’s designs.

Hm, I think I have some wrap dresses in my sewing future…after all, when Mad Men returns it will be in the full-on 70s.

What do you think of 70s fashion? Thumbs up or down? Any fashion memories, good or bad?

How to make the Madeleine Vionnet 30s Scarf

14

image

In a recent post I promised details about making a scarf designed by Madeleine Vionnet, which is shown at the bottom of this post in the photo composite. As I mentioned, the Betty Kirke “Vionnet” book, which you can see on this link: http://www.amazon.com/Madeleine-Vionnet-Betty-Kirke/dp/1452110697/ref=sr_1_1?ie=UTF8&qid=1387372857&sr=8-1&keywords=vionnet+kirke has drawings of pattern pieces for a number of Vionnet gowns, and also for this scarf. The one thing that’s missing is the “key” to the dimensions of the pieces, which makes the gowns difficult to recreate.

In recent years, the Bunka fashion school in Japan took Betty Kirke’s drawing and recreated them, putting the pattern pieces on a grid. There was an exhibit of the recreated gowns, and then the book with the patterns and instructions (pictured above) was released. Currently this book is only available in Japanese, but between the two books it’s possible for an English-speaker to figure out how to recreate the patterns, which is pretty amazing. Here’s a link to the Bunka Vionnet  book:  http://www.amazon.com/Vionnet-Japanese-Bunka-Fashion-College/dp/4579109430/ref=sr_1_1?ie=UTF8&qid=1387373215&sr=8-1&keywords=vionnet+bunka

I decided to test out a method of recreating these designs by using a relatively simple pattern, which was the scarf. Since these books are under copyright, I won’t be showing the actually pages with the pattern and direction, but you’ll get the idea.

Since I was too lazy to draw the gridded pattern onto a larger sheet of paper, I found a website called rapidresizer.com, copied and uploaded the picture of the pattern in the book, then was able to set it to print out on a larger scale. It came out piece by piece on 8″x10″ paper, and then I taped it together like a PDF pattern. After some trial and error, it worked fine.

I traced over the pattern with butcher block paper, and it looked like this:

imageIf you look closely, you’ll see that the grainline is on the bias, which a very important element in the drape of the scarf. Vionnet’s manipulation of the stretch on the bias in her garments are what made them architectural masterpieces. According to Betty Kirke, Vionnet did a line of dresses that she shipped to US manufactures that were unhemmed. The idea was that the bias cuts would stretch to fit anyone, and all the store had to do was lengthen or shorten for the individual customer. Unfortunately the idea was way ahead of it’s time and it bombed. But wow, what a forward-thinking concept!

The instructions for the scarf are all in Japanese, but I’ll give you the general jist:

Cut two of the pattern piece shown above, on the bias. Choose a fabric with some crispness, or underline a soft fabric with identical pieces of silk organza. You’ll need about 1 1/2 to 2 yards of fabric, and I suggest using something that looks interesting on the bias. Here, I used some vintage 30s wool challis from International Silk and Woolens in Los Angeles.

imageSew the “V” shaped cutouts into darts on both sides of both pieces, right sides together, and press. When sewing on the bias, be very careful not to stretch the fabric as you feed it into the machine.

imageSew two of the short ends of the pieces right sides together (you can see I’ve added a silk organza underlining to this soft wool challis).

imageFold the entire scarf lengthwise, right sides together, and sew along the lengthwise seam, again being careful not to stretch it as you’re sewing. Press the seam open.

imageTurn the entire length of the scarf right side out via one of the short ends. The lengthwise seam is now the center back of the scarf. Give that seam and the rest of the scarf a soft steam press, avoiding making creases.

imageTuck under the seam allowances of the two raw ends at either end of the scarf. Make the scarf into a circle like an infinity scarf, without any twists. Insert one unfinished end into the other and fell-stitch them together. You’re done!

imageTo wear the scarf, fold it in half and put the two narrow ends behind your neck. The two large loops will be hanging down in front of your chest. Stick your hands through the loops as shown, grab the outer edges and pull them through. The scarf becomes a bow like magic! Fiddle with it a little to hide the seam. Sometimes I find it works better to put it on inside-out so the seam is hidden when you pull the loops through.

This scarf is so distinctive, yet easy to wear. The bias cut and darts give it that bow “poof” without a big knot. What a great design!

This is why I’m doing this type of re-creation, honestly. It’s one thing to see these designs in photos, but it’s much more educational and meaningful to go through the designer’s process and then hold it in your hand. My hat’s off to Betty Kirke and the people at Bunka who painstakingly researched these patterns. It’s a rare window into early 20th century design.

I’d be curious to know whether any of you are fans of Vionnet. Have you seen any of her creations up close? She closed her atelier during WWII so I can’t imagine there are many of her gowns still circulating in the vintage world, though there are a number of them in museums, thank goodness. I’ve been getting so many interesting comments, and would love to hear more. Thanks for stopping by.

I’m tired of Coco, how about you?

13

Okay, here are a few last details of the construction of Chanel Jacket #4 that I’d like to add before moving onto my next, much more fun topic, a Coco Chanel vs. Madame Vionnet Smackdown! Are you working on a Chanel-style jacket right now? If so, leave me a comment; I’d love to hear about it.

1962 Chanel pattern released by Spadea

1962 Chanel pattern released by Spadea

As I mentioned before, this Spadea Chanel pattern from 1962 was drafted from a retail jacket, the design of which was licensed from Chanel by the US company Suzy Perette. This was a common practice back in the days before off-shore manufacturing. In fact, the pink suit worn by Jacqueline Kennedy on the tragic day of the assassination, though often attributed to Chanel, was actually a copy made in a New York haute couture boutique. Here’s a story about the historic preservation of that suit from the New York Times:

The instructions from the 1962 Spadea Chanel pattern I used were very thorough and old school in terms of construction. Though I had never made welt pockets before, by following the instructions they were a breeze.

Pocket welts

Pocket welts

I created the flaps, attached the pockets, sewed up the side panel seam, and voila, a pretty little pocket made of colorful lining. Though Chanel jackets don’t typically have vertical pockets like this, I have seen examples from this era.

Completed welt pockets

Welt pocket in progress

Let’s talk about the obsession with 3-part sleeves, shall we? The two godmothers of haute couture, Susan Khalje and Claire Shaeffer, both have their disciples make 3-part sleeves for their home-made Chanel jackets, so the sleeve has a graceful bend at the elbow and the vent is high enough on the cuff to show off the trim and buttons.

But the truth is, not all Chanel jackets have had three-part sleeves. In Claire Shaeffer’s new book, for example, she shows several vintage Chanel jackets with two-part sleeves. The Spadea pattern I used cleverly fakes the three-part sleeve with a one-part sleeve by putting some ease in the seam to give it the bend at the elbow. Then the vent is added by cutting a slash in the sleeve and adding a facing that goes around the cuff.

Sleeve facing

Sleeve facing

Whether this is the original Chanel design, or a change made by Suzy Perette for US manufacturing, we’ll never know. But it does work pretty well. It’s still time-consuming, but probably not as much of a hassle as building a three-part sleeve.

My last comment on the sleeve is that I added sleevehead under the sleeve cap and then steamed it on a sleeveboard like this, to give the sleeve cap a nice, round shape.

Shaping sleeve cap

Shaping sleeve cap

After lining the jacket, I added the trim, chain (cleverly woven into a 5/8″ tape–much easier to sew on), buttons, and button loops, then collapsed.

Finished cuff and chain

Finished cuff and chain

My blog has been visited by people from around the world and I appreciate you all. Even the spammer guy from Korea! What projects are you working on? Please leave me a comment and let me know.

Working with a vintage unprinted pattern, if you’re lazy.

0
1962 Spadea/Chanel unprinted pattern

1962 Spadea/Chanel unprinted pattern

If you sew from vintage patterns, you may have been nonplussed to open that package and see absolutely nothing printed on the pieces, like in the photo above. Printed patterns only came into vogue in the 50s, and before that people needed to follow the notches and dots cut into the pattern to find their way. The Spadea company continued to hand-cut their unprinted patterns well into the 60s.

Above is a piece of the Spadea/Chanel jacket pattern I wrote about in a previous post. The instructions included with the pattern explain what the markings mean.  Each pattern piece has a letter made of small dots punched in it, to identify the back, front, sleeve etc. The notches are small “v” shapes on the side, three large dots indicate the fold, two large dots indicate the grainline, and medium and small dots are used in the instruction to indicate buttons, buttonholes, ease lines etc.

Marking pattern on to "Kwik Trace" muslin

Marking pattern on to “Kwik Trace” muslin

The first thing I do when I open an unprinted vintage pattern is write the pattern number, name and original bust size measurement on each piece so they don’t get mixed up with other patterns. Since I was using a rare vintage pattern, I traced it onto tracing paper and put the original away. Then I compared the pattern piece with a pattern from a previous jacket I made to make some fit adjustments. You can do this with a pattern block or sloper if you have one. (Those are basic fitting patterns some people make for themselves to fit patterns more quickly. So far I’ve been too lazy to make one.)

I then used a large piece of tracing paper (from the http://www.richardthethread.com/  website in LA) and a tracing wheel to copy the pattern onto my “muslin” version of the jacket. (Though in this case I’m using Kwik Trace tracing fabric rather than actual muslin, again being lazy.) The downside of Kwik Trace is that it’s unwoven and doesn’t have a grain, so I wouldn’t recommend it for projects where you need to know how the fabric will behave, such as a bias cut dress.

Completed "muslin" of jacket

Completed “muslin” of jacket

I cut out the pieces and constructed the muslin loosely using the method outlined in Susan Khalje’s “Couture Dress” course on Craftsy. (Okay, I skipped a few steps, but you get the idea.) I’ve recommended that course in previous posts, and it really helps with vintage projects like this. http://www.craftsy.com/class/The-Couture-Dress/53?_ct=sbqii-sqjuweho-qbb&_ctp=53,1

Once I tweaked the fit, I marked any changes on the Kwik Trace with a sharpie and took the “muslin” apart. Those pieces now became my pattern. At this point I wrote the pattern number and name on each piece and indicated that it had been fitted for me, in case I wanted to reuse it.

Cutting the fabric with large seam allowances

Cutting the fabric with large seam allowances

I pinned the pattern pieces on my fabric and then cut loosely around them to leave plenty of seam allowance. Boucle like this unravels in a huge hurry, and by the time you’re ready to finish the seams, you may have already lost more than 1/2 an inch.

Thread tracing the seam line

Thread tracing the seam line

At this point, if you follow Susan’s Khalje’s instructions in the Couture Dress course, you are supposed to “thread trace” (loosely baste with contrasting silk thread) around all of the seam lines to mark the seams on the front and back. This is a great idea! But I can’t face it at this point in the construction! (Because I’m lazy.) So, despite the fact that Susan warns against this, I marked both sides of my fabric with tracing paper, which I then could not get out of the fabric. Fortunately my fit was pretty good, so I just stitched inside the line and the marks ended up inside the seam allowance. I did thread trace the armscye and sleevecap as it makes it a million times easier to line up.

How about you? Have you ever worked with an unprinted pattern? How did it go? Leave me a comment, and a link if you have one. I’d love to see your projects.

Till next time… (I used to work in TV so I feel like I need a sign-off line) “May your bobbins be full and your tension even?”