Shoveling Through a Madame Gres Dress and Six Feet of Snow

41

So, I managed to kill off Madame Gres before she killed me. It was a war of slidey jersey knits, sticky power mesh, and numerous sharp objects, punctuated by meals on demand for my snowbound and crabby men. The only one I’m still speaking to is Karl!

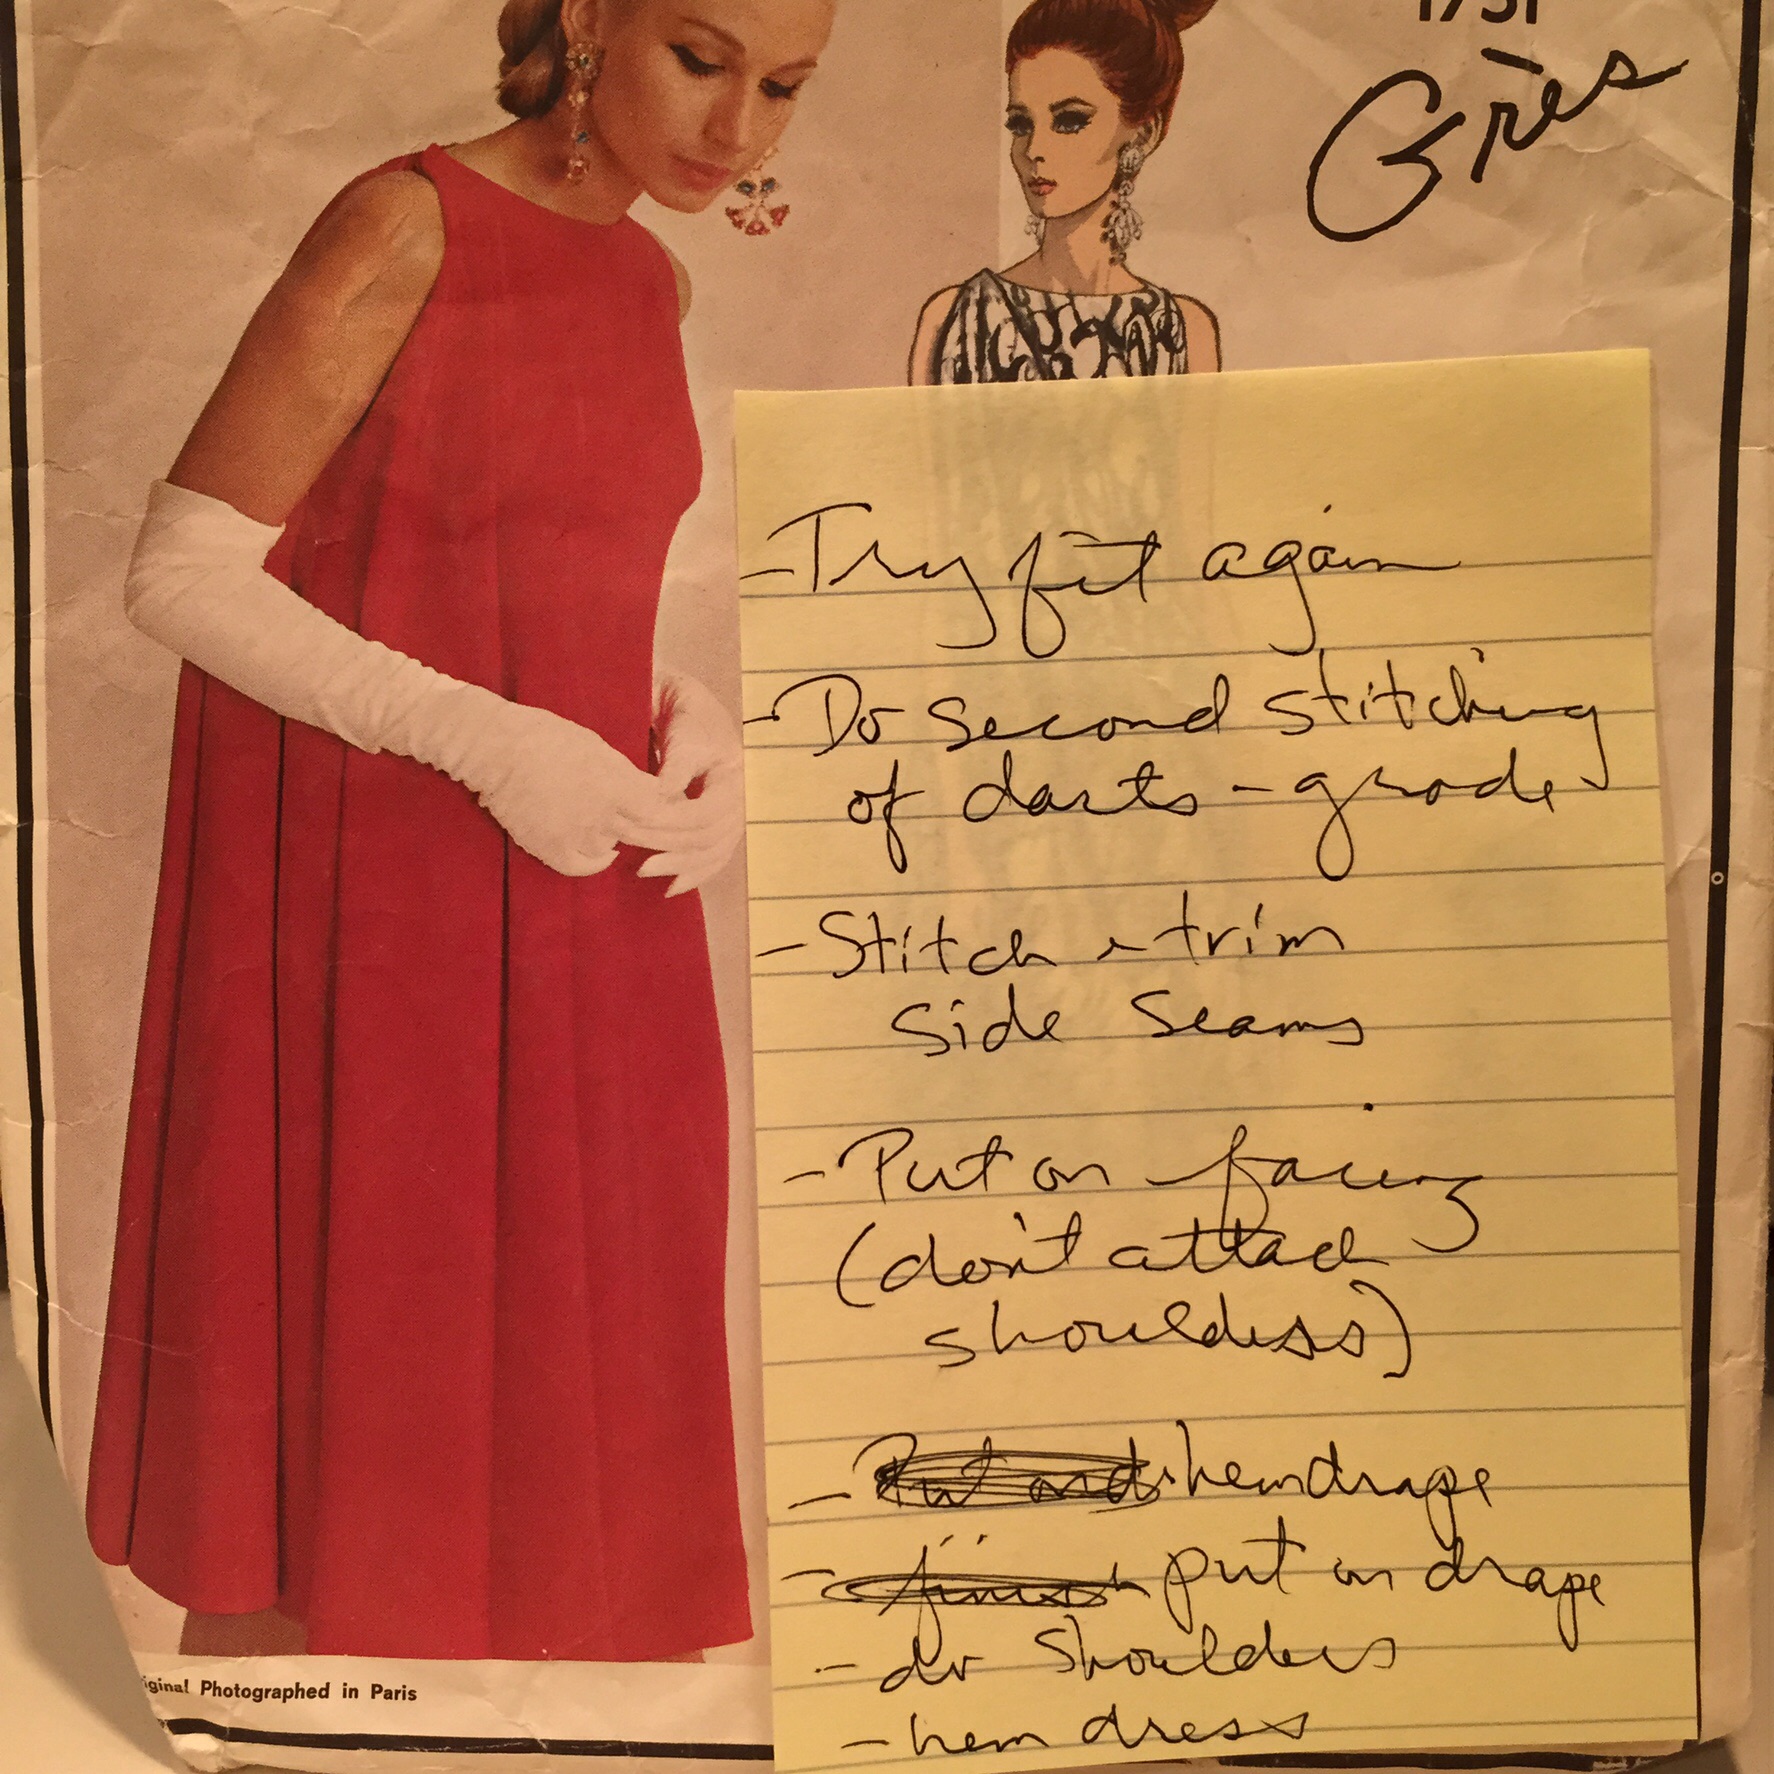
When we last left off on this project:

Gres pattern

There were merely two feet (less than a meter) of snow on the ground in Boston. You can read about making the muslin by clicking here, and the early stages of construction by clicking here.

The snow was still kind of a novelty after storm number one. People were jovial in the snow, and it looked pretty:

image

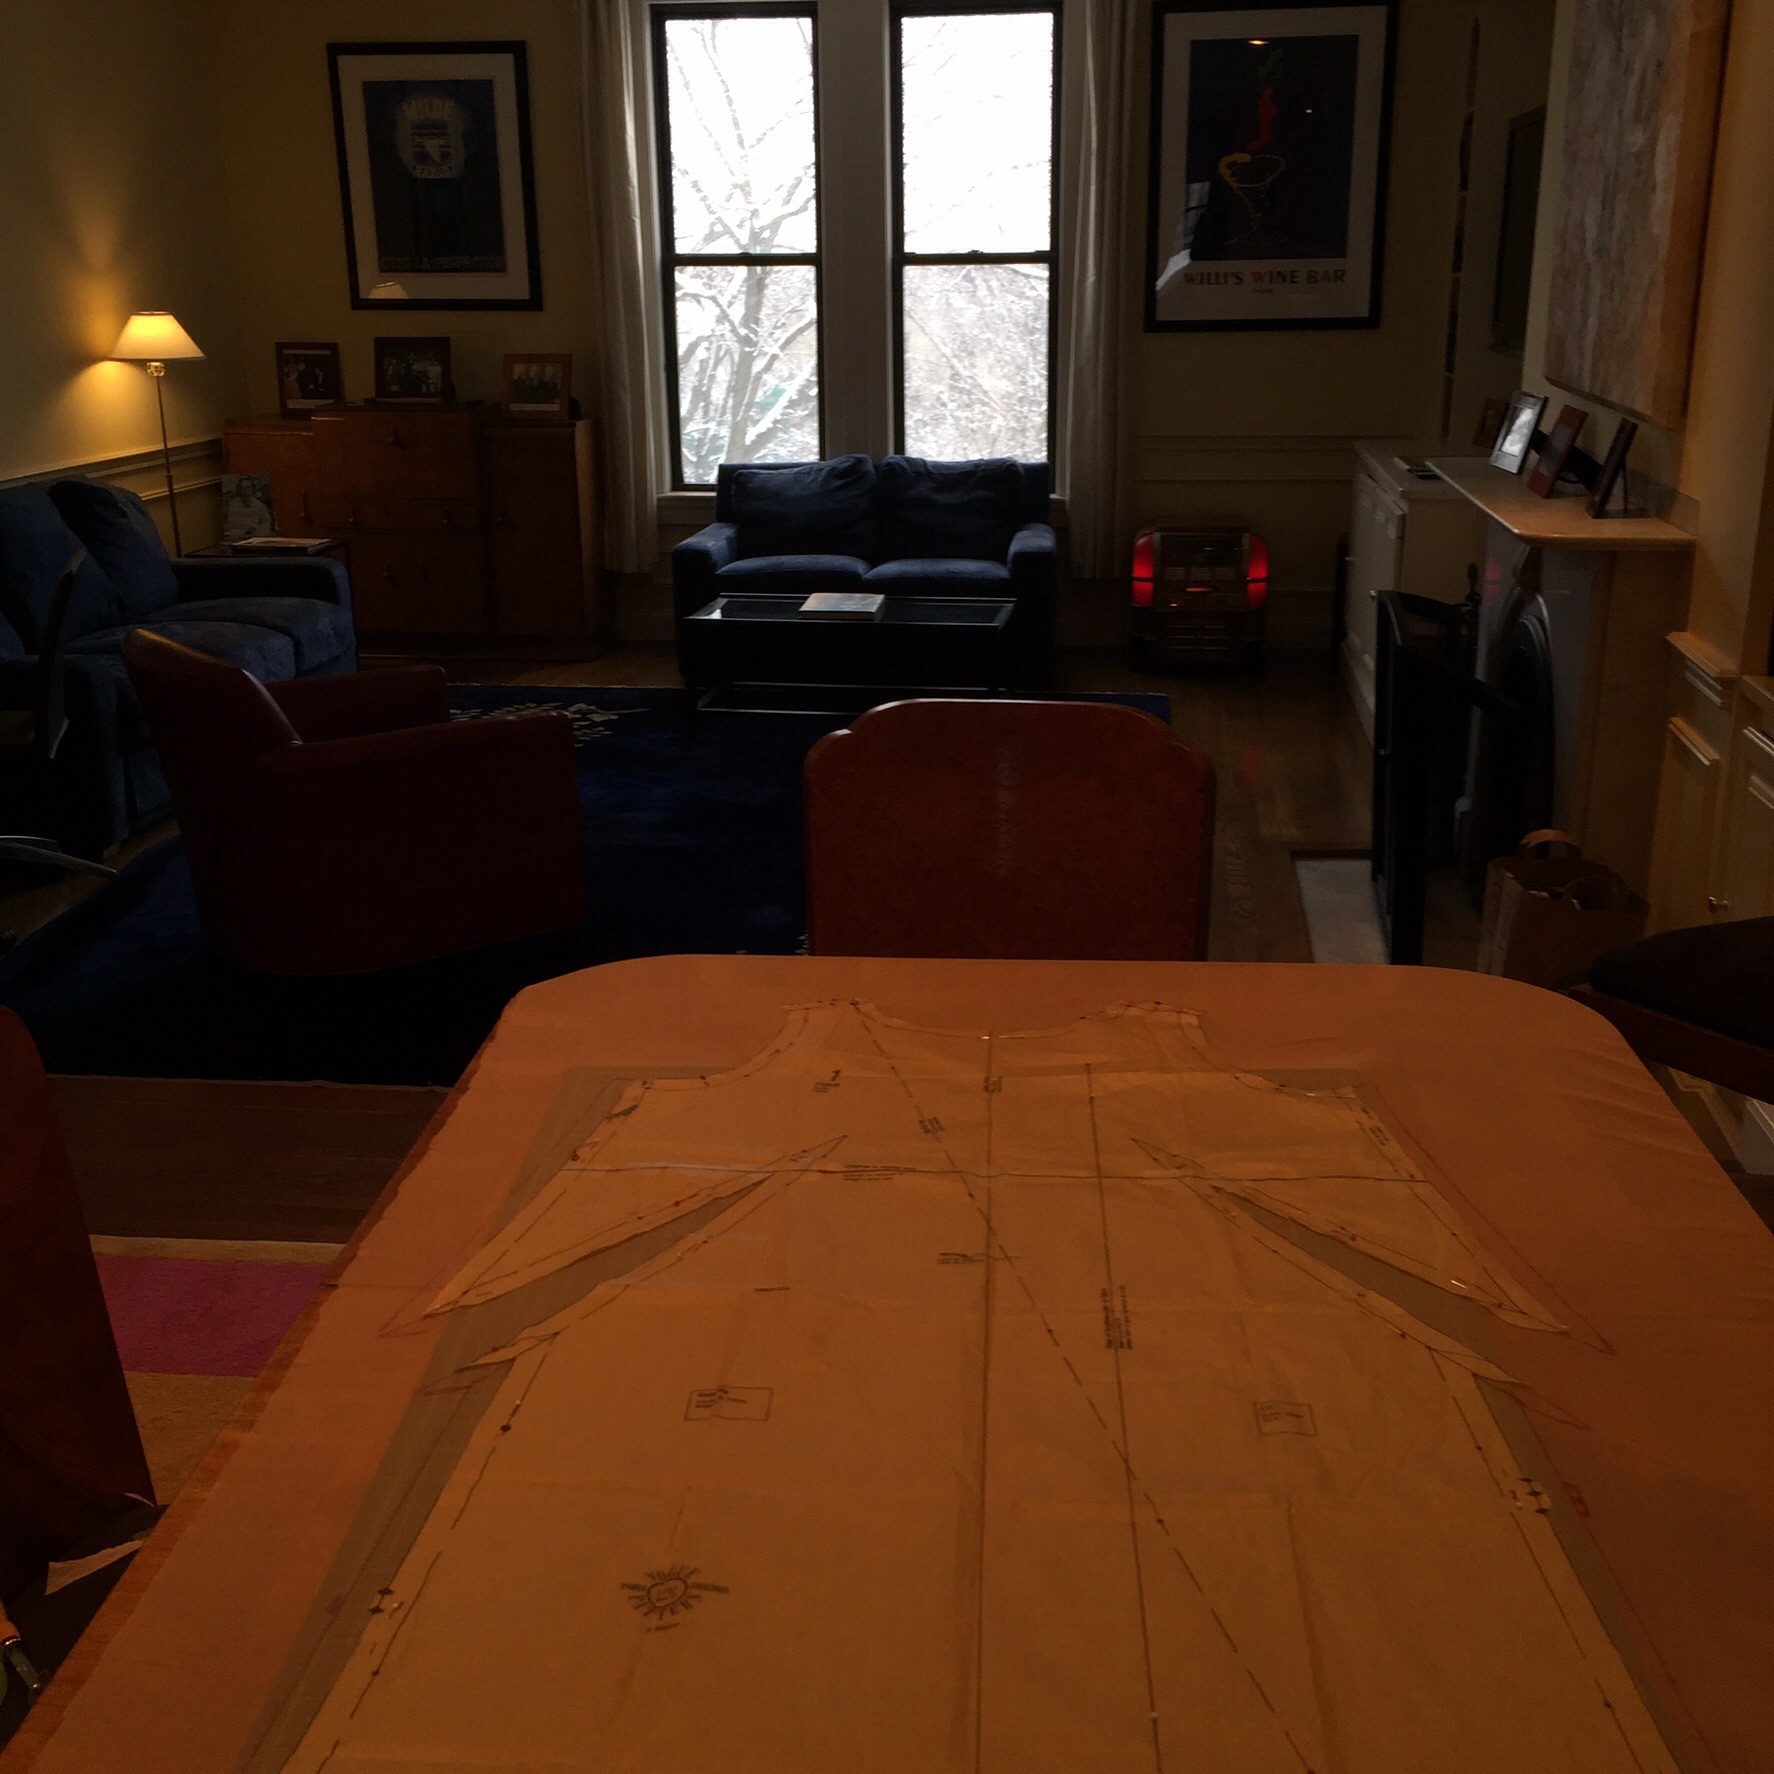
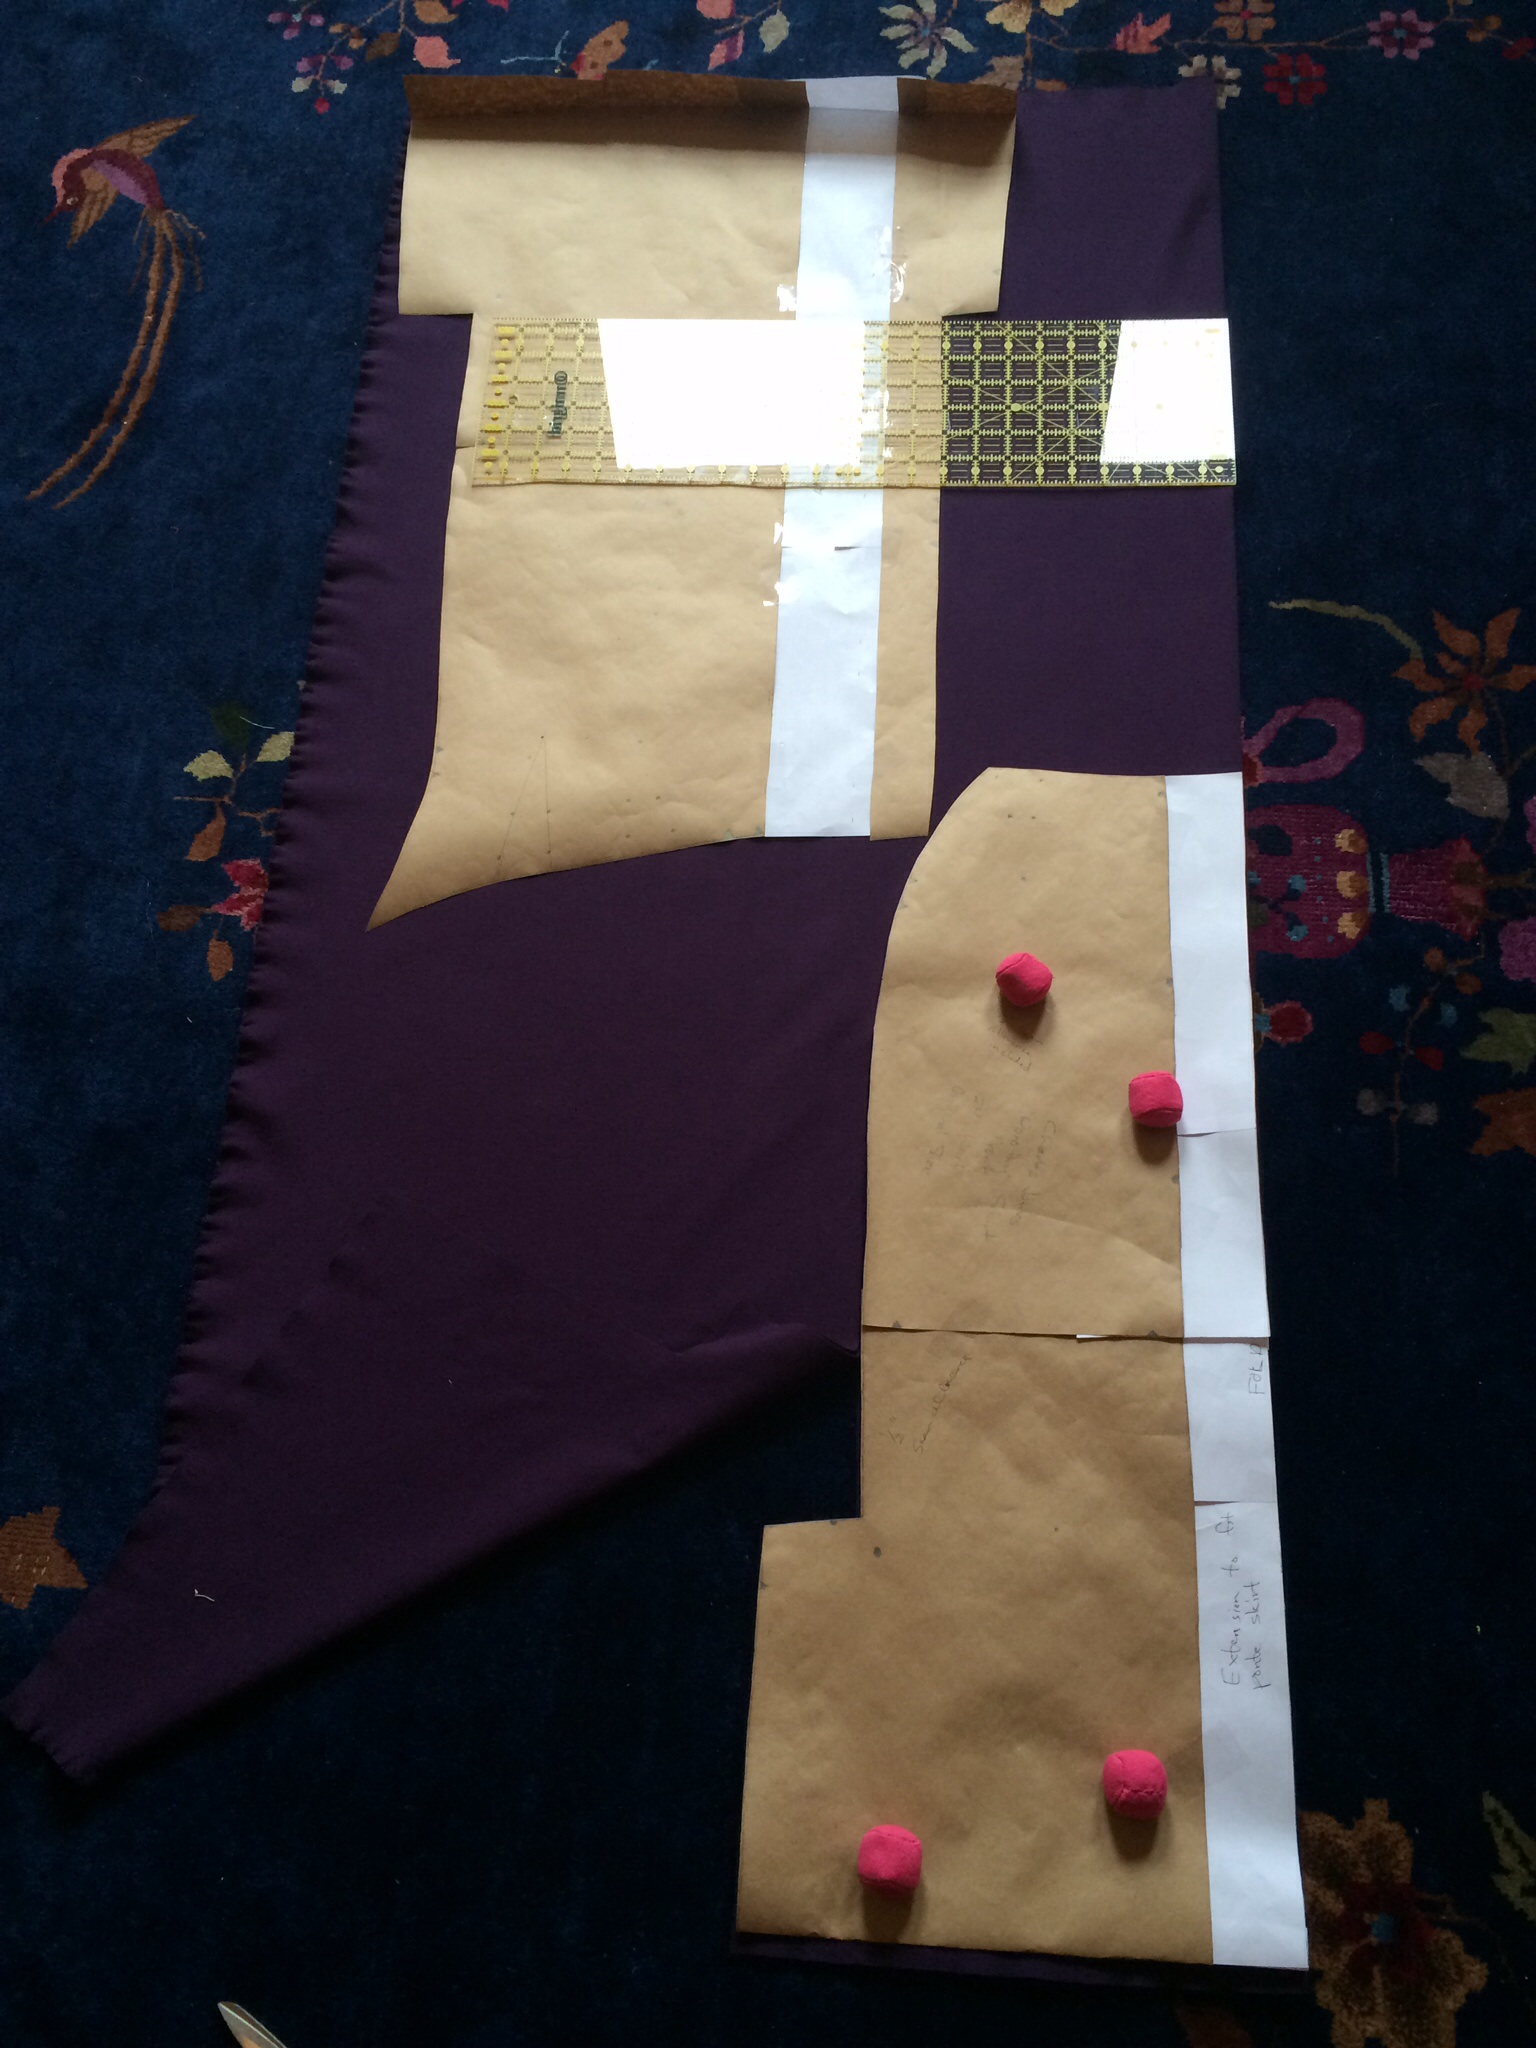
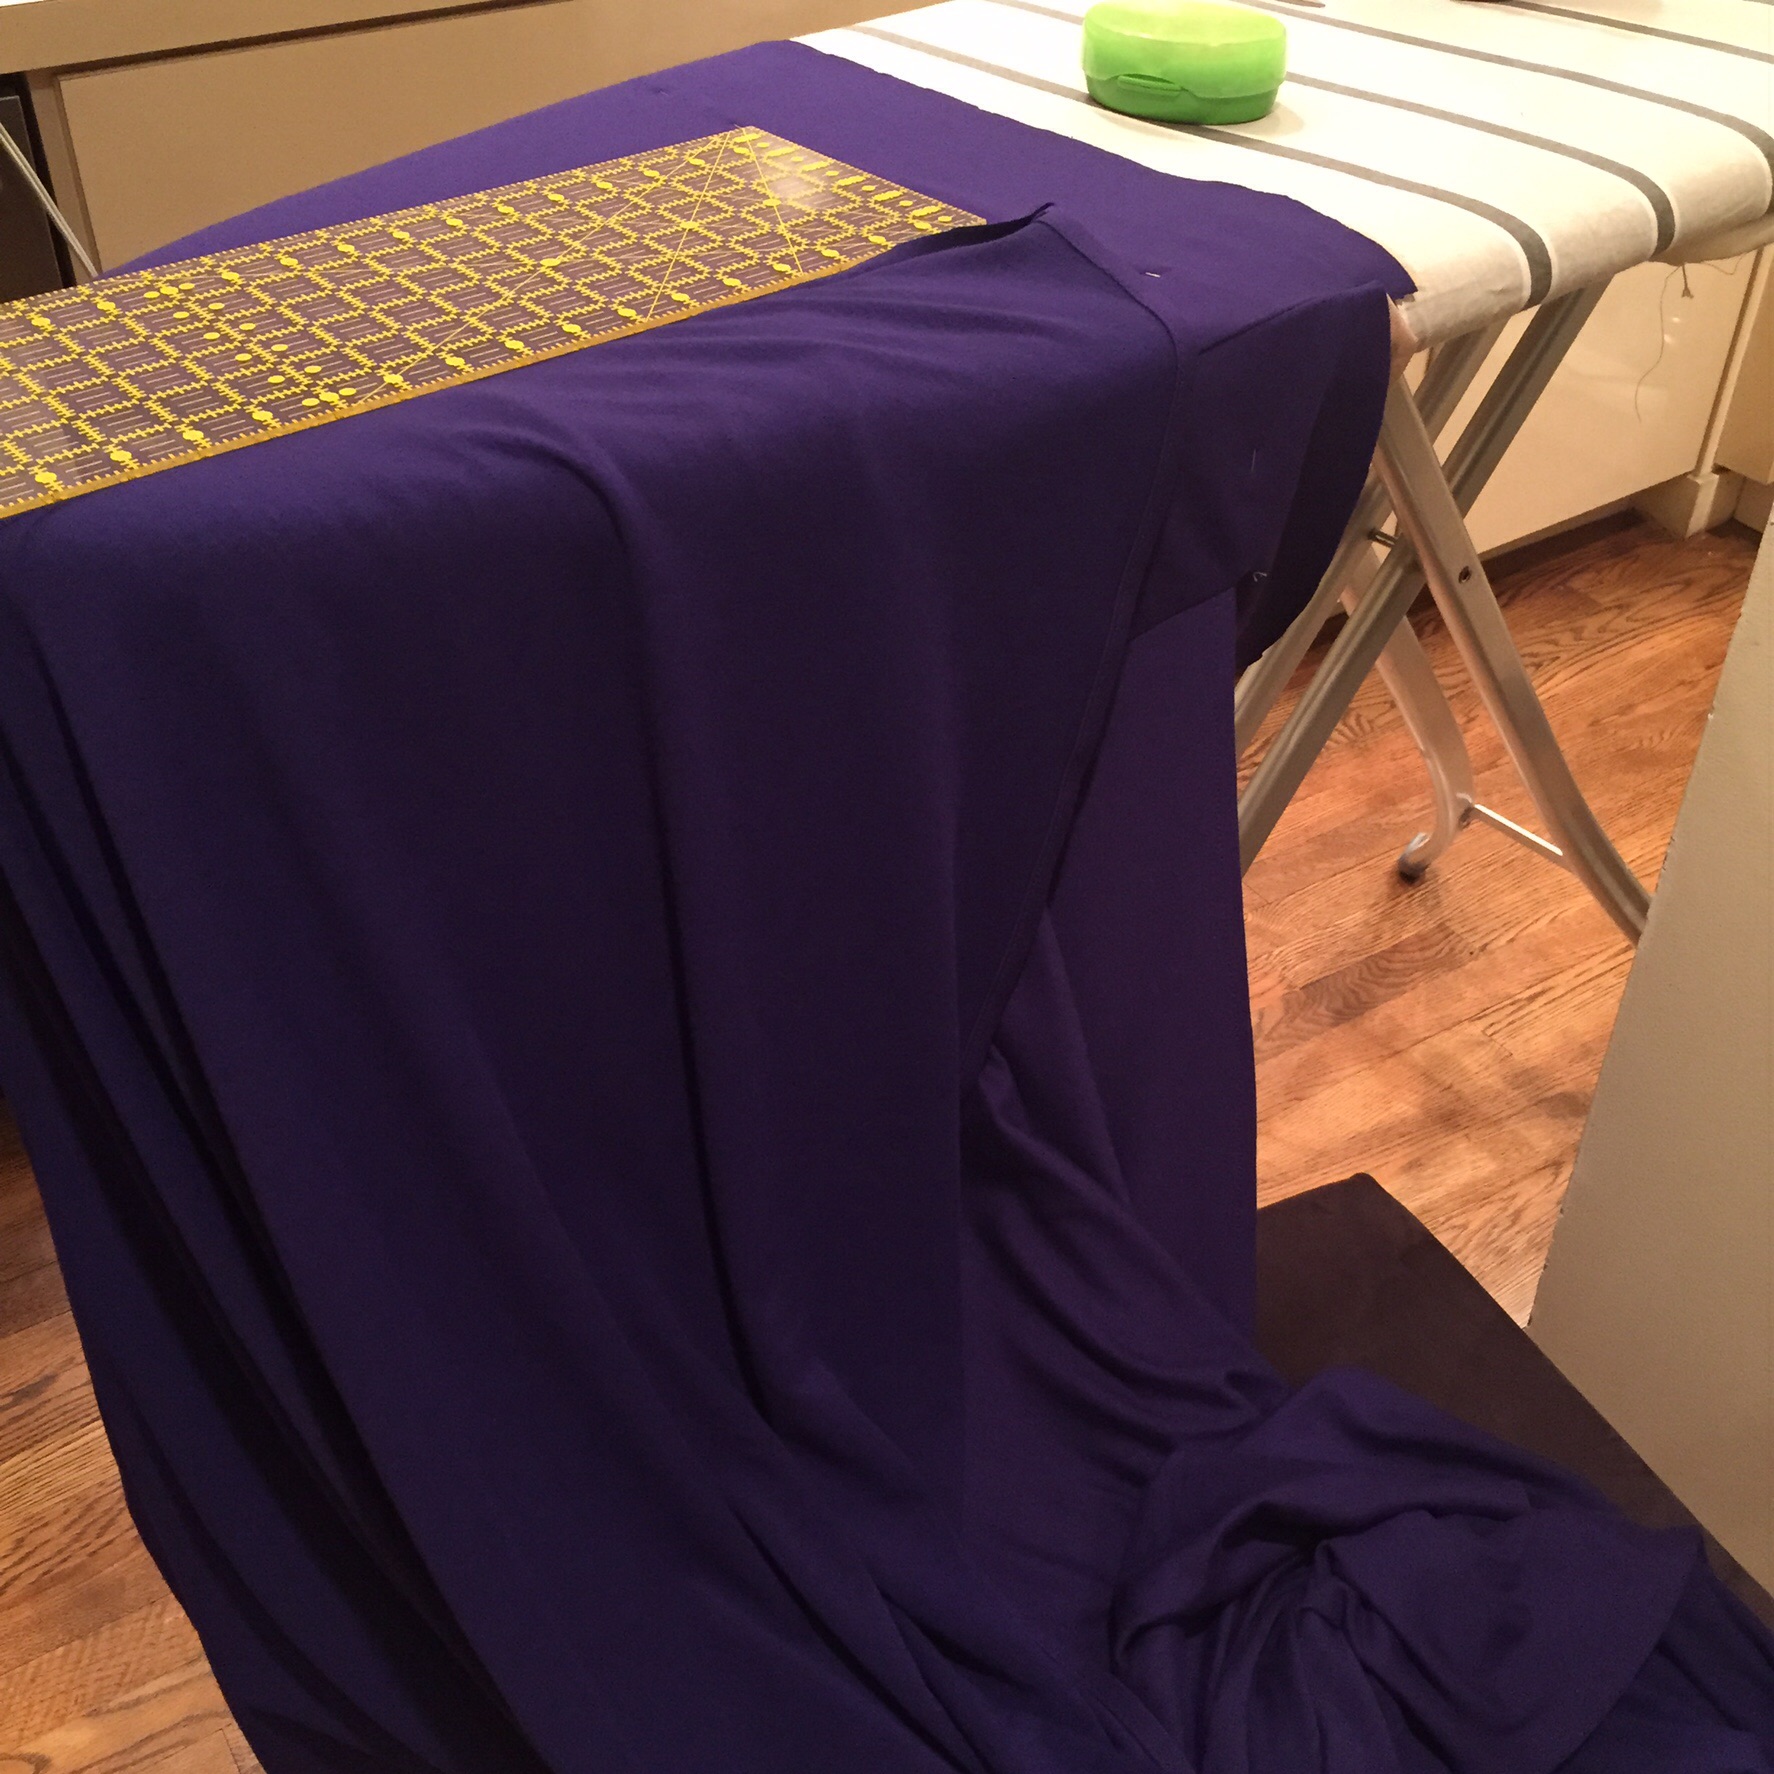
Then, storm #2 hit, with two more days off from school. My husband was in one room working, and my son was in his room doing homework, which stranded me in my tiny kitchen, laboring to create the large half-circle drape that attaches to the underdress. The diameter of the drape is at least six feet (two meters).

image

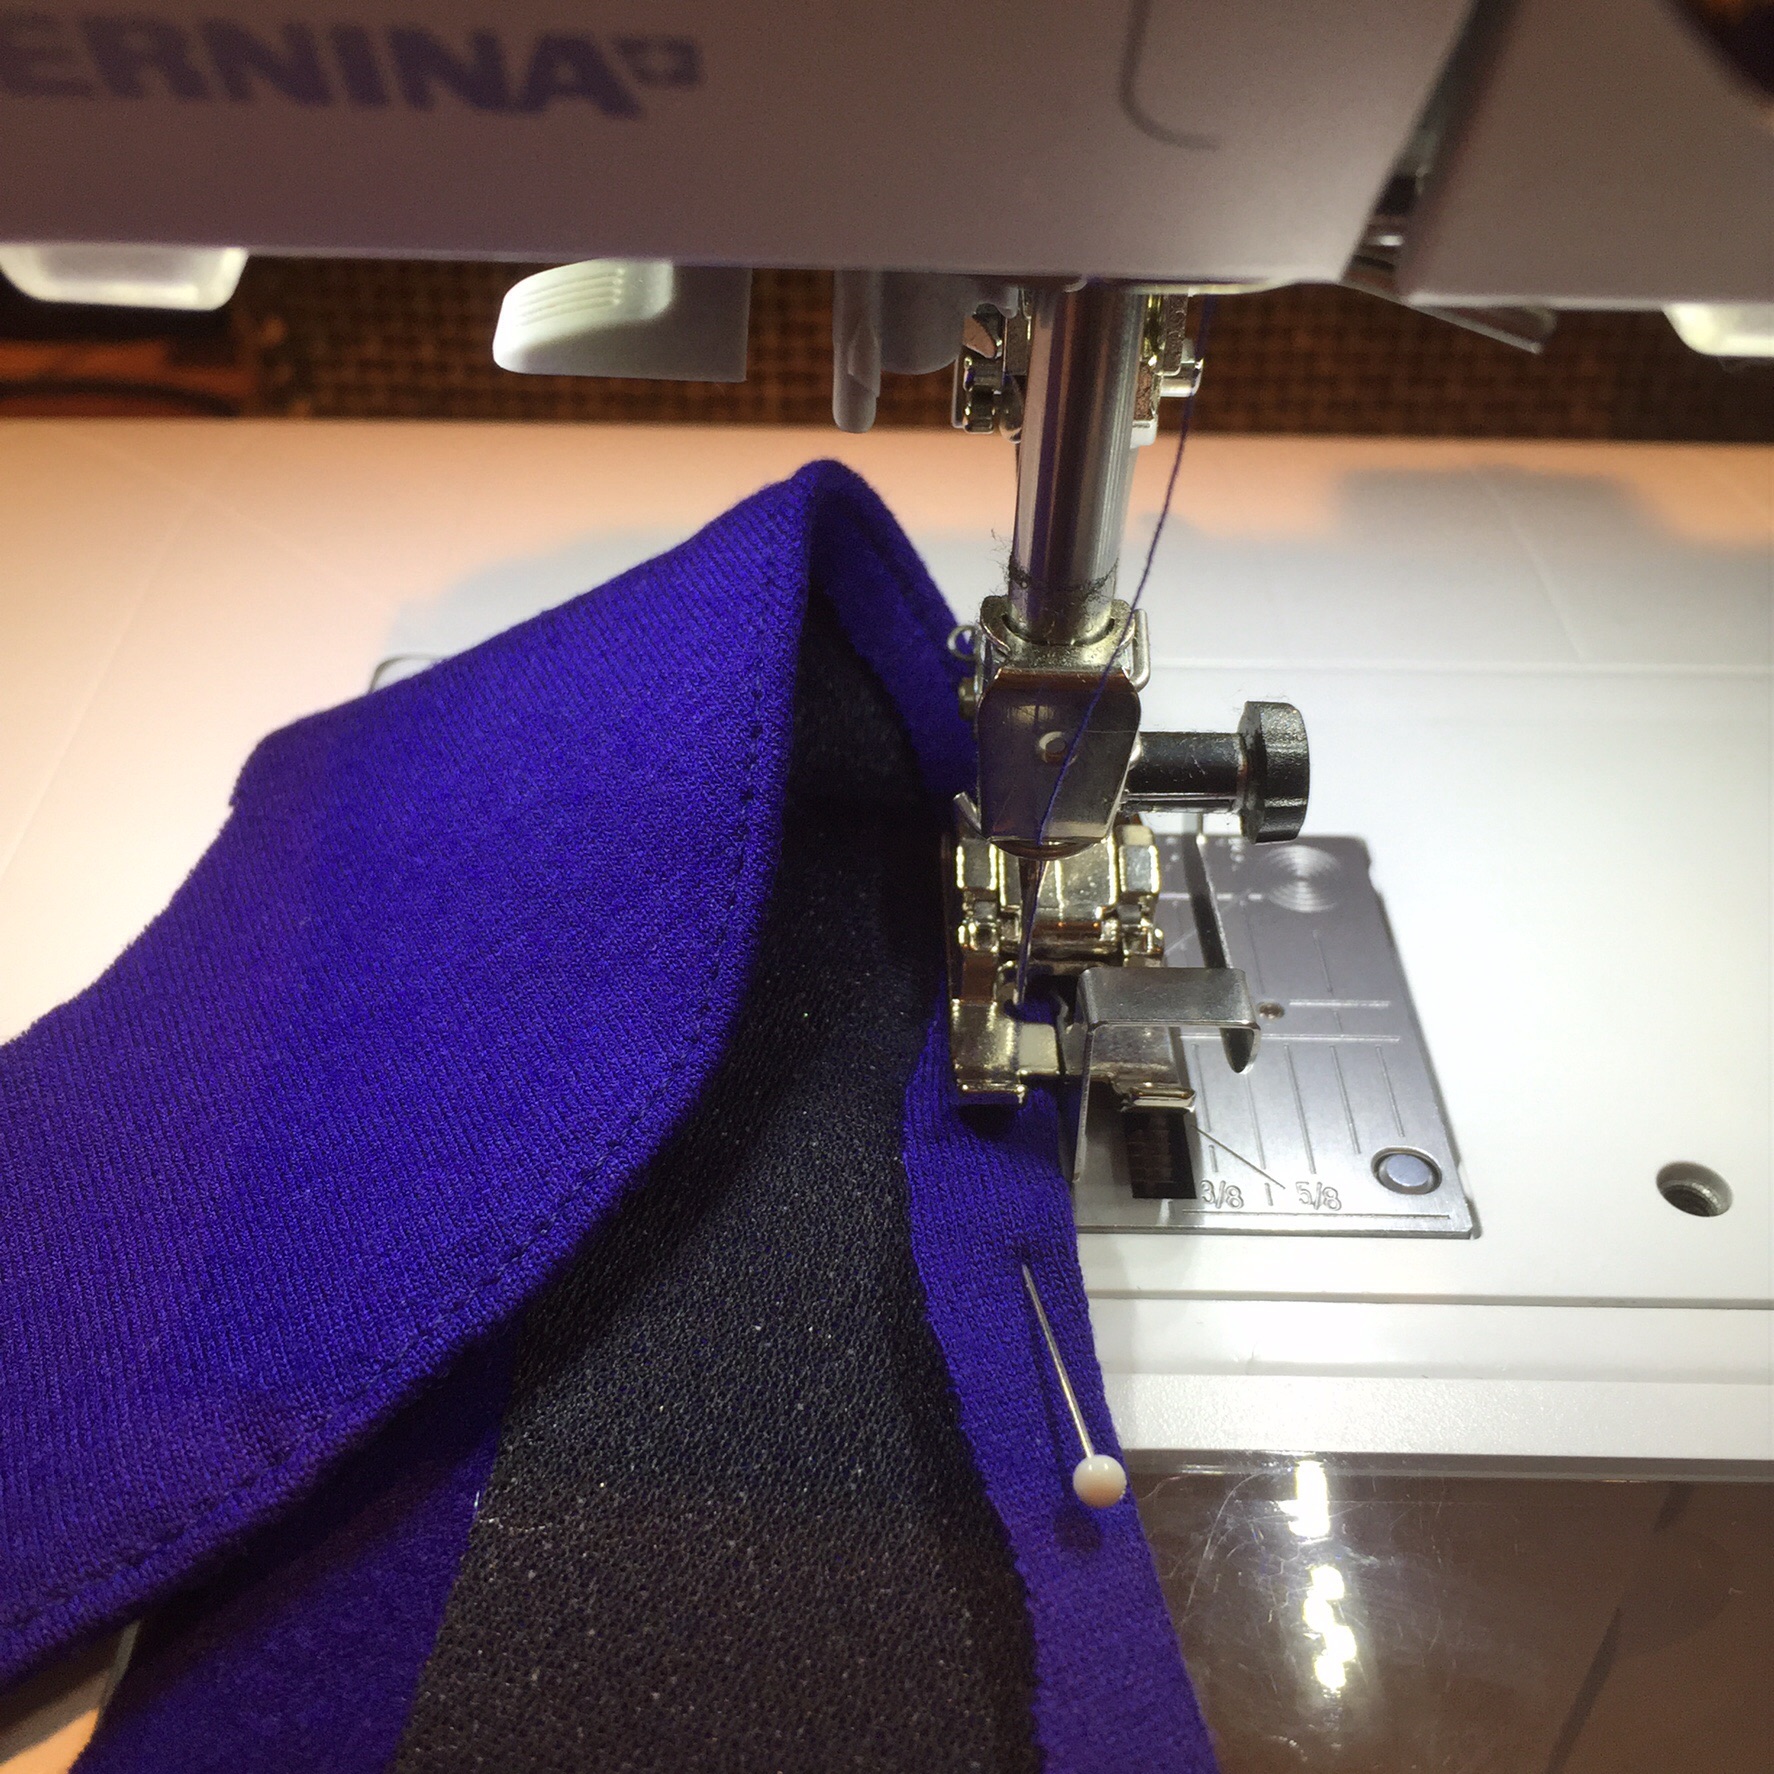
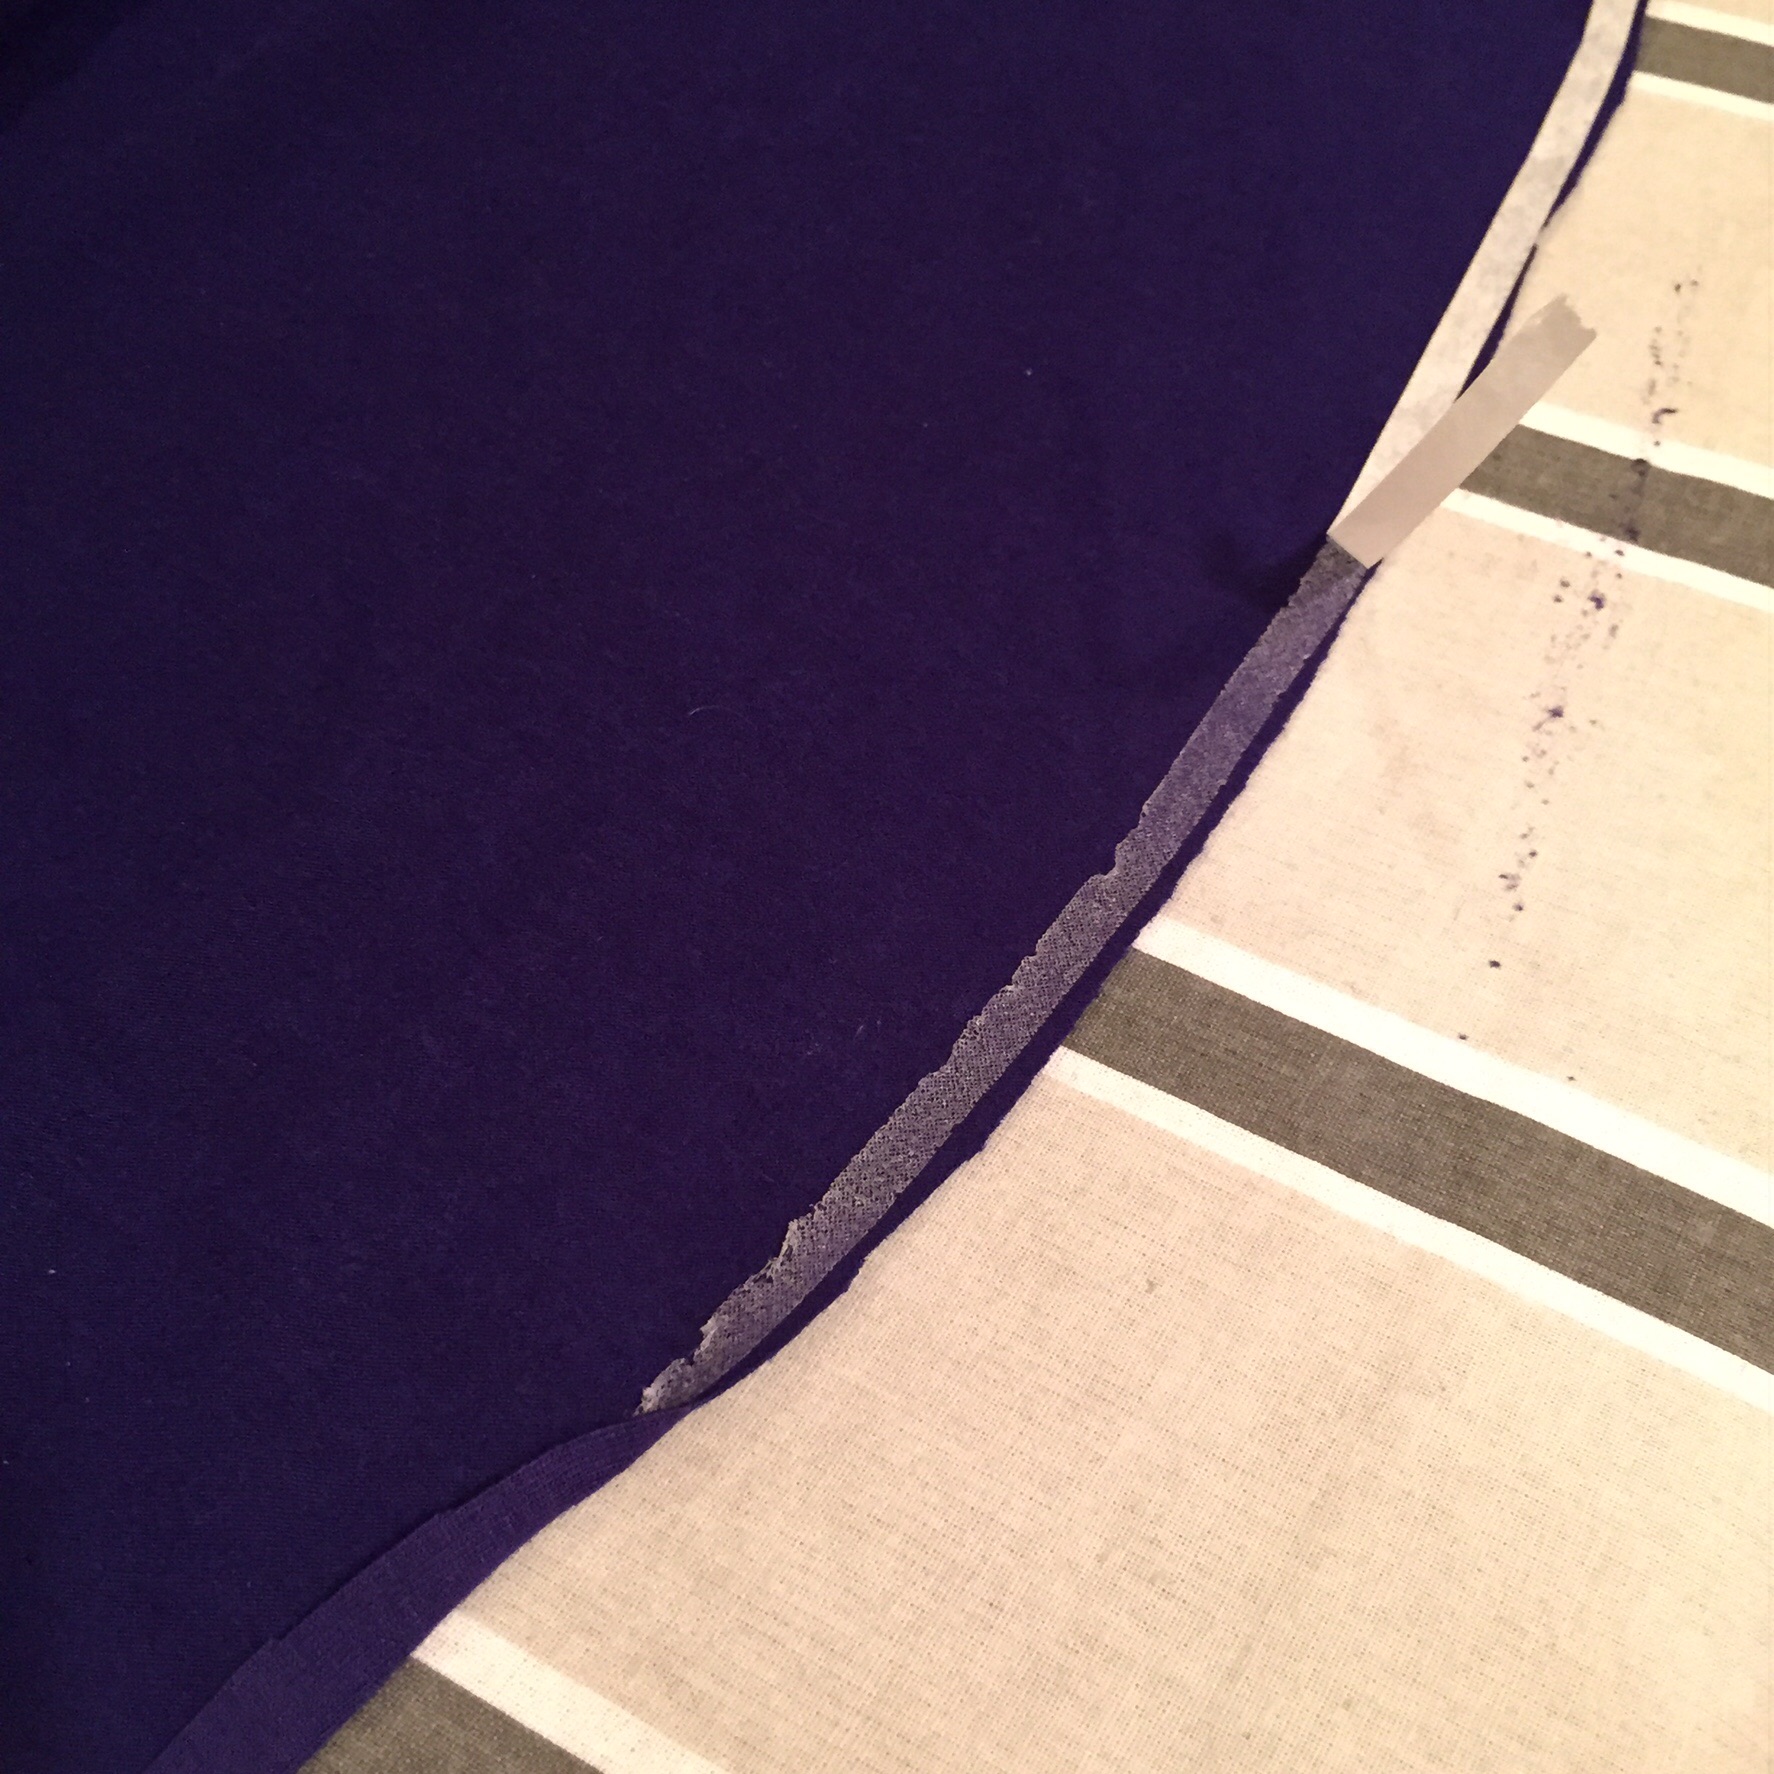
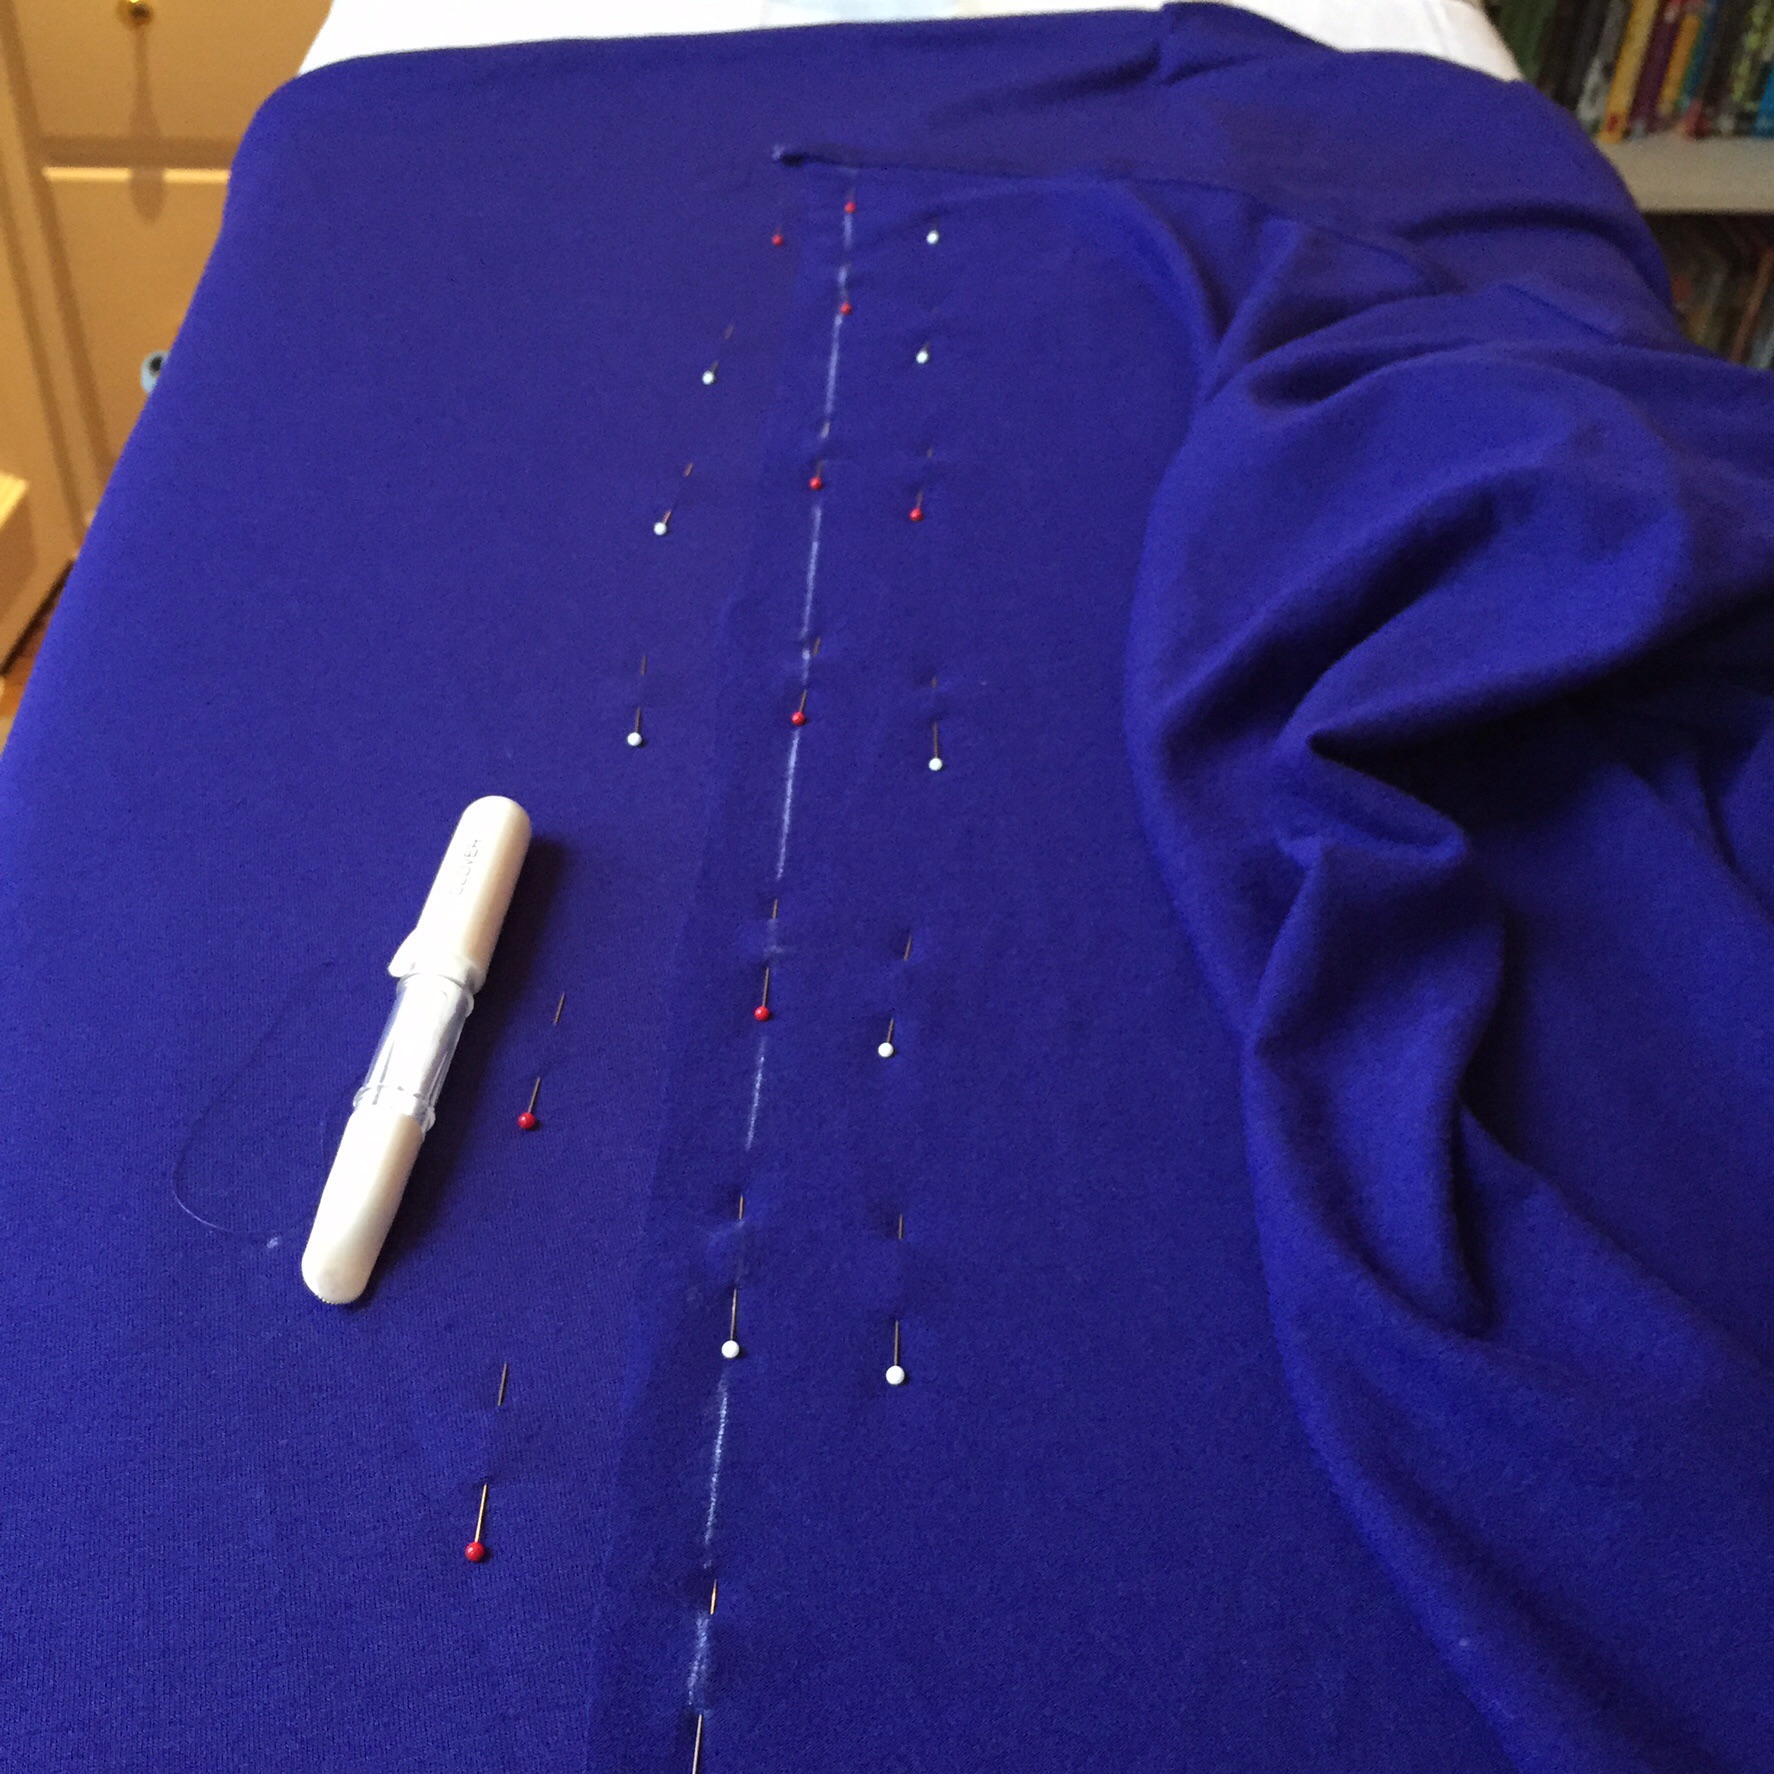
The first thing was to make and stabilize a slash on the straight edge of the drape, which would attach to the shoulder and then go under the arm. Since I was using lightweight, stretchy wool jersey, rather than hand-roll the edge hem as called for in the instructions (which would have led to hari kari), yeah, I got out the old Steam-a-Seam 2 Lite! I’m not ashamed! For the uninitiated, Steam-a-Seam is a kind of mesh fabric glue with paper backing.

image

I glued that sucker down and edgestitched it, and decided I could live with it. Many of us had a long, depressing hiatus from Steam-a-Seam last year when apparently there were production problems with the product. I myself became a hoarder and even bragged about it on InstaGram, which made things worse because people started begging for it. (I refused to share.) But now you can find it again on Amazon, hallelujah!

I learned about Steam-a-Seam from the Craftsy.com course Sewing on the Bias with Sandra Betzina. She recommends laying down the paper strip and tapping it quickly with an iron to get the glue mesh to separate from the paper, which really helps.

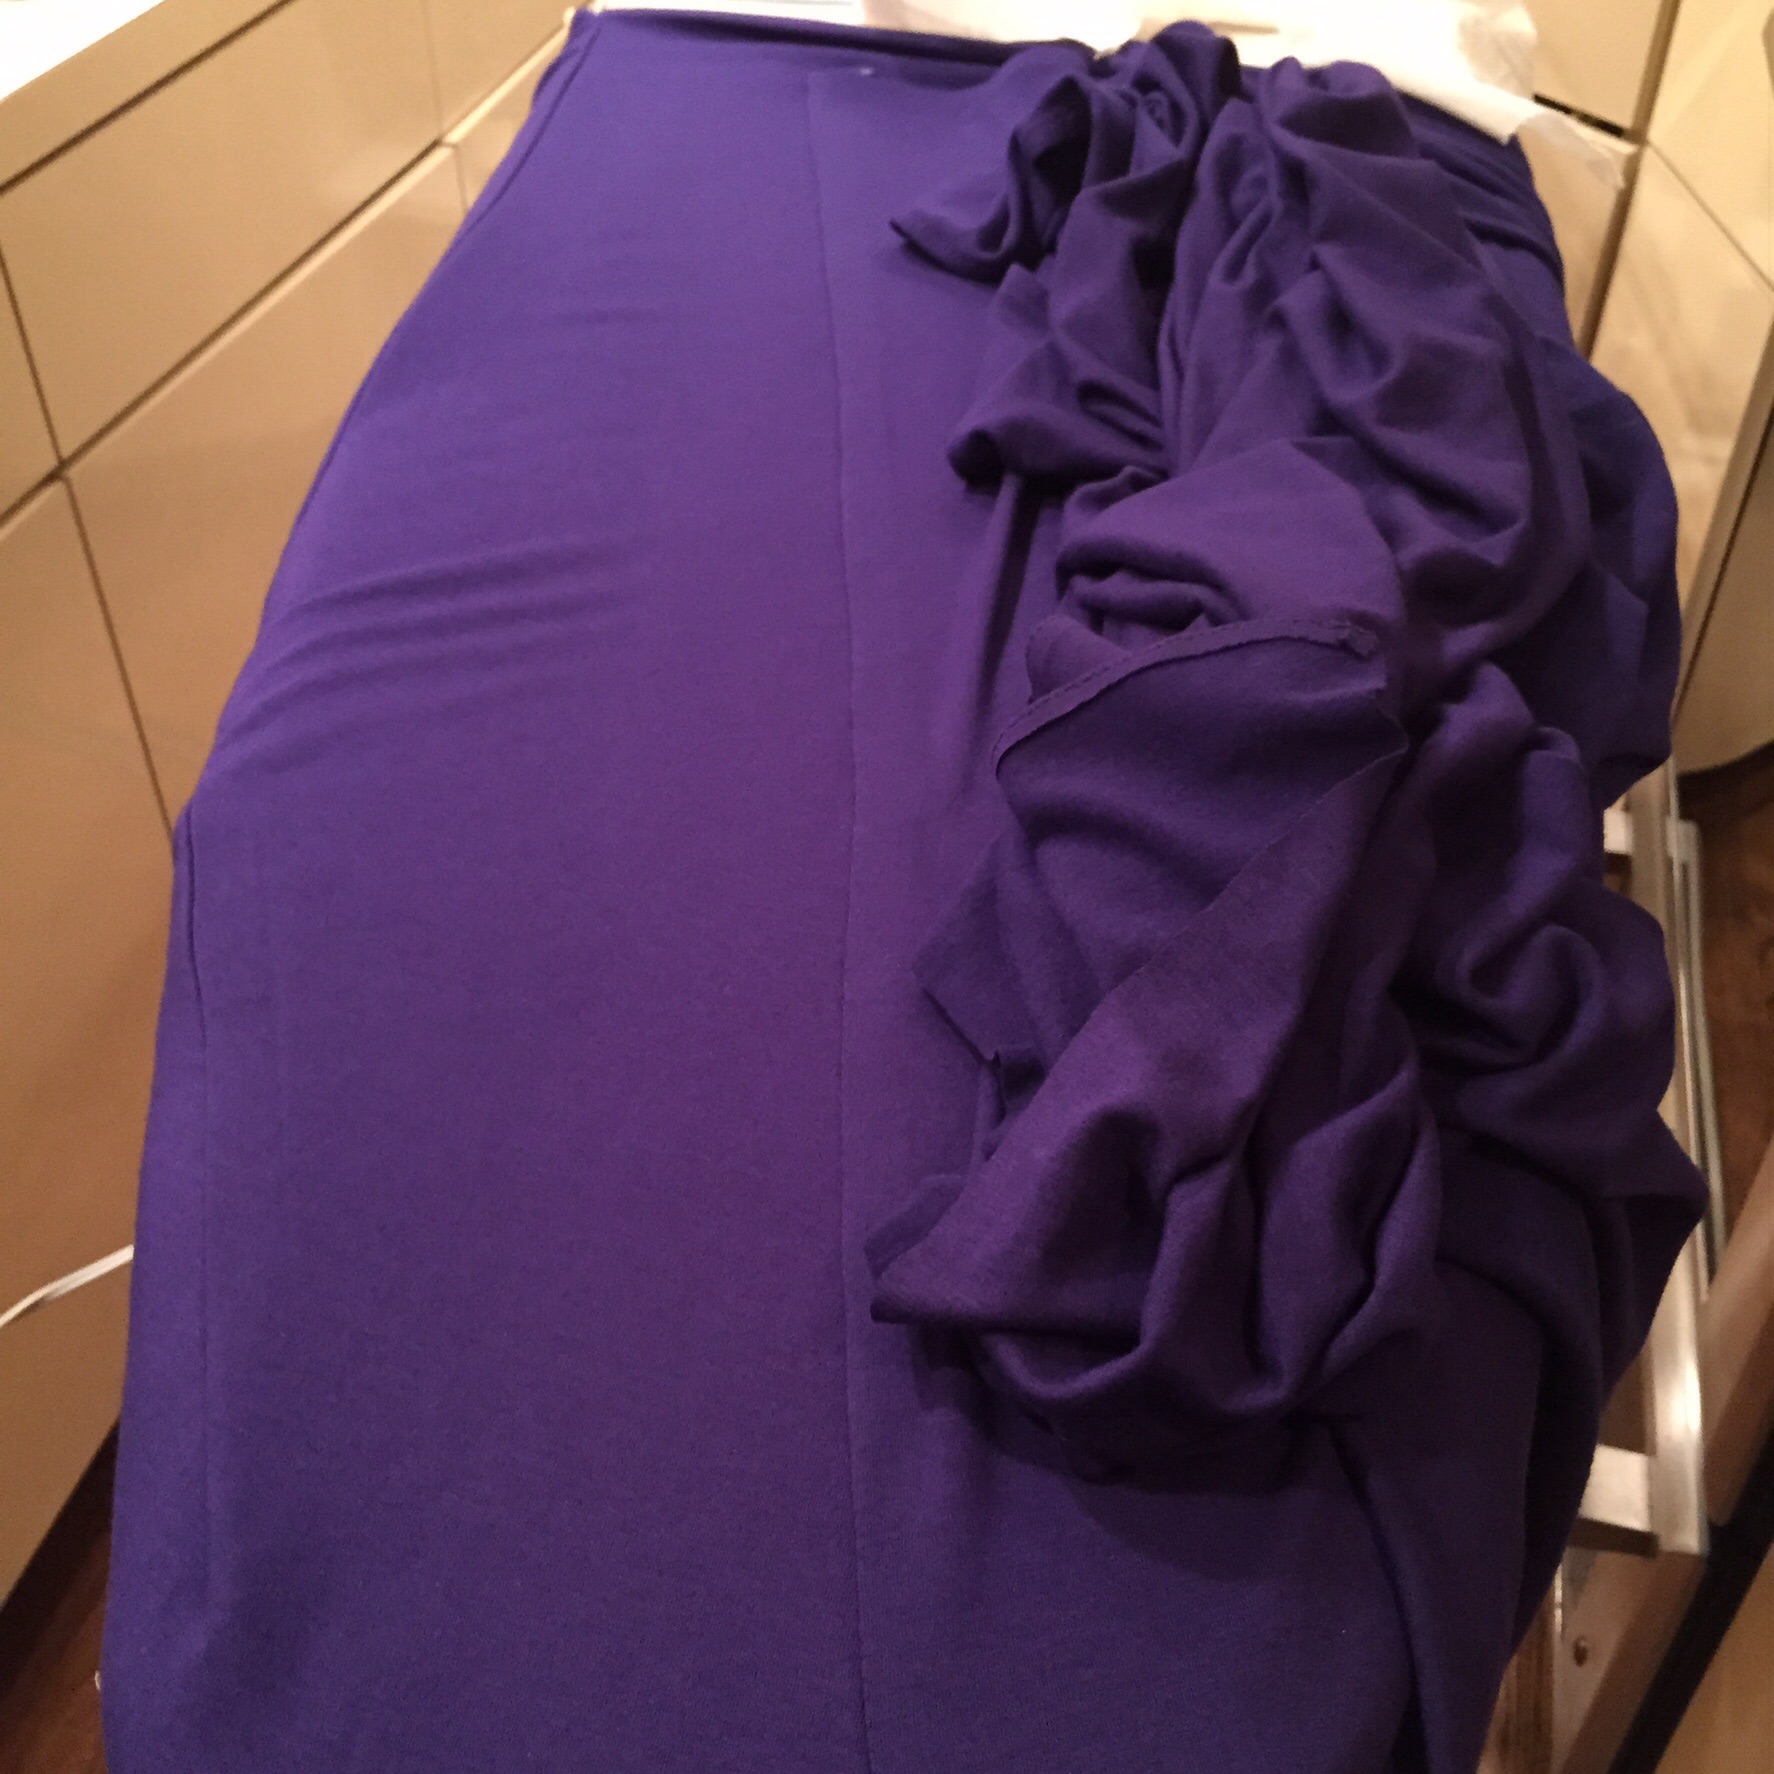
I used the Steam-a-Seam again on the long hem of the drape:

image

From there, it was easy to flip up the hem again and sew it without pressing or pinning. It avoided the wonky wrinkles you can get on a circular hem like this.

image

The great thing about using wool jersey is that even if the edges get a little lettuce-y after they’re sewn, the wool shrinks back with a light steam press, so it’s flat but stretchy.

I know I never got around to profiling Madame Gres and her innovations with jersey (because I was so pissed at her) but you can read all about it here.

Here’s one of her gowns from the same era in the 60s, made of silk jersey, in the Metropolitan Museum’s Costume Institute:

Evening dress

She hated to cut her fabric. Girl after my own heart!

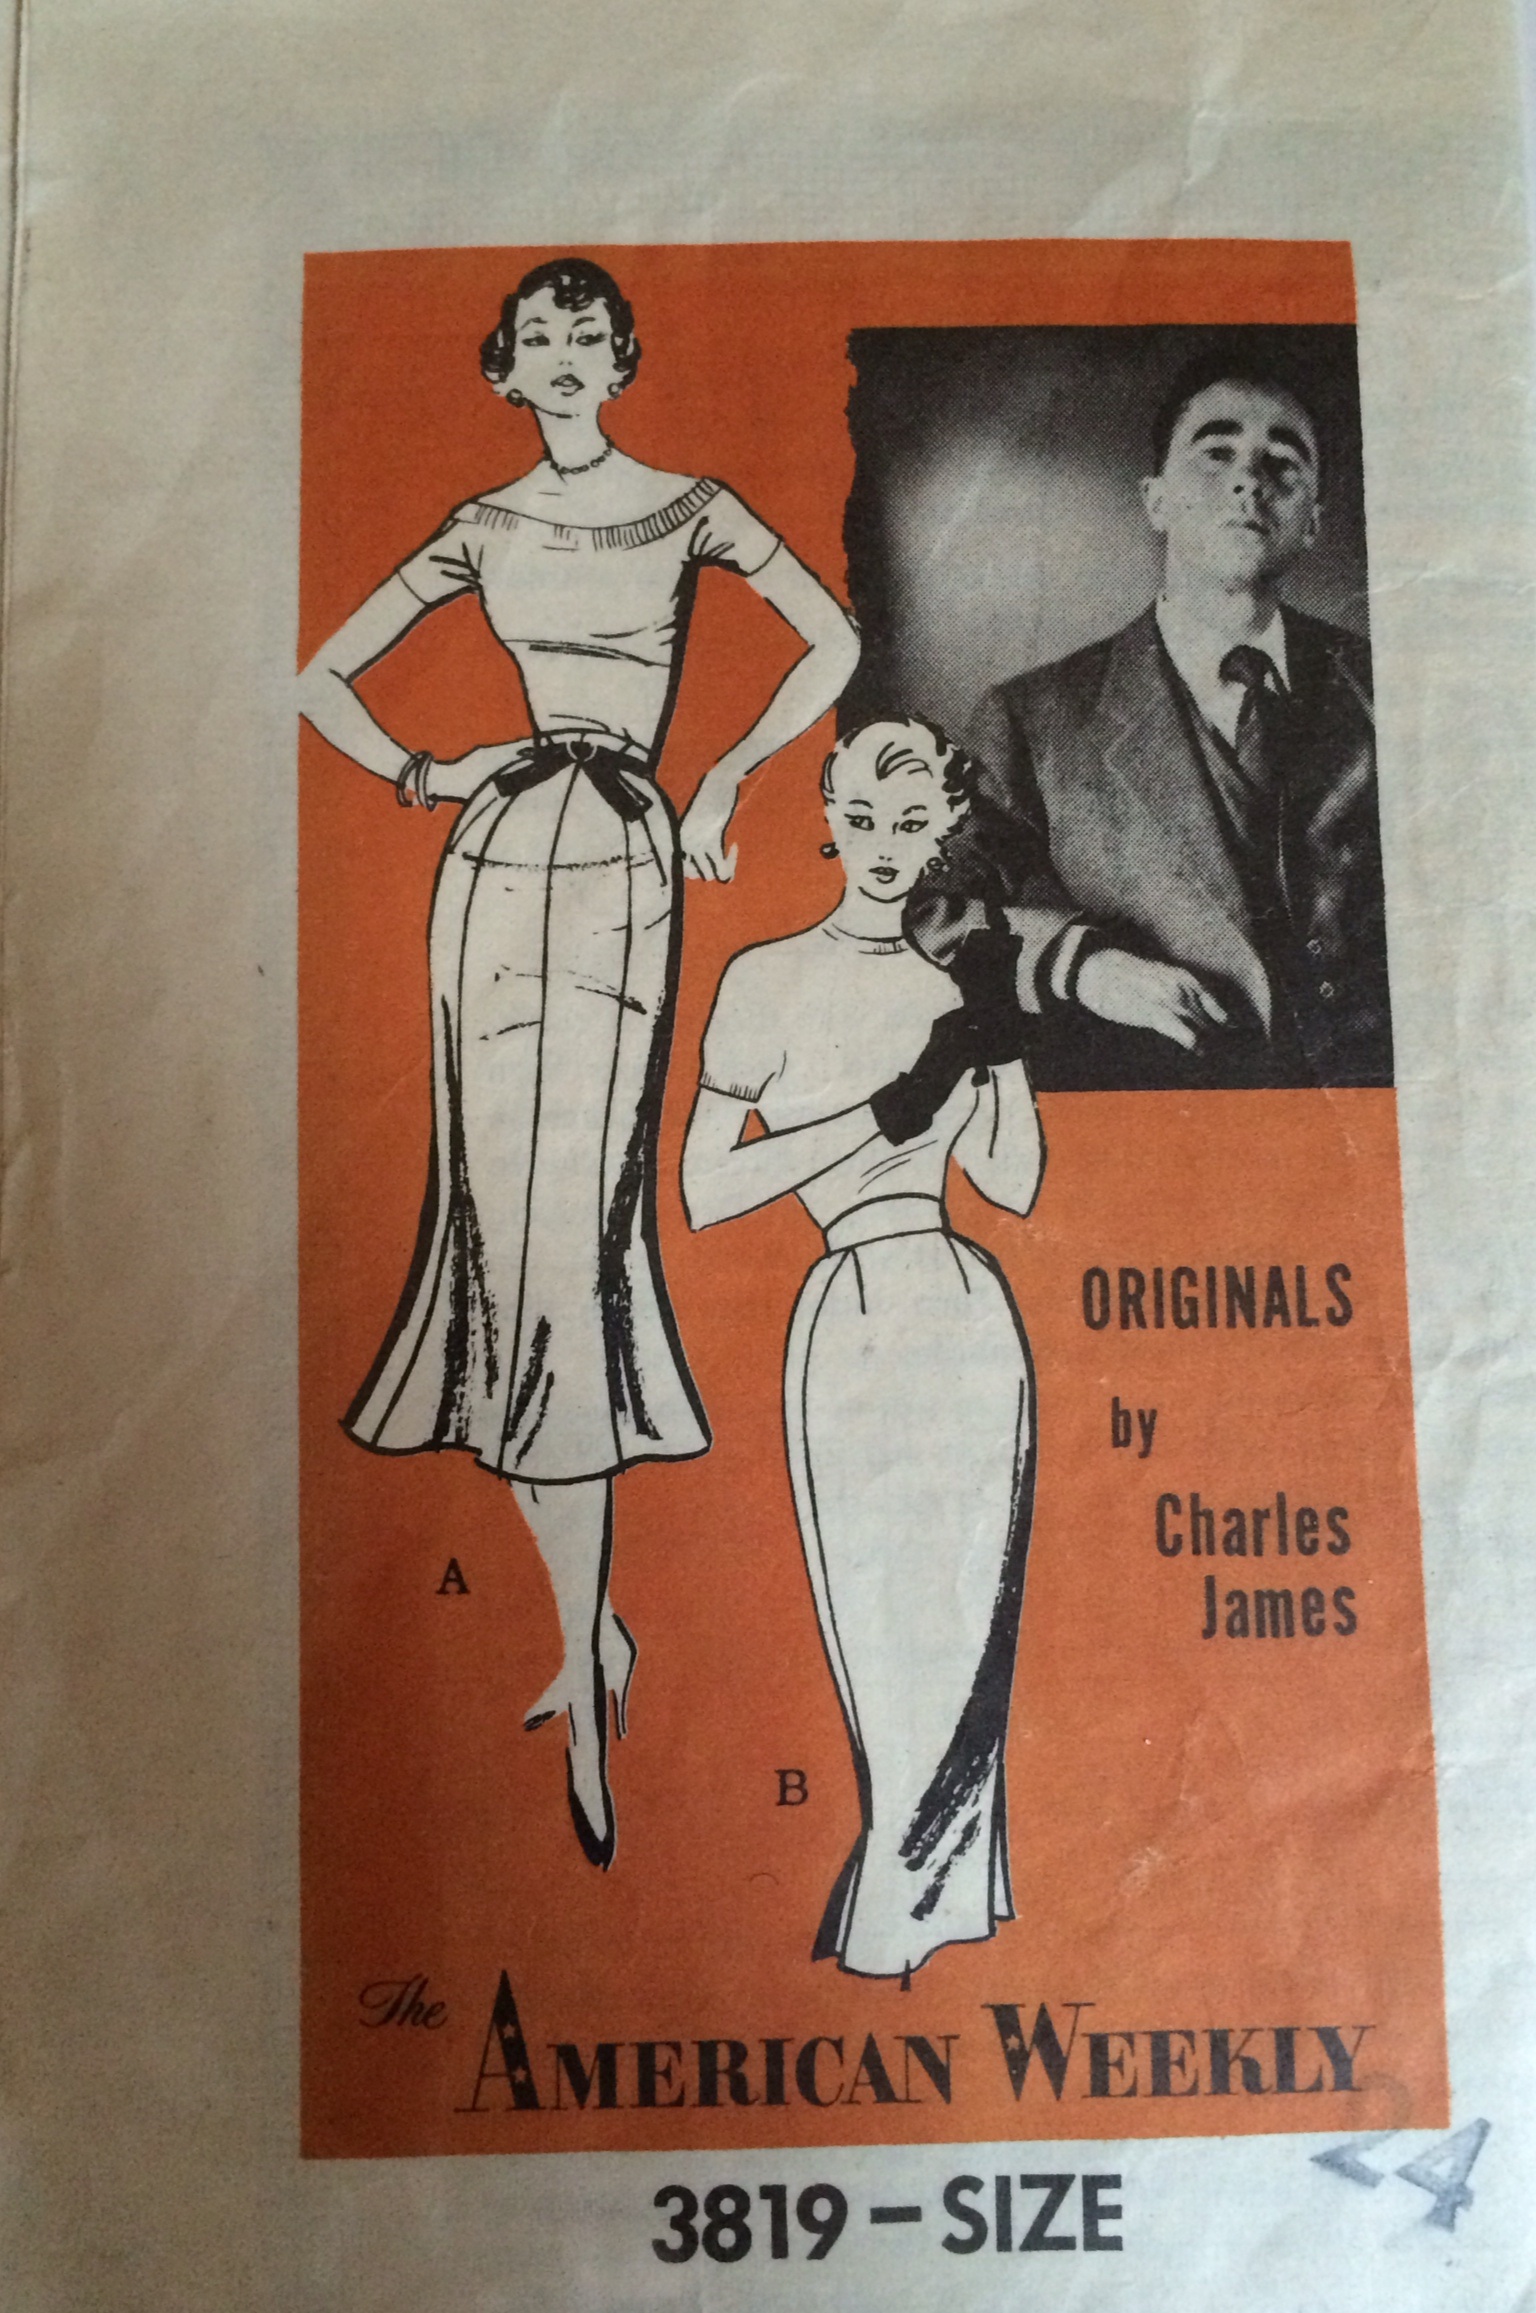
Another great article about Madame Gres, by Arlene Cooper, is in this special issue of Threads Magazine, released this summer. I wrote about it here: (“$9 Couture Course”).

image

It’s well worth downloading a back issue if you’re into vintage couture techniques. The article includes pattern drawings of several of Madame Gres’ knit wraps:

image

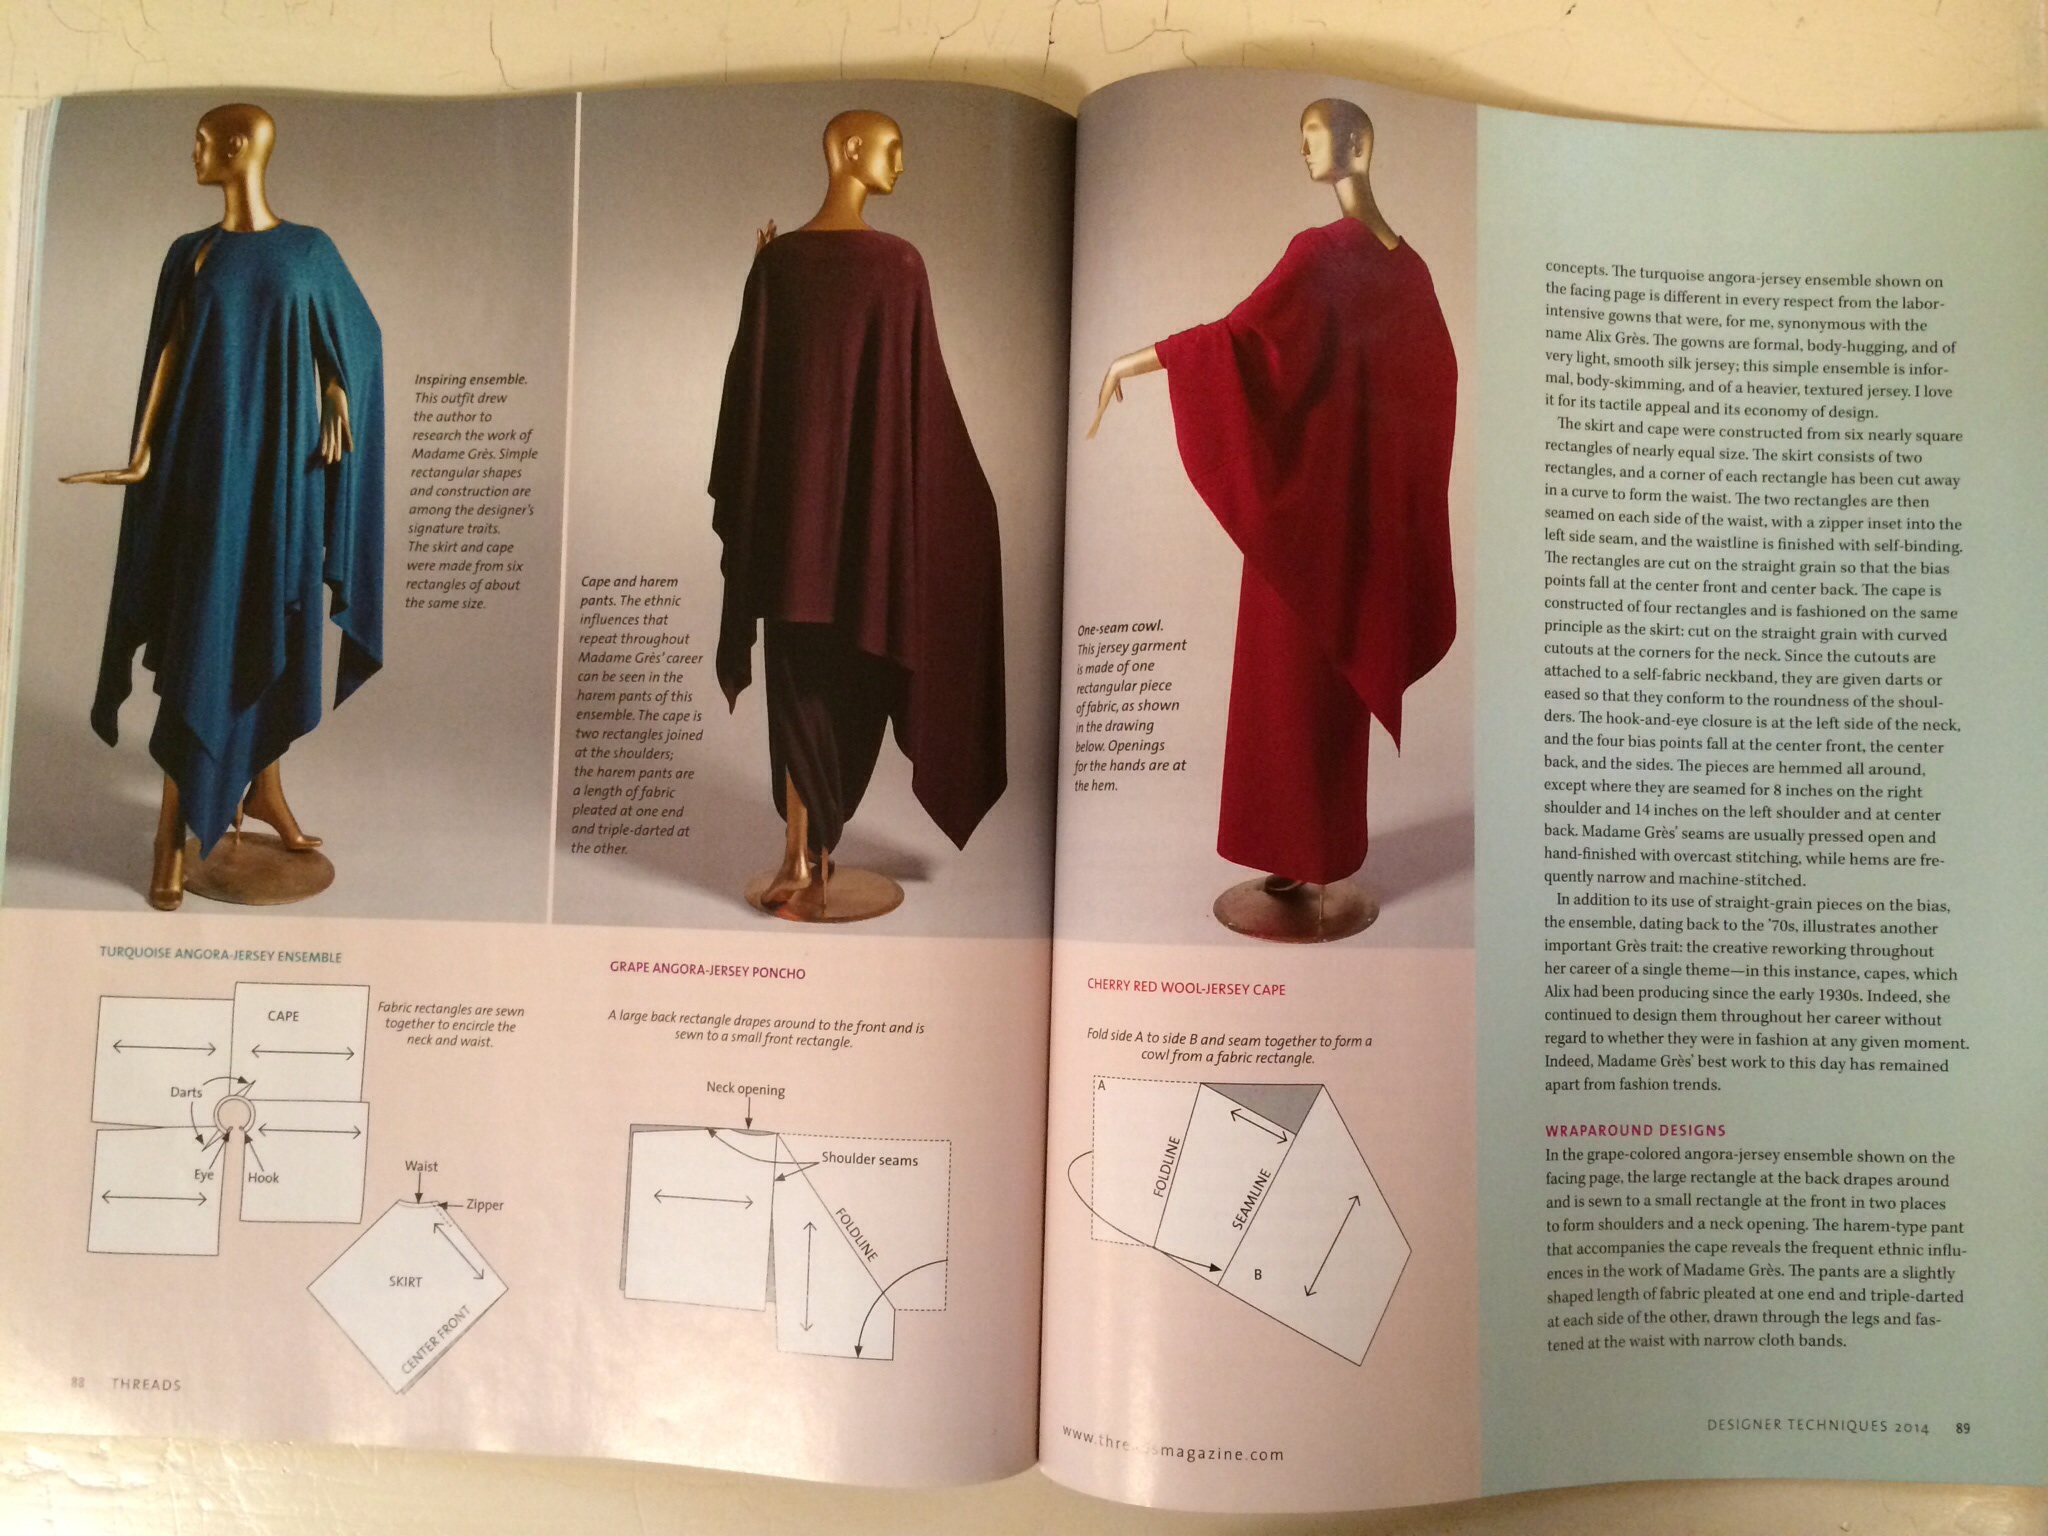
Here’s a quote from the article, which I wish I’d read more thoroughly before I started: “Her work is known for its prodigious use of luxury fabrics in a personal method that is time- and labor-intensive and virtually impossible to copy.” Hoo boy.

Back to the salt mines:

image

(I briefly kicked my son out of his room, then it was back to the kitchen for snow day #4.)

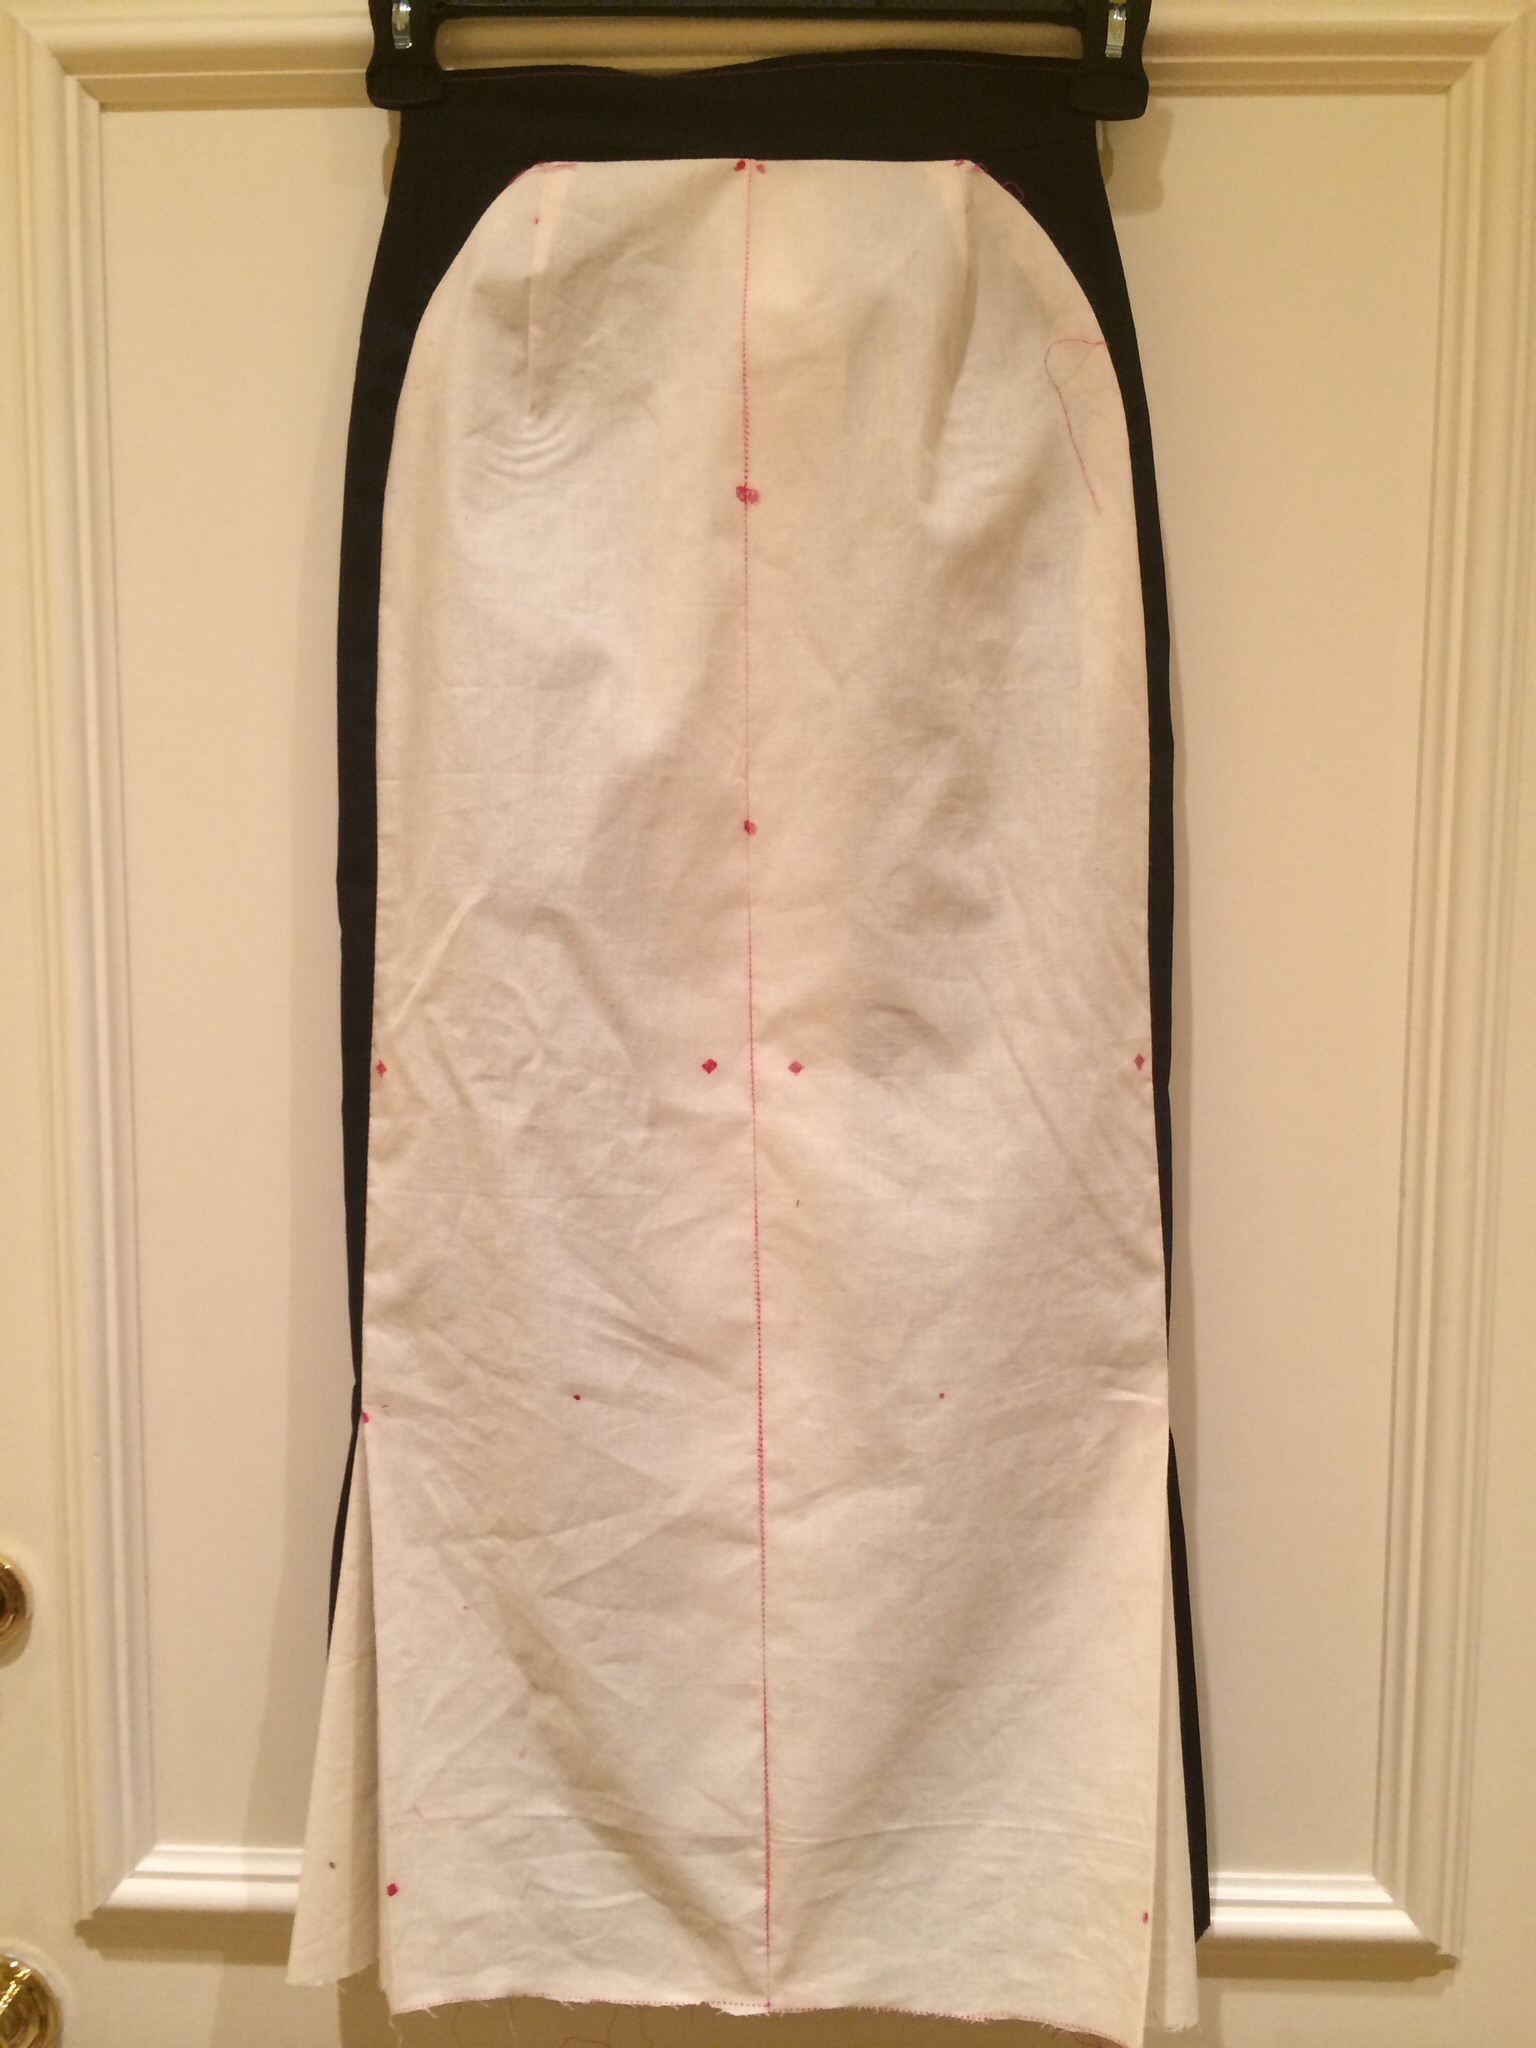
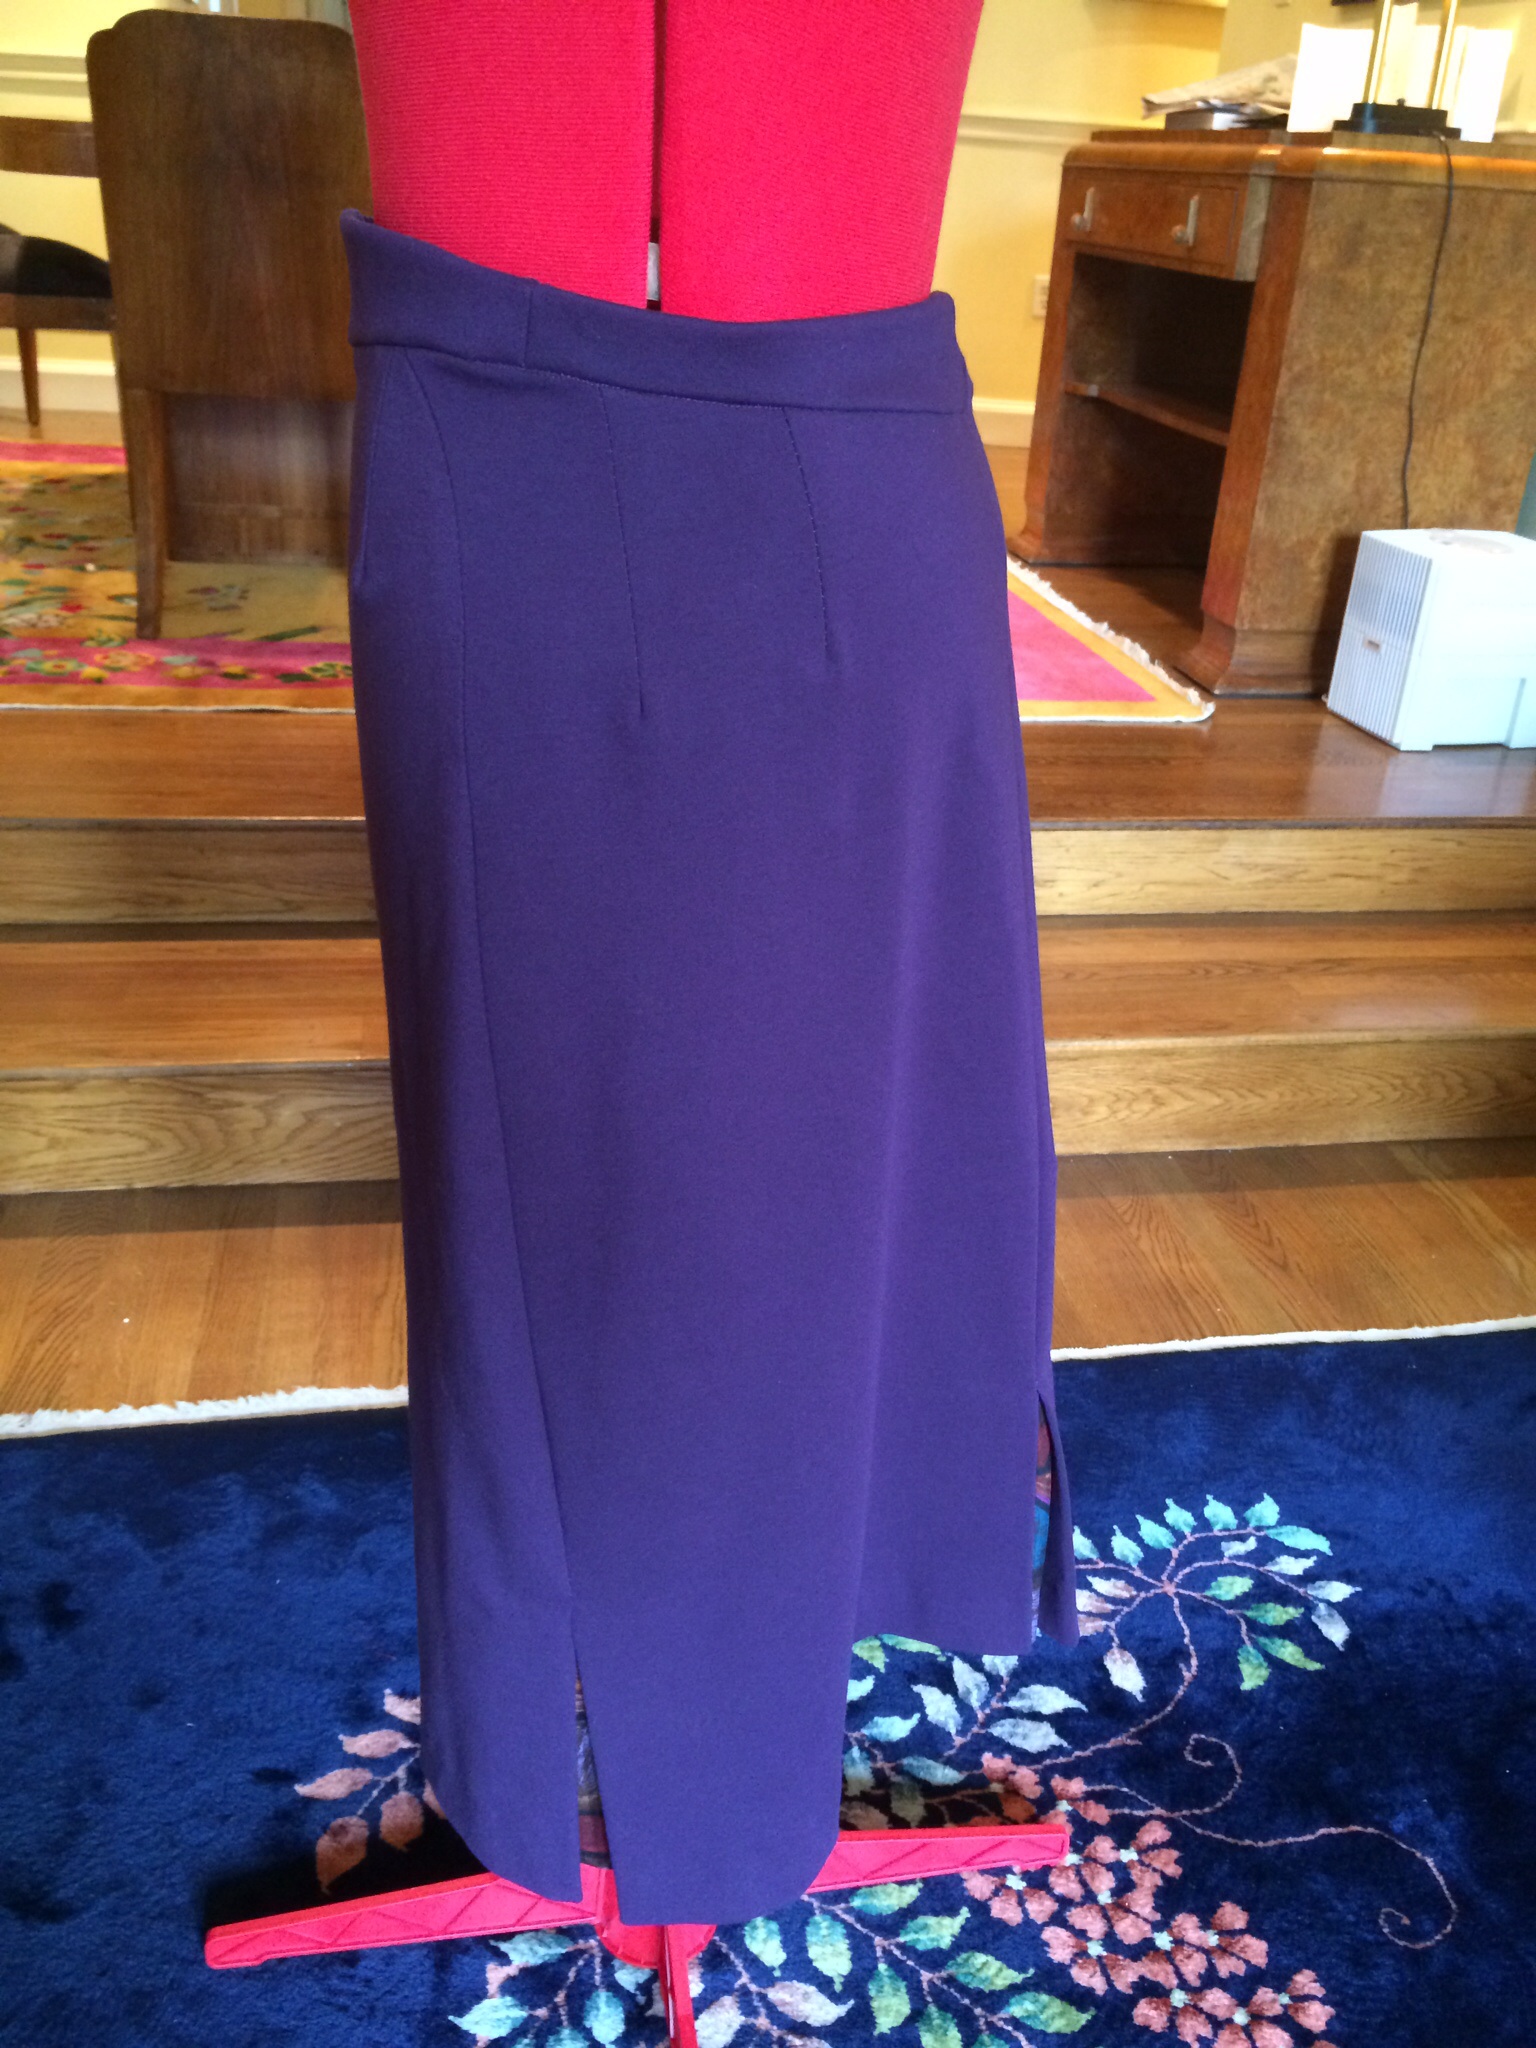
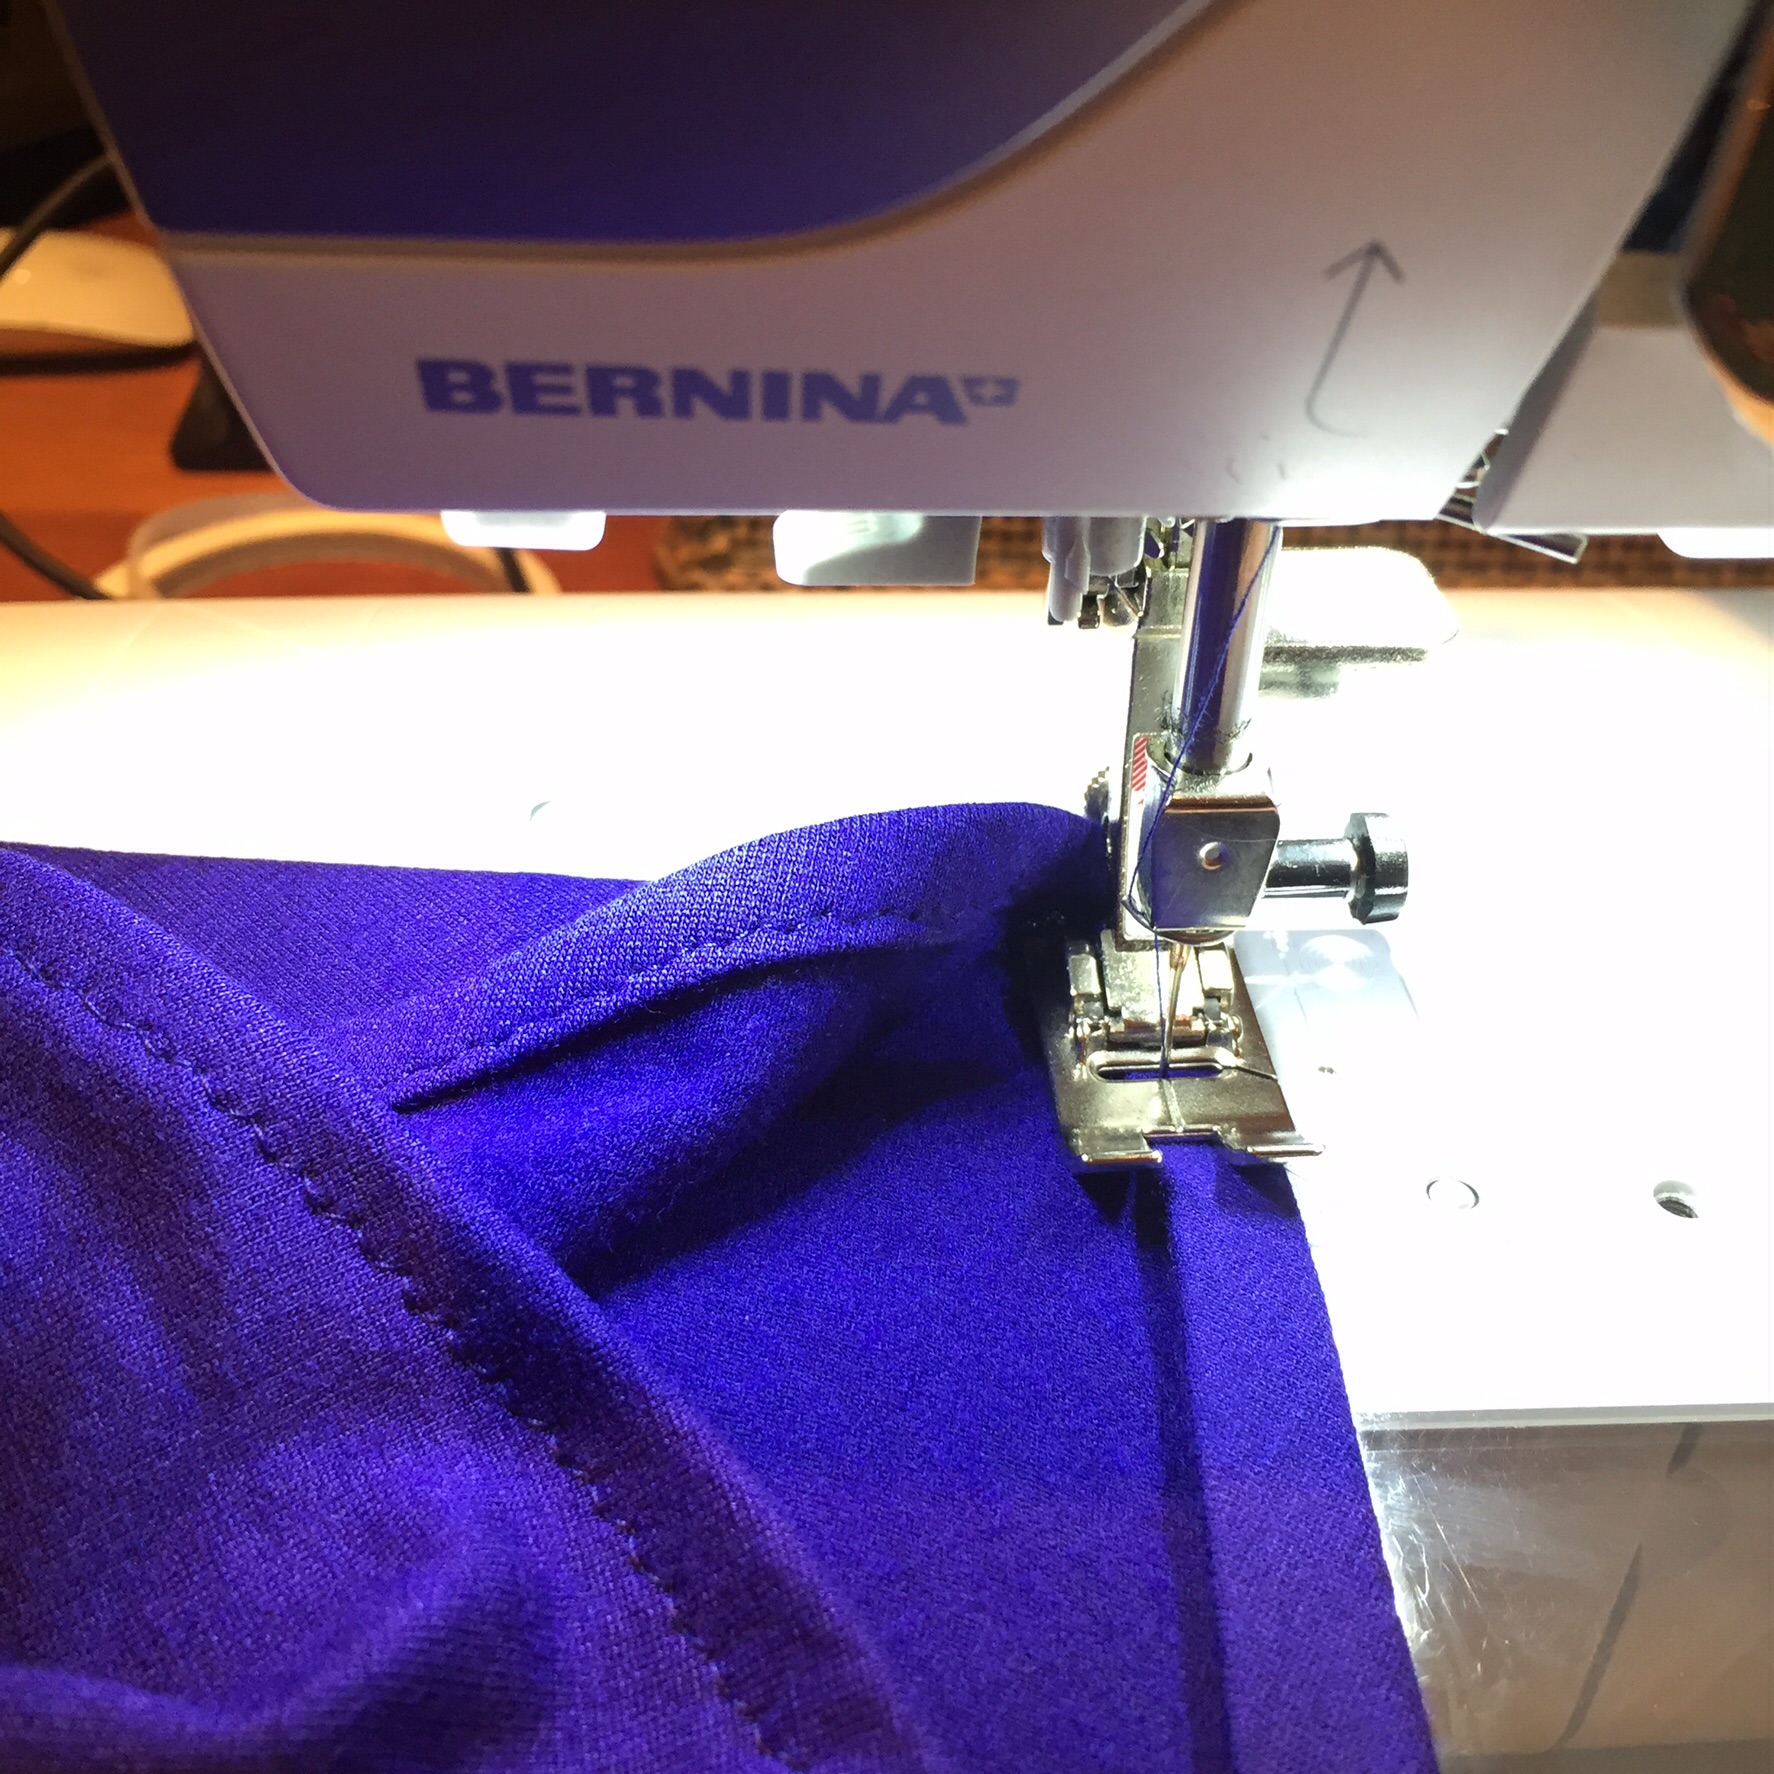
It was time to attach that giant drape. On the underdress, I had hand-basted the jersey to the power mesh underlining, and now I decided to machine-baste it with a narrow zigzag to stabilize it (that’s a big diagonal going down the front and back of the dress).

image

Then I pinned the drape on the dress.

image

Since I had elected not to put in a zipper, I knew it was going to be dicey sewing the thing on smoothly all the way down the length of the dress. I left the shoulder seams detached and headed in from the top and bottom.

image

(I was seriously nervous about that part, but Karl the Bernina 560 pulled it off!)

Ta da! I love how the angle of the drape is exactly parallel to the angle of the French dart on the left.

image

Now we were up to four feet of snow!

image

When the next storm hit:

image

it was time to do the fiddley shoulder seams. After messing around trying to line them up inside out, I decided the only way to finish them was right side out:

image

image

I used a kind of running stitch/fell stitch hybrid to try to mimic machine stitches, and went over it a couple of times to avoid wardrobe malfunctions.

Because…it would be terrible if my shoulder seams unraveled when I was standing next to George Clooney, and he said something like, “Dammit, you should have reinforced those shoulder seams, and by the way, those markings on the power mesh still look like crap!”

George Clooney

Sigh. I forgive you, George.

When it came time to do the hem, the dress was so big I had to put the drape on a chair.

image

Okay, maybe I’ve become a little too in love with Steam-a-Seam…

image

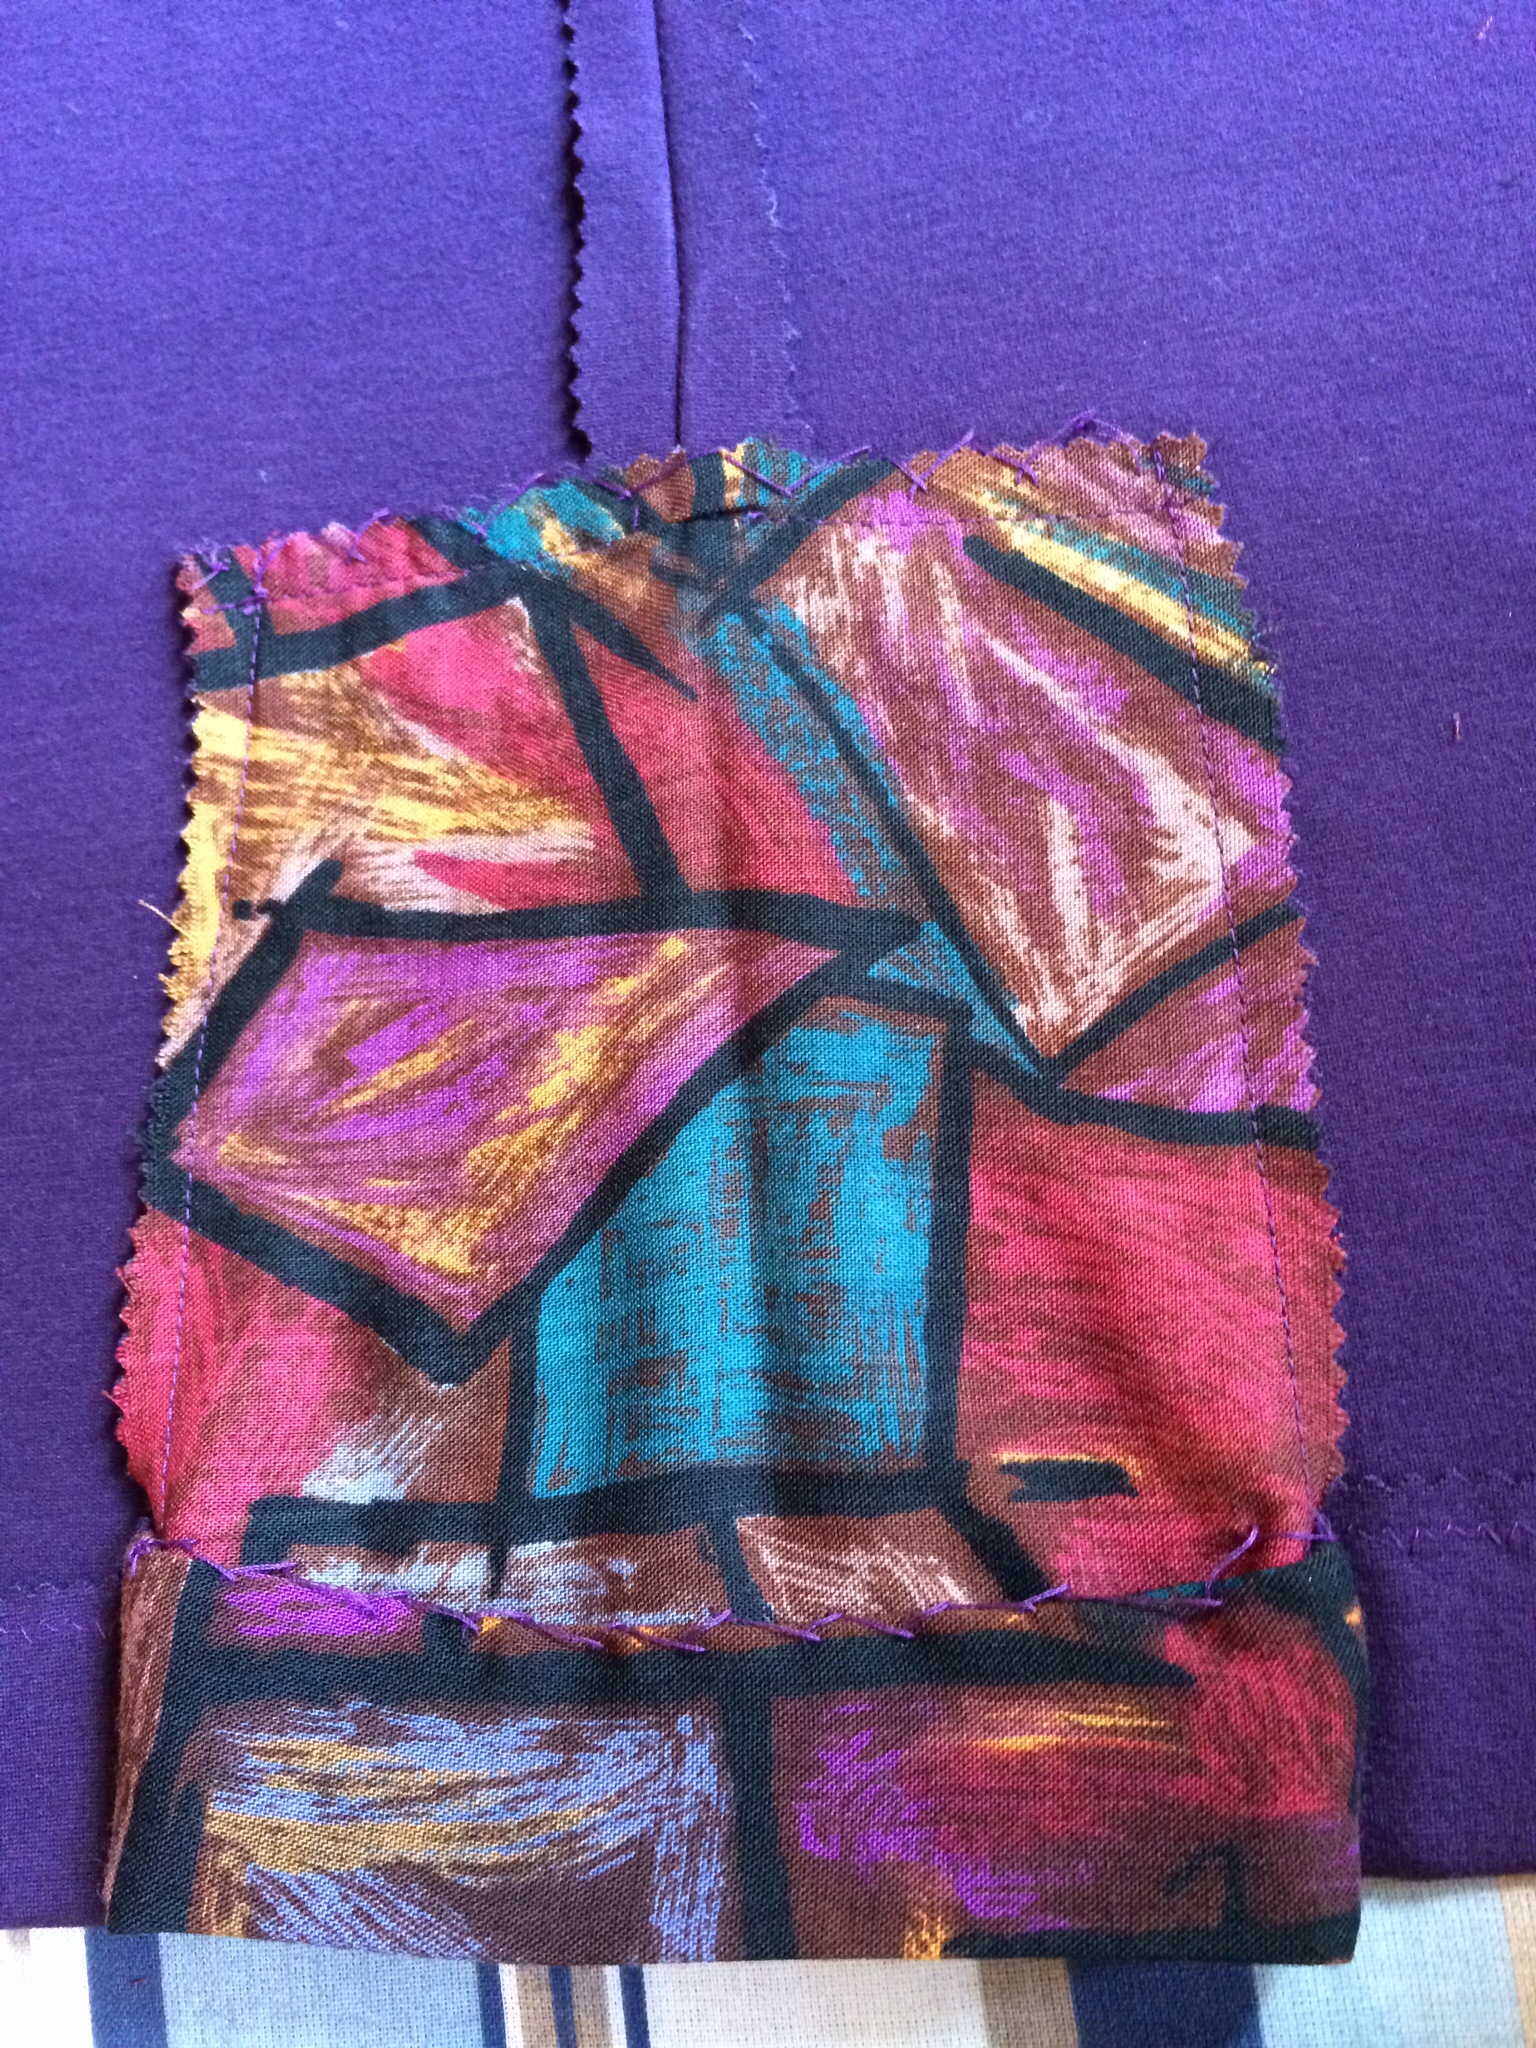
I hand-basted the jersey to the power mesh at the hemline, trimmed the power mesh, glued up the raw edge of the hem, then turned it up and hand-sewed the hem. Are we there yet?

Last stop…the snap to close the drape’s big slash under the arm:

image

Finally!

By then, we were beyond six feet (two meters) of snow! Everyone in Boston was in a horrible mood!

image

And then it was time for the trickiest part…getting my design know-it-all and tact-challenged husband to take some pictures. He’s worse than George Clooney.

Picture #1, so far so good:

image

Picture #2, well, can you tell by the look on my face that my husband had pointed out that a half sheath/half tent-dress is not flattering from all angles on a middle-aged body?

image

image

I’m not even showing you the angle on the other side…

I briefly considered trying to ratchet in the drape a little bit at the waist, but then I thought, hell to the no. It’s about the design. I set out to make a Madame Gres dress, and I’m not going to mess with it.

Though I don’t thoroughly love the dress, I do like it. And going through the process of re-creating the design has helped me have a deeper understanding of Madame Gres’ genius, which is why I’m sewing up these things.

So Madame Gres and I will see you on the red carpet, George. And now I’m enjoying the day when my husband’s in the doghouse and he knows it. He just made me an espresso.

As I was fiddling away on this irritating project, fave blogger Oonaballoona and I had this brief exchange on InstaGram:

IG Oona

So Funkytown is exactly where I’m headed next…

Halston-YSL patterns

How’s your sewing going?

(Just a reminder, for details about the machine-loan arrangement between BERNINA of America and JetSetSewing.com, please click the “Bernina Collaboration” tab. With the exception of this collaboration, Jet Set Sewing does not have advertisers or affiliates. All of those links you see are just good clean fun!)

You’re Really Tedious and Boring, Madame Gres

40

Remember how excited I was about trying out this 60s Vogue pattern by Madame Gres, made with thin wool jersey and underlined with power mesh?

Gres pattern

I made up a muslin (info in this post) and got a lot of nice feedback both here and on InstaGram. I was ready to go!

Then I took a closer look at the directions, which include things like making a hand-rolled hem, something that takes the folks sewing Hermes scarves YEARS to learn…

image

(Check out this Blogger’s post and you’ll understand why Hermes scarves cost $400.)

Not to mention a side slot zipper that had “hours of hand picking” written all over it. (Oddly, the instructions were printed on the pattern.)

image

So I started to think, boy, this is going to be a pain in the ass. An old Monty Python sketch started running through my head, where Michael Palin, an accountant who wants to be a lion tamer, tells John Cleese that his job is “tedious and boring and DULL” and, well, just have a look:

I was thinking, it will be a pain to layout, it will be a pain to cut, it will be a pain to attach the mesh, it will it will be a pain to hem and attach the six-foot drape, it will be a pain to…I was just getting anxious about the whole thing.

Meanwhile, in the next room, my 13-year-old son was complaining about a “take-home” test in American History and stressing about the War of 1812 (anyone?), the Whiskey Rebellion (anyone?), Pinkney’s Treaty (anyone? Except you, Lizzie of The Vintage Traveler, former middle-school history teacher…).

image

So I put on my “mom voice” and said, “the stress will go away when you’re done.”

Then I realized that that was what MY mom would have said, so the next day, I got out that fine wool jersey and did a layout that took up the entire length of the bedroom floor:

image

Did the alterations that I knew the pattern needed on the sides (from having fit the muslin):

image

And figured out a way to hang the big drape, so I could hem it before I put it on the dress. I didn’t think there would be a problem with the bias shifting with a knit, but I did it just in case:

image

Then the blizzard hit, so I took advantage of the snow day to cut and mark the powermesh lining, using a marker to speed things up.

image

I had already marked the wrong side of the fashion fabric with wax sheets and a tracing wheel. The interior was going to be a little messy, but I got over it.

image

I figured if George Clooney and I were somewhere out of earshot of our spouses, and suddenly he got fiesty and ripped off my dress, he would be enough of a gentleman not to say, “boy, you really should have put in some kind of lining, even though it would have made the dress more bulky, because, dammit, those magic marker lines look like crap.”

George Clooney

(I put that picture in for my friends Darcy and Christine, who don’t really sew, but read my blog anyway. Isn’t he dreamy?)

As much as I wasn’t feeling it, I hand-basted (“thread traced”) the fashion fabric to the underlining at the darts and the line where the drape will attach. I’ve just found it’s so much easier to manipulate darts with underlining if you take the time to do this:

image

I wasn’t about to thread trace all the way around, so I attached the underlining to the fashion fabric around the edges by using a long, narrow zigzag about 3/8 inch outside of the seamline.

image

My Bernina 560, Karl, was so happy to be back in action, his walking foot was jumping up and down! The walking foot kept the layers together and even. (For details about how Bernina is loaning a B560 and walking foot to assist with these vintage projects, click the “Bernina Collaboration” tab.)

image

Yeah, it was still snowing!

When I went to pin the darts, the thread tracing made it so much easier to line everything up, it was worth the effort.

image

I basted the whole underdress together, and saw that the fit wasn’t too bad.

image

I also saw that it was time to get back to the gym. But since the dress was stretchy, I knew I could jettison putting in a zipper, which made me delirious with joy.

Then the next day, when the whole town was digging out:

image

I decided to use light knit fusible on the neck facings, to speed things up. I turned up the bottom edge by 1/4 inch and edgestitched it.

image

So I’m getting there, but I still have a way to go:

image

The snow’s not going anywhere anytime soon, either!

image

Anyone else’s sewing stuck in the snow? Keep shoveling!

Charles James skirt details and a walk through Boston’s Back Bay

25

Well, now that I’ve recovered from what was apparently a hot flash brought on by the gowns at the Charles James exhibit, I’d like to share the details of making this skirt:

image

from this Charles James pattern,

Charles James sewing pattern

which I had to pull off in three days. Cue the stunt sewing music!
I’ve talked about making the muslin for the skirt in this post  and how versions of this skirt are in the MetMuseum.org online collection. Here’s how the completed muslin looked:

image

Knowing that I had three sewing days to complete a wearable version (interrupted by a weekend of grandchildren invading our home like Cossacks), and that the skirt had to be widened by a whopping eight inches, I had to choose a forgiving fabric that didn’t need lining.
Tucked in my stash were two yards of high-quality stable knit ponte in aubergine (from Eileen Fisher) that fit the bill. Since I spent my 20s sewing Diane Von Furstenberg knock-offs out of a slippery knit called “Quiana” on a straight-stitch Singer 15-91, I have no fear of knits.
I basically chopped the center front and two parts of the back of the muslin open lengthwise, stuck in swaths measuring a total of 8″ straight up and down in both, fitted it quickly and got ready for the “Hail Mary” pass. (For those of you visiting from other cultures, the “Hail Mary” is any last minute desperate play a losing sports team will use to try to win a game in the final seconds.) Rah rah rah!

image

Two yards of wide ponte should work for a pencil skirt, right? Er, not when the pattern has odd protrusions and three kick pleats. So I quickly took up the pattern by about 4″ in length and as you can see, it just squeaked by.

I started constructing the skirt using a very narrow zigzag, as I wanted a stitch that was easy to pick out if I got in trouble. (No sergers around these parts). Constructing the body of the skirt went smoothly as I had already worked the bugs out on the muslin. With no time to finish the seams, I trimmed them with Kai pinking shears to give them a vintage look. As a reader once commented, super-sharp Kai shears are “all that and a cup of coffee.”

This particular ponte has excellent stretch and recovery, so I was reasonably sure that I wouldn’t need a zipper. But the waistband has an elegant yet tricky shape that arcs up in the front and dips down toward the back, which is critical to the design. I was stumped as to how I could reinforce it enough to hold the shape while having it be stretchy enough to get over my head.
Friends, this is the kind of thing that keeps me up nights.

Cue the cute grandchildren!

image

Whew, that was exhausting.

When time came to make the waistband, I rooted through my bag ‘o interfacing looking for that knit fusible I thought I might have (desperate times call for desperate measures), and spotted a yard of corset mesh stashed away. Corset mesh is like bathing suit liner meets Spanx on steroids. It’s constructed like mesh, so it’s breathable, but it’s stiff as granny’s girdle. Apparently the designer Roland Mouret used a similar fabric, power mesh, to line his famous “Galaxy” dresses of a few years ago.

image

I think I once had a notion to knock off a Galaxy dress using Vogue pattern 8280,

image

so I think I ordered both power mesh and corset mesh (which is stiffer, and I need all the help I can get), and that’s how the stuff got buried in my stash. You can find here: (Corset mesh from EmmaOneSock.com), and they have power mesh as well.

I carefully cut the corset mesh and sewed it into the exterior pieces of the waistband. Then I drew the curved seamline of the waistband onto the pieces and, barely breathing, sewed the exterior pieces to the lining along the curve, which starts down, arcs up, gets flat, and arcs back down again.

image

I attached the waistband front piece to the back piece, anxiously lining up the seamlines.

imageimage
I trimmed the corset mesh and seams, then got the waistband aligned and sewed onto the body of the skirt.

image

I flipped the whole thing over, pressed the lining inside, and lacking time to hand-sew the lining down, took a deep breath and “stitched in the ditch” (top-stitched right on the seamline) where the waistband met the skirt body.

imageimage

Goalllll!
That corset mesh holds the waistband up and holds me in, and now I want to put it in everything I own.

There are three kick pleats (two on the side and one in the back) and rather than lining them with the ponte, I decided to use a vintage wool challis from the 50s that I bought in the third floor vintage fabric room at International Silk and Woolens in Los Angeles. I’m using the rest of the fabric to make a top to go with the skirt. I’m busting so much of my stash this month!

Following the original pattern directions from the 50s, I folded back the “pleat” part of the main skirt pieces and attached the lining rectangle to the two sides. Then I catch-stitched the whole thing to the skirt itself at the top.

image

Phew, just enough time to give the skirt a blind hem and pack for New York! And you know the rest.

“And what about Me-Made-May?” I’m sure you didn’t ask…
I’m not participating officially, because my projects come along so slowly that most days I’d be running around in a Chanel jacket and my underwear if I had to wear my “makes” for a month. But spring has bust out so beautifully I thought I’d share some photos from around the neighborhood in Boston. Most were taken one morning after I met a friend for coffee on Newbury Street, wearing a version of the crushed boatneck frankenpattern top I wrote about here (when I also attempted to knock off a matching Chanel 2.55 bag).

imageChanel 2.55 style bag

image
This is the long “mall” of walkways, statues and trees that goes between the two sides of my street, Commonwealth Ave., for about a mile. This part of town is called the Back Bay, because the bay it was built over was filled in and developed in the mid-1800s. A number of the wealthy Bostonians who moved in had been on what was called “The Grand Tour” of Europe, so the area was developed to look like France.

image image image
At the beginning of Commonwealth Ave. is Boston’s famous park “The Public Garden” which is always well-kept and beautiful, but particularly in spring.

image
In the warmer months, the famous Swan Boats are pedaled like bicycles around the pond, just as they were in the much-loved 1940s children’s book “Make Way for Ducklings.” If you walk through the Public Garden on a warm Saturday, you often see two or three wedding parties having their photos taken.

image
One day my son and I encountered an unusual wedding party there, where the groomsmen were hanging back cooling their heels, the bridesmaids were hovering around in a concerned tizzy, while the bride was lying prone on her back on a bench, clutching her bouquet on her chest, and bawling her eyes out in what appeared to be a full-on anxiety attack. There’s so much pressure put on brides in U.S. culture now to be skinny and be the star of the show, I figure she hadn’t eaten in weeks. I’ve often wondered what happened to that marriage.
Around the corner is Newbury St., where you can get your Chanel on. It’s fun for window-shopping or grabbing a bite.

image image image image

I like those candy-colored linens and bags in the Max Mara window. I my next life I’m going to be an Italian contessa and dress like that 24/7.

I have been celebrating “Me-Made-My” by stitching up some things to wear with the Charles James skirt, including a Claire McCardell shrug that I’ll share next time. I hope your sewing is going well, too!