Well, Edith Head and I made it to the Hollywood Costume Exhibit dinner with only minutes to spare.

(I believe that’s Faye Dunaway doing a photo bomb in back of me.)
After I finished wrangling with the difficult neckline on this #$&?! pattern, I got a comment from reader Mary Ann Kiefer about how she’d made this pattern back in the day, and her mother had had to help her with the bolero because it was so tricky. So that made me feel a little better about my struggle with the extremely brief instructions. Mary Ann, I wish your mother had been around to help me!
Once I completed construction of the exterior, I tested the fit again, and saw that my muslin fitting had been correct. Phew!

Godzilla! (Oh Gawd, you can see my bellybutton.)
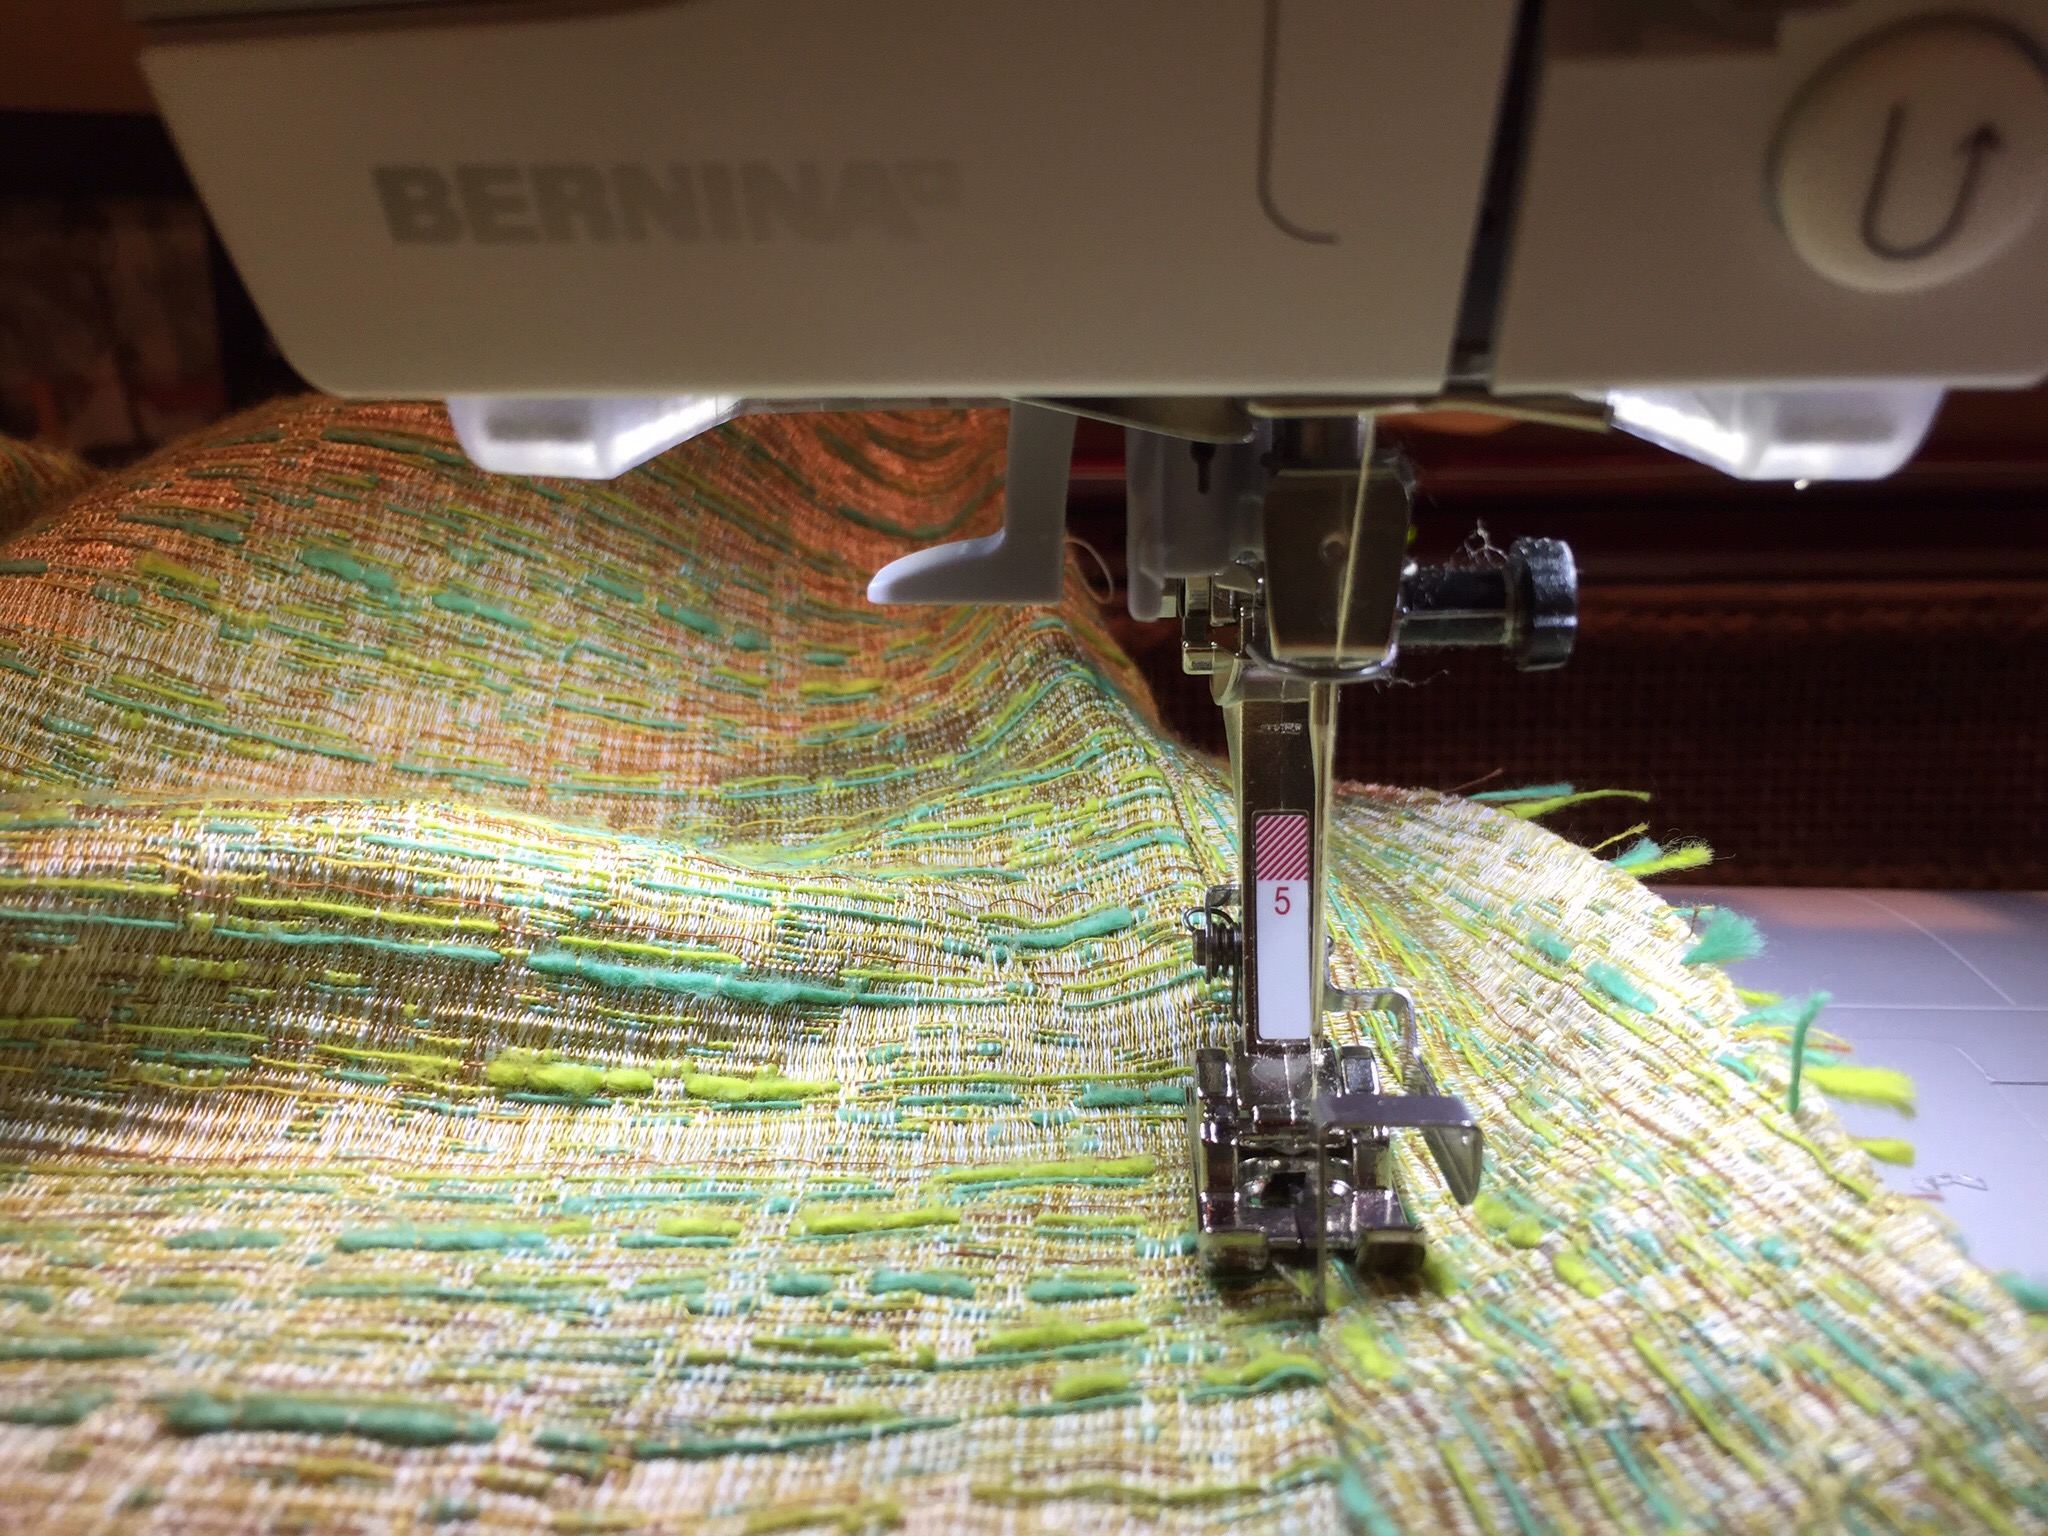
At this point it dawned on me that what I was making was not a simple bolero, but was actually a backwards lined jacket. So I had to get moving!
There were several points that had to be turned on the jacket, so I used a technique I think I read about on the Sew Maris blog, which is full of handy tips. Once you’ve sewn the corner, you clip it, then put a needle and thread through the inside of the point, pull the thread through for a couple of inches, and put the needle back in again.
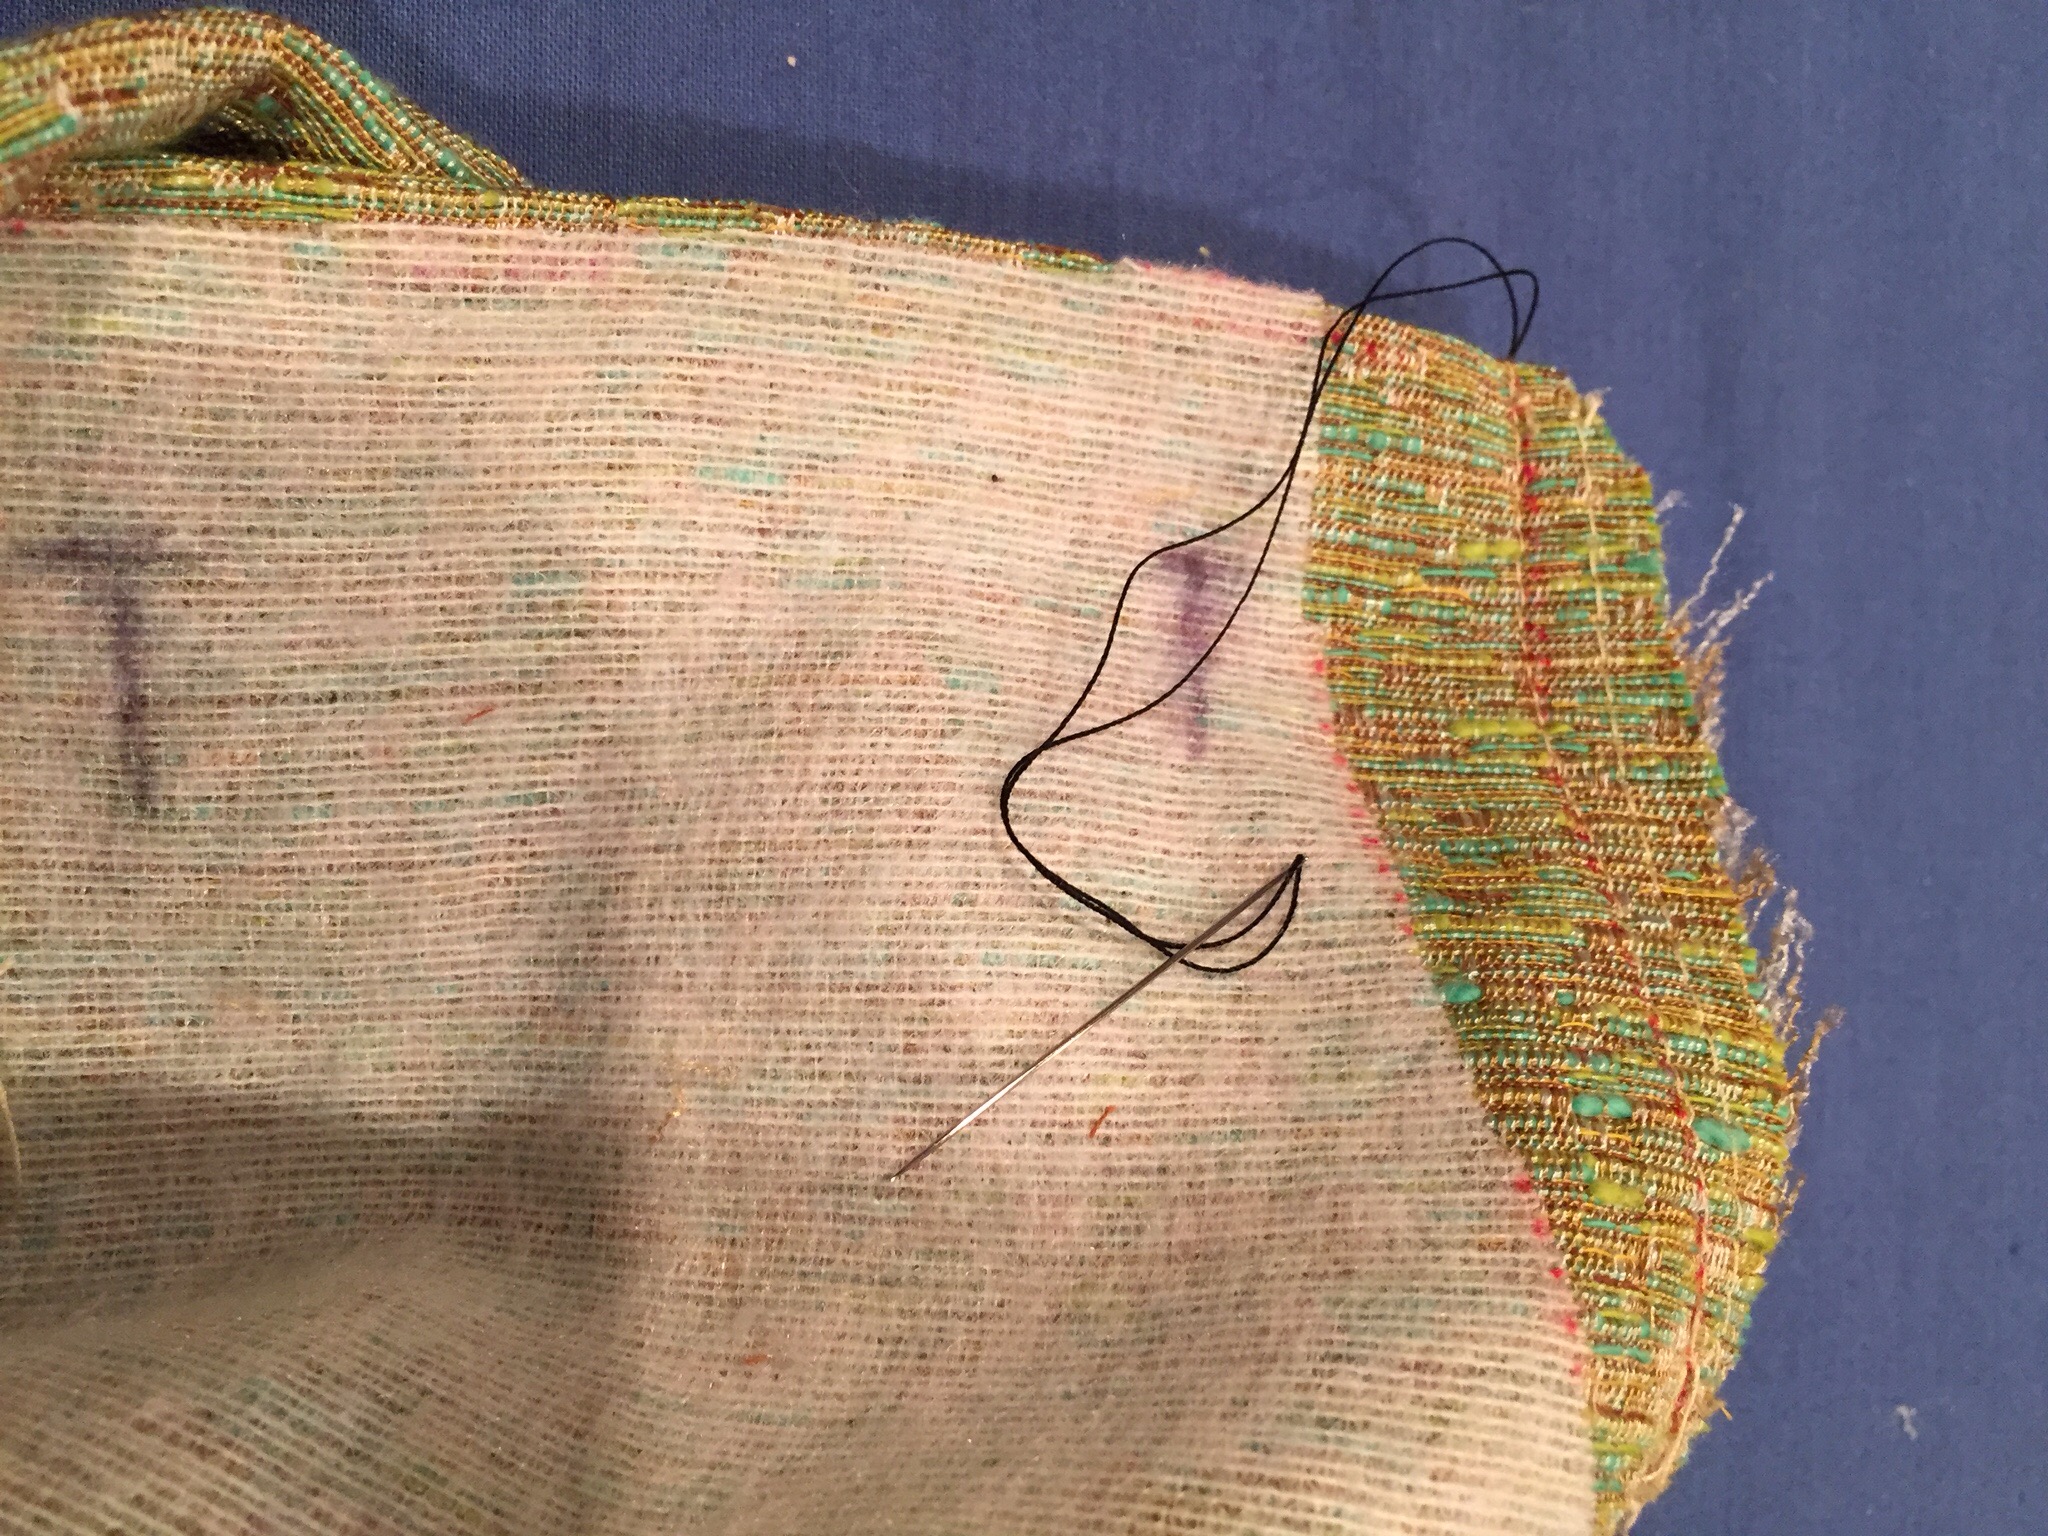
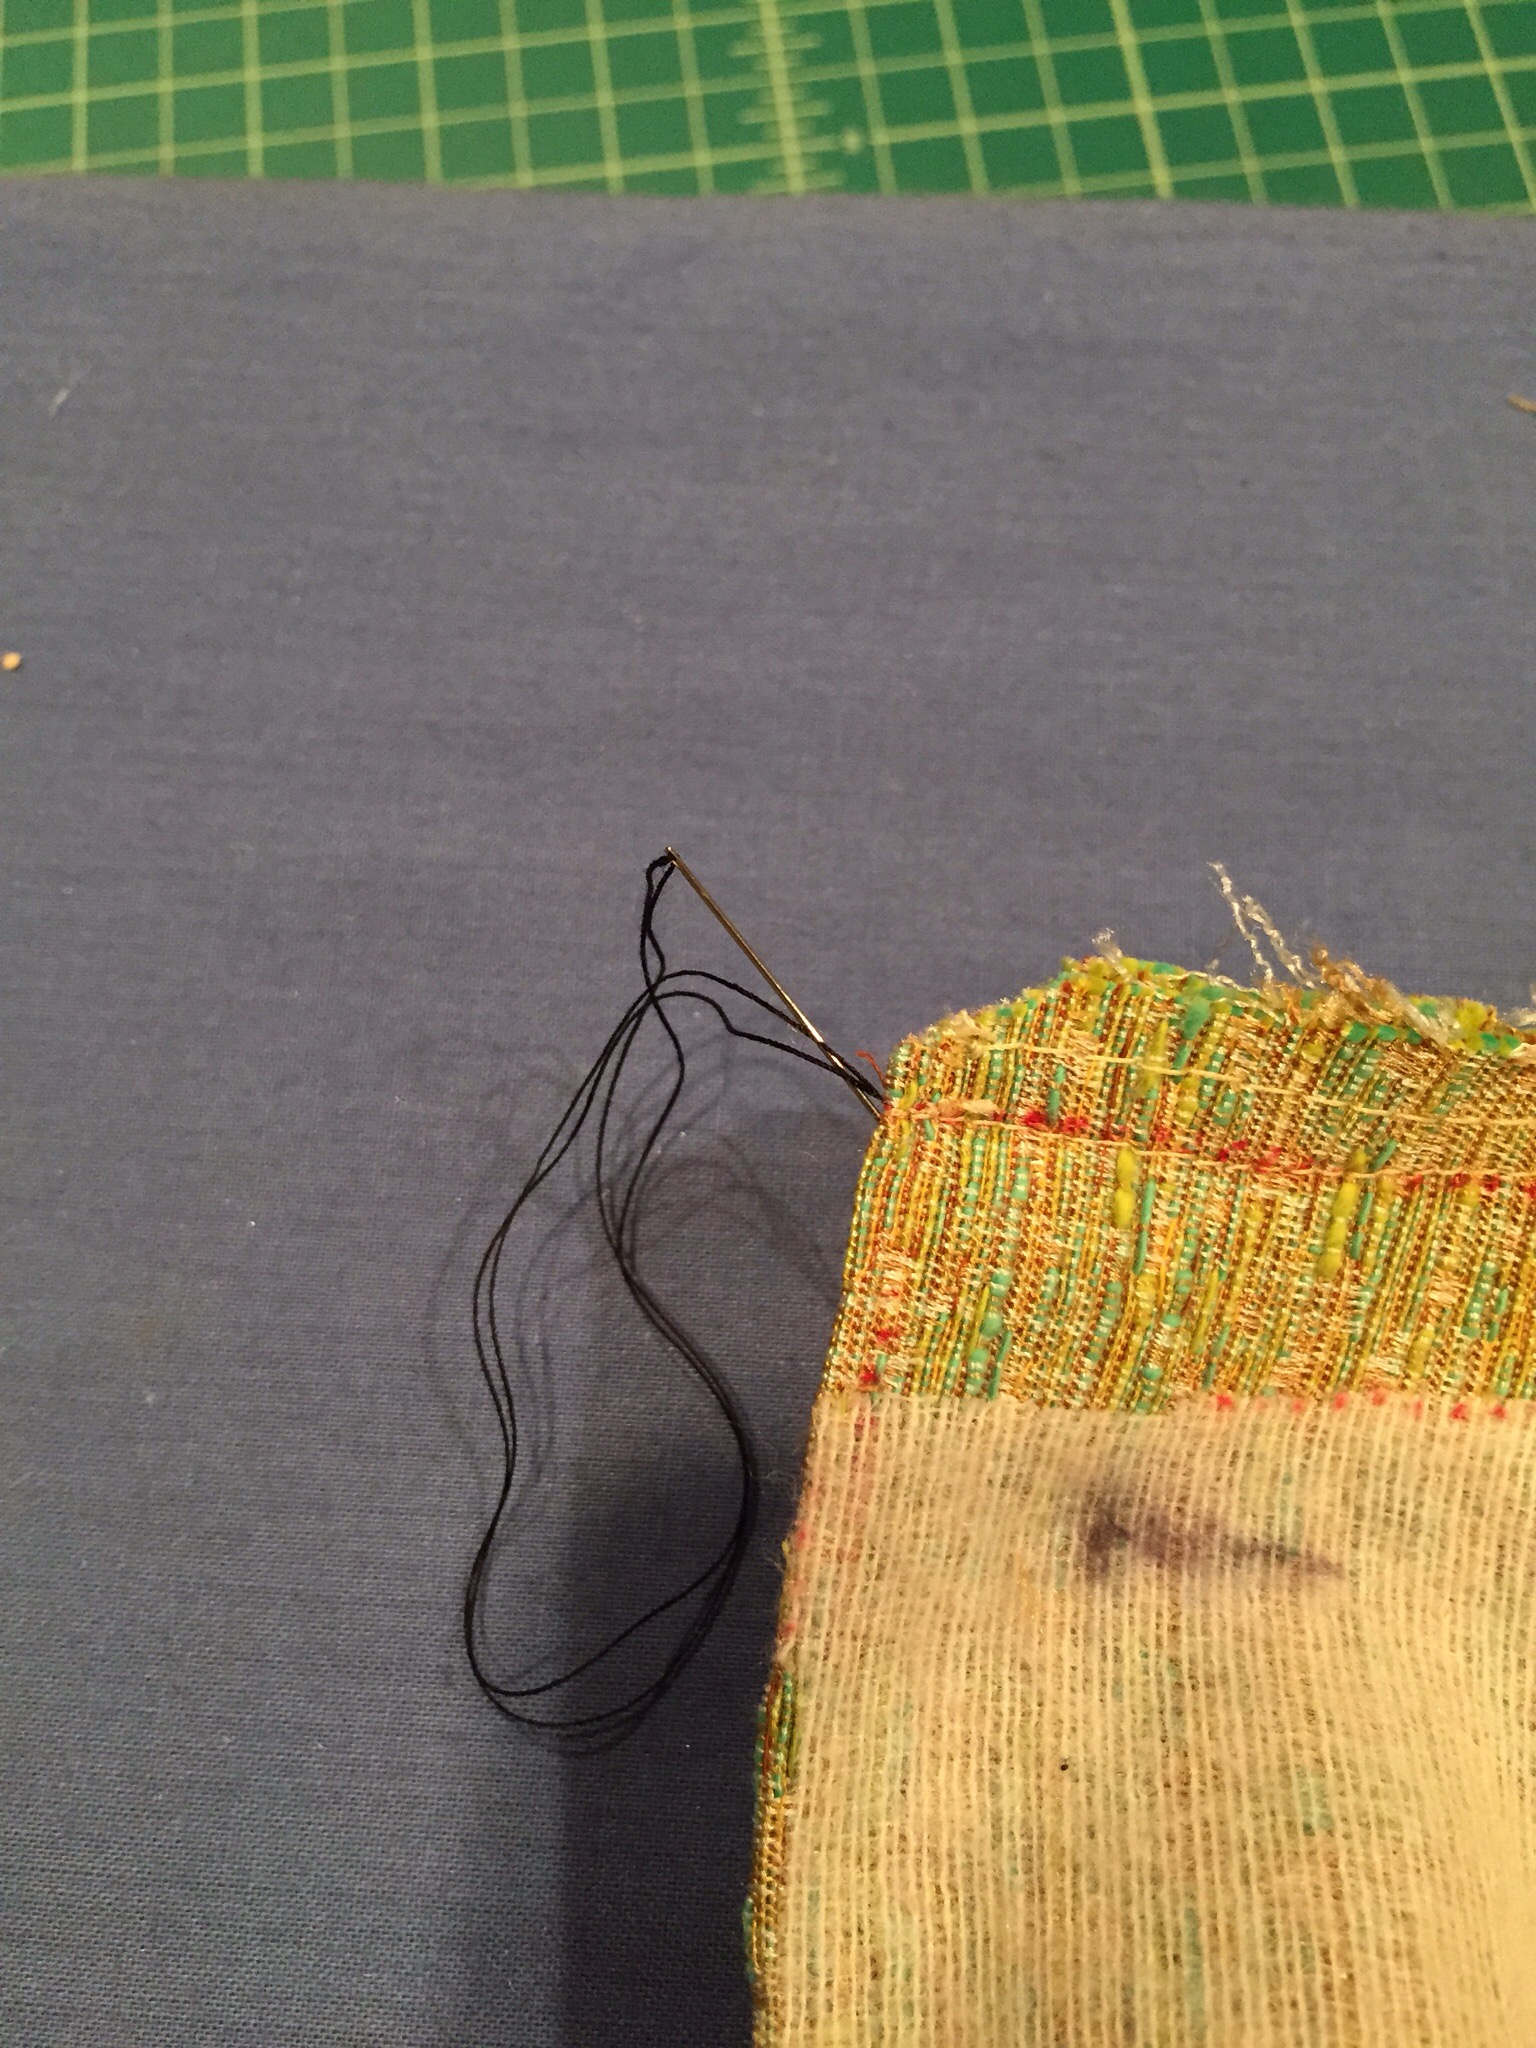 Then you take both ends of the thread from the inside, pull them at the same time, and the point comes popping out!
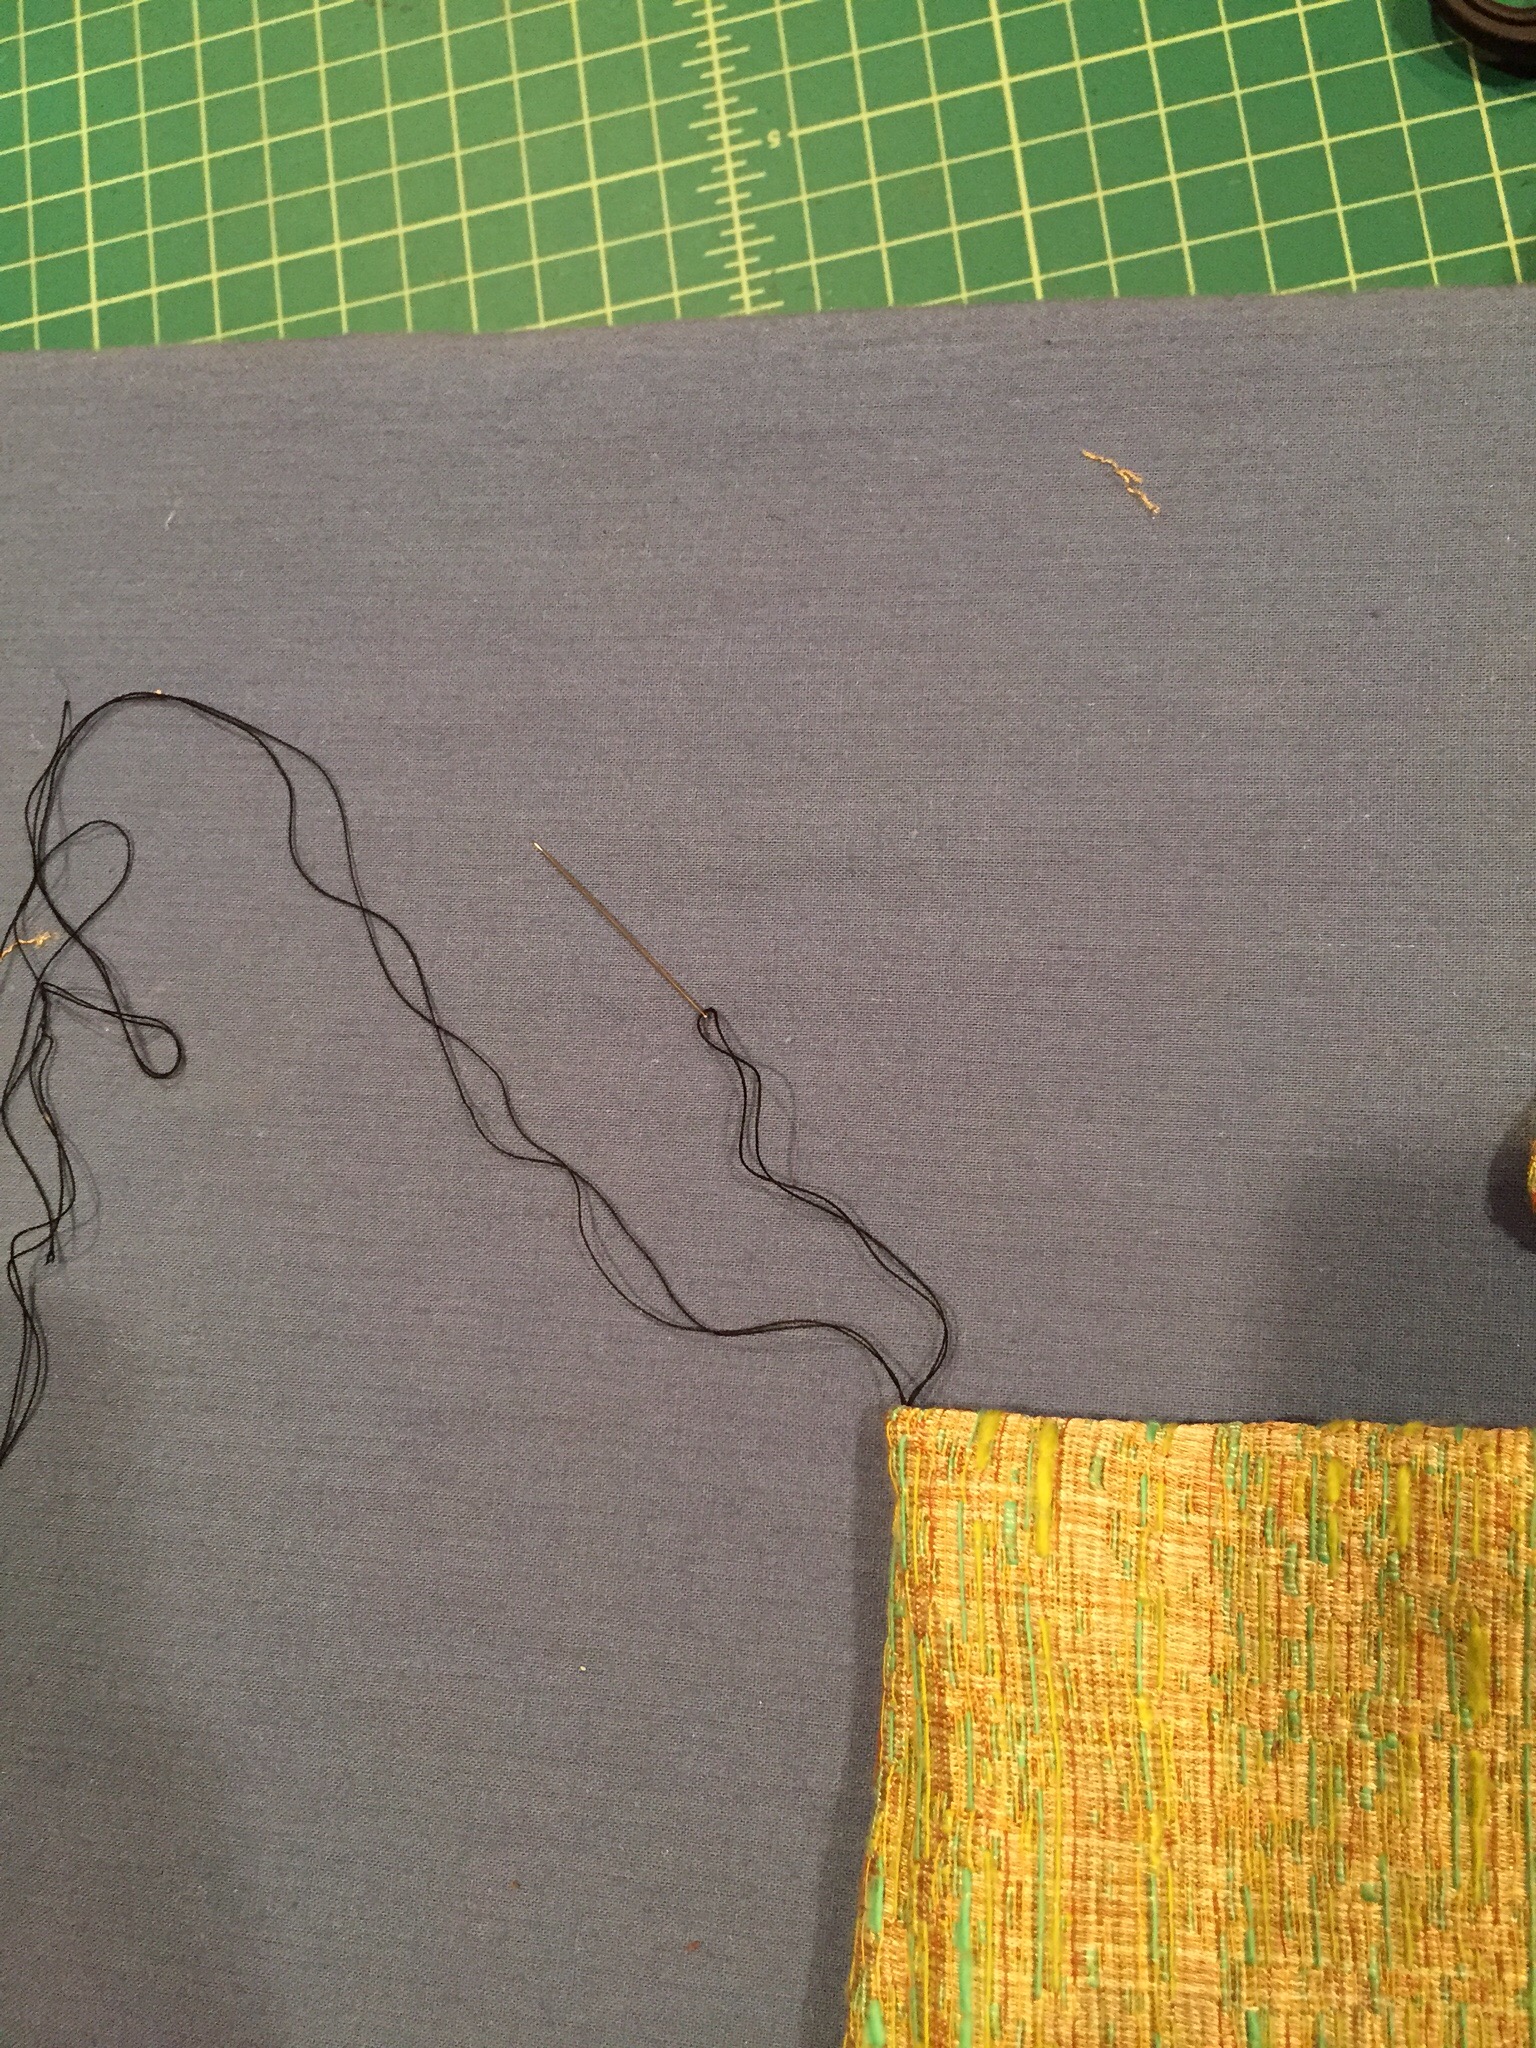
So much cleaner and easier than trying the shove the point out from the inside.
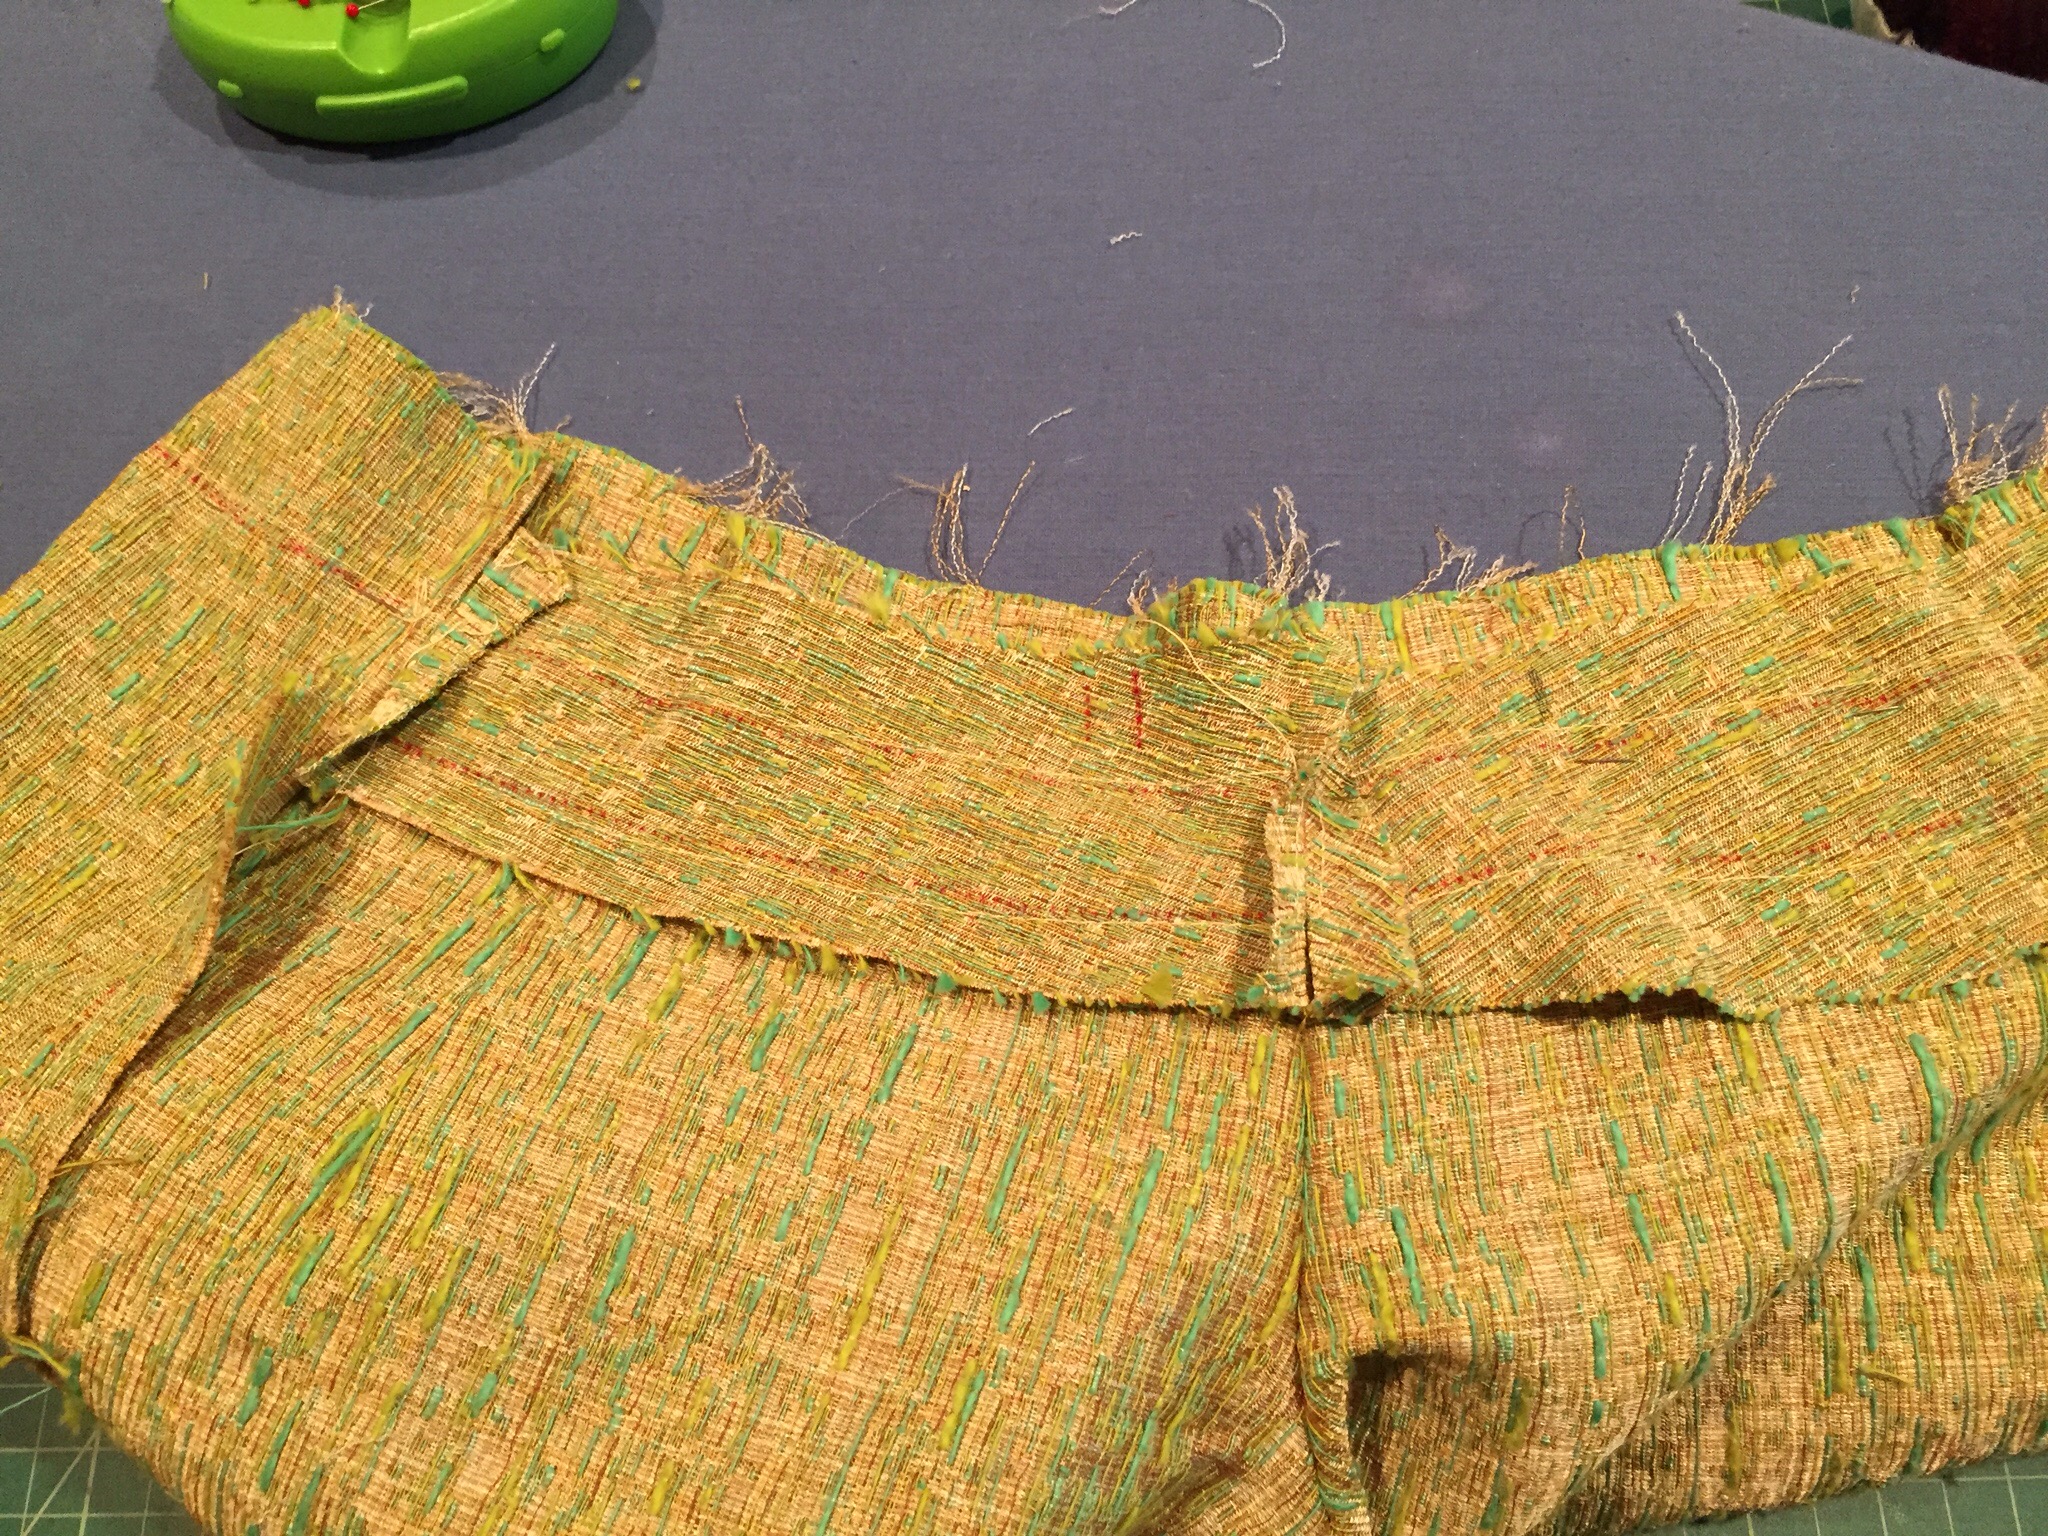
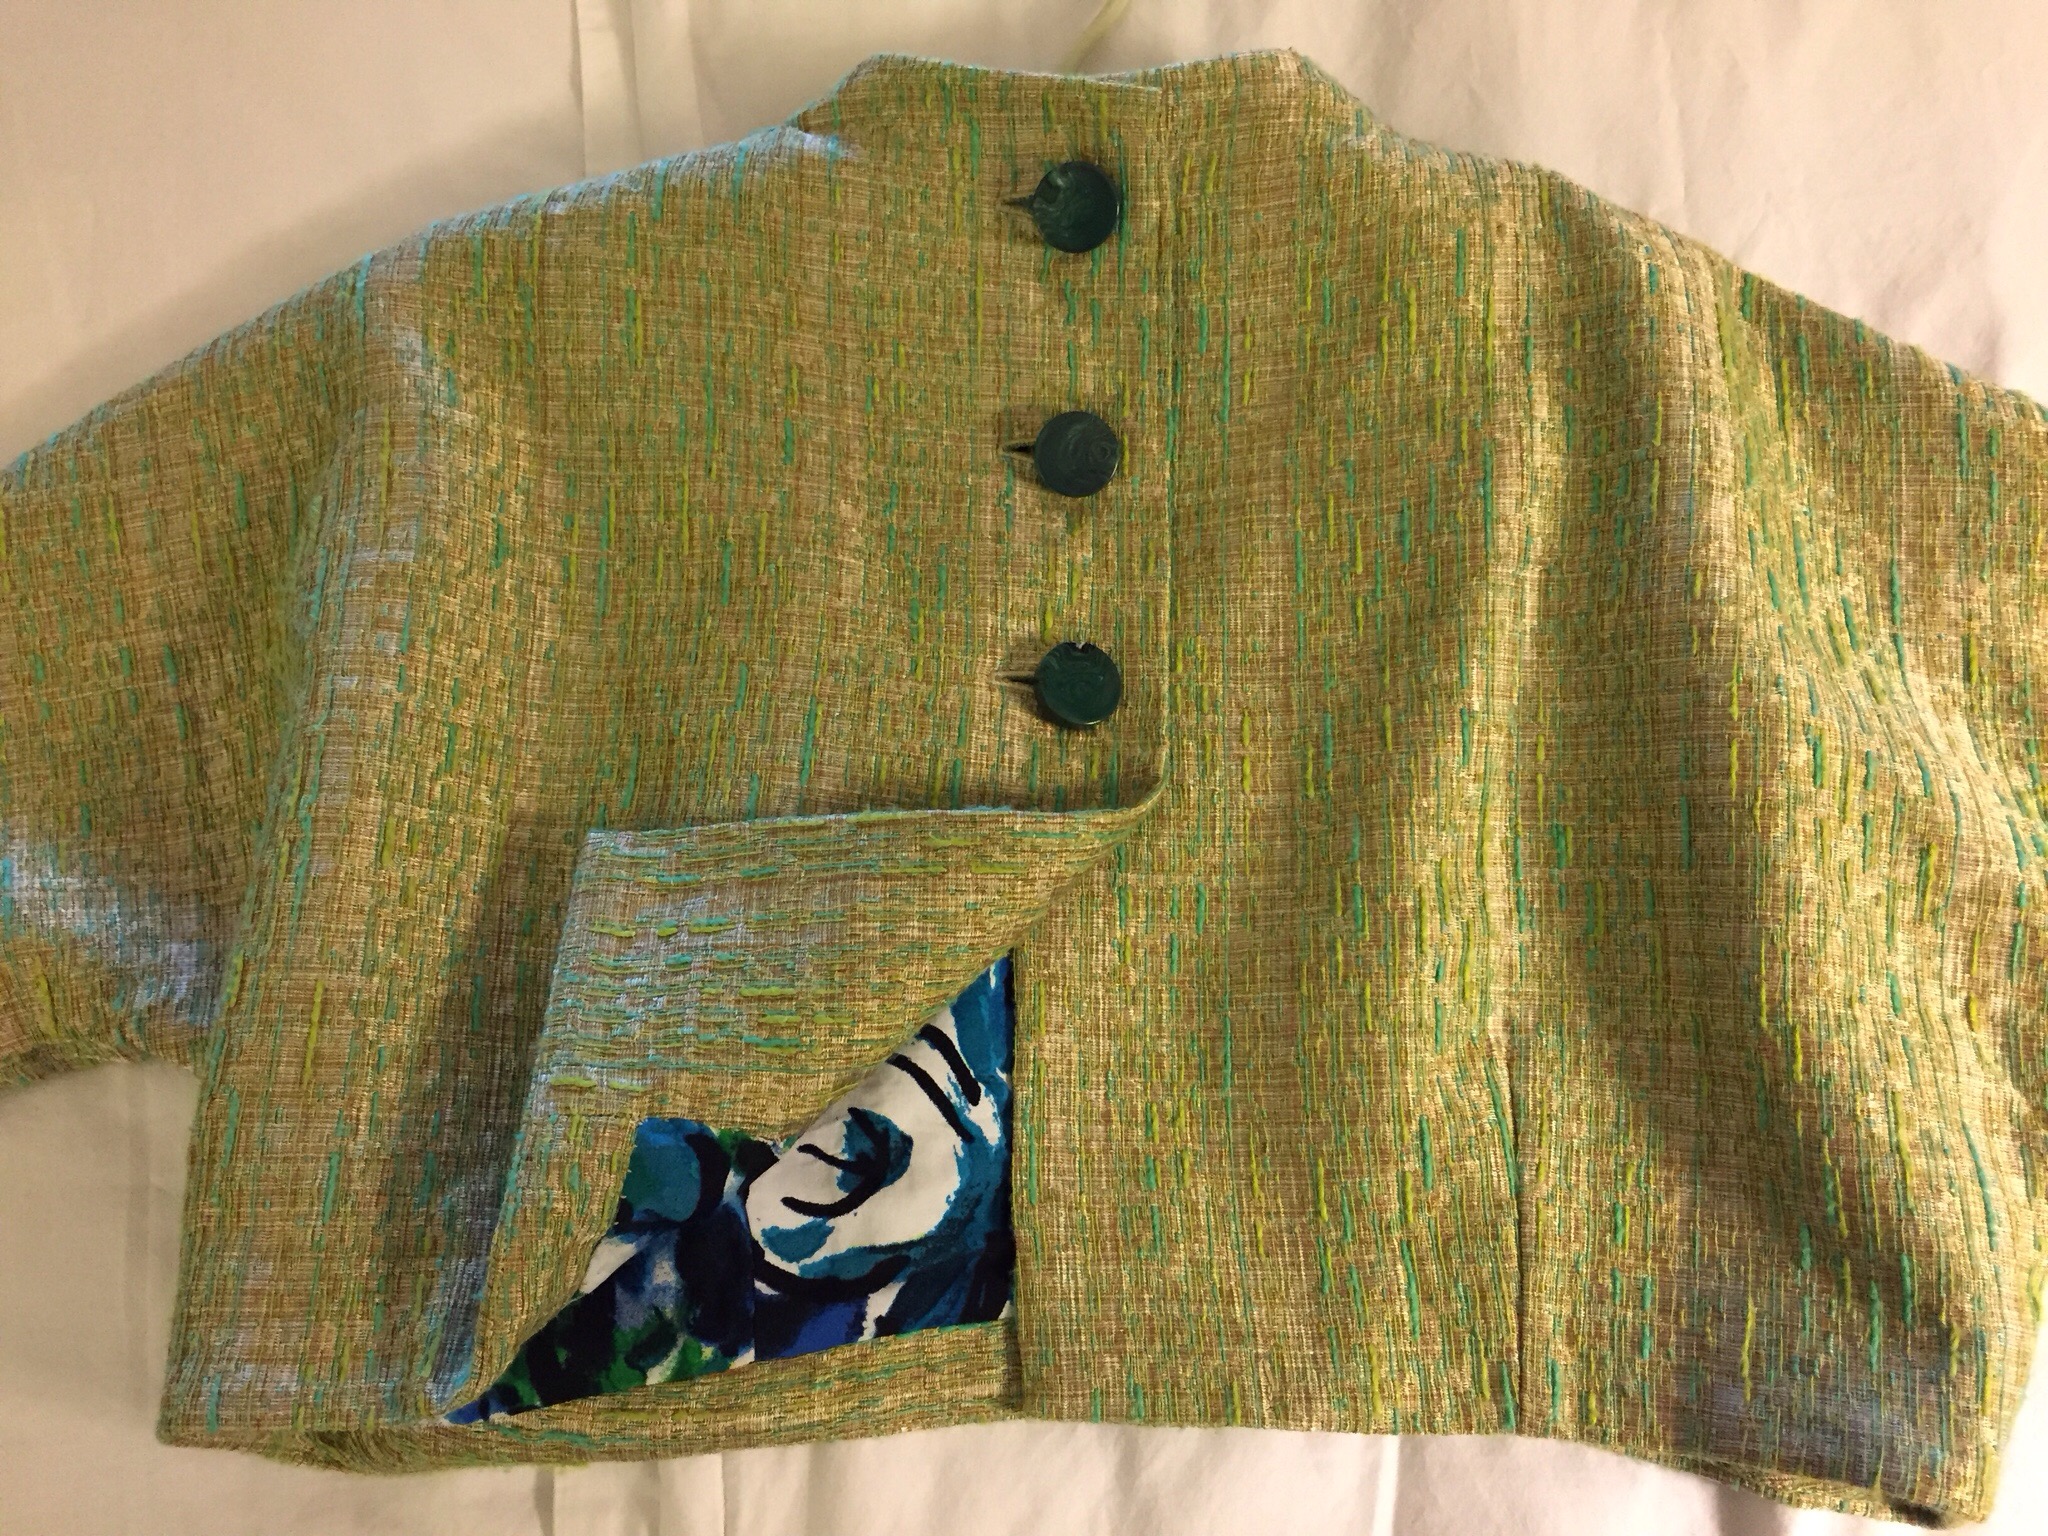
I was mystified as to why the bottom of the bolero was finished with a facing, rather than a turned up hem. But once I made the facing, I saw that it was because the facing needed to curve outward to accommodate the extension at the bust. Very clever!
After I attached it, I understitched the facing to the seam allowance to keep the facing from popping out.
When it came time to make the buttonholes, I used a feature on my darling Karl, the Bernina 560, which automatically sets the buttonhole length by measuring your button. I just hold up the button and twist the knob until it matches the size of the button.

(For details about how Bernina USA is supporting my reconstruction projects, click the “Bernina Collaboration” tab above.)
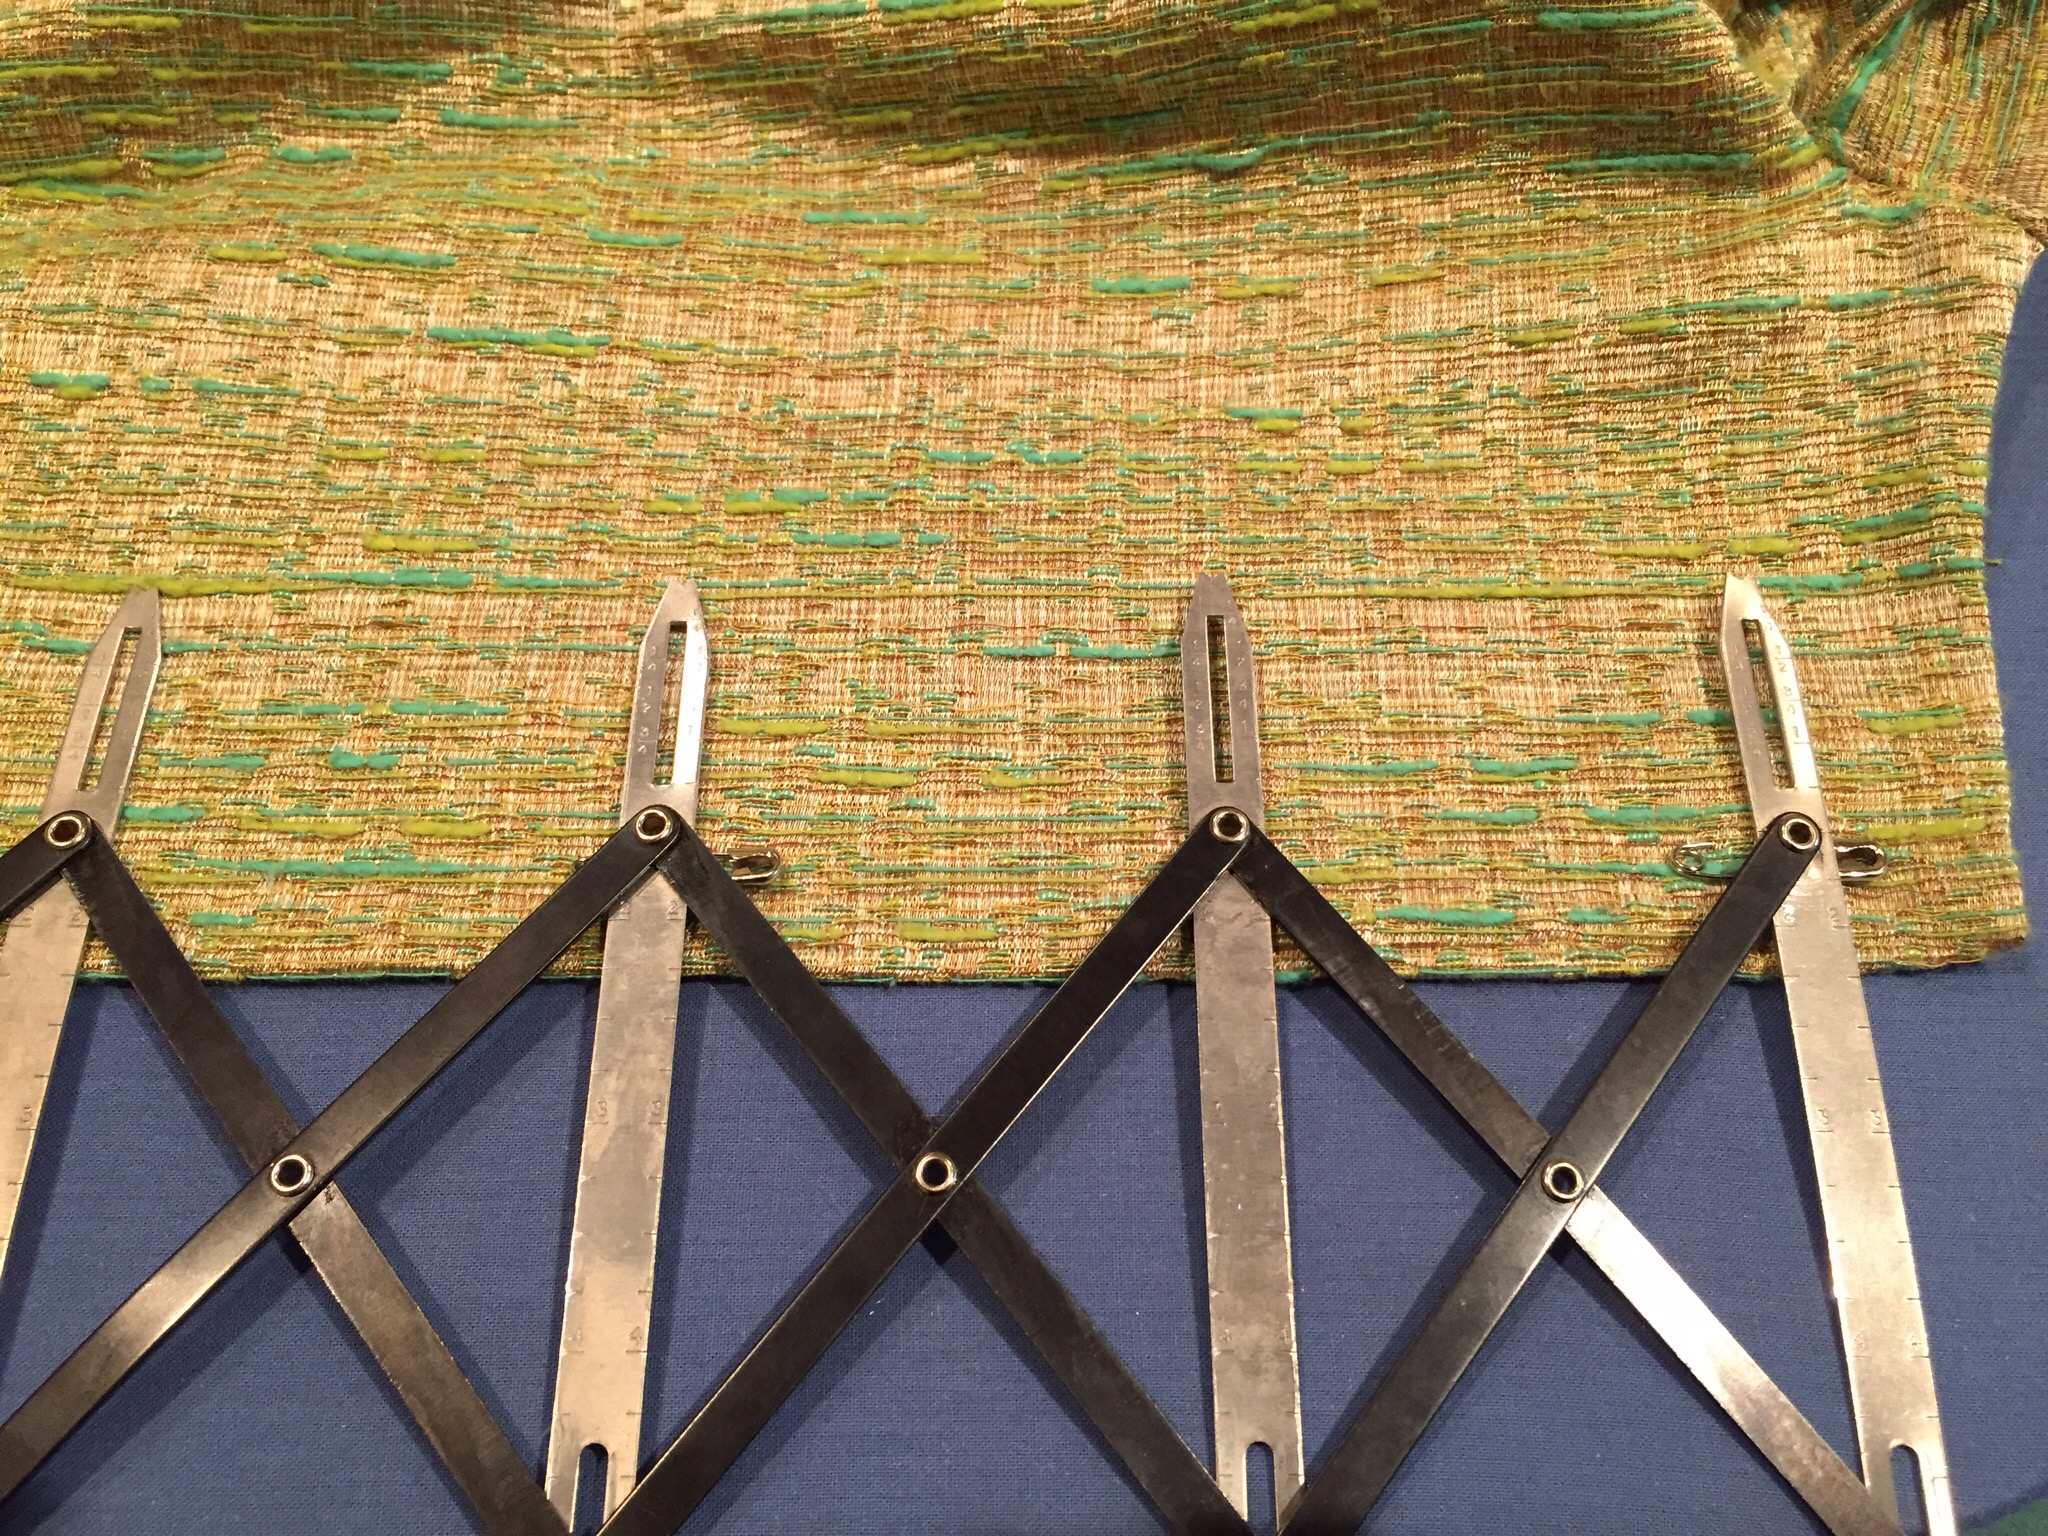
I spaced the buttonholes using this vintage “Slimflex” expandable sewing gauge I got from Ebay. The box looks like it’s from the 50s or 60s. Recently I’ve seen modern versions of this gauge on websites such as RichardTheThread.com and Nancy’s Notions. Same thing and same brand after all of these years!
Karl was good to go, so we (actually he) made corded buttonholes.
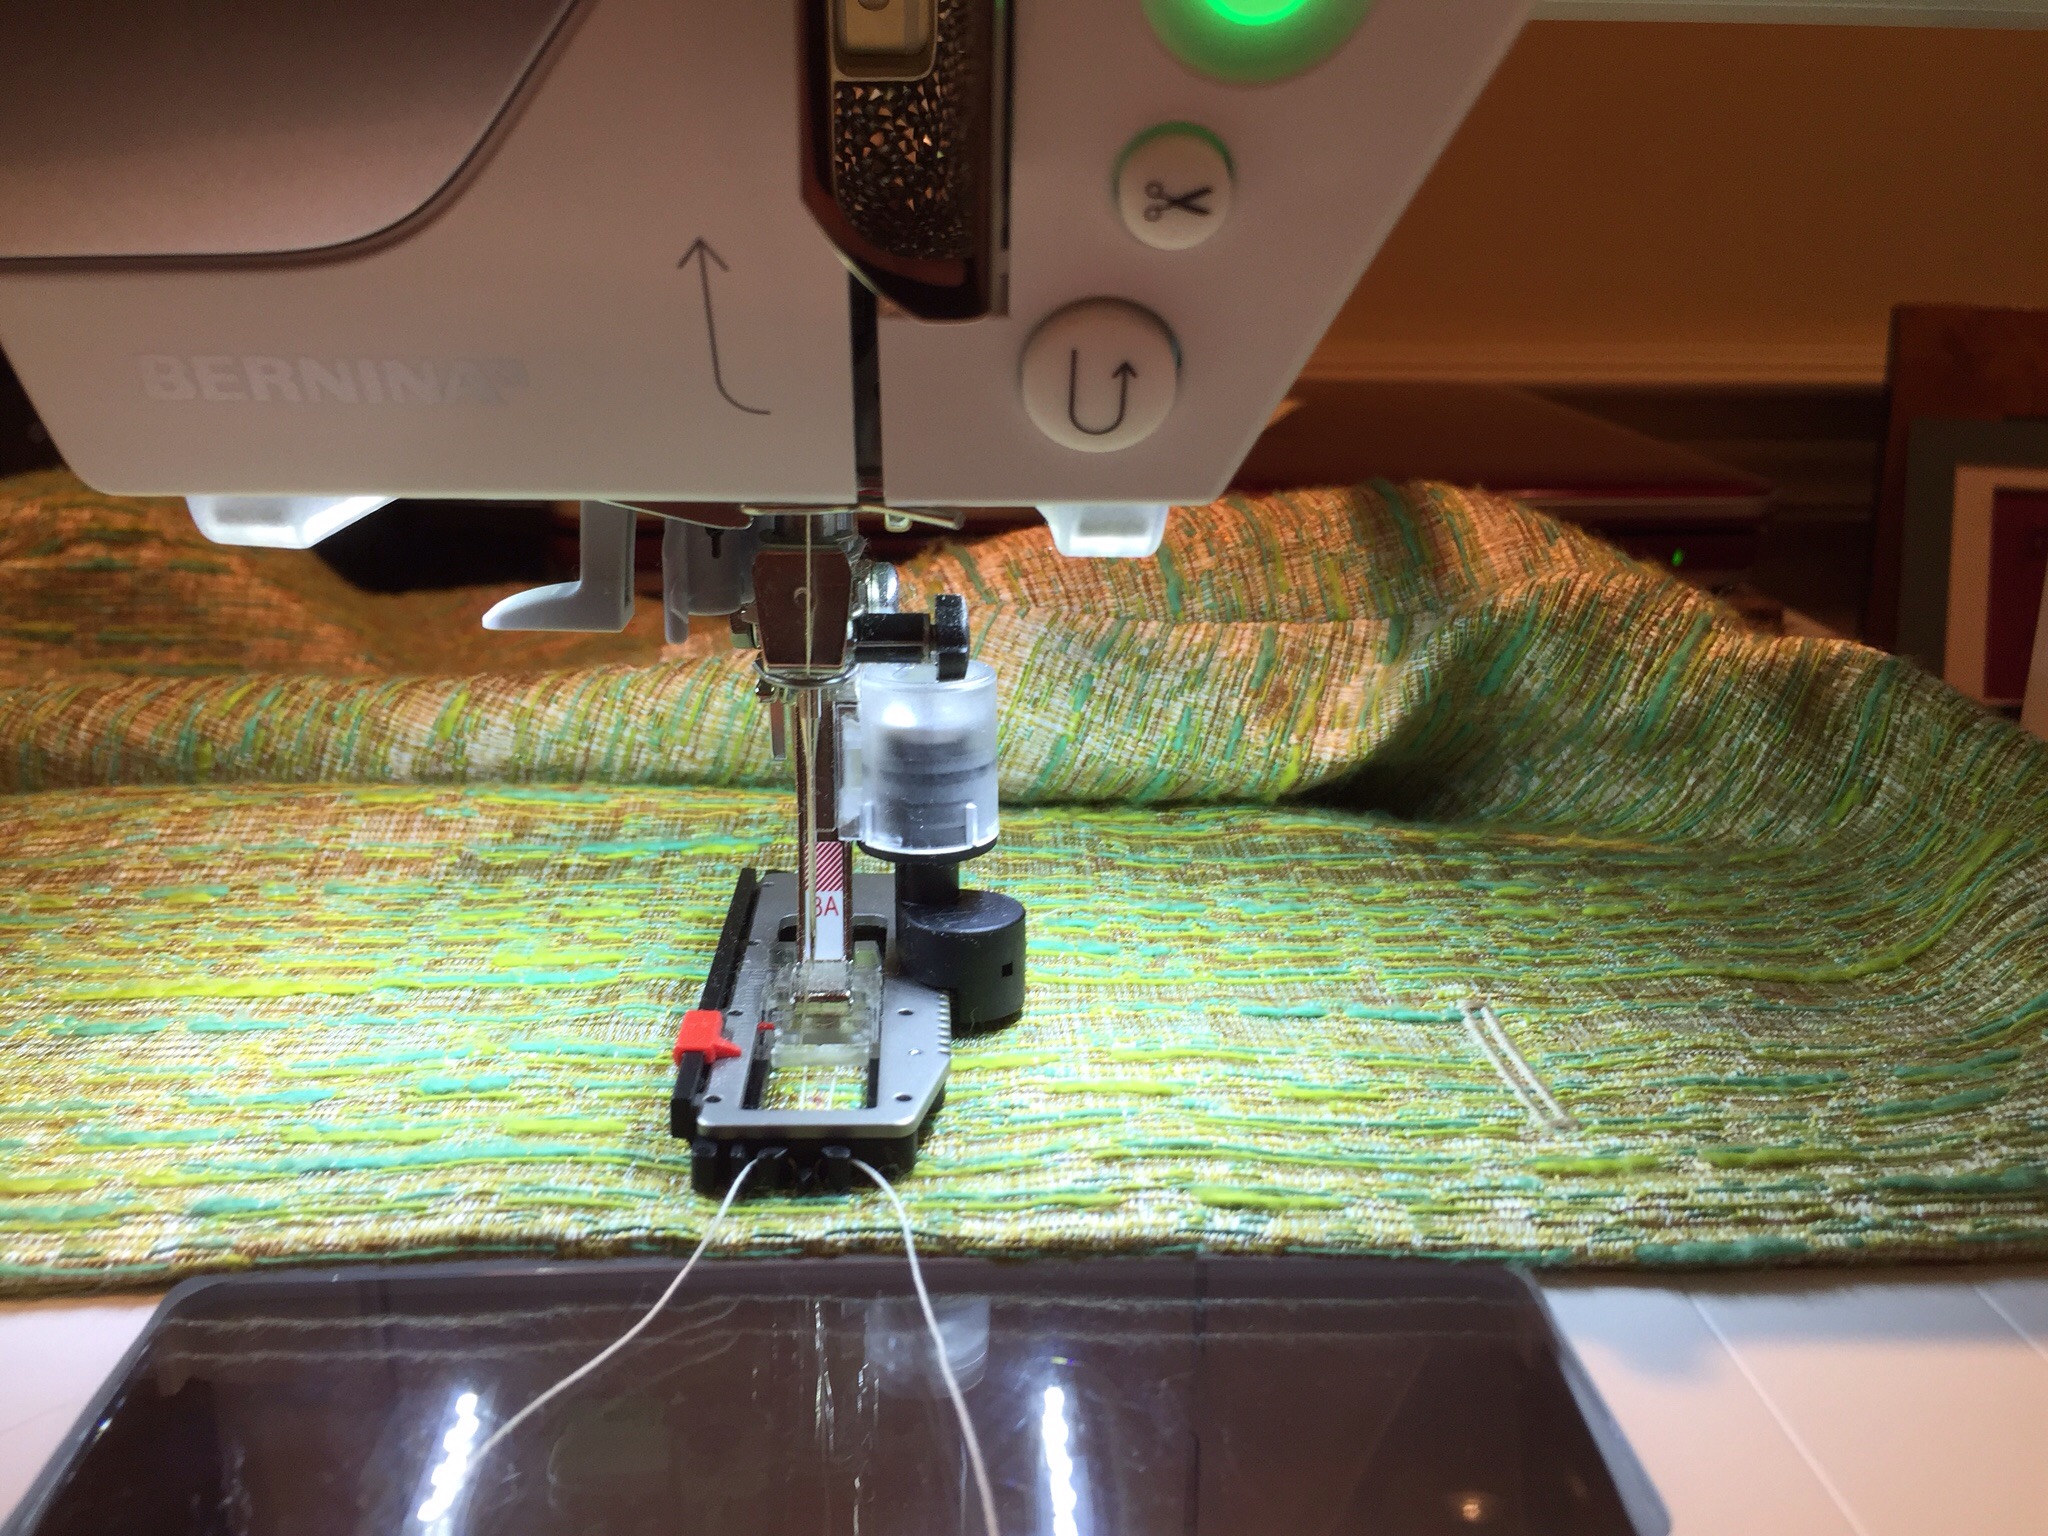
Then it was time for my least favorite part of any jacket project, the lining! Since I was using slippy-slidey rayon challis, I used my Bernina walking foot to keep the layers from sliding around.

Then it was time to pack Edith up, still full of pins, (ignoring the sniffling and blubbering coming from Karl’s direction, where I heard “don’t take Edith, take MEEEEEE!”).
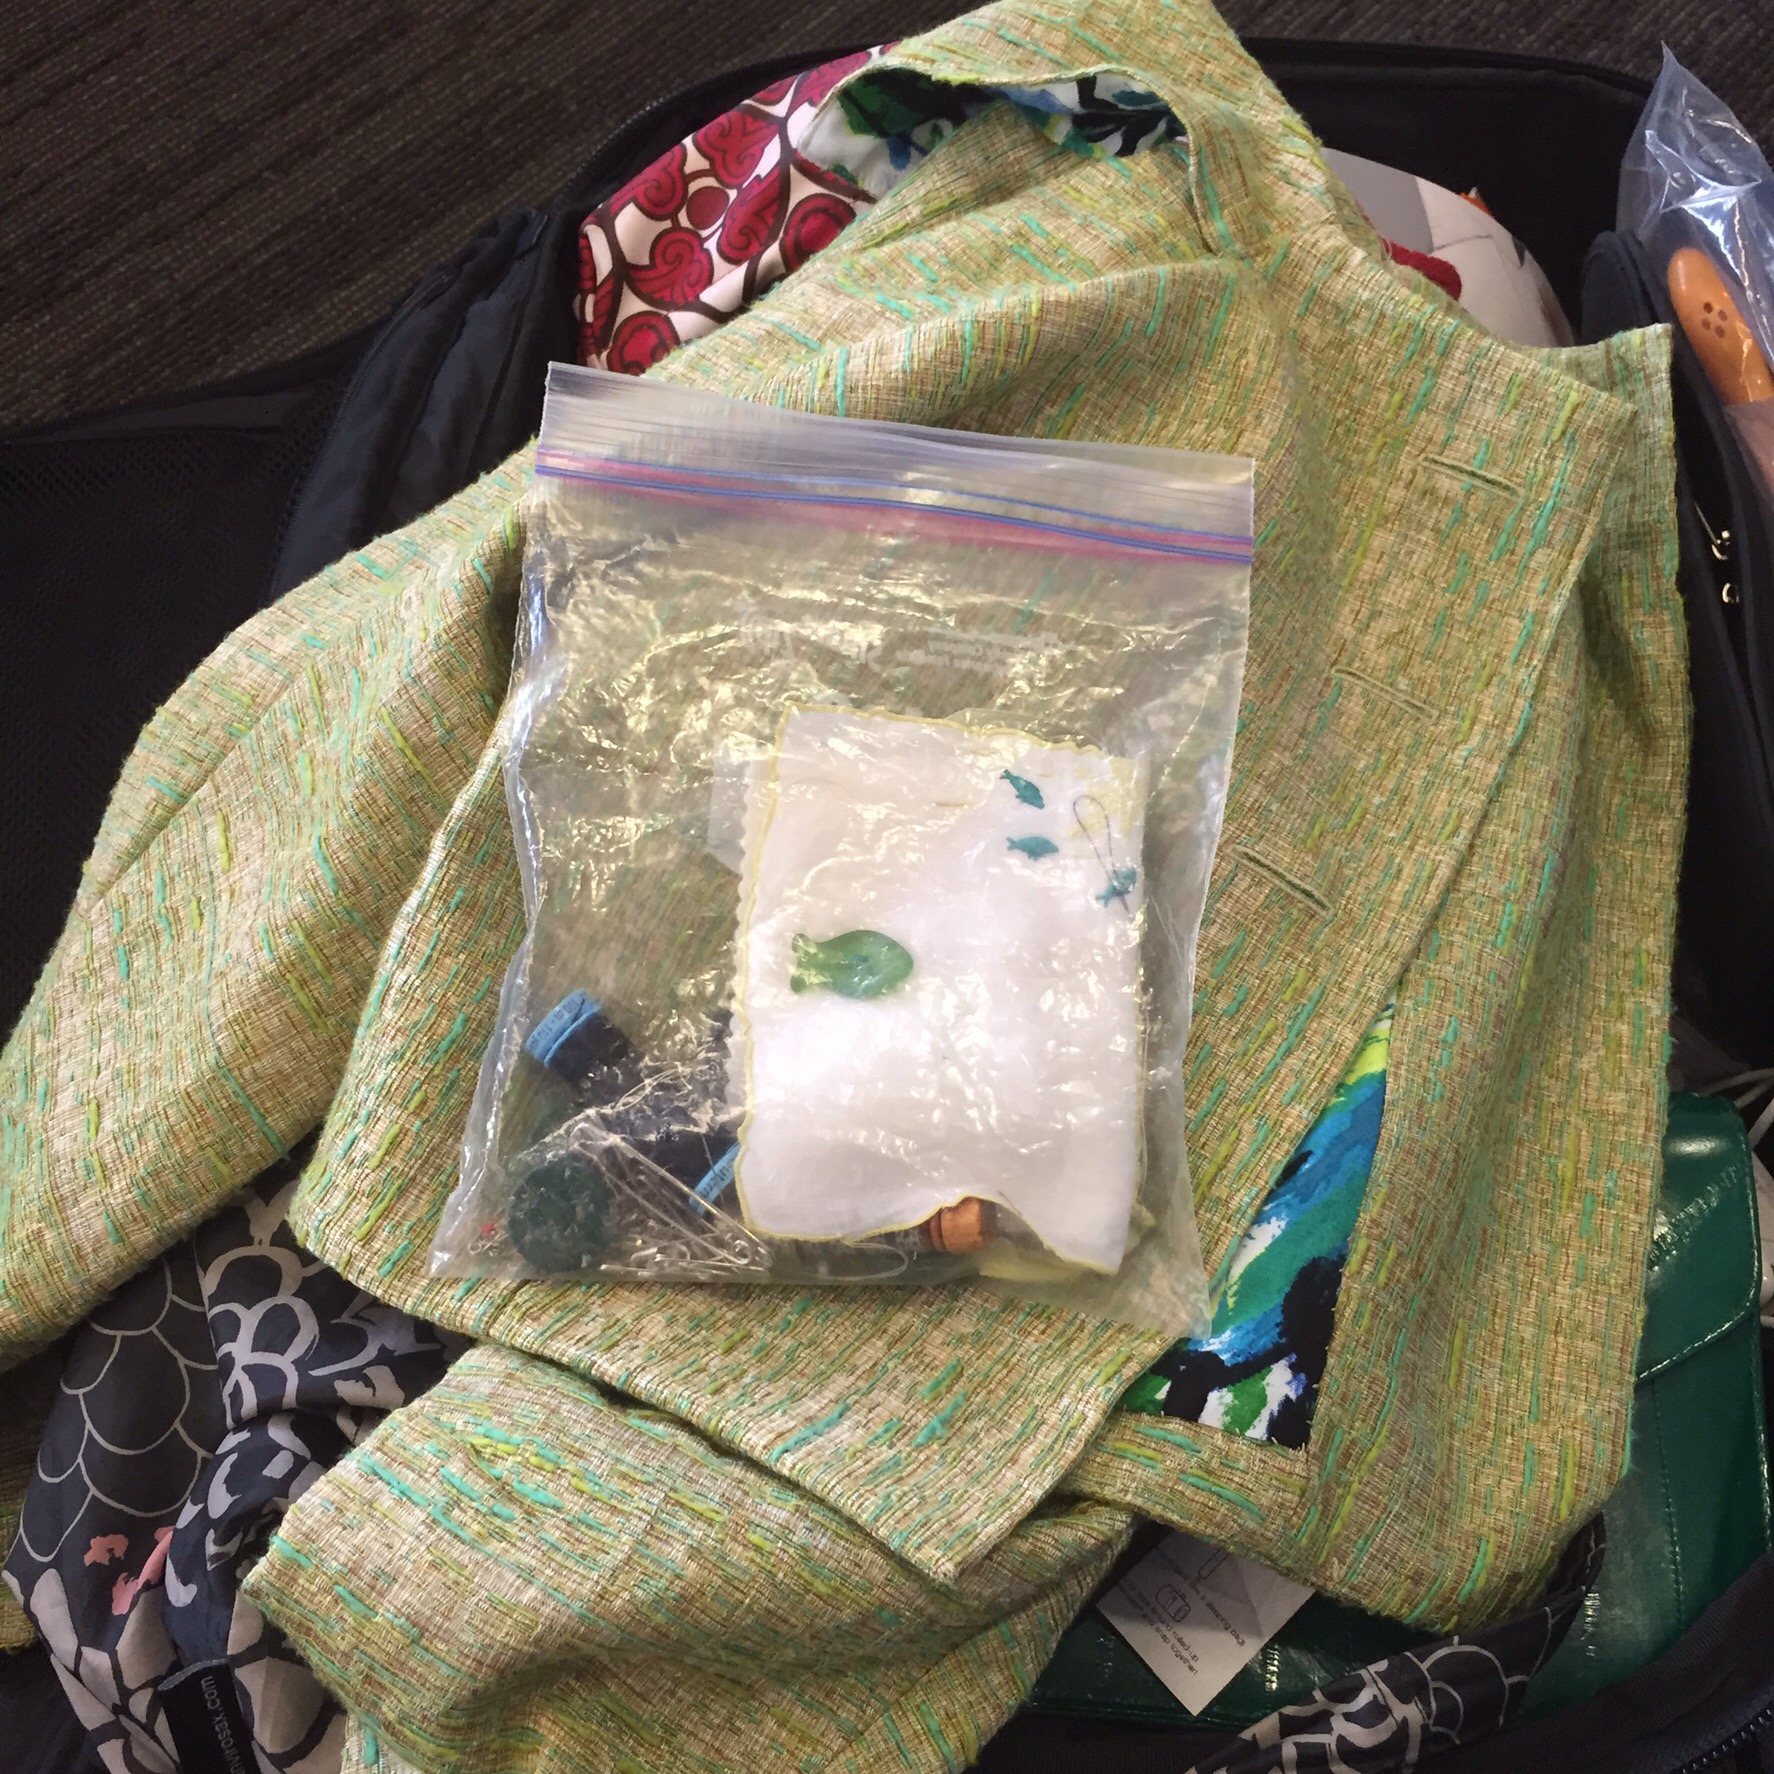
How do you like my classy Ziplock hand-sewing kit? I managed to get more of the lining sewn in on the plane.

Then I finished the rest of the handsewing at the hotel, looking out over this film noir view of L.A.

(The hotel iron was something out of “Psycho,” which was costumed by Edith Head, by the way.)

After I put on the buttons, I realized that I needed one snap. My excuse to go to a fabric store! I high-tailed it to International Silks and Woolens on Beverly.
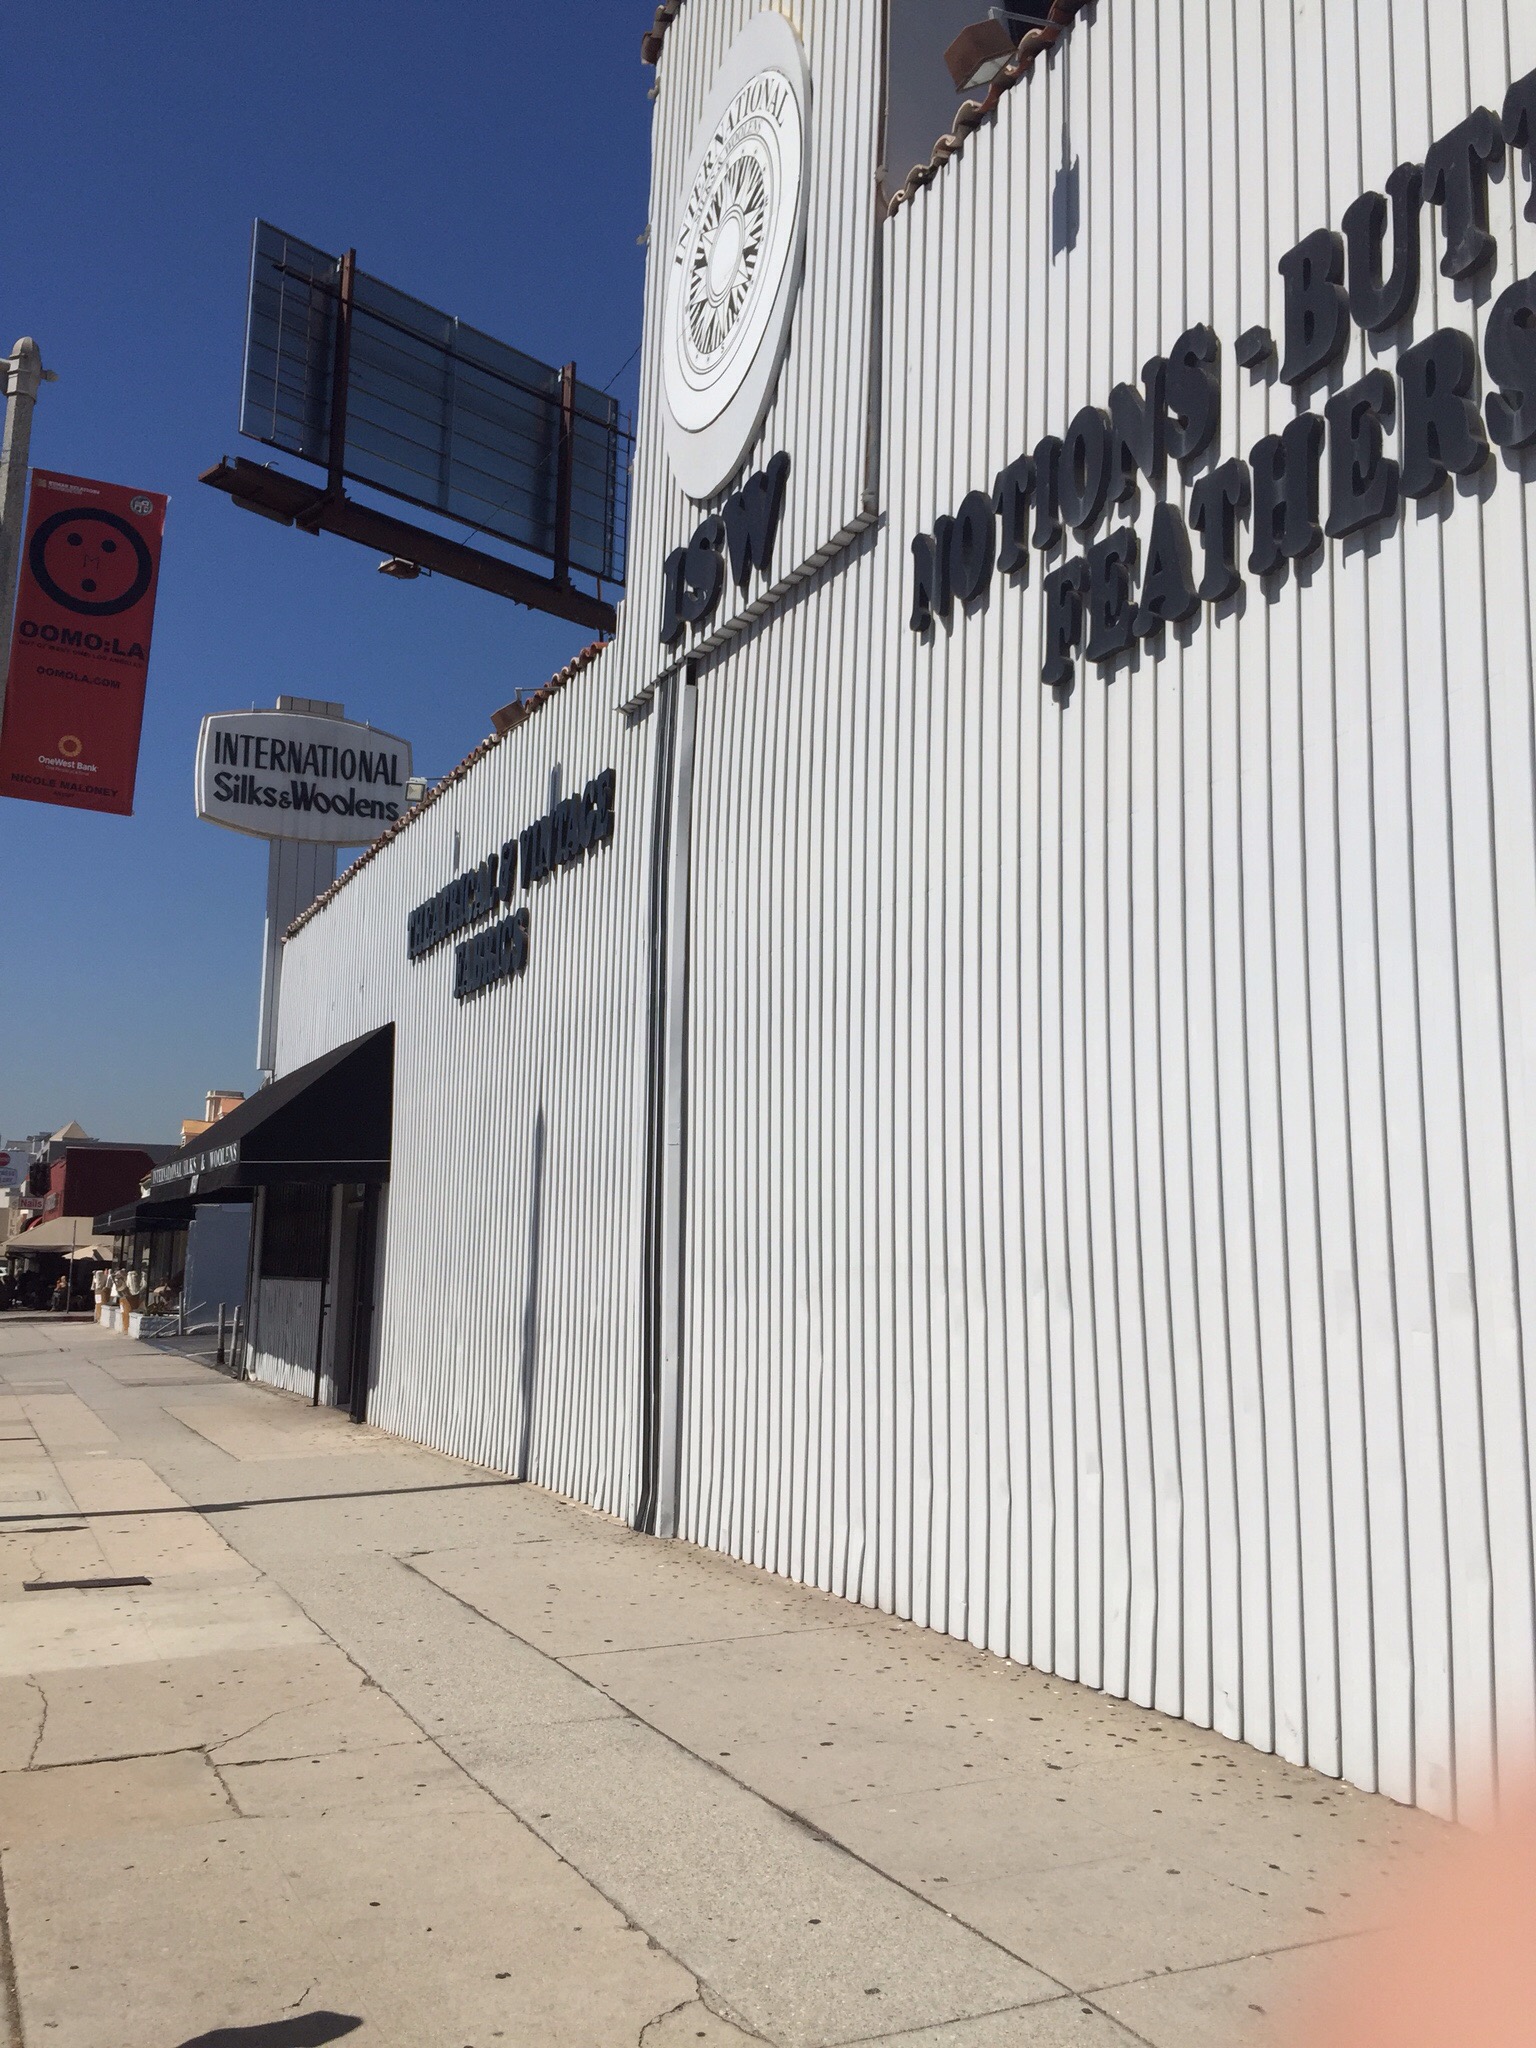
It’s one of those completely overwhelming places with a lot of everything, and it takes patience.

(Look on this table if you want “Liberty (like)” fabrics.)
There are also a lot of pictures of marginal stars on the walls. Is that Prince? No wonder they had so much metallic purple spandex.

Don’t get me wrong, you can find good things here. They have a good notions department, where I got my snaps:

And on the third floor, they have a very eclectic collection of vintage fabrics, some of which appear to be from as early as the 40s.

During the spring, I used some vintage wool challis from this store to make a crushed boatneck shell. When we got to L.A., I wore it over to the Academy Museum when I was tagging along with my husband. I’m always amazed at how things made out of quality wools, lined with silk crepe de chine, literally jump out of my carry-on without a wrinkle.

With the snap in place, the bolero was finished! For those of you who weighed in on the button choice, I went with the overwhelming favorite of the green buttons.
I got ready to go, put on the bolero, and everything was copacetic. After we walked up the red carpet, the first thing we saw, upon entering the exhibit, were all of Edith Head’s Oscars lined up in a row.
As for the other thrilling pieces of Hollywood fashion history I gawked at in this comprehensive exhibit, that will have to wait for next time. No photos allowed, but I have plenty to tell you.

GAWJUS! Love that you sewed in lining on the flight (he-he)! Were you comfortable, temperature-wise? Remember that being another of your questions.
But oh, that red & that blue vintage fabric. . . Another gotta go place, if I ever get to LA!
del
Thanks so much! I was pretty comfortable most of the evening, and the rayon challis was very smooth next to the skin. I did score some pretty vintage knit at that store as well, because once I finishing something, I can’t let my large stash pile get smaller!
Agree on stoking the stash!
Finished with time to squeeze in a bit of shopping. I’m impressed!
I’m very motivated when it comes to shopping, Lizzie.
You look lovely! And the exhibit?
Thanks Lynn! The exhibit is great. I’ll be writing about it in the next post. It’s part Hollywood history, part fashion. Lots of fun things for sewing enthusiasts to see.
That is gorgeous and it looks like it fits you so well. I love the lining choice, too. I think I may have told you that already. Very nice. Do you have trouble buttoning it?
Thanks so much! As for buttoning it, that’s what husbands are for. Though when I was fitting it, I had a maneuver whereby I pinned at the two lower button places, put it on backwards, pinned the top, spun it around and put my arms in. It’s part of the exercise you get from sewing.
Pingback: 50s Reverse Bolero by Edith Head
She may have been difficult, but it was worth it in the end : ) and oh my how I love that trick for pulling points through! I love your button-hole spaces nearly as much. Looking forward to hearing about the exhibit 🙂
Thanks! I am glad that project is over, but it was so much fun to be wearing an Edith Head design to the event! The point-turning technique is so simple and effective; I was amazed. Plus I couldn’t live without the buttonhole spacer. It has measurement marks on each buttonhole. Definitely worth the investment.
So glad you made it in time, it looks great on you!
I really like this bolero, it has this twist that makes people look once “ok, a bolero” and then look twice “oh, what a bolero!”
That buttonhole spacer seems to be a very useful toy, will keep my eyes open for such a thing.
Thanks Ette! I am happy to have that bolero in my collection now. It’s very wearable! And that buttonhole spacer is very helpful. It’s definitely worth finding one.
It’s beautiful!!
Thank you!
The bolero is just gorgeous!!!
Thanks! All’s well the ends well.
I travel to Santa Monica every year, and for some reason have yet to visit International Silks and Woolens, but I will definitely do so next year. Regarding the pictures hanging in the stores, it appears that one of them is of Anne Bancroft (Tony and Oscar winner). Would that indicate that Ms. Bancroft shopped there for fabric or that a studio designer bought fabric for her?
It’s a fun place to visit, though personally I prefer Mood Fabrics and The Fabric Store, which are close to one another on LaBrea. As for Anne Bancroft, I have no idea, but I did just get the funniest mental picture of her hunched over a sewing machine, while her husband, Mel Brooks, bugged her by doing schtick.
P.S. I totally forgot to comment on the fact that your Edith Head bolero is fabulous, as are you in it. I previously hit the send button before realizing that I hadn’t included the comment about the bolero.
WOW! I love your style! great job!
Thanks so much!
Your jacket is adorable and your fabric choices are to die for. Great lining!!! 🙂 Anita
Thanks Anita!
Hey, Julie, I just got to see more of your amazing Edith Head bolero at the Threads SewStylish fashion challenge! Beautifully done. You got my vote, though I somehow don’t think you really need to win the Teach Yourself to Sew DVDs.
Thanks Patricia! It was fun to wear to that event. I have some good competition in that challenge! As for the DVDs, having learned to sew 40 years ago, there’s always something modern to pick up…for example, there was the time I bailed on the couture method and resorted to Steam-a-Seam (shhhh).
Pingback: Hollywood Costume Exhibit Report (Finally…) | Jet Set Sewing
I realize this post is nearly 4 years old, but I’m slowly making my way through the We Sew Retro archives and I saw this. I have this pattern! I’m hoping to sew it someday. I’m so glad you have documented your process here. Based on the trouble you had with it, I’m glad to know there is a resource for when I finally get to it.
It’s a fun pattern—your should give it a go!